Get Started with MobilePush
Learning Objectives
After completing this unit, you’ll be able to:
- Navigate MobilePush.
- Integrate MobilePush with your app.
- Manage your app settings.
Get to Know MobilePush
It’s clear, mobile apps and push notifications offer an exciting channel to connect directly with your customers in an immediate and personalized way. And we’re going to help you make the most of these mobile opportunities—from configuration to your first send, you’re in the right place. In this module, we assume you are a Marketing Cloud Engagement admin. If you’re not, that’s OK. Read along to learn how you would take the steps in a production org. Don’t try to follow these steps in your Trailhead Playground. Marketing Cloud Engagement isn't available in the Trailhead Playground. Let’s start by taking a tour of the MobilePush Overview page found under Mobile Studio.
From the Overview page you can create messages, reports, and add mobile contacts. You can also navigate to two other tabs: Sends (1), where you can view the performance during a specific day, and Location (2), where you can create location-based messages.
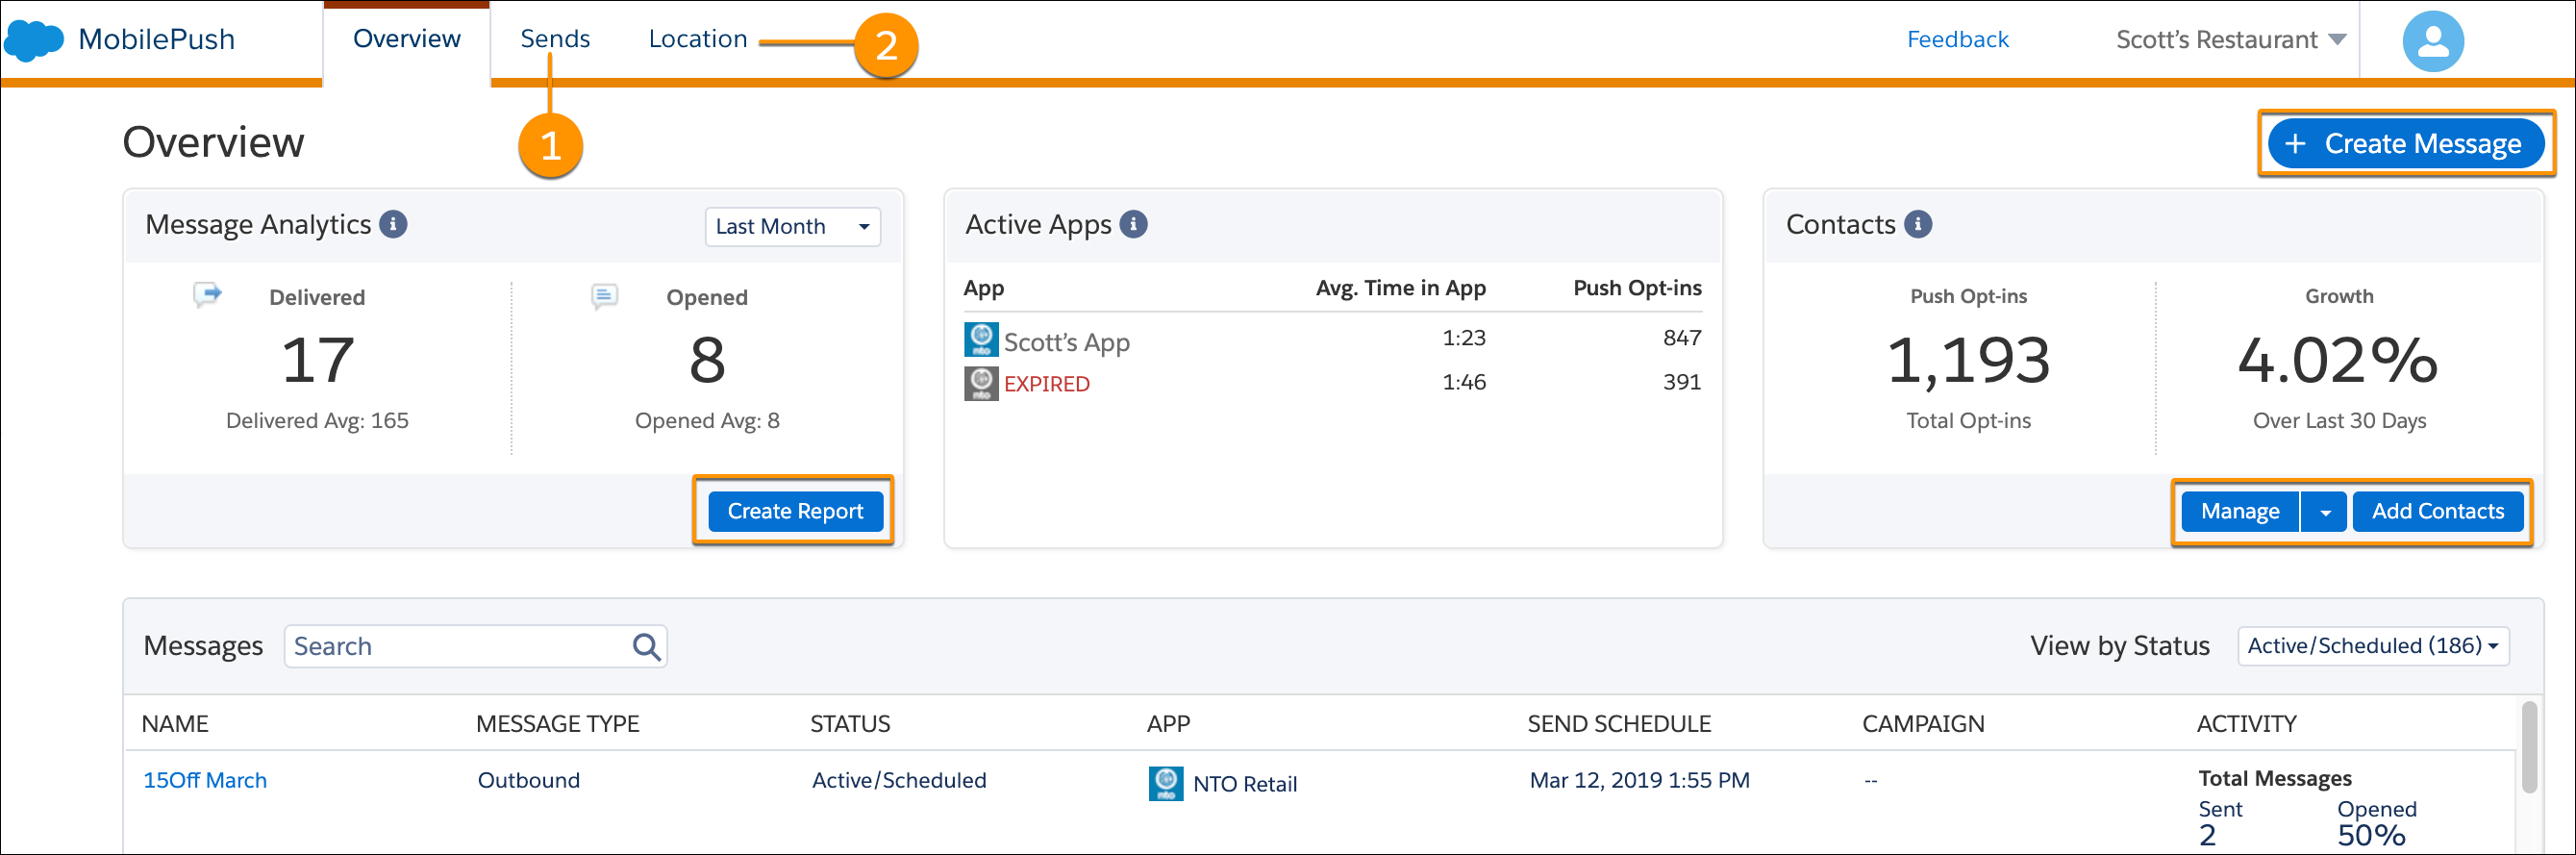
Until you are configured and sending messages, the Overview page will look pretty bare. So let’s jump right into configuration.
First Things First
Start by setting up your MobilePush SDK (Software Development Kit)—with the help of your app developer. Why? Well, the SDK provides the required elements to connect your company’s app to MobilePush.
| Developer Steps |
|---|
| App developers need to follow the required steps found on the developer documentation page Marketing Cloud Engagement SDKs to provision your app on Android and iOS. To avoid any connectivity issues, implement the latest version of the MobilePush SDK. Complete the required steps, taking note of the following information: Android device: Server key from the Firebase (which is Google’s mobile platform) console iOS devices: .p8 Auth Key |
Manage Your MobilePush App
Let’s take a look at how Scott’s Restaurant and Bar plans to use MobilePush to manage its loyalty program and offer coupons to its top customers. First, Scott’s digital marketer Simone Wright, meets with the company’s app developer, Eduardo, to review configuration. Eduardo follows the developer steps—provisioning the app for Android and iOS devices, then sending Simone the server key, production certificate, and password. With this info, Simone is ready to configure the app in Marketing Cloud Engagement. Let’s follow along.
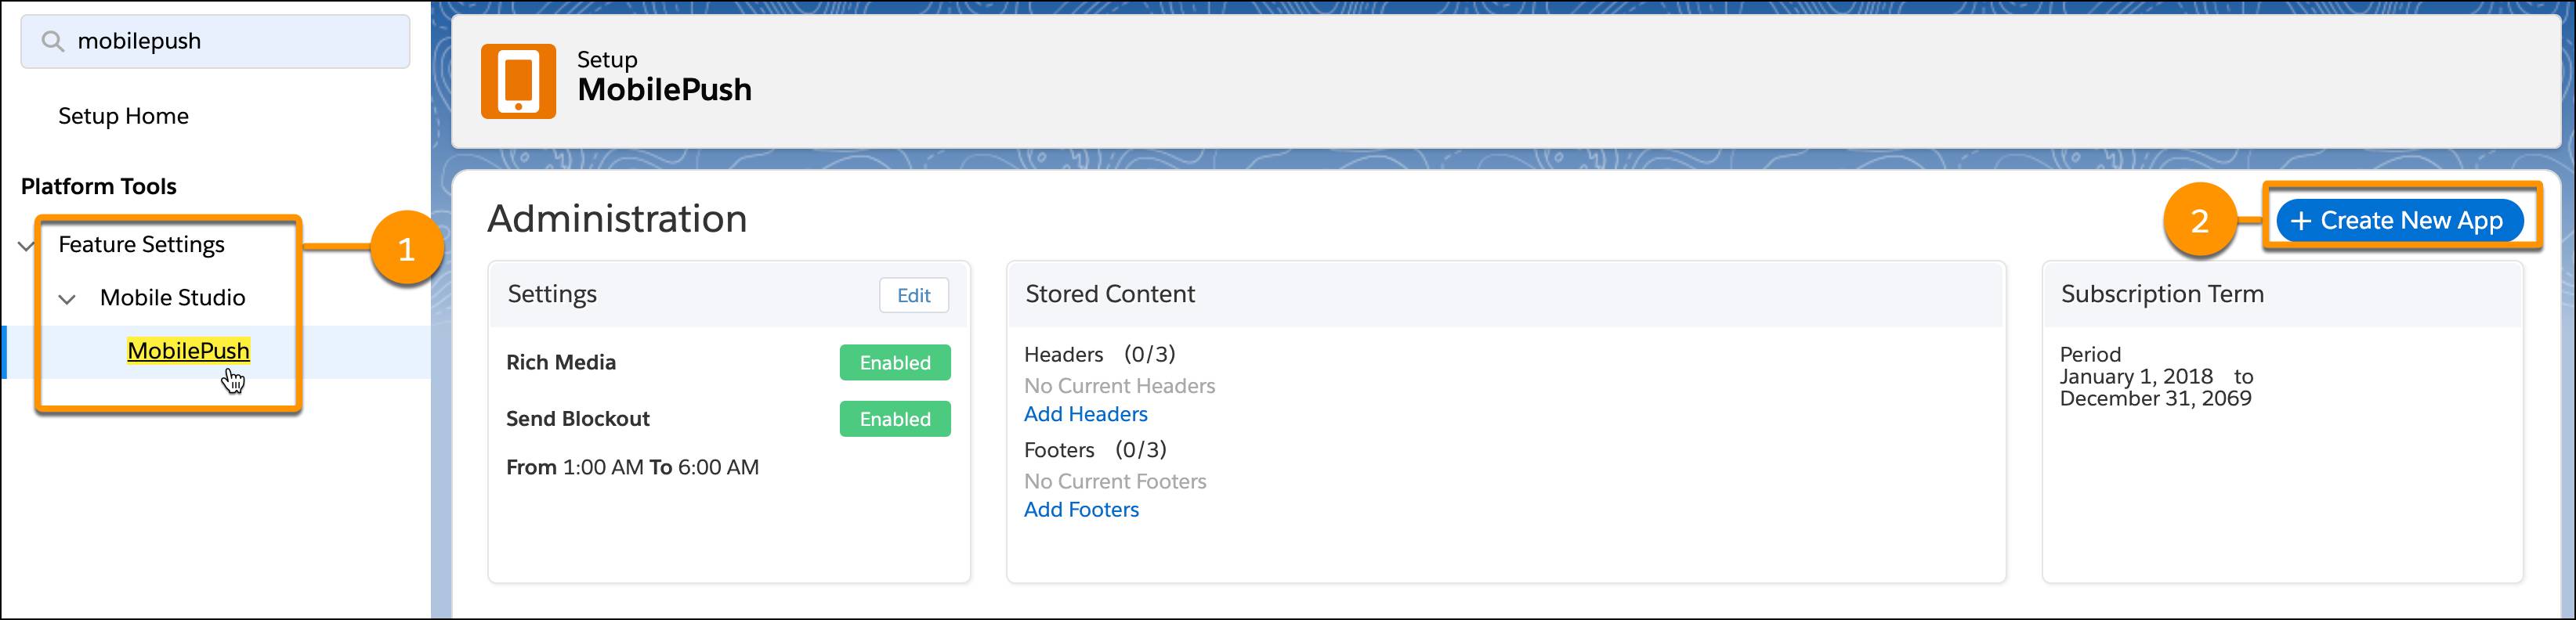
- Simone first navigates to Setup under her username dropdown.
- Under Setup she searches for MobilePush (found under Feature Settings).
- Next she clicks Create New App.
- She adds a name for her app, along with a description. (This name is for Marketing Cloud Engagement purposes, it does not need to match your app store name.)
- She clicks Save.
- Next she finds the access token, app ID, and app endpoint. These are automatically generated and are used by your app developer to finalize SDK configuration.
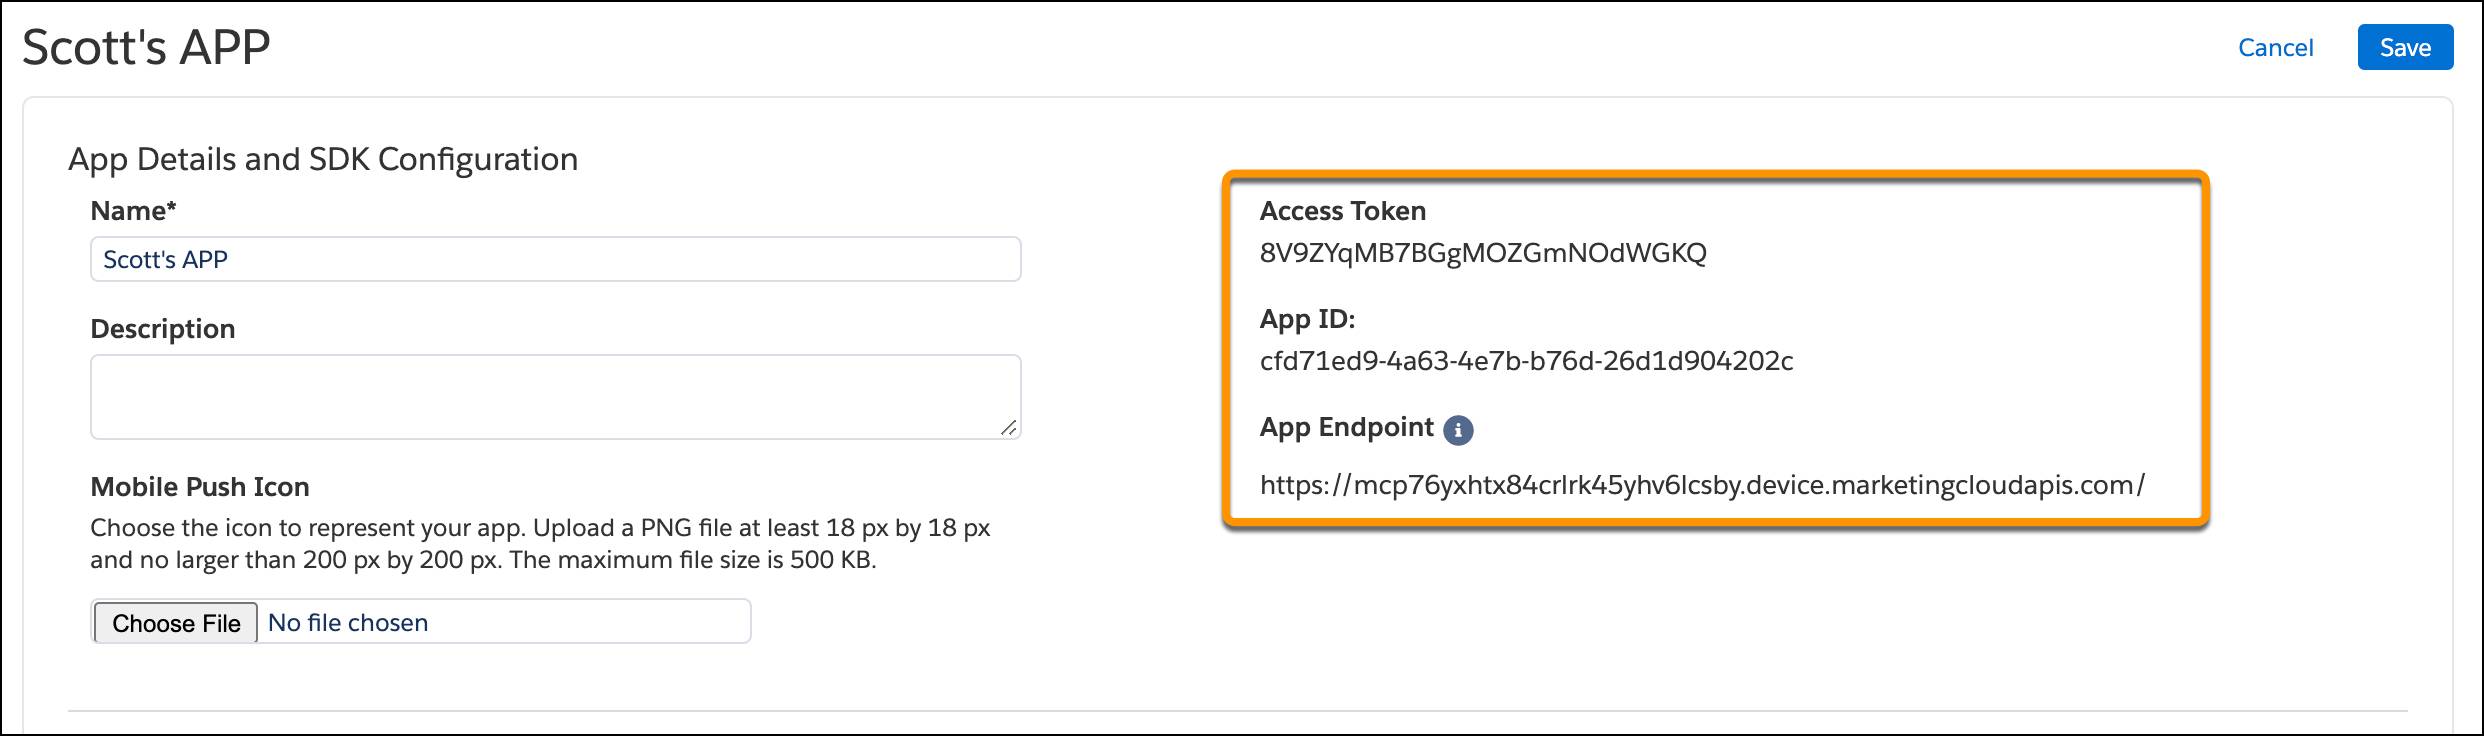
- She copies them into an email for the app developer, Eduardo.
Connect Your App with Marketing Cloud Engagement
Now Simone needs to enter the information she received from Eduardo when he provisioned Scott’s Restaurant and Bar app. This step is important because it connects the Scott’s app with Marketing Cloud Engagement—allowing app messages to be sent to customers. Here are the requirements and steps according to platform (iOS and Android) from the MobilePush Setup page.
Sending Services
 iOS Sending
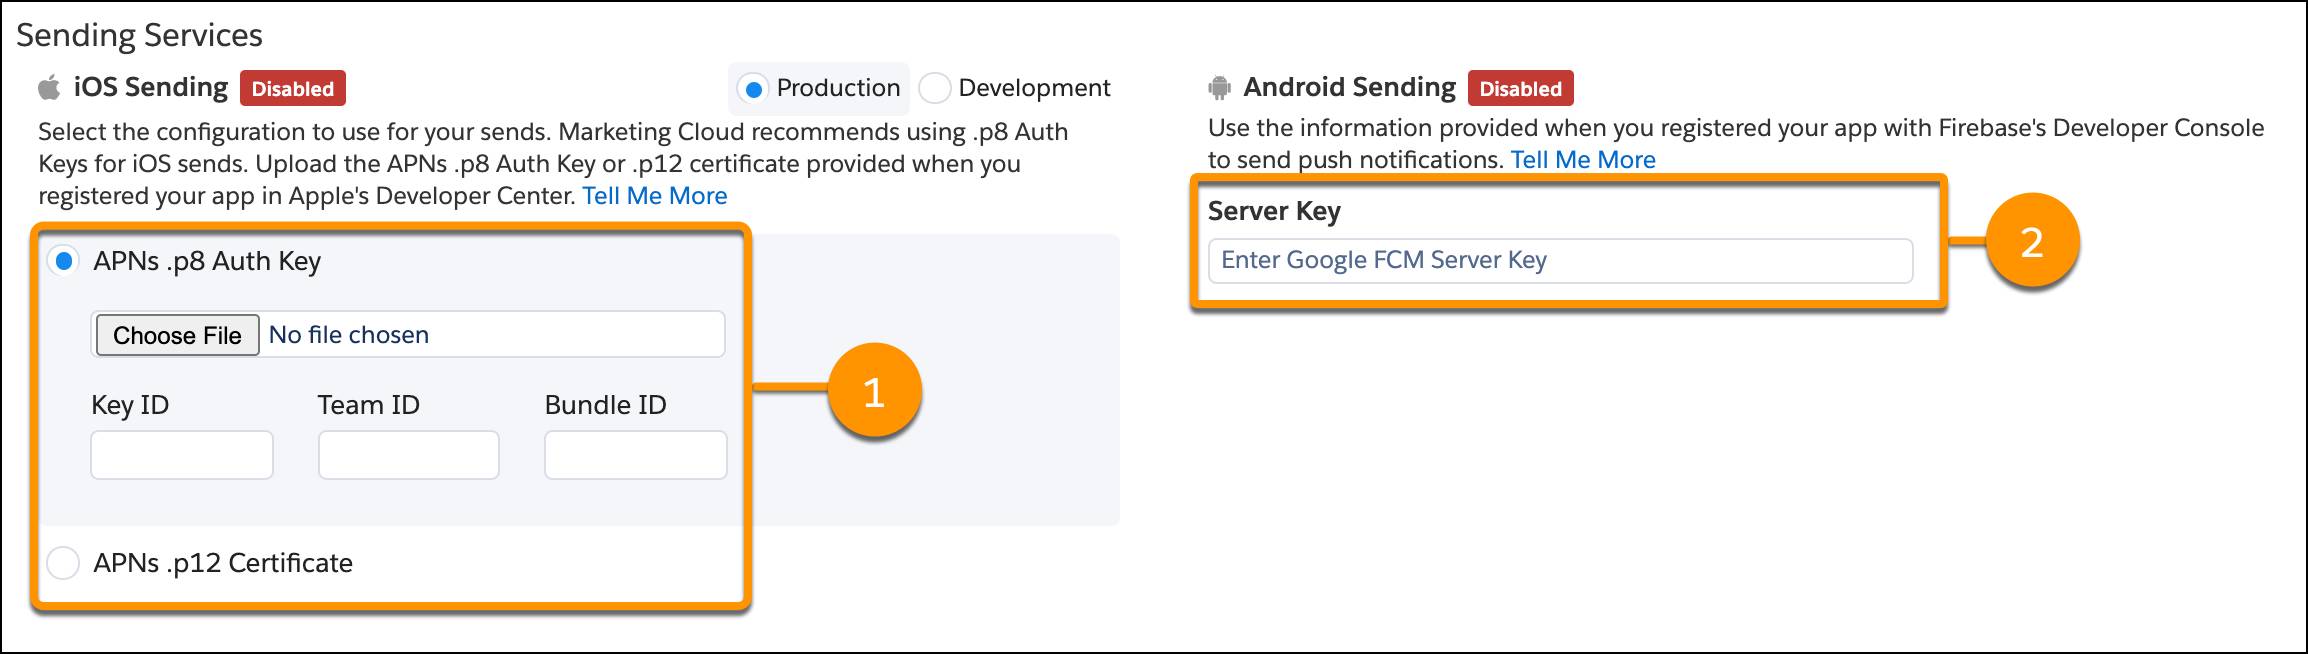
First select between an APNs .p8 Auth Key or an APNS .p12 Certificate.
APNs .p8 Auth Key (1)
- Obtain these identifiers from the iOS Provisioning Portal:
- Auth Key: unmodified .p8 file
- Key ID: 10-character key ID associated with the .p8 file
- Team ID: 10-character Team ID associated with your Apple developer account
- App Bundle ID: ID for the app you’re using with MobilePush
- In the section labeled APNs .p8 Auth Key in MobilePush Administration, upload all four credentials.
APNs .p12 Certificate
- Select and upload a certificate.
- Enter the certificate password (optional).
- Enter a Bunde ID.

Android Sending
- In the Android Client field, enter the server key (2) from Google’s Firebase console in the API Key field.
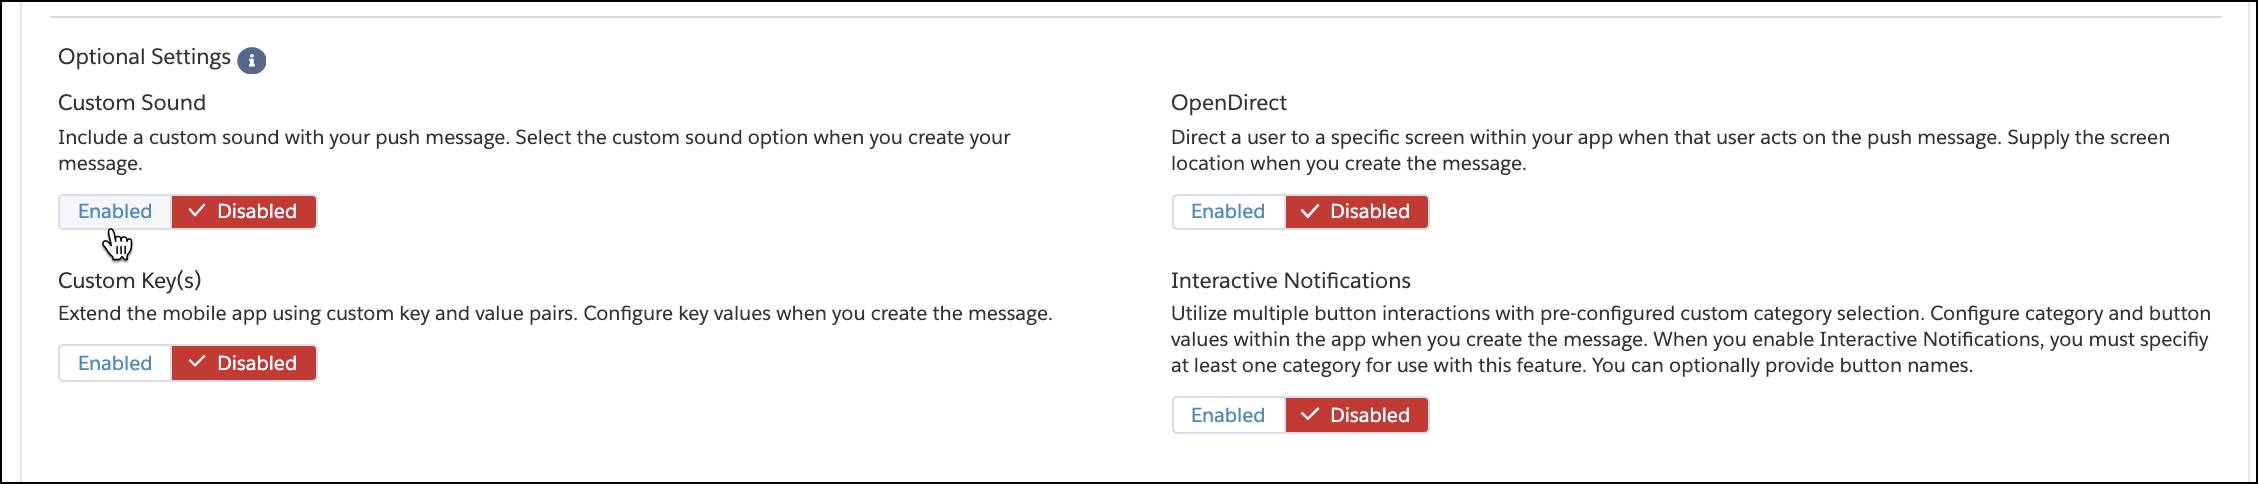
With that important step done, Simone reviews the optional settings and decides to leave Custom Sound, Custom Keys, OpenDirect, and Interactive Notifications disabled.
Finally, Simone reviews all the information she entered and clicks Save.
Test Your Configuration
Once everything is properly configured, your mobile app appears automatically in MobilePush. Before you move forward, make sure your configuration is set up properly. You can do that with a test notification. Let’s review the steps Simone takes to send a test notification.
Step one: Create a filtered list for testing
A filtered list is a list of contacts who are narrowed down based on a specific demographic or piece of data (such as loyalty level or state). For MobilePush testing, you want to use the contact key that is associated with the mobile device you are using for testing. Here’s how Simone creates a test list in MobilePush.
- From the Overview page of MobilePush, she clicks Manage.
- Next, she clicks Create List and then Filtered List.
- Under System Data, she chooses Contact.
- Then she drags Contact Key to the filter and she enters the contact key for the test mobile device she and Eduardo are using for testing.

- She clicks Done and then Save as Filter.
- She then enters a name for her test list and clicks Save.
Once a list has been created, it can take up to 5 minutes for the contact created by your app to show up in the filtered list. Refresh the list until the new contact is returned before proceeding to the next step.
Step two: Create a test push notification and press Send.
This notification doesn’t need to be fancy, so Simone creates a simple outbound message to confirm successful configuration. She then selects the test list she created and presses Send. Need some help to create and send a message? We cover this step in detail in the next unit.
Step three: Review message activity to confirm success.
Simone checks her test mobile device and sees the test message—success! If you didn’t receive a message, don’t fret—just rereview your app settings, and reach out to your app developer to troubleshoot.
Additional Settings
With Simone’s successful test, she heads back to Setup to review and adjust the settings for Scott’s new app. From this screen, she can click Edit to enable Rich Media and a Send Blockout (1) period. She can also Add Headers and Add Footers (2) on this screen as well. 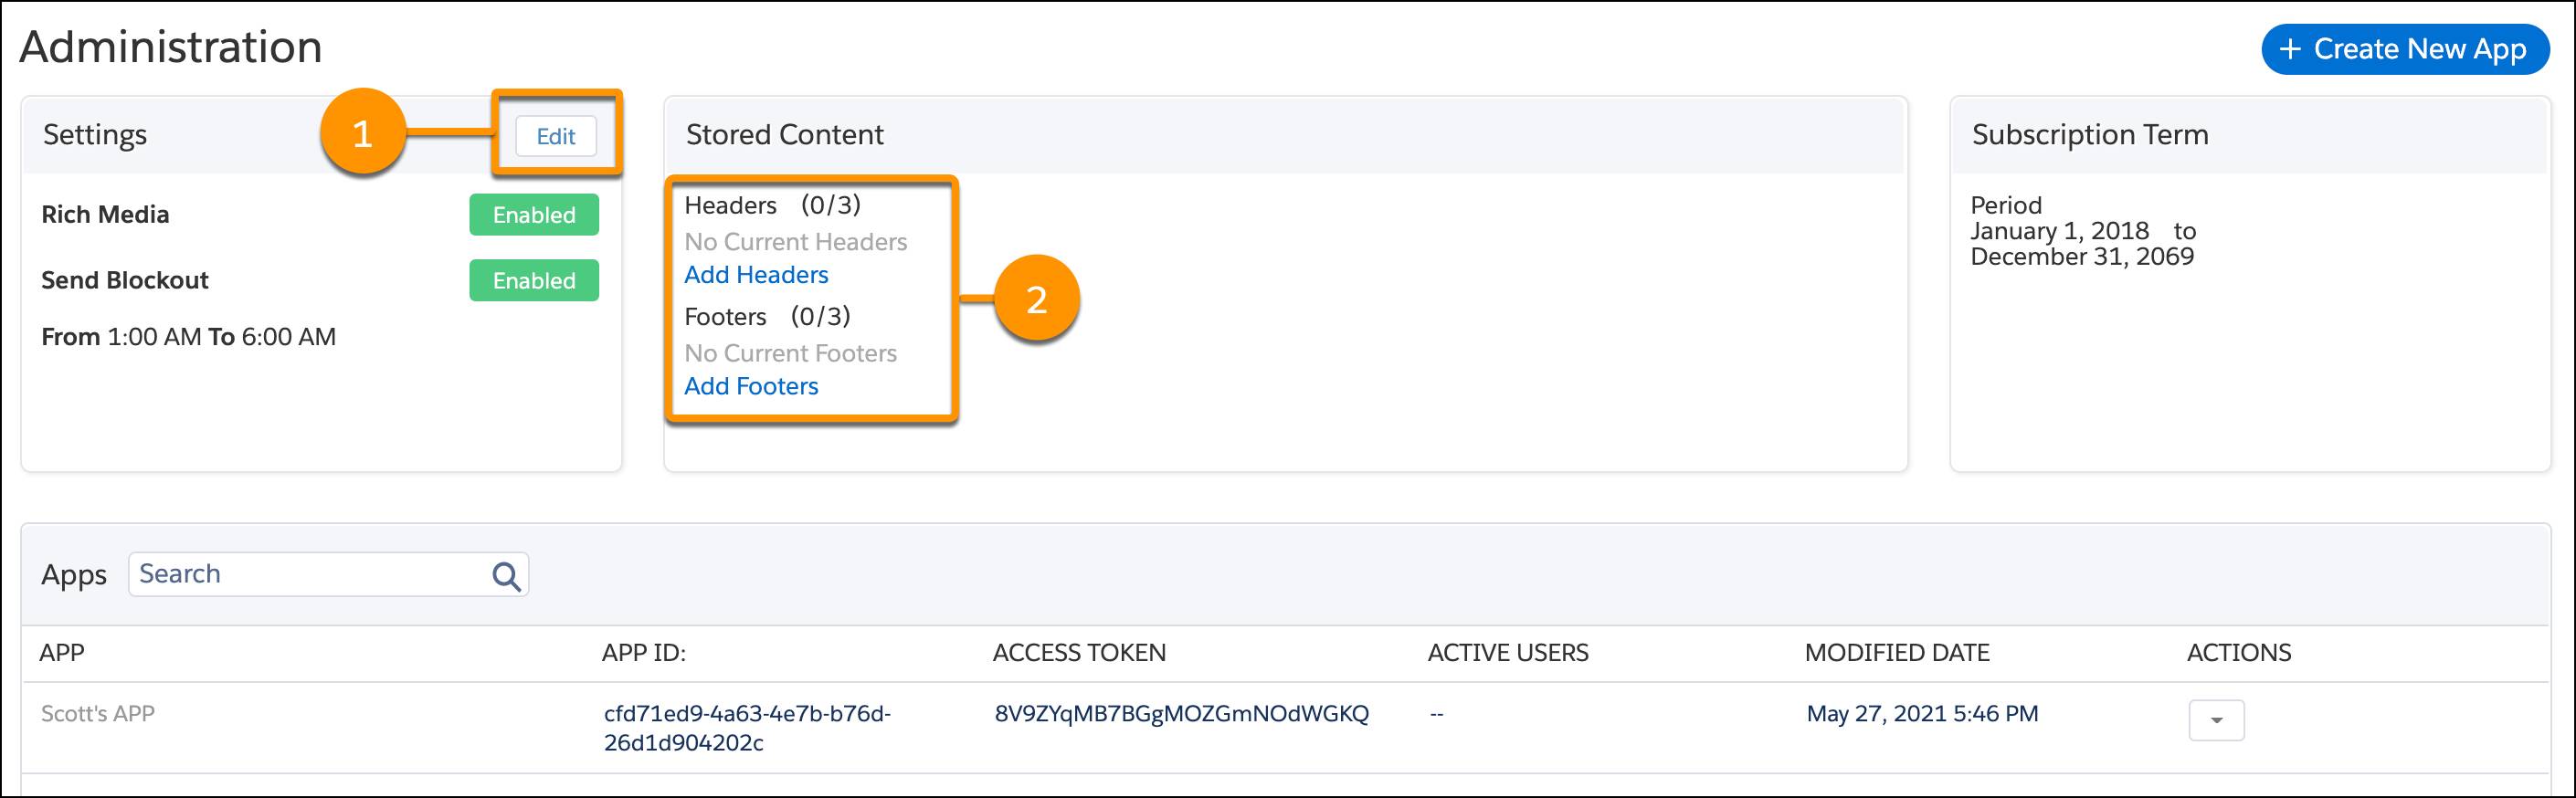
Why use these options?
- Enabling rich media allows you to add images and video to your notification, which can increase the likelihood that customers will open your message. Who wouldn’t want that?
- Send blockout windows are used to restrict push messages from being scheduled from Marketing Cloud Engagement during a certain period of time, typically late in the evening to early morning. Why? To keep customers happy, not annoyed. No one wants to be woken up at night about a burger of the month. Especially if the store isn’t even open to satisfy those late night cravings!
- Standard headers and footers are a great way to add brand consistency to all future push notifications. Creating standard headers and footers gives Simone peace of mind that all messages sent from MobilePush, regardless of who on her team sends them, are clearly branded as Scott’s Restaurant and Bar and have the correct links.
Now that you have successfully connected your app with MobilePush (high five!), you are ready to learn how to use MobilePush like a pro. See you in the next unit.
Resources
- Salesforce Help: Getting Started with MobilePush
- Salesforce Developer: MobilePush and Journey Builder for Apps SDK
- Salesforce Help: Add Provisioning Info to Your App
- Salesforce Help: Obtain Required Items from Apple to Send iOS Push Notifications
- Salesforce Help: Create and Send a Push Notification
- Salesforce Help: Get Started with Rich Notifications
- Salesforce Help: MobilePush Optional Settings
- External: Apple Developer