Create Push Messages in Journey Builder
Learning Objectives
After completing this unit, you’ll be able to:
- Add a MobilePush activity into a journey.
- Review mobile performance in Journey Builder.
Journey Builder makes sending cross-channel communications easy for marketers. So now that you are set up in MobilePush and know the basics, you can add push notifications to enhance your customer journeys in Journey Builder. That’s what we cover in this unit.
Create a MobilePush Activity in Journey Builder
Let’s check back in with digital manager Simone Wright. She is ready to add a push notification to the welcome journey for Scott’s Restaurant and Bar. Let’s follow along as she completes the needed steps.
Friendly reminder: Before adding push notifications into journeys, be sure to review your entry source data extensions. To successfully send a push notification using Journey Builder, ensure there is a contact key in the data extension and that the contact has an associated device ID, device token, and platform type registered within Marketing Cloud Engagement.
Simone has all the required data in order, so she’s ready to start.

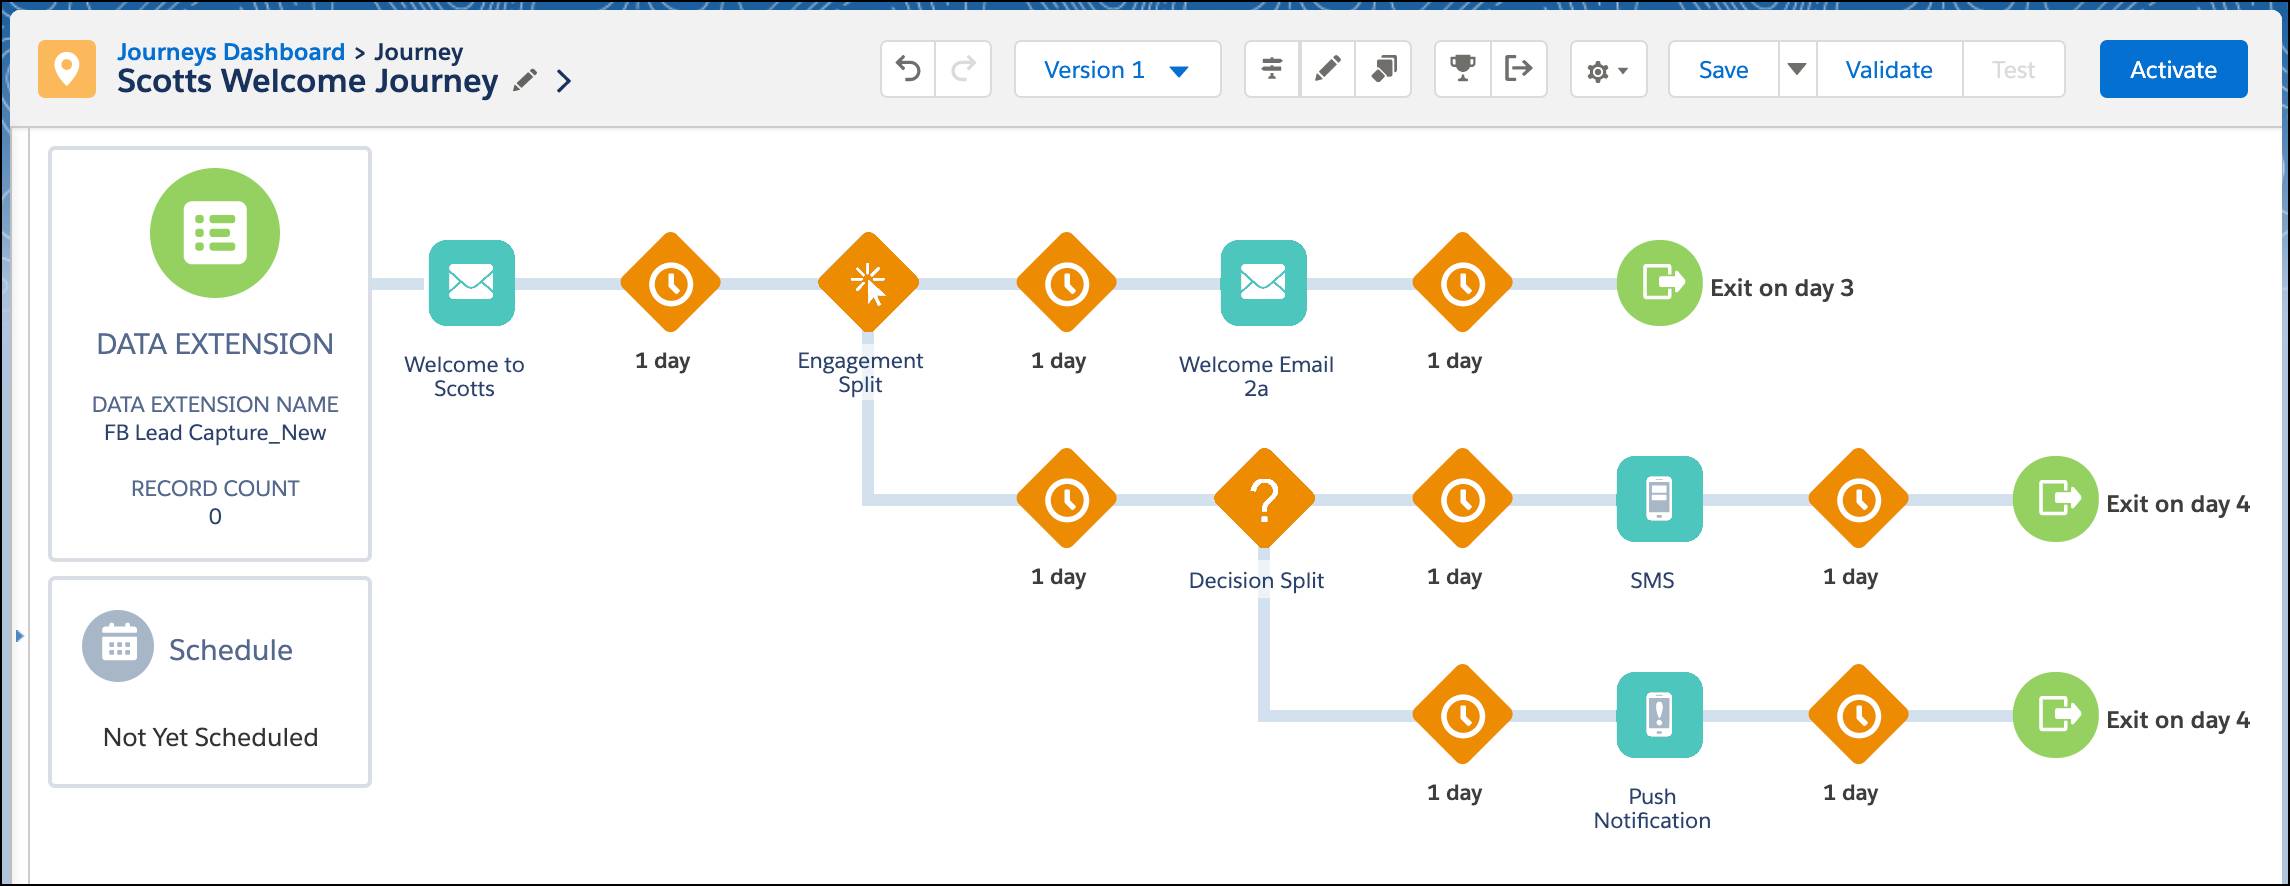
First, she navigates to Journey Builder and locates her Welcome Journey.
- She starts by clicking New Version, to create a second version of the running Welcome Journey.

- A new version is automatically created and ready to be updated.
- Simone drags the push notification icon to the canvas where she wants to add the new channel option.
- To configure, Simone clicks the Push Notification activity to define the activity.
- Simone wants to create a new message, so she clicks New Message.

Message Definition
- From this screen, she adds a Title and Subtitle.
- She keeps the Show button selected, to view the title and subtitle in the message preview.
- Then she enters her notification message, “Stop in today to get 10% off the burger of the month!" (You can add personalization and AMPscript to your message inside the Message field. Learn more about AMPscript in the module, AMPScript for Non-Developers.)
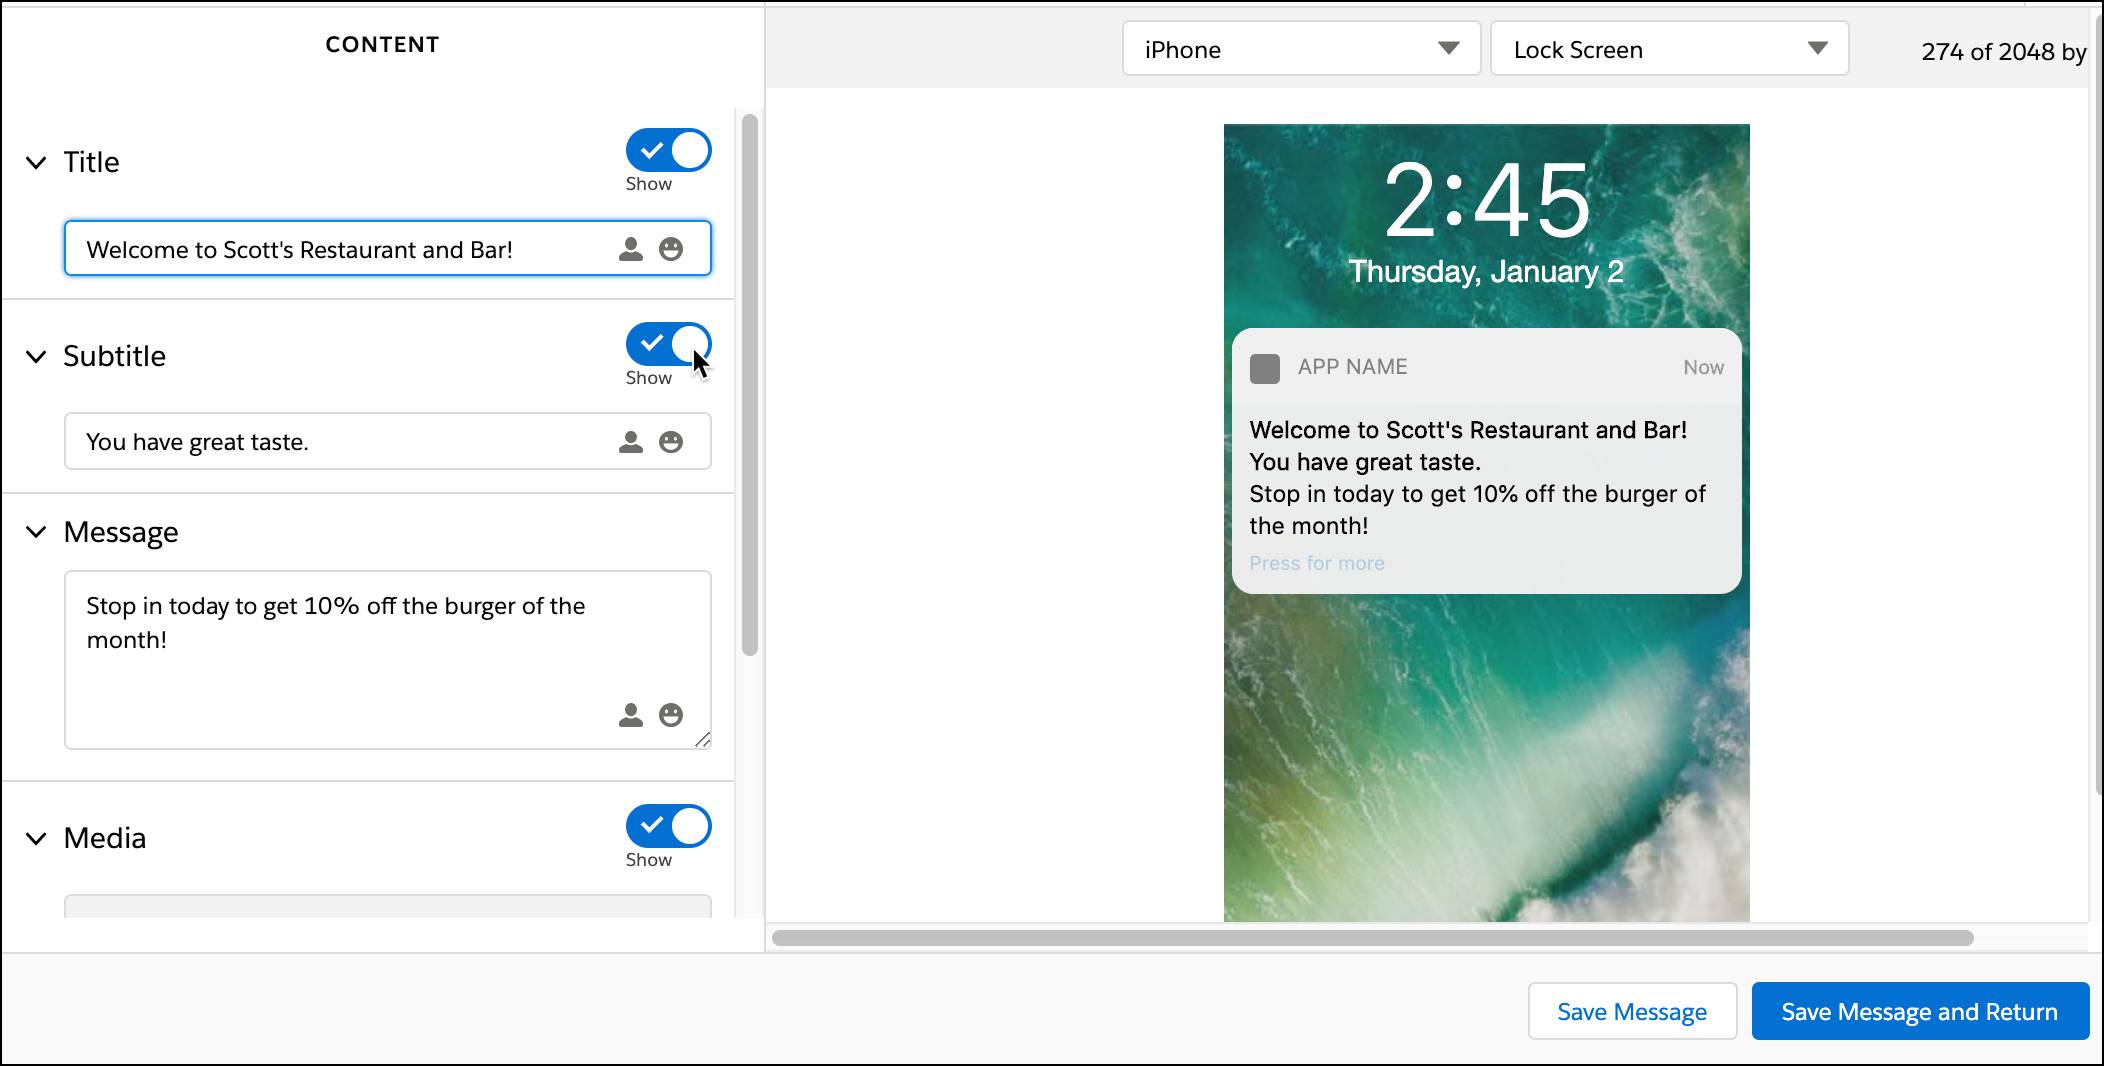
- If she wants, Simone can add media to her message as well. Simone skips this section and moves on to select an open behavior. Her options are:
- Open the App: Opens the app when the user taps the message.
- Go to App URL: Insert a URL in the field that goes to a specific page in your app.
- Go to Web URL: Insert a URL in the field that goes to a web page.
- Go to CloudPage: Takes the user to a CloudPage landing page.
- Simone selects Open the App.
- She then reviews the preview screen to see how the message looks on iPhone, Android, and the Apple Watch.
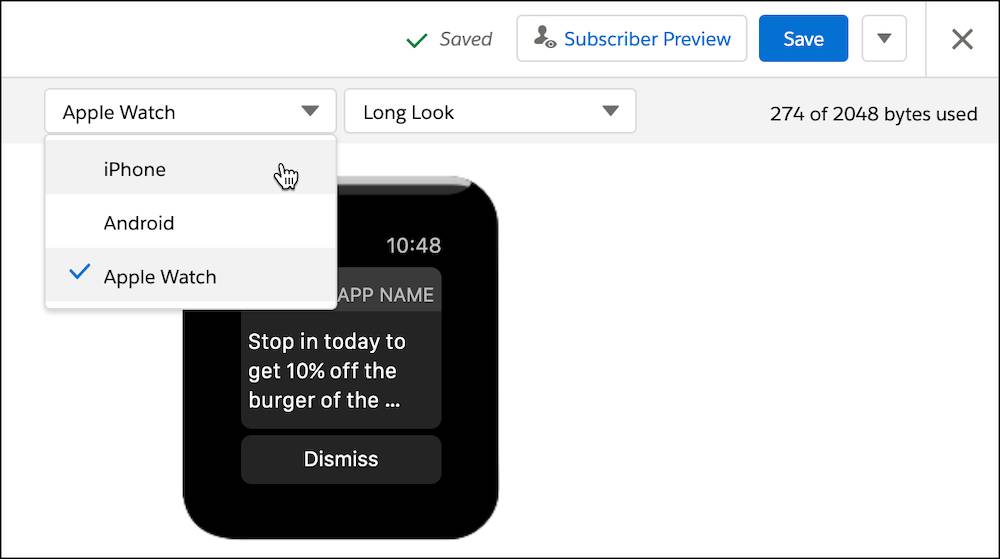
- She clicks Save.
Message Configuration
- From the push notification summary screen, next to Message Configuration she clicks Edit.
- She selects the Scott’s Restaurant and Bar app.
Delivery and advanced options on the summary screen are—you guessed it—optional. Under delivery options, Simone can select custom sound options, confirm display options, and associate her message with a campaign. Under Advanced Options, Simone can add reporting and custom key information.
Push Notification Summary
- Simone reviews the summary screen to confirm setup is correct.
- Once reviewed, she clicks Done.
And with that, Simone has added a MobilePush message to Scott’s welcome journey. (Cue the confetti!) Her next steps are to validate the new version, test with a test list, and then activate her new journey.
Push Notification Analytics in Journey Builder
The new version of Scott’s Welcome Journey has been running for a few weeks now, and Simone wants to check in on how it’s performing. In Journey Builder, Simone can find tracking information for each mobile message activity within the journey canvas. She simply clicks the push notification activity from the journey canvas to access analytics, as well as a summary of the push notification configuration details. 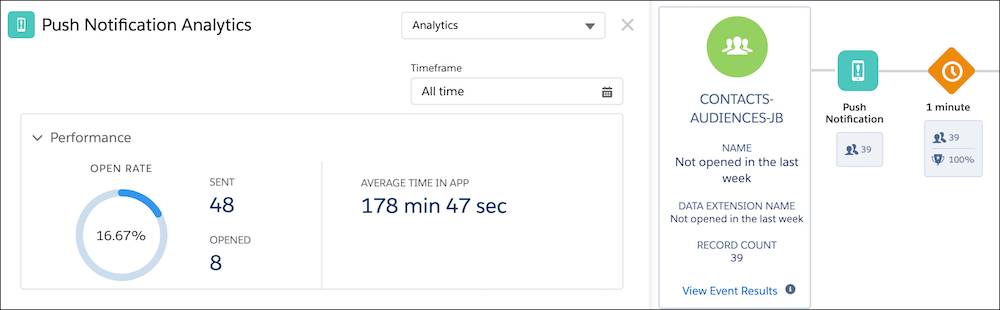
On the analytics screen, Simone can find basic performance information including open rate, number of messages sent, and average time in app. It’s a great way to spot-check performance of your MobilePush messages.
Now that you are using push notifications in Journey Builder, it’s time to meet your customers where they are with location-based messages.