Discover List Actions
Learning Objectives
After completing this unit, you’ll be able to:
- Explain how to merge data using a List Action.
- Configure a List Action to order the merge list.
- Describe how to use the Advanced Merge feature.
Introduction
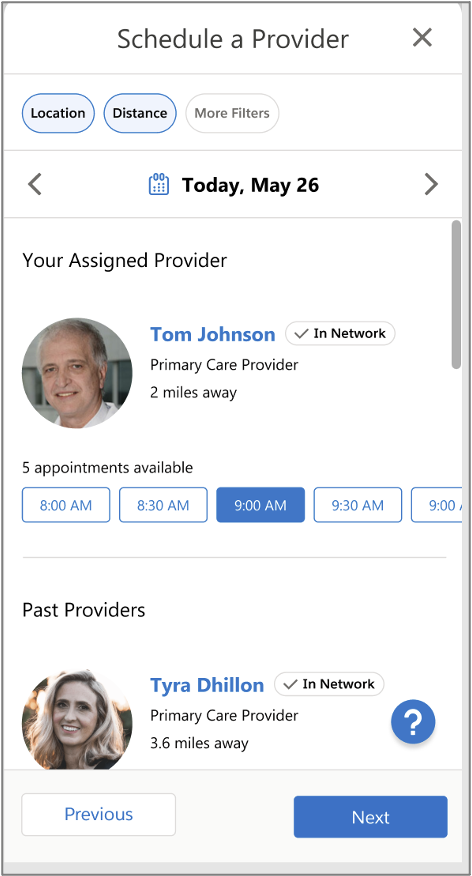
ClearLight sends Robert a new requirement. The Marketing team receives two different lists of customer leads from their Customer Care Center with the same AccountId. They want to merge the lists into a single list with the values in a specific order.

Robert is eager to create this solution, but he wants to experiment first with an existing product. He uses the time slots example again, this time to work on the list-merge requirement.
Tom Johnson is the assigned primary care provider, and he has five appointment time slots available.
Robert looks at the Actions available in an Integration Procedure and confirms that he can use a List Action to experiment. Let's dive deeper into List Actions and make sure Robert is set up for success in making the customer requirements a reality.

Robert asks, “What’s a List Action? How do I configure a List Action?”
List Actions
List Actions merge multiple lists by matching the values of specified list item JSON nodes. Based on the project requirements, you can use either a basic merge or an advanced merge.
- A basic merge matches node names exactly.
- An advanced merge matches nodes that have different names or reside at different levels in the incoming lists.
To match nodes with different names or nodes at different levels, click Advanced Merge.
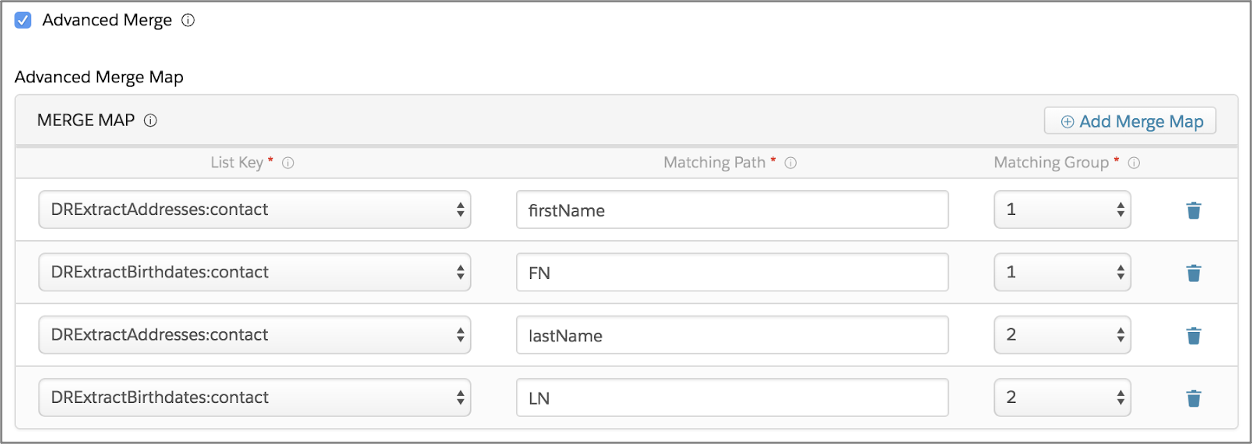
Then specify settings for the nodes to be matched, as follows:
- List Key: Enter the name of the JSON list node containing the data to be matched.
- Matching Path: Enter the path to the data to be matched.
- Matching Group: Specify the same number for all values you want to match.
Set List Action Properties
Let’s see some of the main properties you use later in this unit to configure List Actions.

List Actions merge multiple lists by matching values in list item JSON nodes. You can also use List Actions to sort, filter, and add values to a list. Let’s examine the configuration options in the List Merge section.
| PROPERTY | DESCRIPTION |
|---|---|
|
Merge Lists Order (1) |
The order in which lists are merged. If a list contains a value for a key that was populated by an earlier list, the later entry overwrites the earlier one. |
|
Advanced Merge (2) |
Matches nodes with different names or nodes that reside at different levels in the incoming lists. |
|
Merge Fields (3) |
The name of the JSON nodes that must match for entries to be merged. To specify nodes below the top level of the JSON structure, use colon-delimited paths. By default, the nodes in both lists are assumed to have identical names and reside at the same level. If you don’t specify merge fields, the lists are merged into a single list, whereas nodes with matching keys are not merged. |
|
NULL is a Valid Matching Value when Merging (4) |
When merge fields are all null, specify whether to treat them as matching. |
|
Has Primary (5) |
Specifies the list elements in the output. Elements in other lists that don’t match the elements of the primary list are ignored. |
Configure a List Action
Robert's itching to make serious headway on the project. To help point him in the right direction, let's look at an example Integration Procedure with a List Action.
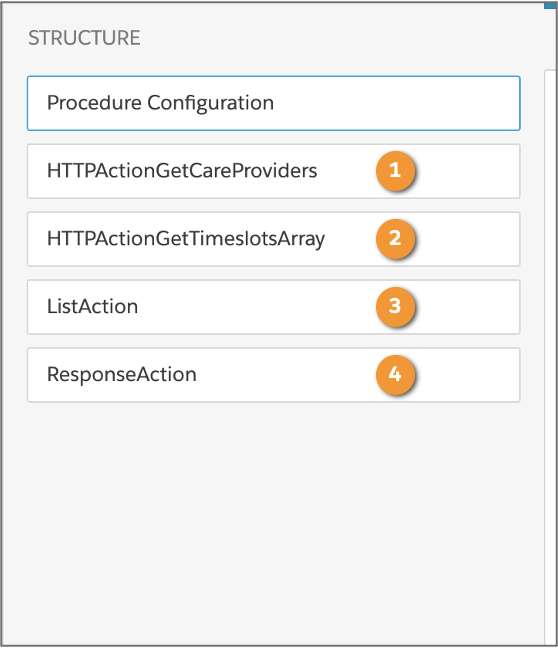
What building blocks does Robert need to create a solid Integration Procedure? He needs an HTTP Action to get data related to care providers (1) and another HTTP Action to get time-slot data (2). Plus, he needs to include a List Action (3) to merge multiple lists and a Response Action (4) to trim the JSON data.

The first HTTP Action (1) gets data related to care providers from the HTTP Path. Enter the desired URL in the HTTP Path field (2), and set the HTTP Method (3) to GET.
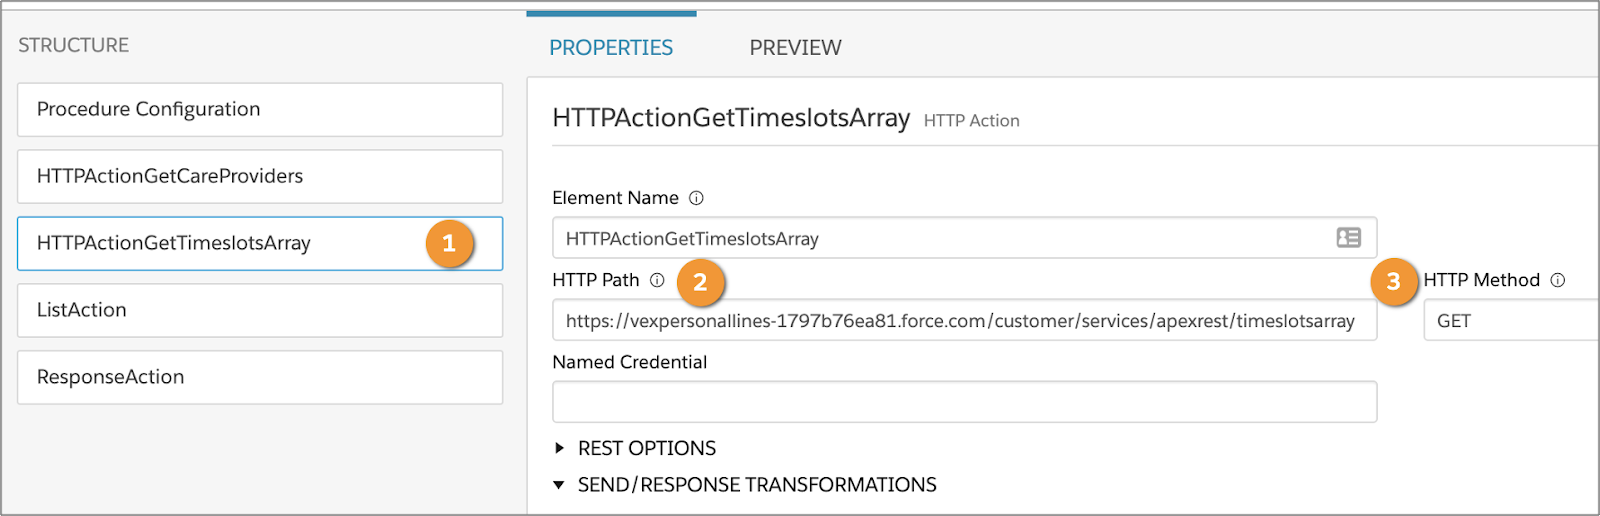
In the next HTTP Action for time slots (1), enter the HTTP Path (2) for the external system and the desired action under the HTTP Method (3).
Now it’s time to configure a List Action in detail.

Remember, List Actions are perfect for merging multiple lists by matching node values. Drag a List Action (1) into the Structure Panel. Configure the Merge List Order (2). Set the value for care providers to HTTPActionGetCareProviders:careProviders. To create a time-slot list for each care provider, add the value HTTPActionGetTimeSlotsArray:slots. Enter the name of the JSON node in Merge Fields (3). The name of the node should match the entries you want to merge.
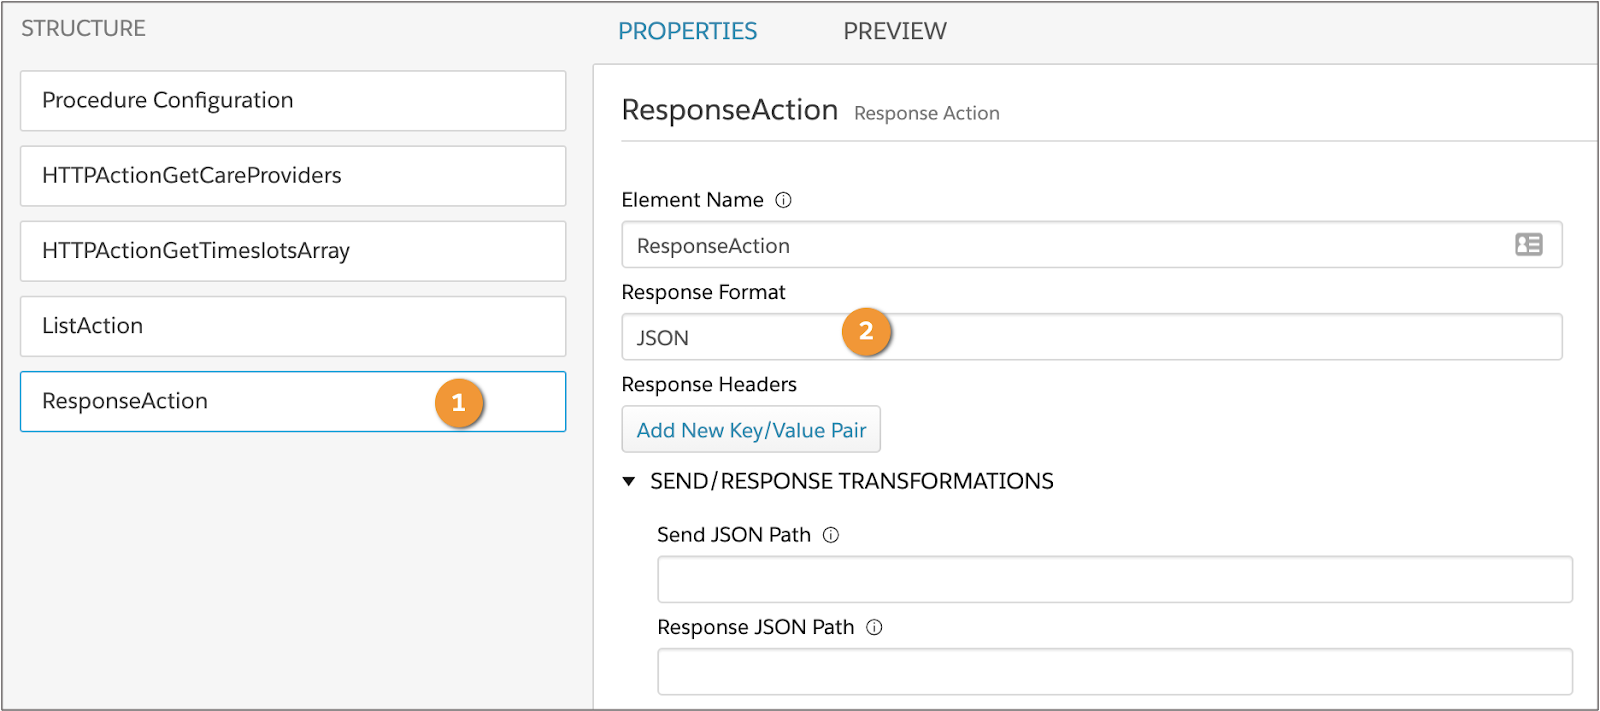
Finally, drag a Response Action (1) into the Structure Panel. In the Response Action, enter the desired format in the Response Format field (2). In this case, the desired format is JSON. Next, preview the configured List Action, and view the results in the Response section.

In the Input Parameters (1) pane, click Execute (2). The Response pane (3) shows the results with the data arranged in list format with the care provider ID.
Robert is confident about merging lists using a List Action. Now it’s time for him to learn more about the advanced features of Integration Procedures.