Manage Plans and Data Components
Learning Objectives
After completing this unit, you’ll be able to:
- Organize plans and components into folders to enhance clarity.
- Describe filters, data sheets, and worksheets to ensure easy identification and usability.
Organize Plans and Associated Components
The Plans tab in Spiff Designer can feel a bit overwhelming at first because there’s a lot happening here. This is where you create commission plans to group sales reps who earn commissions the same way. Each plan is made up of multiple rules, with each rule defining a specific type of commission payout. These rules often rely on various components, such as datasheets, worksheets, quota tables, and accelerator tables. It can get complex quickly, and without good organization, things can spiral out of control. The good news? Spiff Designer gives you the tools and flexibility to structure and organize your plans just the way you want.
Dive into plan organization using a sample plan named Chief Revenue Officer. This image shows the plan with five payout rules, each pulling calculations from multiple datasheets.
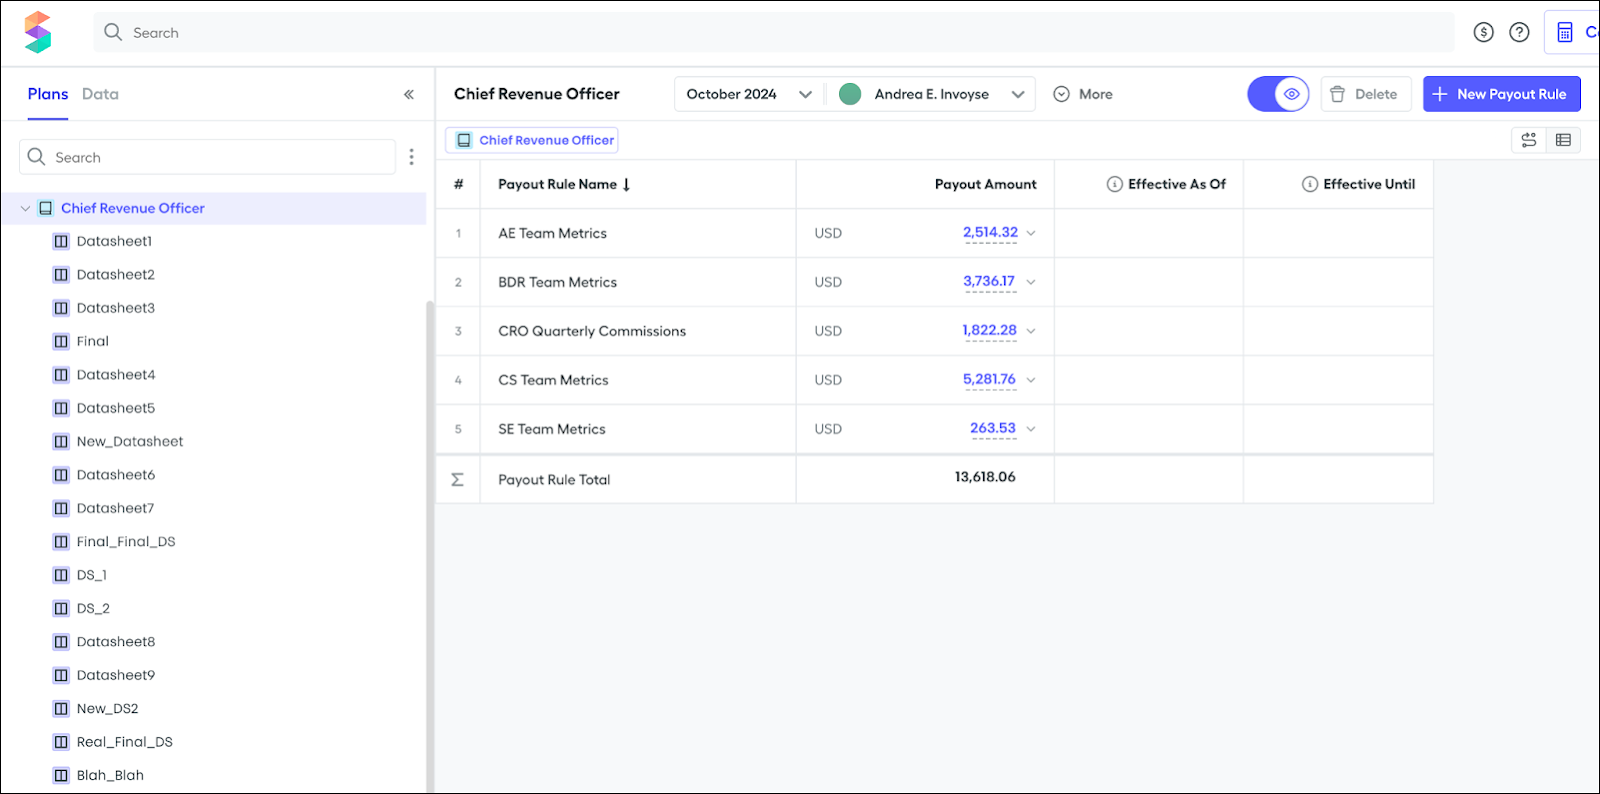
The problem? It’s difficult to figure out what these datasheets are based on their current titles. Plus, it’s not clear how these datasheets are connected to the five rules. If you didn’t create this plan, it can take a lot of time to figure out what’s going on. Even if you’re the admin who built it, juggling multiple plans such as this makes it easy to lose track.
So, start by renaming these datasheets to give them some context. Naming is one of the most critical steps in organizing your plans and rules in Spiff Designer. Good names save time and make it so much easier to find and use the data you need.
Here are a few tips for creating effective names.
- Make the names clear and descriptive. Choose names that make sense to someone viewing the plan for the first time.
- Avoid similar names. Use distinct titles to avoid confusion between datasheets.
- Describe the function. Use names that highlight what the datasheet does or how it contributes to the plan.
- Use familiar terminology. Use language that’s clear to everyone on your team.
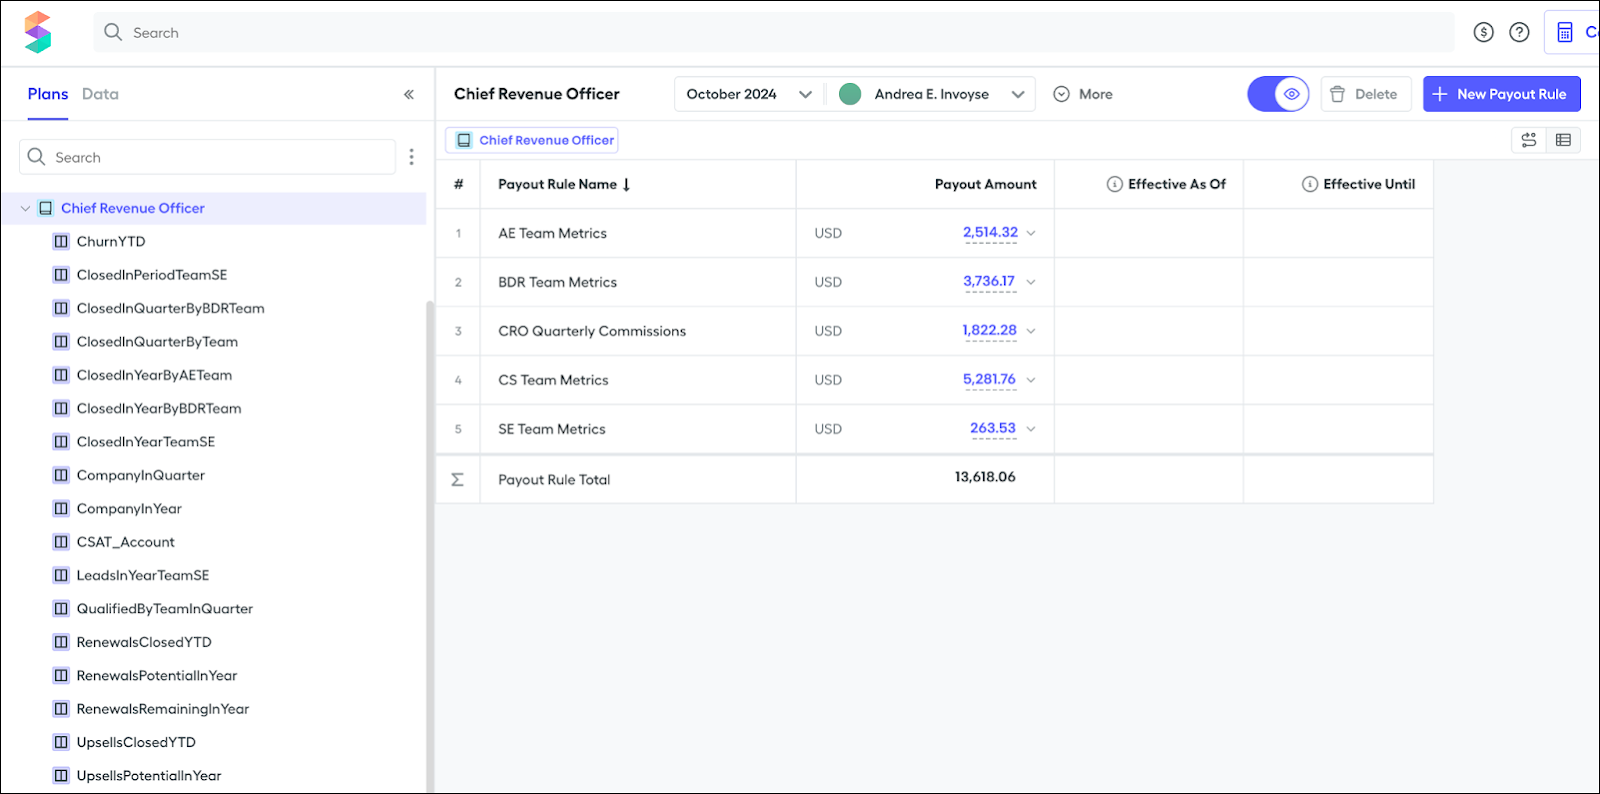

This is definitely better—you can now tell what these datasheets are at a glance. However, the list is still long and doesn’t give a clear picture of which calculations are feeding into which rules. There’s room to make things even more organized by grouping them into folders.
The great thing about Spiff Designer is that you can group plan components in a way that makes the most sense to you. For example, you can create a separate folder for each payout rule and place all the related plan components inside it. This not only makes navigation easier but also helps you quickly understand how everything connects.
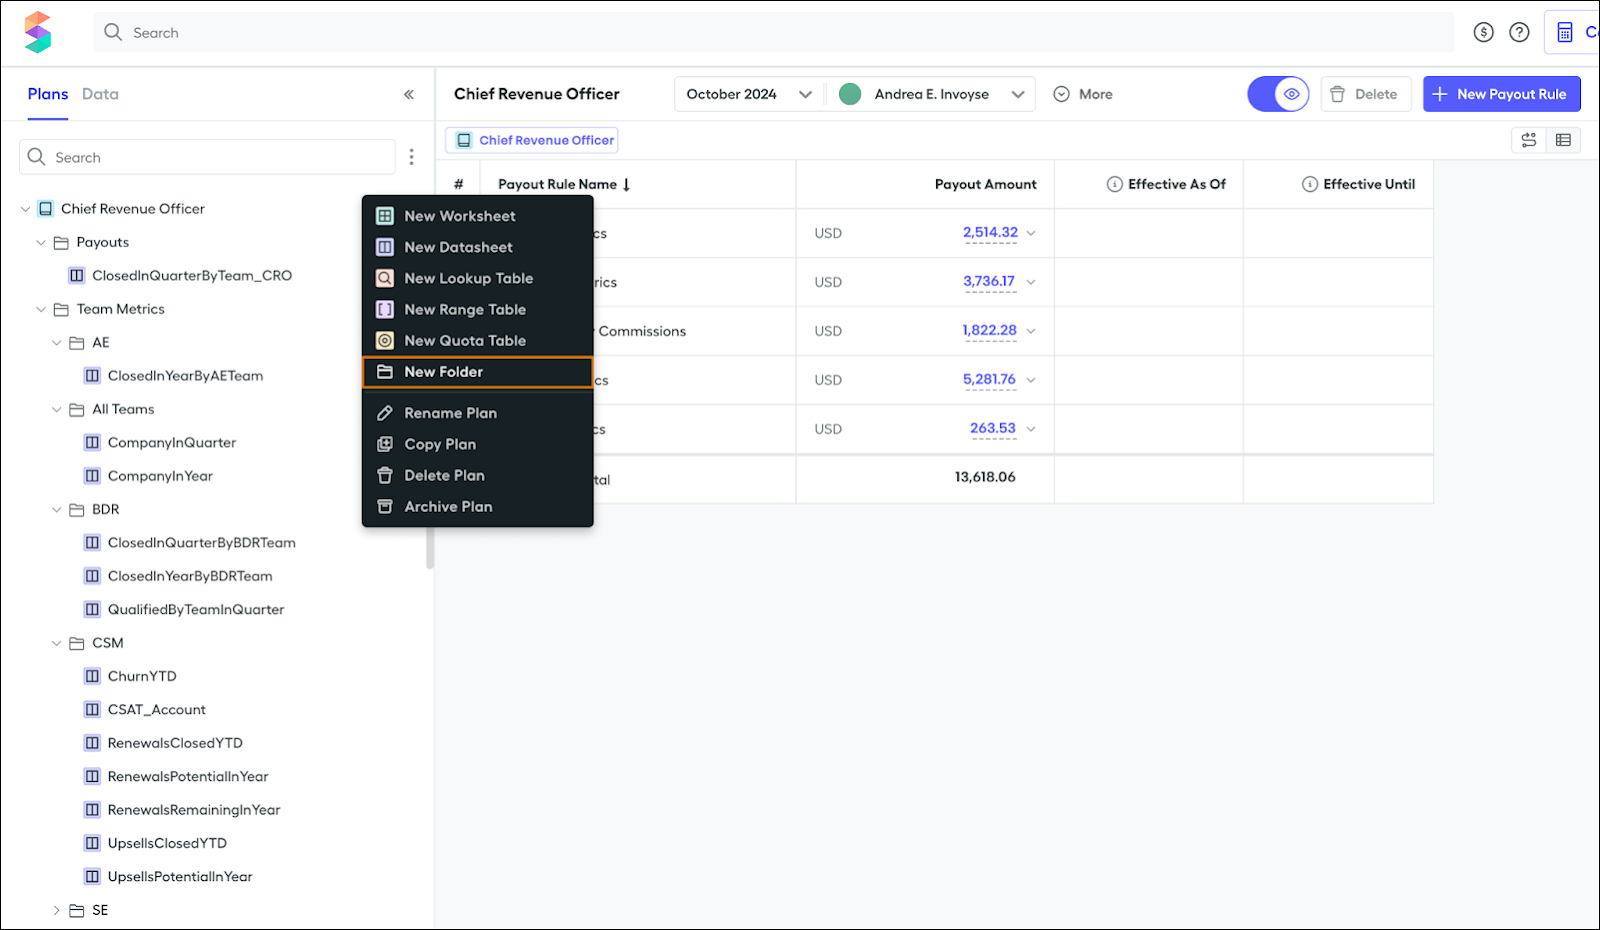
When creating folders, remember to use clear and descriptive names. A well-named folder can save a lot of time and confusion, especially for someone who didn’t create the plan—or even for yourself in the future. With a good folder structure, keeping your plans organized becomes effortless.
Organize Data Filters
The Data tab in Spiff Designer is where fields from various objects and their associated filters live. Similar to datasheets, it’s a good idea to organize your filters with folders and meaningful names. A well-named filter makes it easy for anyone using Spiff to understand its purpose without deeper exploration.
For example, check out this image of a filter that sorts deals by a rep for a defined period and only includes those deals that the rep has won.

A title such as ClosedInPeriod provides a simple, clear definition that highlights its purpose. Also, notice that this filter is made up of four other filters, each with descriptive names.
That said, filter names can get pretty long if you try to describe every detail. It’s OK to truncate or leave out certain aspects, but aim to stay as descriptive and consistent as possible.
Typically, you work within one object at a time, but let’s say you already have a ClosedInPeriod filter for the Opportunities object and now you need one for the Accounts object. A good practice is to name the new filter ClosedInPeriod_Accounts. By appending the object name, you keep things clear and distinguish between similar filters across different objects.
With clear and consistent naming, your filters become much easier to manage and navigate.
Speaking of effective management and navigation, grouping your filters into folders can be a game changer. When your list of data filters grows really long, scrolling through it to find the exact one you need can become a hassle. A well-thought-out folder structure can save you from this frustration and make your workflow much smoother.
For example, here’s an image of a long list of filters to sift through. Instead of scrolling endlessly, you can hover over the object name to bring up a menu and select New Folder. You can now create folders to organize your filters in a way that works best for you.

Let’s say you have several team filters and plan on creating even more. Grouping them into a dedicated Team Filters folder makes it much easier to locate and manage them as your list grows. With this approach, you can keep everything tidy and easy to navigate.
Archive Plans
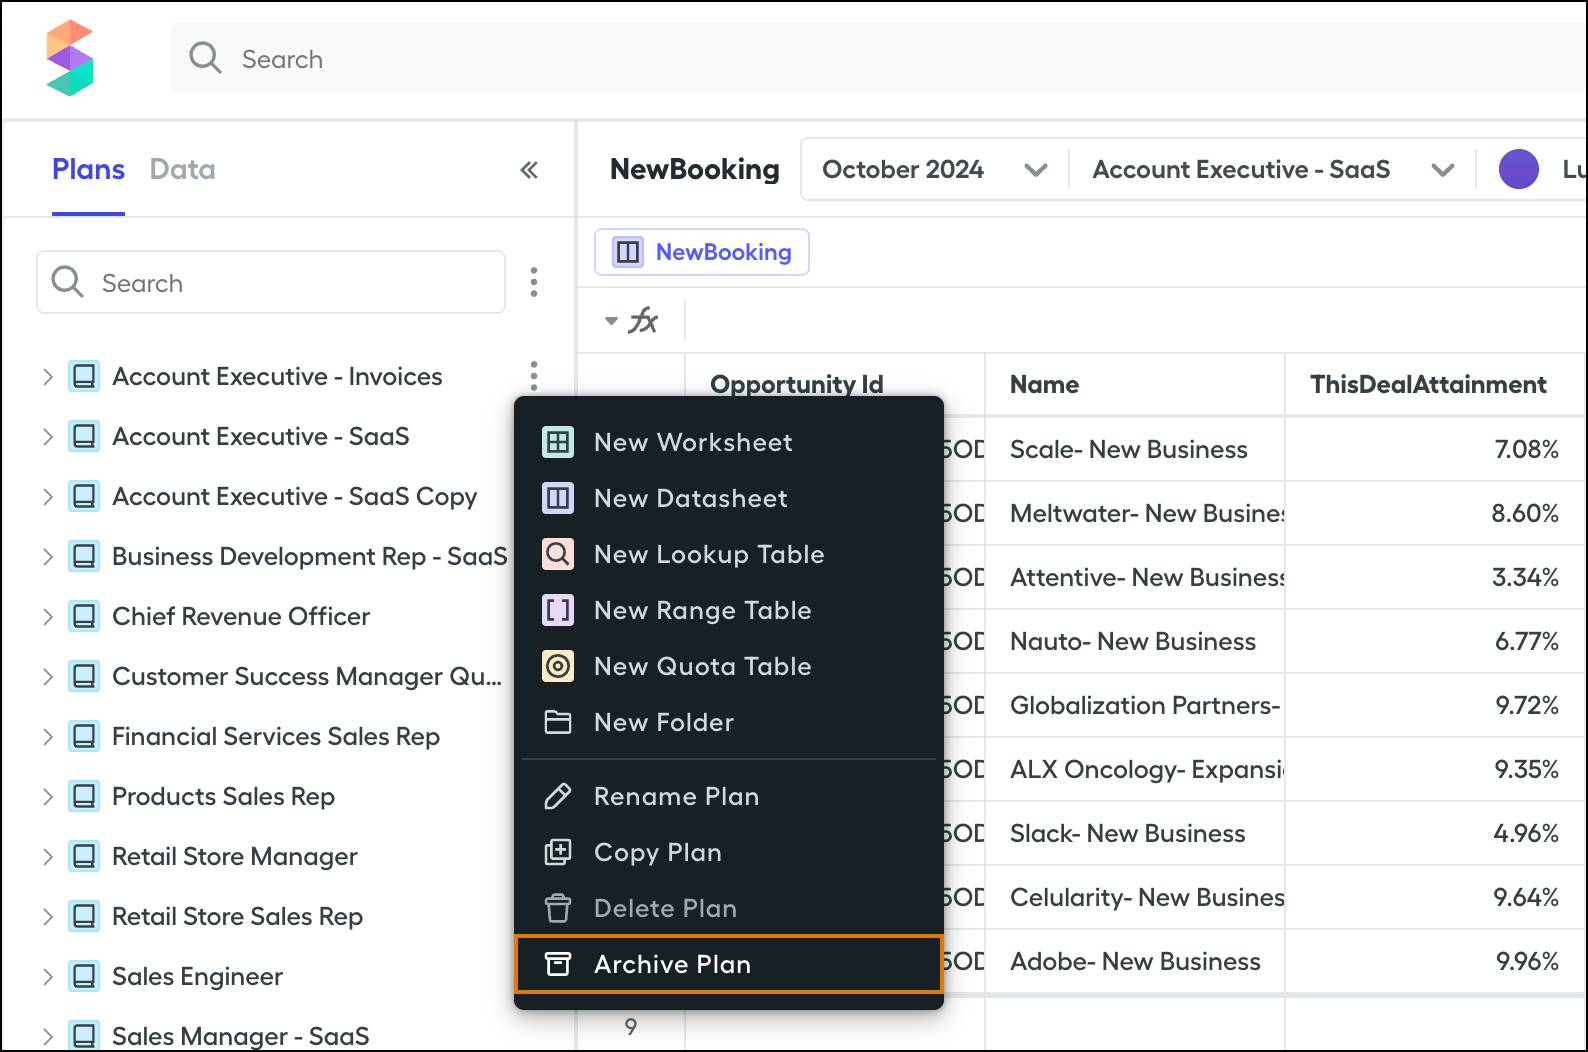
Commission plans often undergo changes at least once a year. If you no longer need certain plans actively, deleting them completely isn’t always ideal—sometimes you need to reference them later for historical data or insights. That’s where the Archive Plan feature comes in handy. You use this feature to retire plans you no longer use while keeping them accessible for future review. Explore how to use this feature.
- In Spiff Designer, navigate to the Plans tab.
- Locate the plan you want to archive.
- Click
 next to the plan’s name.
- Select Archive Plan.
- After you archive a plan, it moves to the Archived Plans section within the Plans tab. From this section, you can choose to clone, delete, or unarchive the plan.
Considerations
Remember these points when archiving plans.
- Archiving a plan hides it from view in the Plans tab in Spiff Designer and the Plans page on the core platform.
- If reps have active plan assignments on an archived plan, their commission statements remain visible.
- You can’t delete plans with frozen statements and attempting to do so returns an error. To delete a plan, first unarchive it and then set the Effective Until date.
- To set effective dates for a plan, first unarchive the plan.
To wrap things up, organizing your plans and filters in Spiff Designer makes your life easier—it’s like tidying up your workspace so you can actually find your stapler when you need it. Grouping plans into folders and giving them clear, meaningful names keeps things neat and stress-free, even when your setup gets complex. The same goes for filters—folders and thoughtful nomenclature take the hassle out of scrolling through endless lists. With these tips, you’re well on your way to being an expert in using Spiff Designer.