Create a Path Optimizer Activity
Learning Objectives
After completing this unit, you’ll be able to:
- Create a Path Optimizer test in Journey Builder.
- Describe Path Optimizer activity options.
Before You Begin
In this module, we assume you are a Marketing Cloud Engagement user with the proper permissions to create journeys in Journey Builder. If you’re not, that’s OK. Read along to learn how you would take the steps in a production org. Don’t try to follow these steps in your Trailhead Playground. Marketing Cloud Engagement isn’t available in the Trailhead Playground.

Create a Path Optimizer Test
Now that you have ideas for what to test, let’s review how we use the Path Optimizer activity in Journey Builder. Northern Trail Outfitters (NTO) wants to test the content of their first welcome email to improve performance. Let’s follow along as digital manager, Isabelle, tests the first email in a welcome journey.
- First, Isabelle navigates to Journey Builder and selects the NTO Welcome Journey.
- She clicks New Version to create a new version of the running journey.
- She locates the Path Optimizer activity under flow controls and drags that activity to the beginning of the new journey.
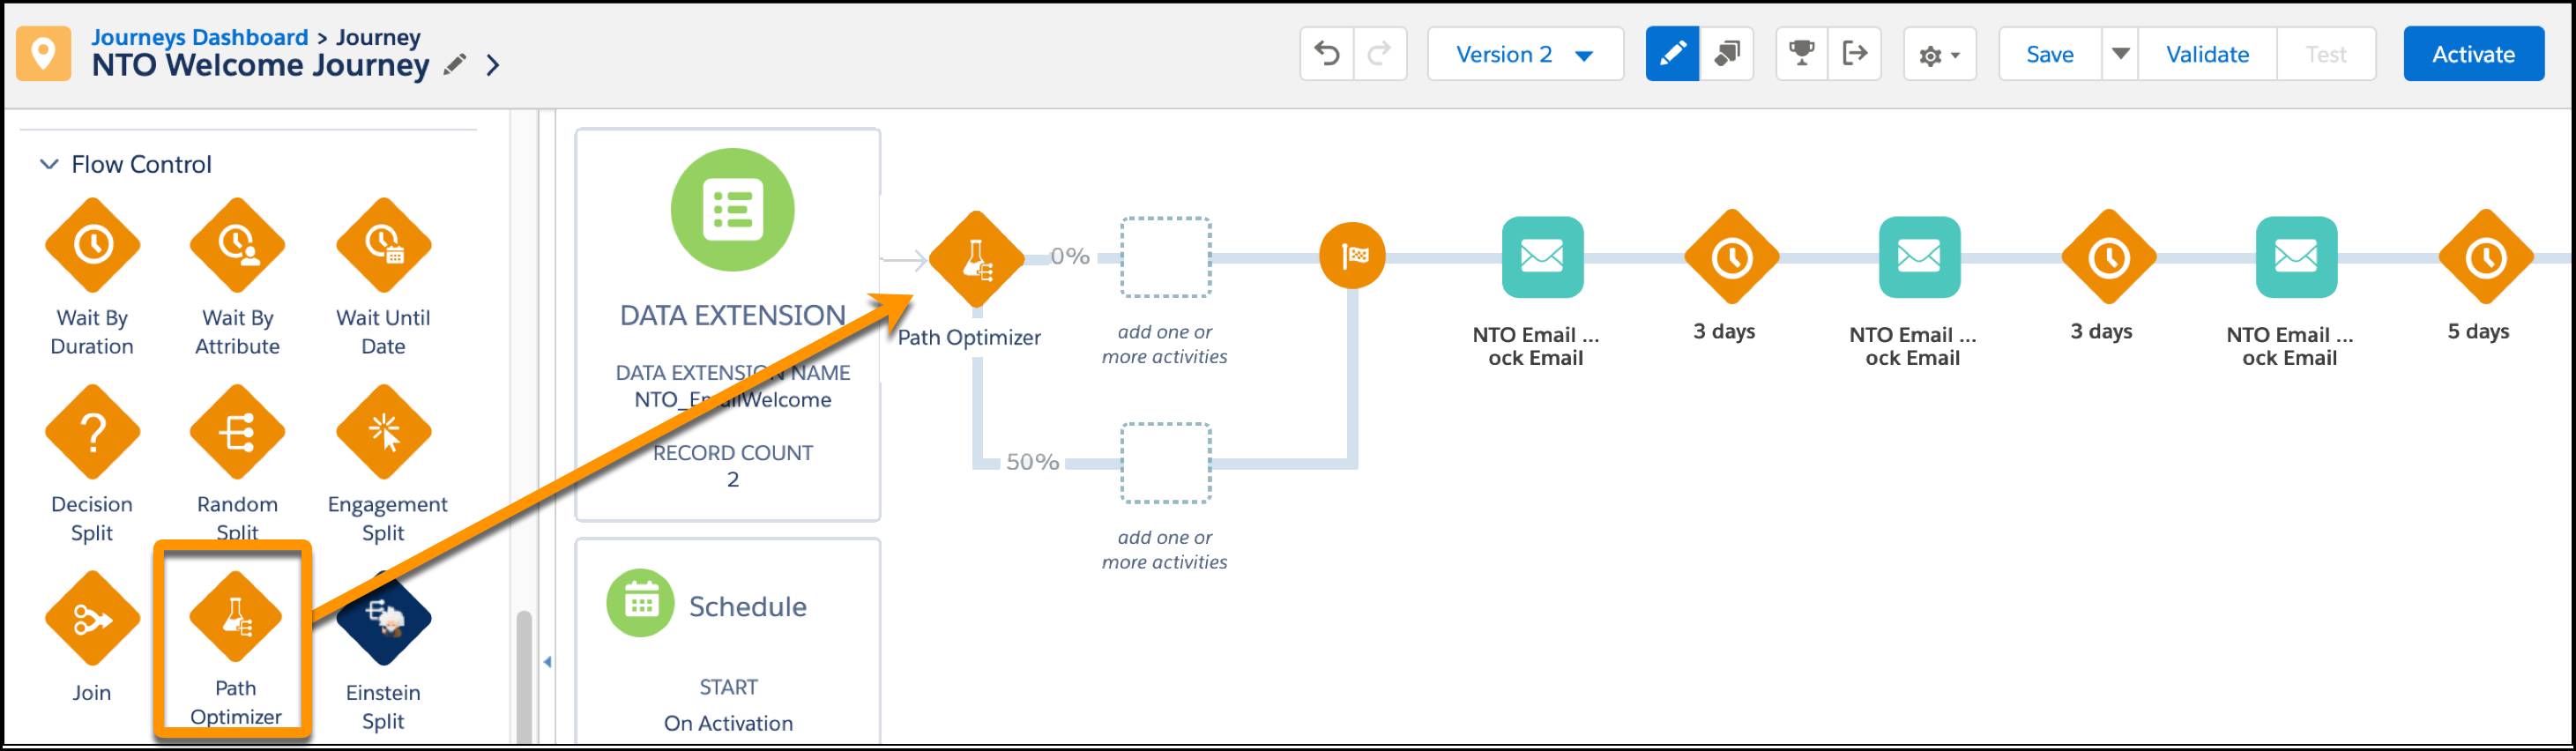
- Then she clicks the Path Optimizer activity to configure.
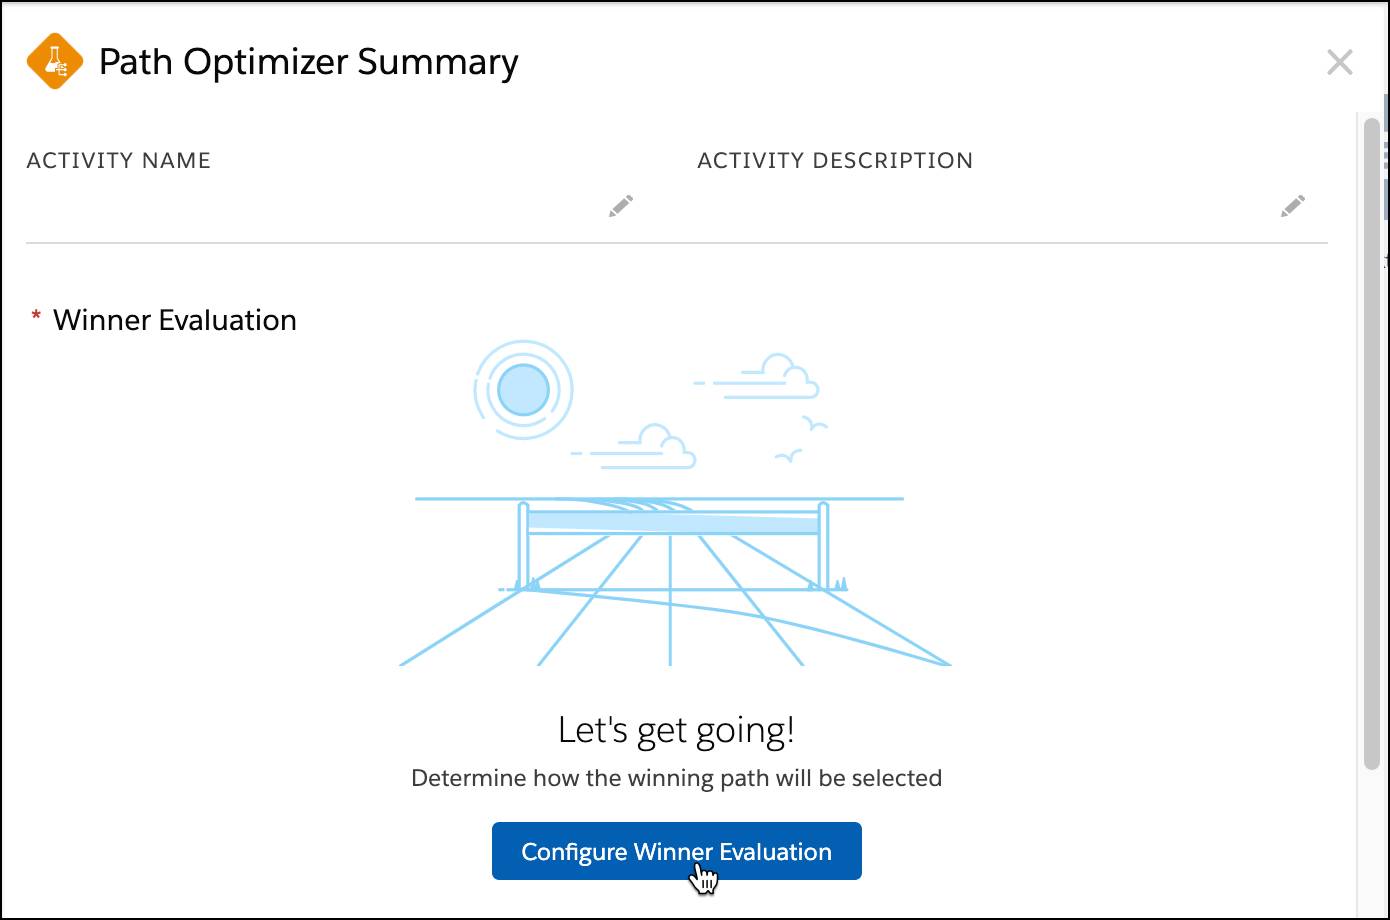
- From the summary screen, Isabelle enters a name for the activity and a brief description.
- Then she clicks Configure Winner Evaluation.
Determine a Winner
Path Optimizer selects a winner based on either email engagement or manual selection. Let’s break those down.
Email Engagement
Select email engagement if you want Journey Builder to choose a winner automatically within a time frame you select based on either the highest click rate, the highest open rate, or the lowest unsubscribe rate. If you don’t have wait periods in your test paths, selecting a test duration is straightforward. However, if you do have wait times, the test duration needs to factor in the length of your test paths. For example, let’s say your journey includes wait times and you selected a 2-day test duration when configuring your test. The total test duration would be the time value you selected (2 days) plus the duration of the longest test path.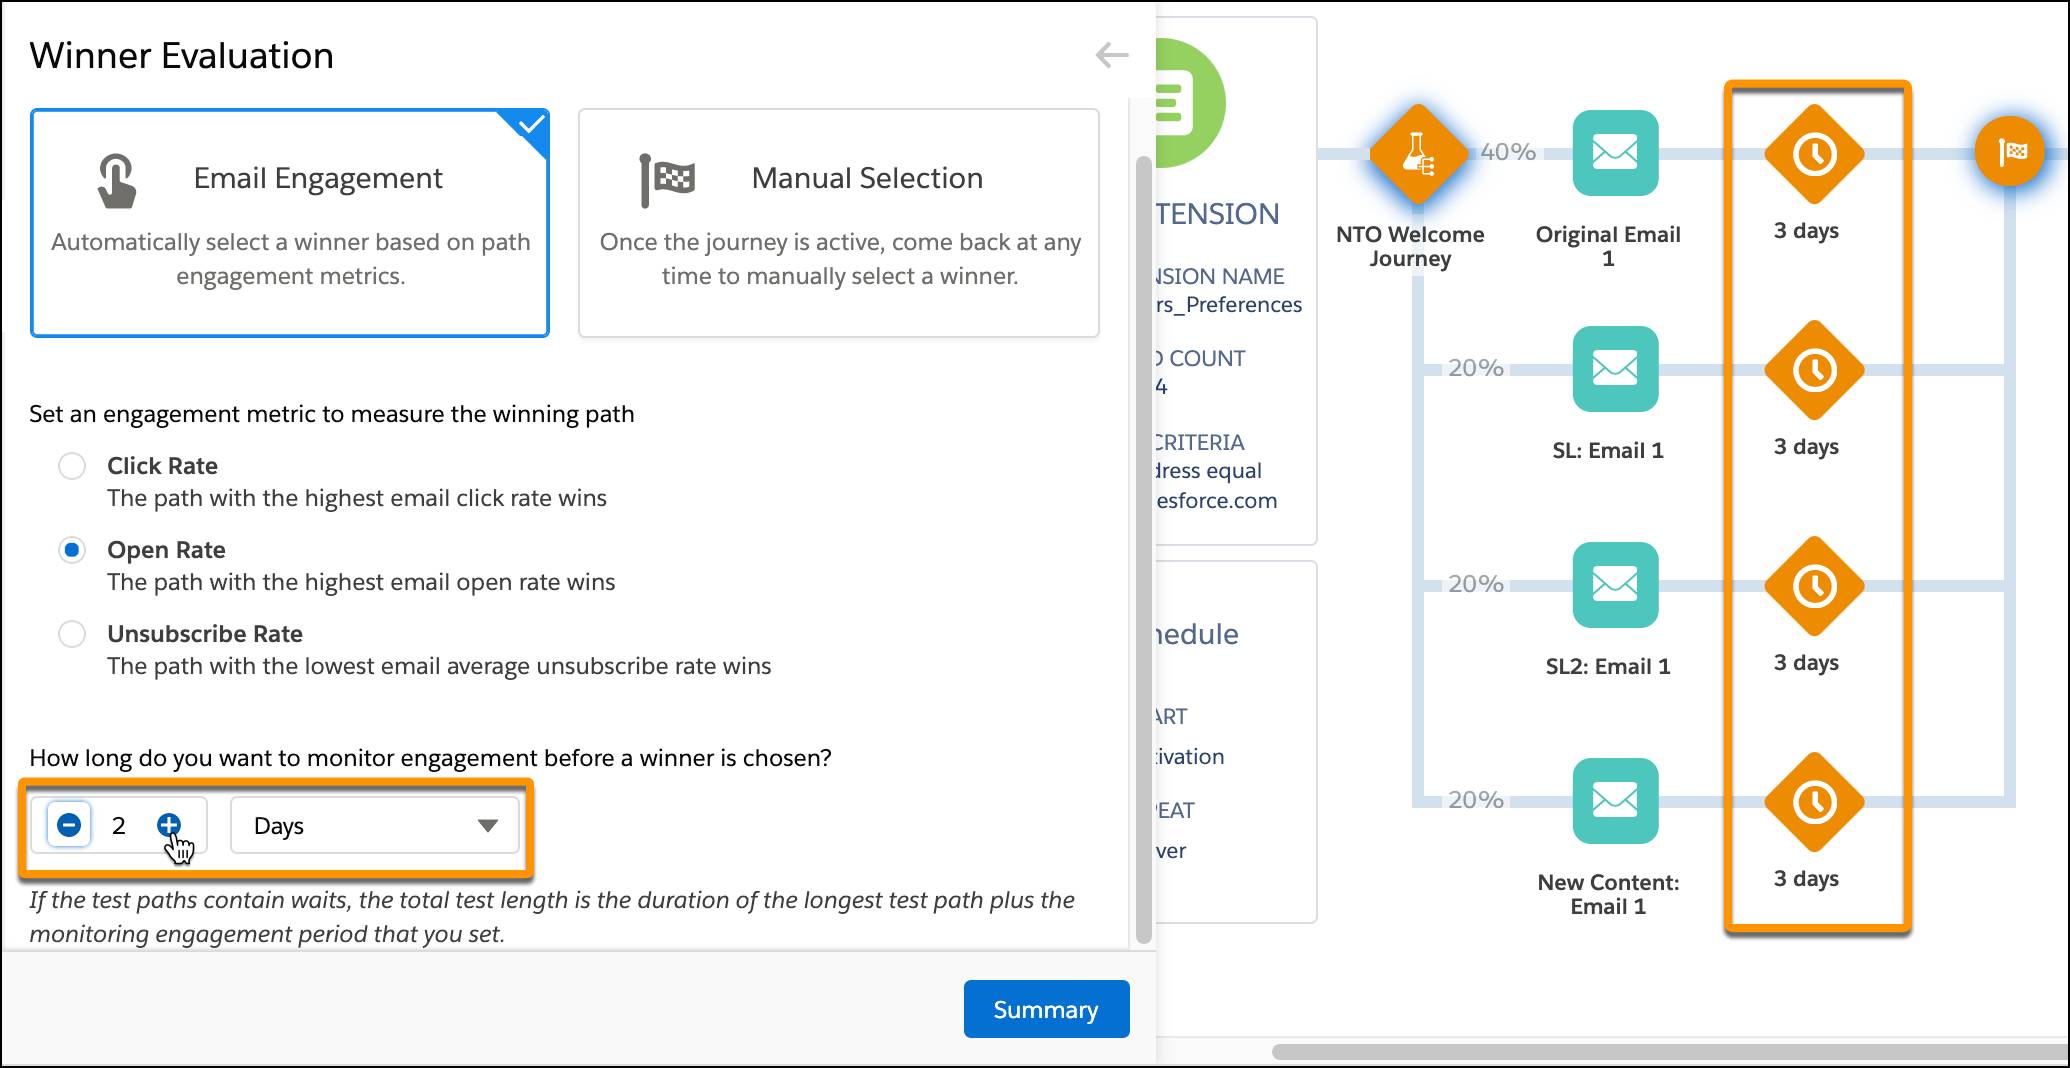
In the example above, the total duration would be 5 days (2 days as selected for winner evaluation plus the longest test path, 3 days).
Manual Selection
Selecting a winner manually is pretty straightforward—you get to pick the winner. You can do this at any time, by clicking on the Path Optimizer test activity in a running journey. This is a great option if you want to track both opens, clicks, and unsubscribe rates. Plus, it’s helpful if you have data outside of Marketing Cloud Engagement that might influence how you define a campaign’s success. For example, you have a contest running and while tracking entries you notice an increase in entries coming from Path 1 versus Path 2 or 3. Manual selection gives you the control to interpret all of your data (inside and outside of Marketing Cloud Engagement) in order to make a decision on the winning path.
Let’s see what Isabelle chooses for her winner evaluation method.
- Isabelle wants to measure opens, so she selects Email Engagement.
- She then selects Open Rate as the engagement metric.
- Then she chooses a test duration of 3 days.
Split and Holdback
Next up, it’s time to select the number of paths to test and the percentage of subscribers you want to receive the tests. Then, you can determine if you want to hold back any subscribers to only receive the winning path. In other words, you’re going to determine your split and your holdback. Let’s review.
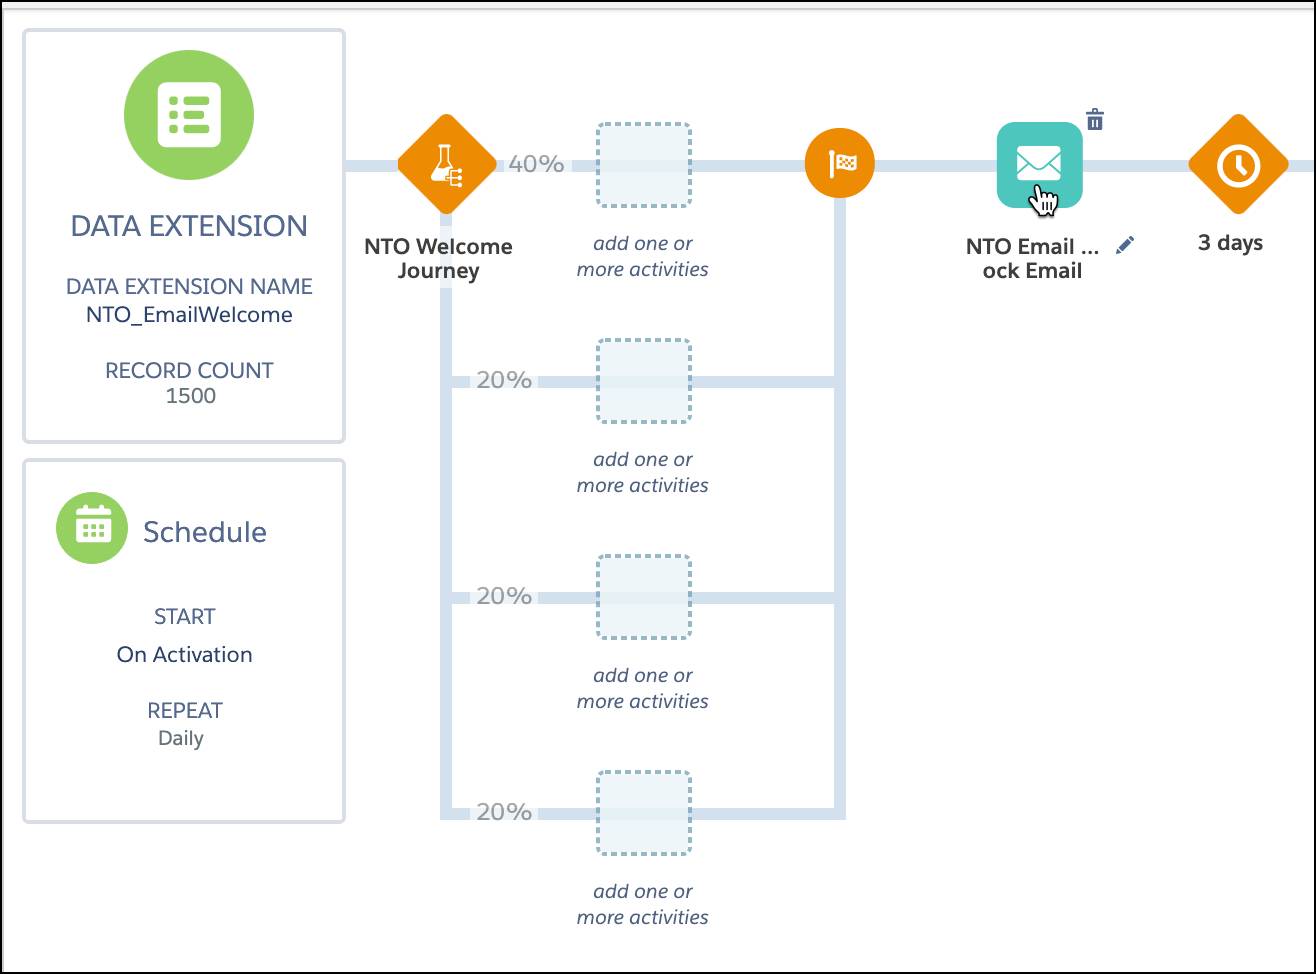
A split determines the distribution of people across the various paths. On the Split page, you can add or remove paths and select the audience percentage for each path. Each path percentage can be evenly distributed or modified to a custom percentage. No rules here—your math just needs to equal 100%.
Configure a Holdback to allow a percentage of your audience to wait to receive the winning path. Once a winner is selected, these contacts are released to the winning path in your journey. Why use this option? This is a good option if you’re sending to a large subscriber list and you want more people to enter the most successful journey path. For example, retailer Northern Trail Outfitters (NTO) uses a holdback audience on their annual tent sale campaign that goes to their full list of over 2 million subscribers. This is a large send for NTO and an important campaign, so it makes sense to ensure that most subscribers receive the winning path. It’s important to note that holdback audiences are only available for a one-time scheduled journey, not ongoing journeys.
With this info in mind, let’s follow along as Isabelle determines her split.
- Isabelle selects Split under Winner Evaluation.
- From here, she clicks + Add Path twice to add two additional test paths.
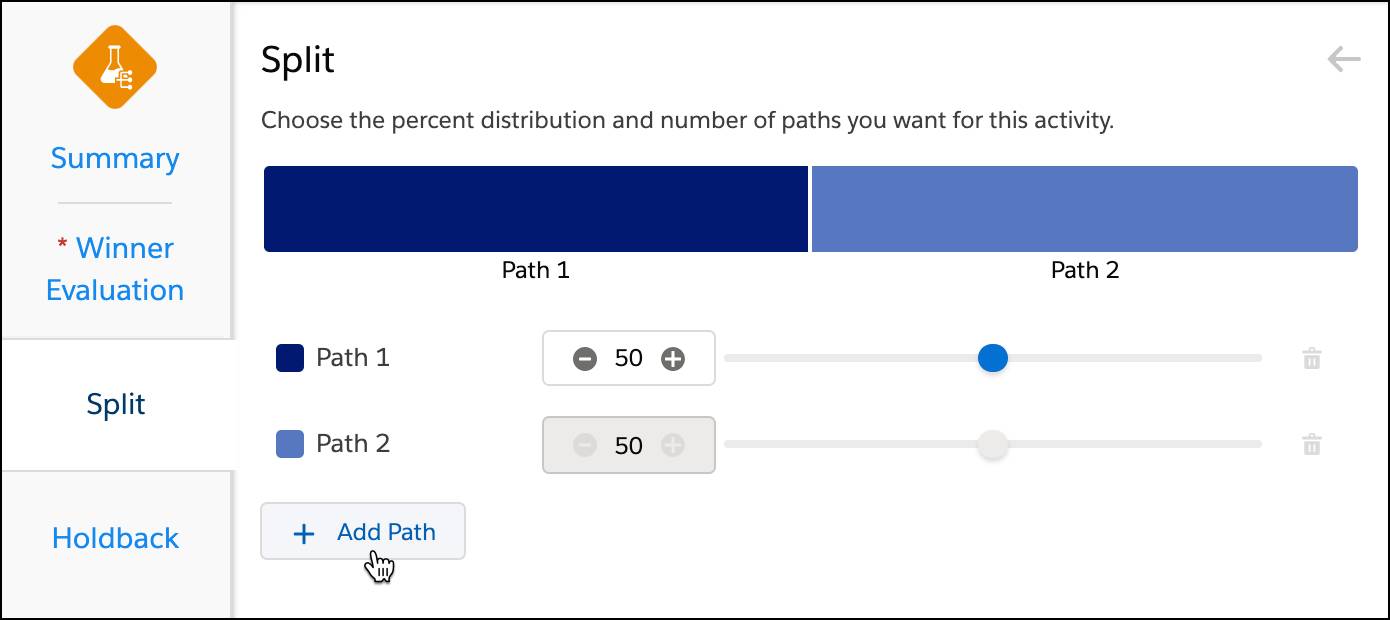
- Once she has added two more paths, she adjusts her audience percentages. She believes path 1 is going to be the winner, so she selects an audience of 40%.
- She then updates the remaining audience percentages to 20%.

Holdback and Summary
The next configuration option is the holdback screen. As we learned earlier, holdback audiences can only be applied to a one-time send. Since the NTO welcome journey is an ongoing journey, Isabelle skips this section.
- Next she clicks Summary to review the configuration.
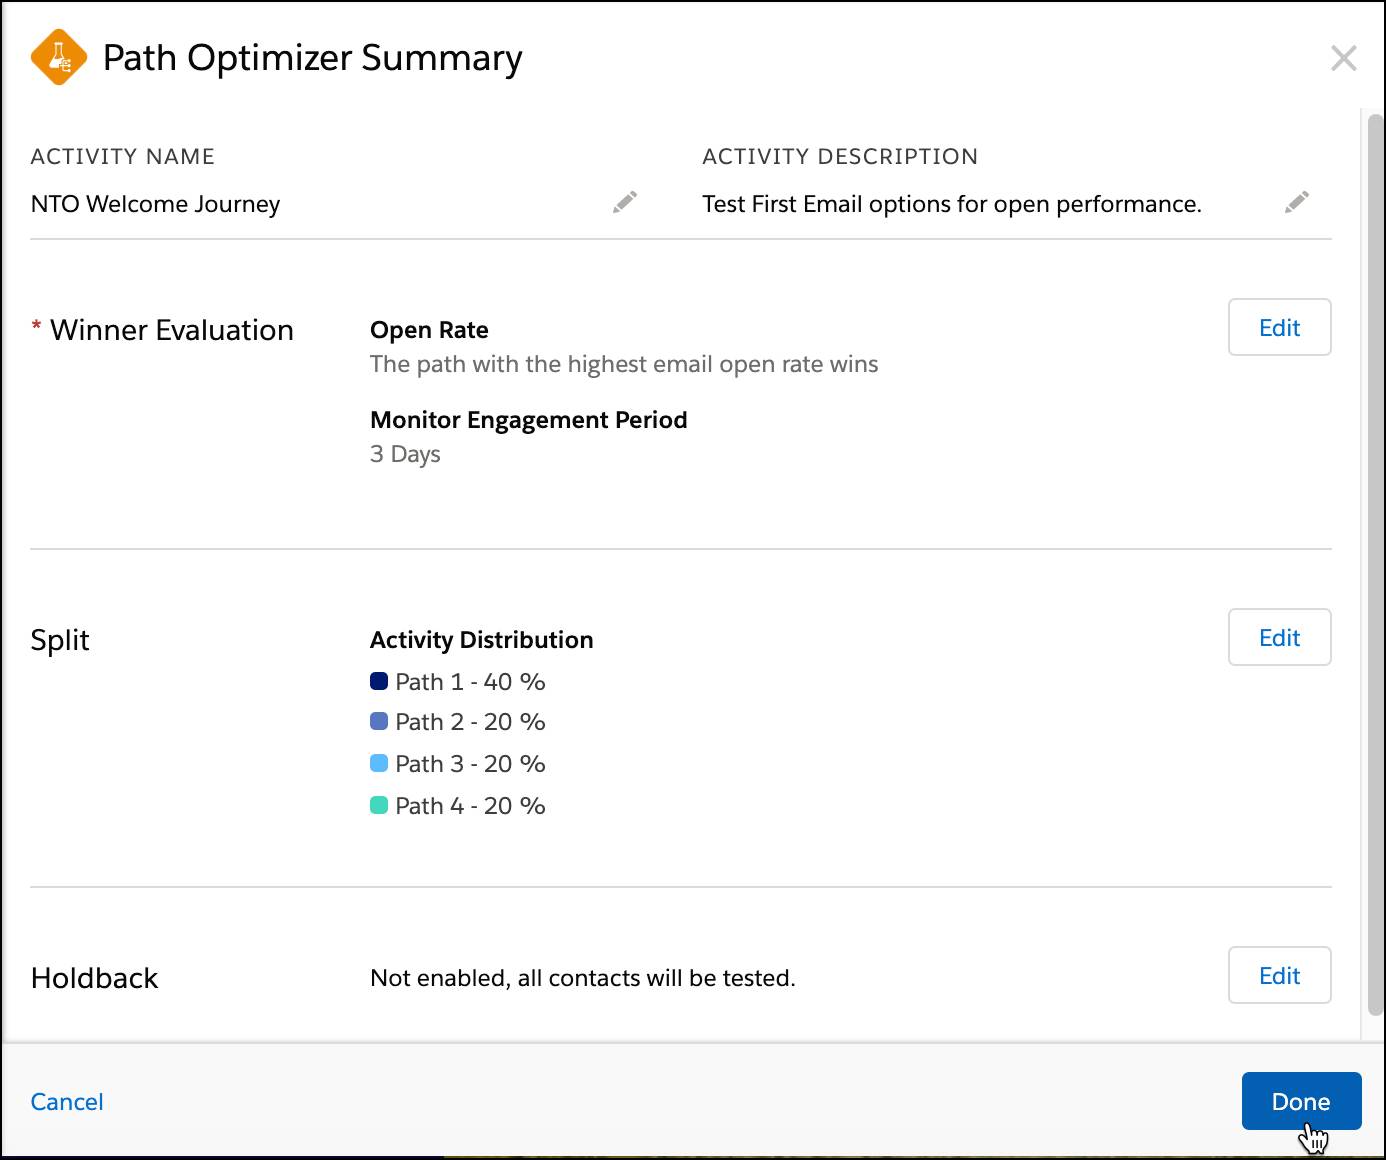
- Once reviewed, she clicks Done.
Create Test Paths
Isabelle is now ready to build the test activities into her four paths. NTO wants to test:
- The original email
- The same email with two different subject lines
- A brand-new email with different content
She has the new email ready to go, and has identified two different subject lines to test. Now it’s time to set up her test paths and see which email achieves the highest open rate.
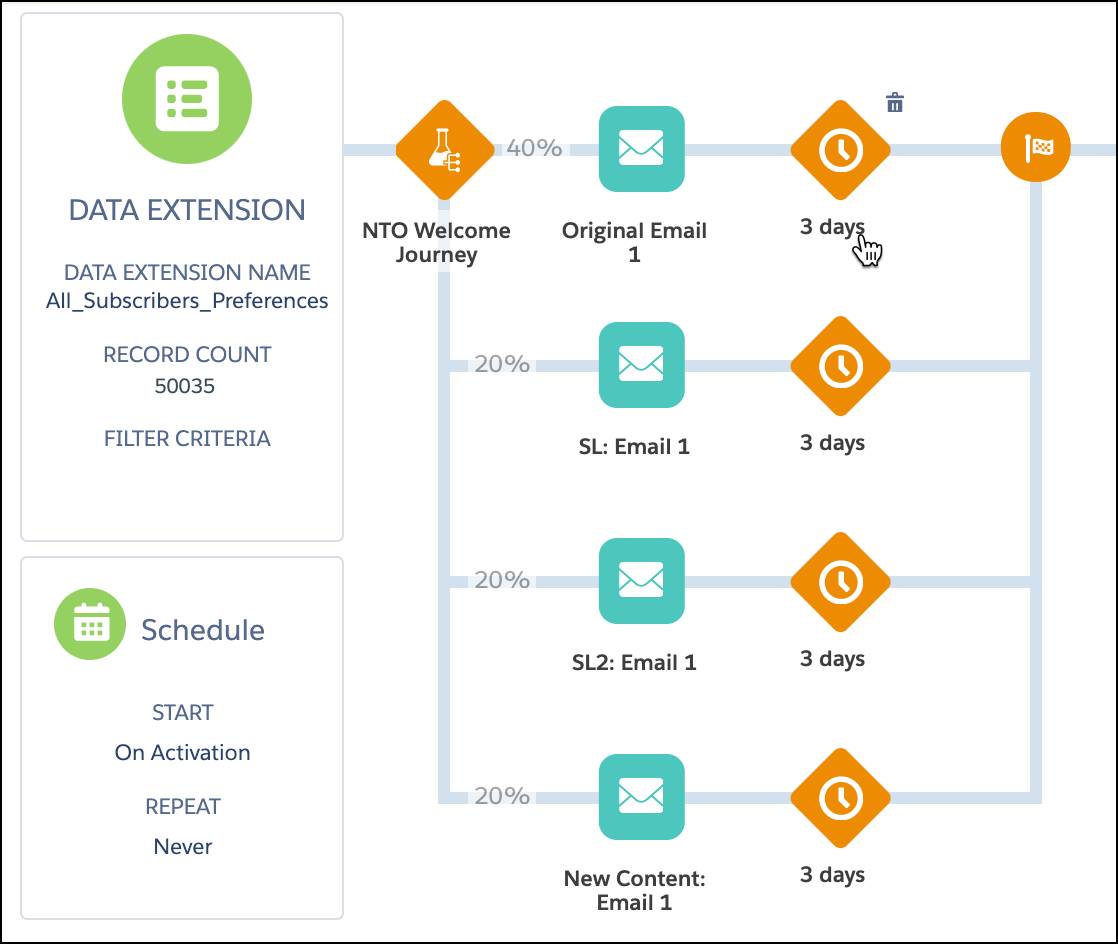
- From the journey canvas, Isabelle drags the existing Email activity to the empty activity slot in path 1.
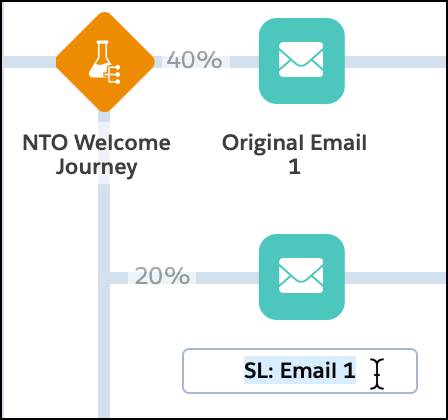
- Next, she adds a new email activity to path 2 and clicks the activity to configure.
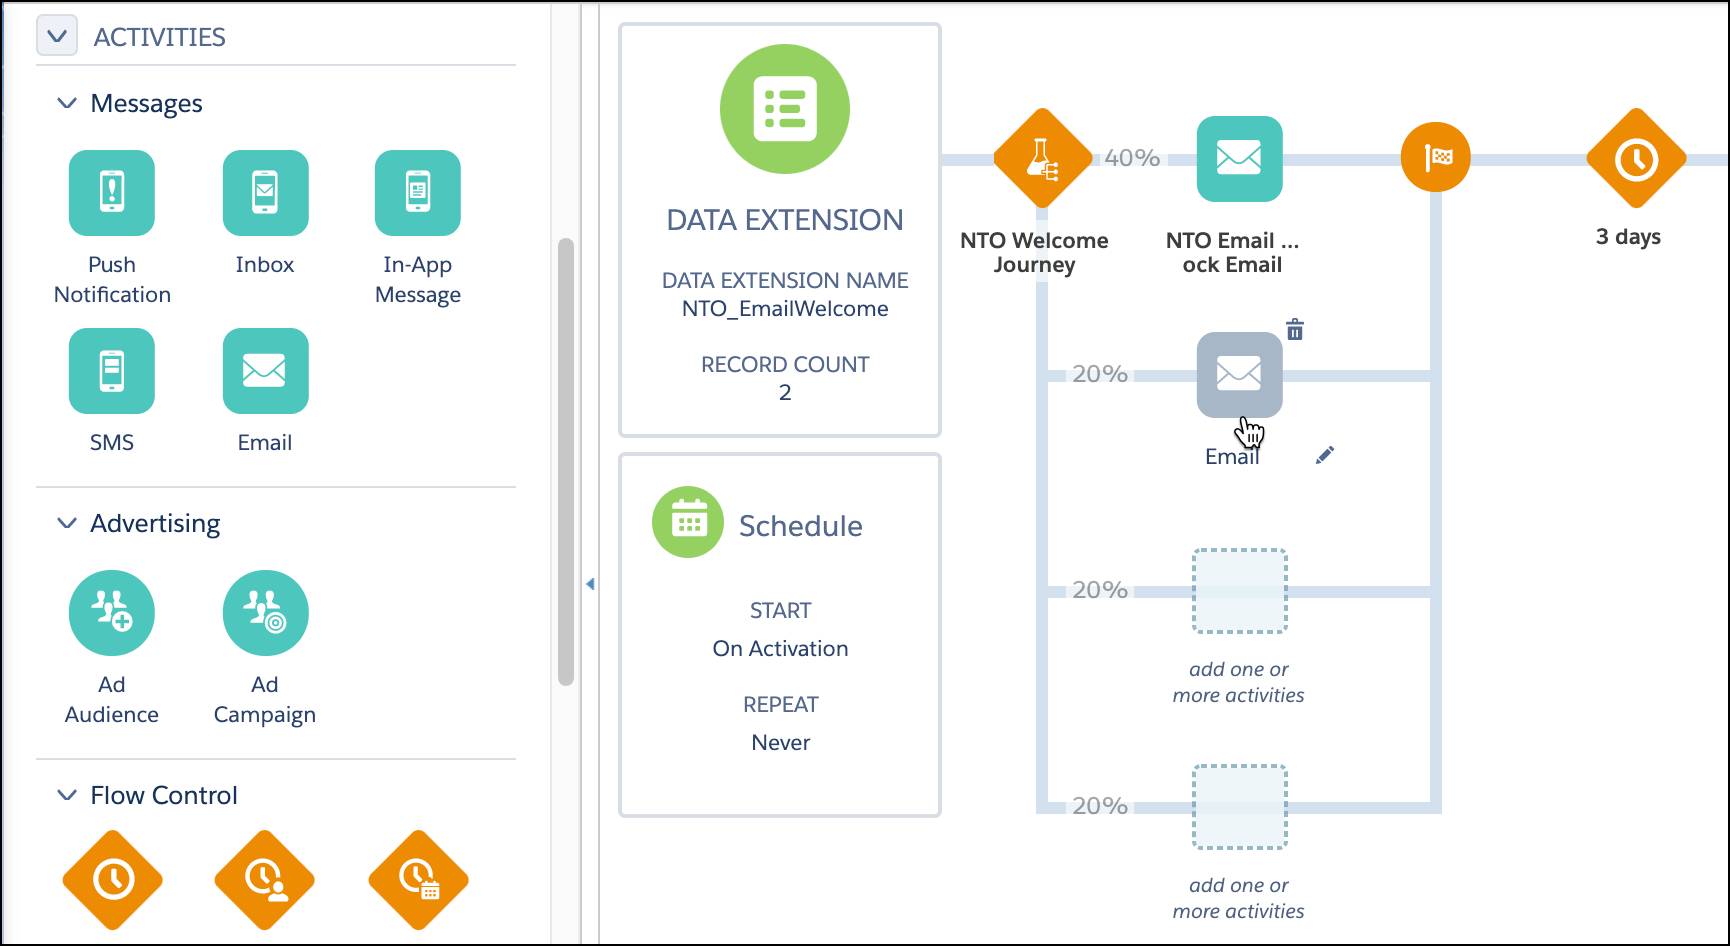
- For path 2, she selects the same existing email as the first path, but under Message Configuration, she updates the subject line.
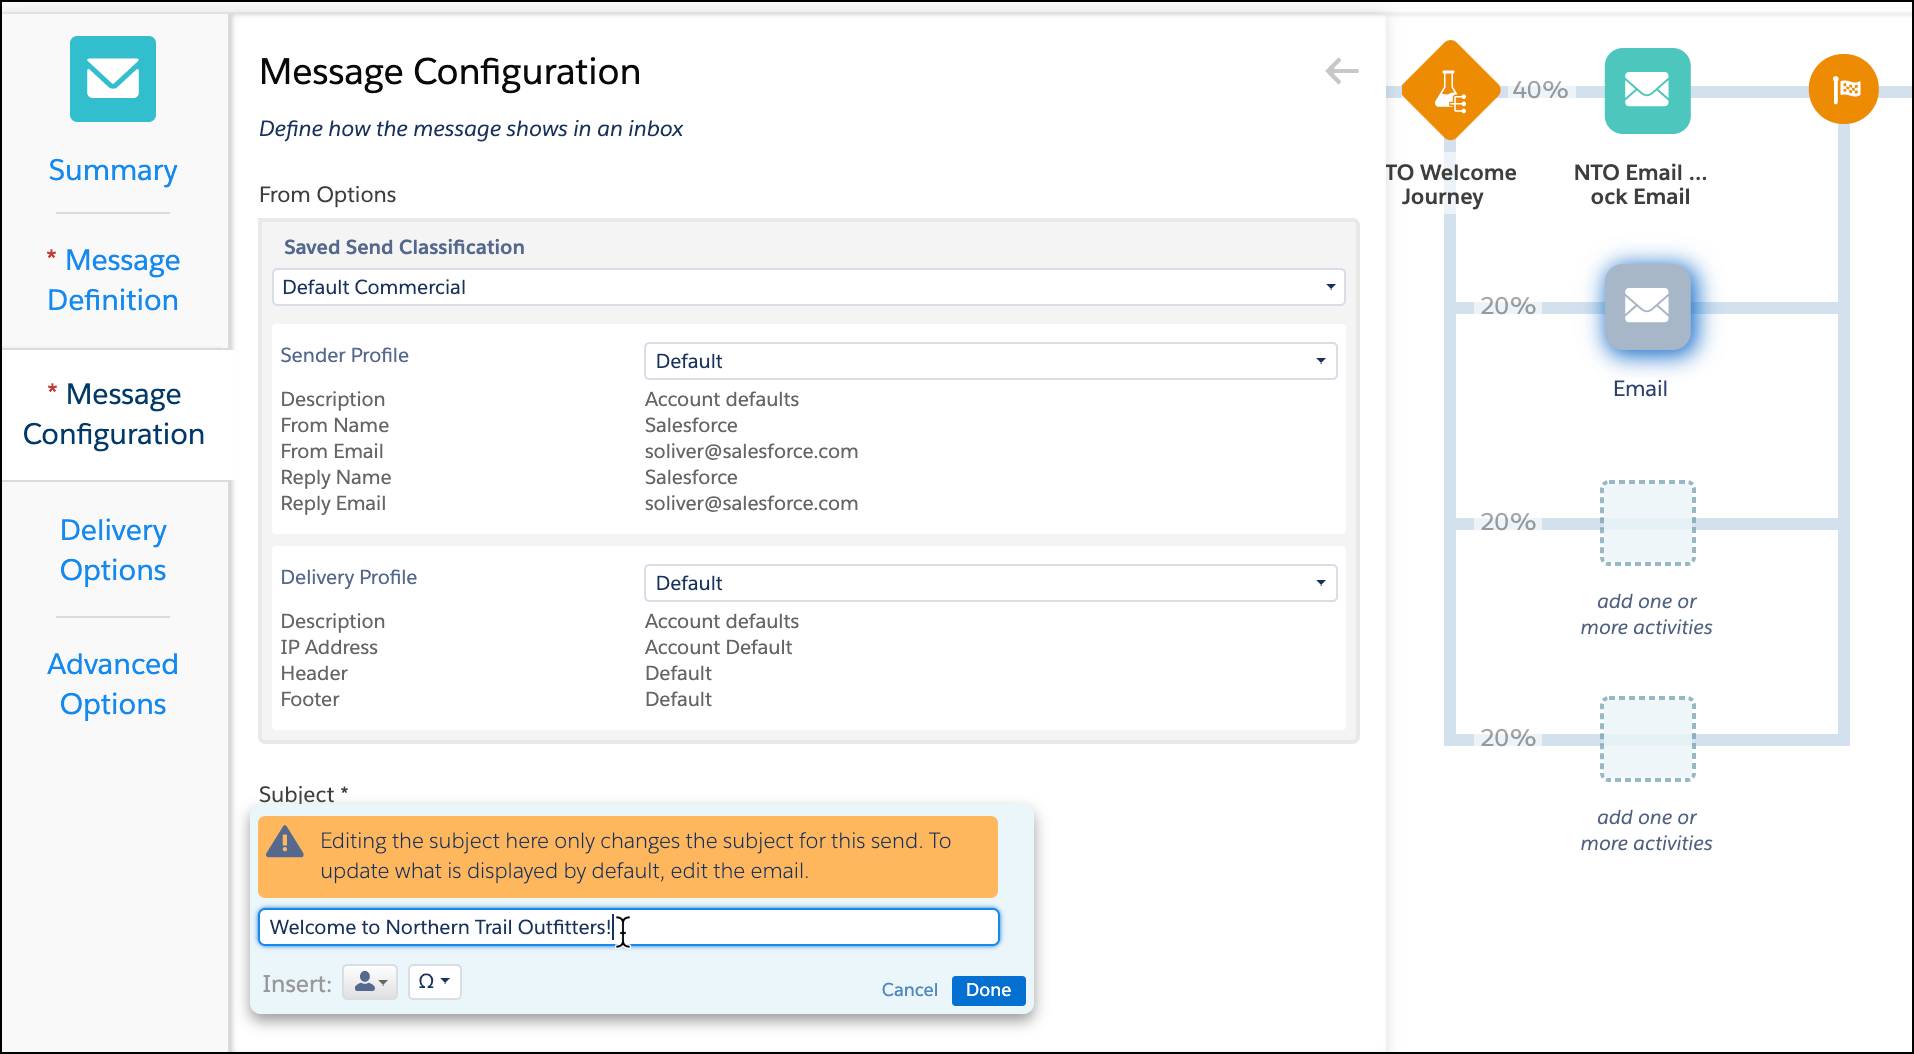
- Once updated she clicks Done.
- She reviews the configuration and clicks Done again to return to the journey canvas.
Isabelle follows these same steps to update the subject line for her path 3 test. And for path 4, Isabelle selects the brand-new email with alternative content, called NTO Welcome Email 1_JBTest.
Finalize Journey
Now that the test is configured, Isabelle reviews her work.
- For clarity, she double-clicks the name of each email and updates to better reflect each test.
- Next she adds in a wait step after each email. It's important to add a wait activity after the last message included in the test to allow the system time to track engagement for all preceding messages.
- Finally she clicks Save.
With the paths configured, NTO’s new welcome journey is ready to validate, test, and then activate.
A Test in Progress
After the updated journey has been running, Isabelle wants to review the test. From the running welcome journey, she clicks the Path Optimizer activity. (She notices the icon to the upper left of the activity. This indicates an active test. Once a winner has been selected, this icon disappears).
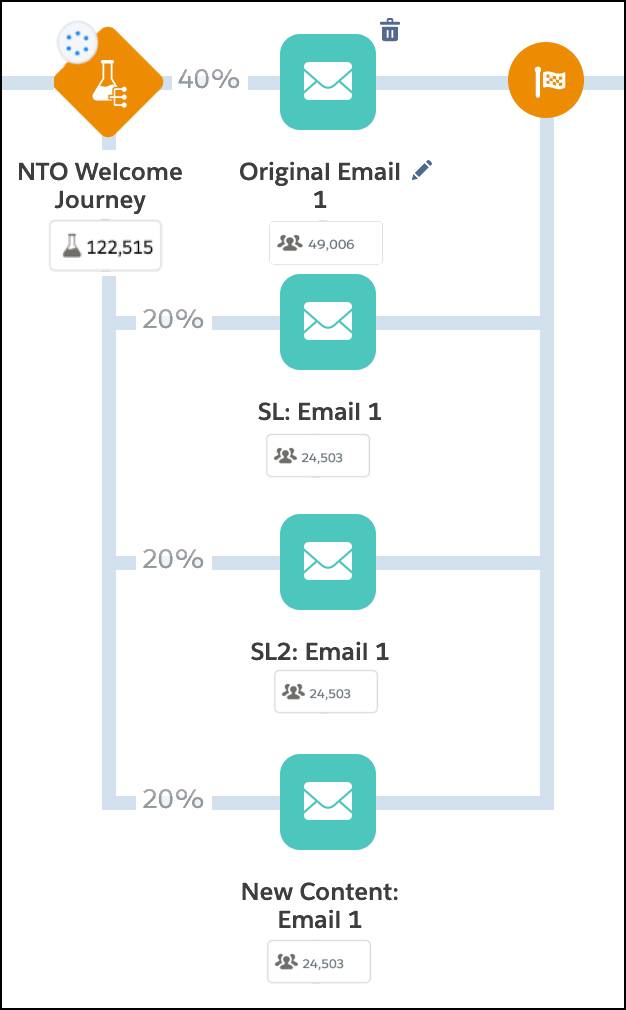
Isabelle can see the performance of the four paths on the Path Optimizer Summary page.
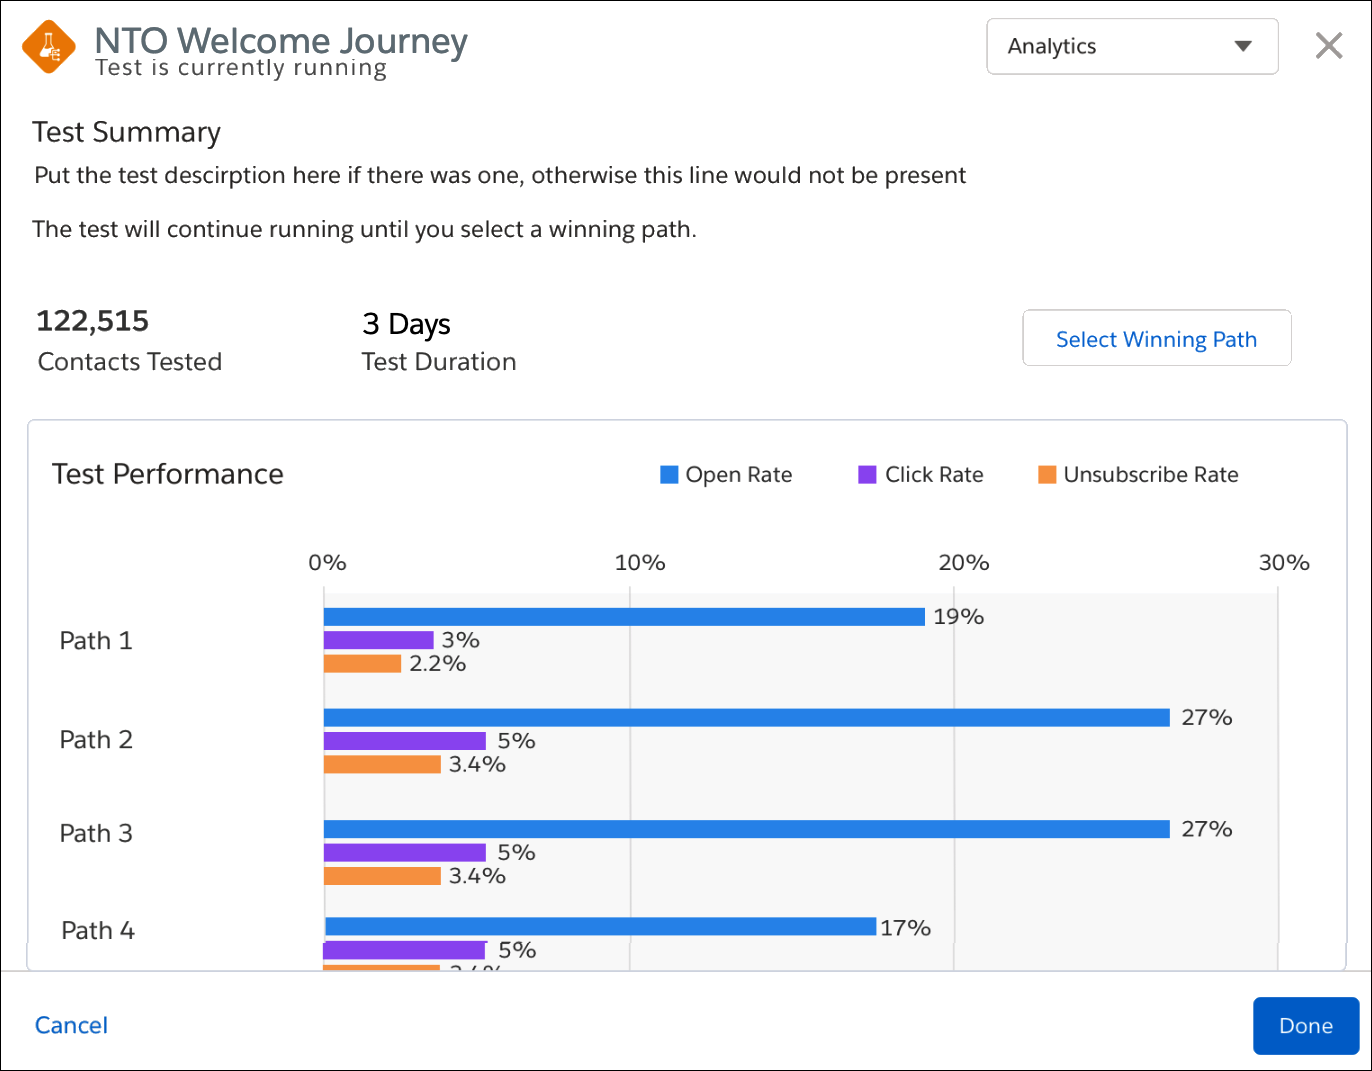
If she sees a clear winner, she can go ahead and manually select a winner by clicking Select Winning Path. Isabelle, however, decides to wait until the test completes.
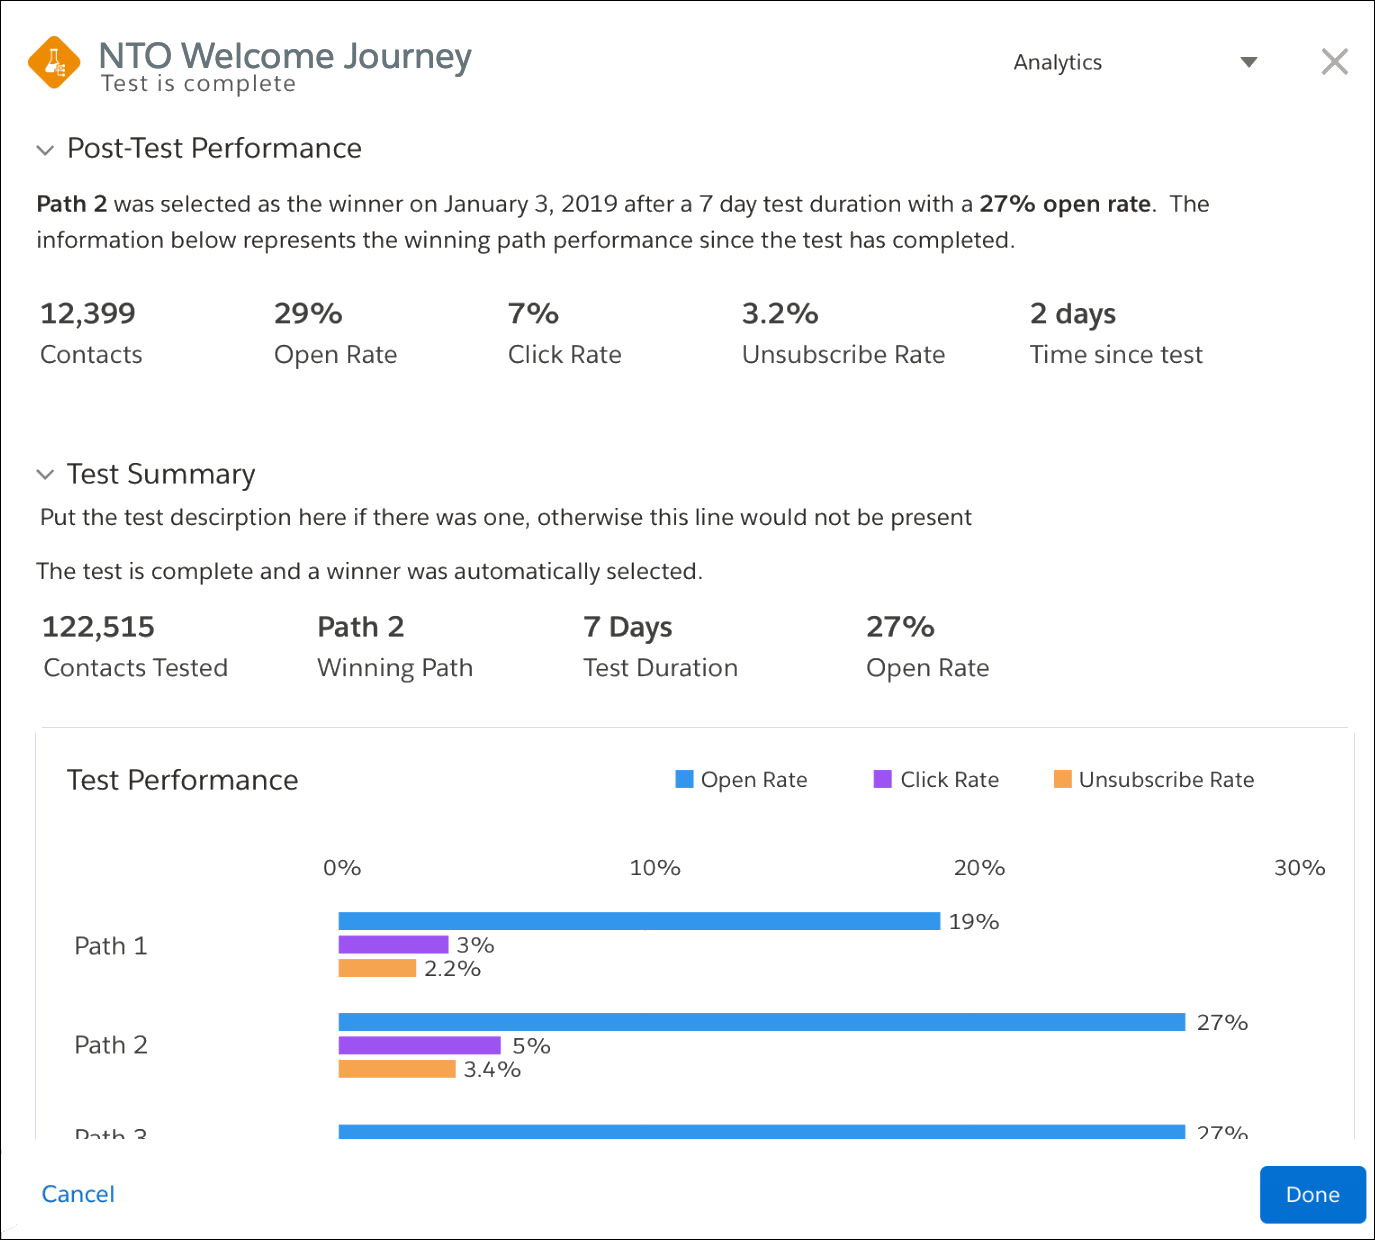
Post-Test Analytics
Once the winner is selected, all new customers entering the journey follow the winning path and the test paths are collapsible for a clean view of the journey. Curious about analytics of a winning path? Select the completed test to view the summary and Post-Test Performance screen.
The Scientific Method
Path Optimizer is journey experimentation made easy. Easy as π. (We couldn’t resist a little S.T.E.M. humor.) Before you go, we have one last experiment.
| Hypothesis | Test | Result |
|---|---|---|
| You are ready to create your own Path Optimizer test in Journey Builder. | Take the Trailhead quiz below. | Successful quiz completion and a brand-new badge. |
Now that you have the tools to experiment in Journey Builder, go out and make Marie Curie proud. Congrats on your successful experiment and a shiny new Journey Builder badge!