Move Your Data
Learning Objectives
After completing this unit, you’ll be able to:
- Set up a secure FTP account.
- Create an import activity in Automation Studio.
Set Up Your FTP Account
A File Transfer Protocol (FTP) is a standard protocol for securely moving files between environments. Before you can officially move into Marketing Cloud Engagement and begin creating imports, you need to set up any FTP accounts that you’ll be using. Each Marketing Cloud Engagement account comes with a Secure FTP (or SFTP) that needs to be configured before you do any import activities.

Here’s how to get your Marketing Cloud Engagement SFTP set up.
- Navigate to Setup and then Data Management.
- Select FTP Accounts.
- Click Add FTP User.

By default, the username is your Marketing Cloud Engagement MID.
- Enter a password for the user.
- Reenter the initial password and click Save.
All set! Now your FTP site can be accessed at the unique URL found under FTP Site Information. Marketing Cloud Engagement automatically creates Import, Export, and Reports folders in your SFTP folder. Don’t delete these folders! Trust us, they’re important.
Your data sources may use other external FTP or SFTP locations—so be sure to connect those to Marketing Cloud Engagement too! Learn more about how to configure these on the Create a File Transfer Location help page.
File Handling
Let’s take a minute to discuss the files you plan to import. If your files are encrypted or zipped, a file transfer activity is needed before you can import the file into Marketing Cloud Engagement. A file transfer activity is a two-step process in Automation Studio that 1) transfers the file to the safehouse (more on that in a minute) and 2) decrypts or unzips the file to prep for import. The safehouse is where Marketing Cloud Engagement stores decrypted or unzipped files for a short period of time.
Import Your Data
Temporary storage is exactly that, temporary. Marketing Cloud Engagement removes files from the SFTP and the safehouse after 21 days. So we need to get your data out of there—grab a dolly and let’s get moving!
There are three ways to get data into Marketing Cloud Engagement. Let’s take a closer look.
| Manual Importing (Email Studio) |
Import Definition (Contact Builder) |
Import Activity (Automation Studio) |
|
|---|---|---|---|
|
Description |
You can import any data type into Marketing Cloud Engagement manually by navigating to the data extension and clicking on the Records tab. From there, click Import. Follow the instructions on the screen to import your data into the data extension. |
You can create a reusable import definition within Contact Builder. To run this import definition in Contact Builder, click the action icon in the row of the definition you want to trigger. |
Create an import definition or reuse an existing one from either Contact Builder or Automation Studio. Once you create the import definition, add steps to the automation and define when you want the automation to run. |
|
Pros |
|
|
|
|
Cons |
|
|
|
Next, let’s take a closer look at creating import activities in Automation Studio.
Automate Your Data Imports
Remember Maggie from Cloud Kicks? She needs to set up a scheduled nightly automation to import data from website purchases into Marketing Cloud Engagement. Here’s how she does it. She first reviews the purchases data extension and confirms that it has all the required fields. Next, she navigates to Automation Studio and clicks New Automation. Here are the options she has for a Starting Source.
| Source & Option |
Description |
When to Use |
|---|---|---|
|
Schedule - None (run once) |
Automation runs once. |
You will not use the automation regularly. |
|
Schedule |
Automation runs based on definition (hourly to yearly). |
You want to consistently update data based on the time of day. |
|
File Drop - No Filename Pattern |
Automation runs when a file is dropped into a designated FTP folder regardless of naming convention. This creates a new folder for each automation. |
You want data to be updated when the data is ready. |
|
File Drop - Use Filename Pattern |
Automation runs when a file is dropped into a designated FTP folder only if the file includes a designated filename pattern. (If you have multiple files you plan to drop into that folder, use a unique filename pattern.) |
You want a specific data extension to be updated when the data is ready. |
Since Maggie knows she wants her import to run nightly, she chooses Schedule as her Starting Source and configures the automation.
File Transfer Activity
Remember how we discussed file handling steps? Here is where those steps come into play. Maggie needs to import a zipped file from Marketing Cloud Engagement’s SFTP, so she follows these steps.
- Drag over File Transfer activity to the workflow and then Choose to configure.
- Click Create New File Transfer Activity.
- Enter a Name and select a File Action of Manage File.
- Enter a description, and click Next.

Maggie then enters a file naming pattern for the file. She copies this name to a notepad, to easily paste the exact name in the next step. She then selects the Source File Location.
 She reviews any File Management actions or Qualifications and then clicks Next. Finally, she reviews the summary and clicks Finish.
Now that Maggie has a File Transfer in place, she moves on to creating the import definition in Automation Studio. She drags the Import File activity to the workflow and clicks Configure to Create New Import Definition. Under Activity info, she names the import definition, adds a description, and then enters her email address to receive a notification of completion. She clicks Next.
First, Maggie selects the appropriate File Location from the list of established FTP options (1). She pastes the File Naming Pattern (2) from the previous transfer activity. Remember, the file name must be an exact match. Then, she selects a Date Format (3), and then Comma (4) as the file delimiter. She reviews and then clicks Next.
Lastly, she moves on to Destination and Mapping and follows these steps.
- Select the data extension where your data is going.
- Click Next.
- Select the Data Action from: Add Only, Update Only, Add and Update, and Overwrite.
- Then select from the options of Map by Header Row, Map by Ordinal, or Map Manually.

Once completed, she clicks Next, reviews the summary screen, and then clicks Finish. Maggie reviews her work, clicks Save, and then activates the automation by selecting Active.
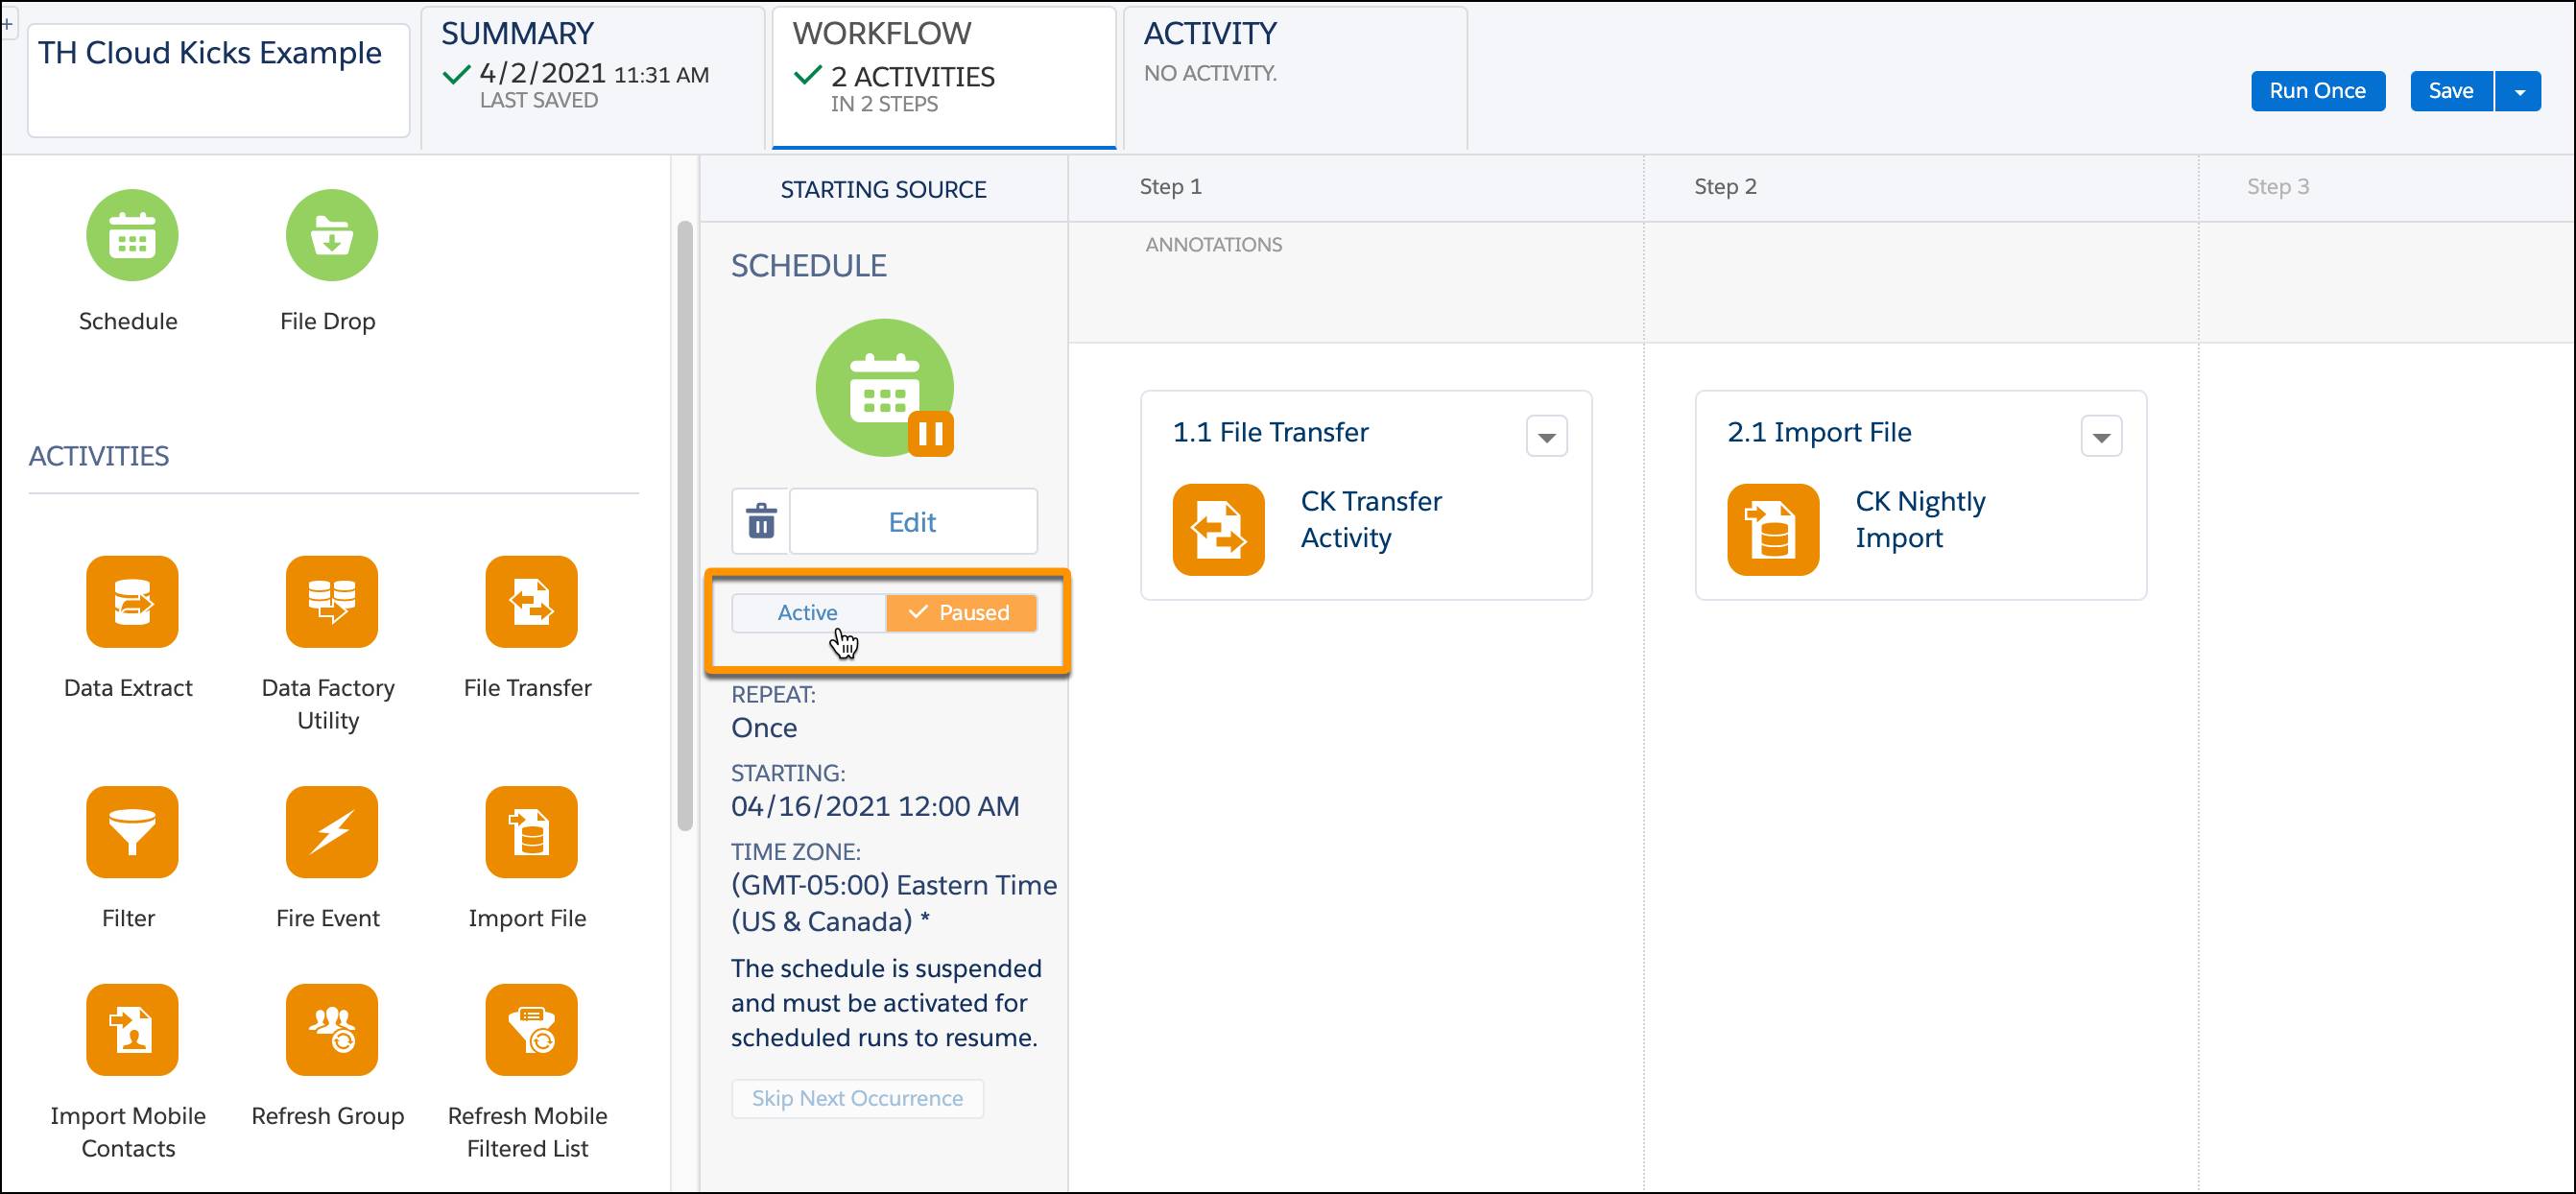
It is important to note there is one other step needed if the encrypted file is on an external FTP. In Automation Studio, you add an additional File Transfer activity to the workflow. The first one moves the file to the safehouse, the second one decrypts the file.

Maggie repeats these steps to add import definitions or automations for all the data sources that she would like imported into Marketing Cloud Engagement.
And with that, moving day is over! But like most new homeowners, you can still need a few of the essentials. In the next unit, you learn how to get more of the data you need to make the most of your new home in Marketing Cloud Engagement.