Use a Flow to Create Salesforce Records
Learning Objectives
After completing this unit, you’ll be able to:
- Configure a flow to automatically create records.
- Share your landing page through various channels to generate leads.
With the content drafted, Erin hands over the remaining to-do items to Lance. It’s time to customize the flow settings, publish and activate the content, and promote the page.
Create Lead Records
First, Lance needs to configure the form’s flow to create lead records using the submitted data.

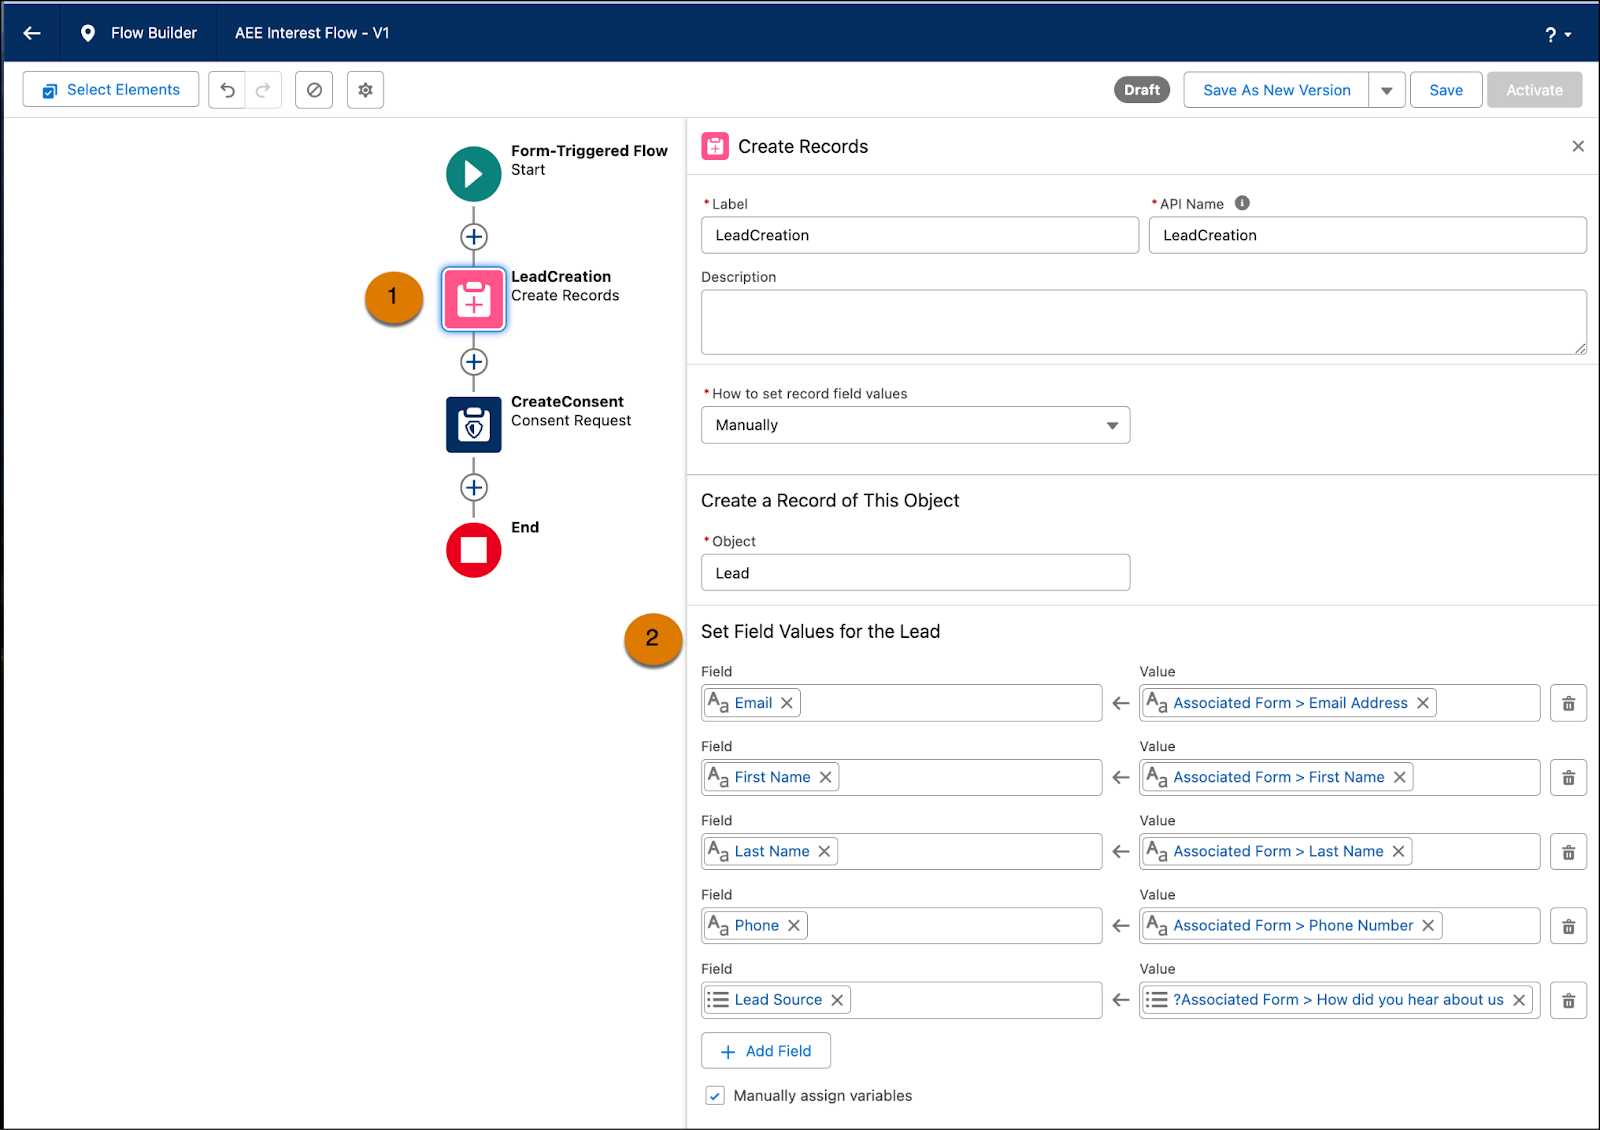
He opens the flow from the campaign record and edits the Create Records element (1). To match the form that Erin created, Lance needs to remove the Company field and add the Lead Source field (2). Lance saves his changes.
Create Consent Records
The create consent record action updates the consent status of people who fill out the form, opting them in to receive marketing materials from Ursa Major. Without this record of consent, Ursa Major can’t send marketing materials to people who fill out the form.
The Consent Request element is already in place on the flow canvas, so Lance only needs to configure a few fields.
- Consent Status = Opt In
- Contact Point = Email Address
- Channel = Email
- Communication Subscription = select at least one subscription
- Click Save
Publish and Activate the Content
Now that Lance has configured the flow, the to-do list that he and Erin set up is almost complete. They created a signup form campaign, customized the landing page and form content, and configured the flow settings. To see how the content looks together, Erin returns to the campaign record and opens the landing page for preview. She confirms the content is ready to be made publicly available. Then she publishes the landing page, which also publishes the form and activates the flow in one step.
The last task is for Lance to confirm that the landing page’s public URL is active. From the default marketing content workspace, he opens the landing page detail page and confirms that the URL Alias Status shows as Active. Their content is live!

Promote the Landing Page
With the URL alias active for the landing page, the team is ready to direct traffic to the page. Lance copies the public URL to use on their social media profile. He also generates a QR code for the printed welcome sign at Ursa Major’s expo booth.
Together, the team has published a customized signup form and an engaging landing page. These tools are the foundation of Ursa Major Solar’s lead generation campaign.
