Design a Common Workflow
Learning Objectives
After completing this unit, you’ll be able to:
- List the steps to create a workflow.
- Design a workflow that tracks product feedback.
Create a New Workflow
When creating a new workflow, you have two options: Use a template, or start from scratch. Using a template can save you time with a premade framework, while building from scratch gives you the flexibility to customize the workflow to suit your exact requirements. Let’s explore each option.
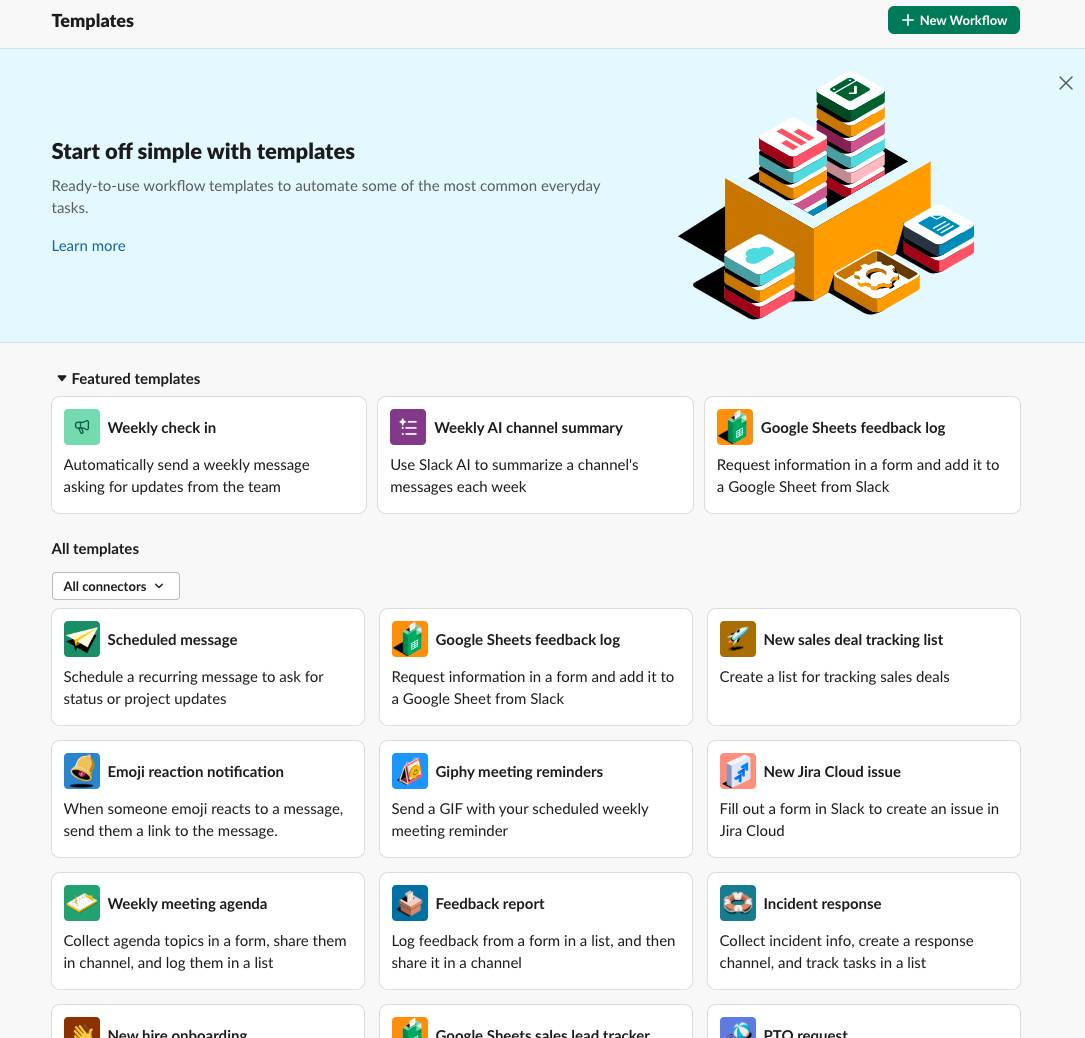
Choose a Template
There are a variety of workflow templates available to help you automate common tasks in Slack. If you’re new to building workflows, customizing a template is a great way to get started. You can even browse templates or filter templates by Connector. For example, if you’re creating a workflow to automate calendar events, you might filter templates by Google Calendar.
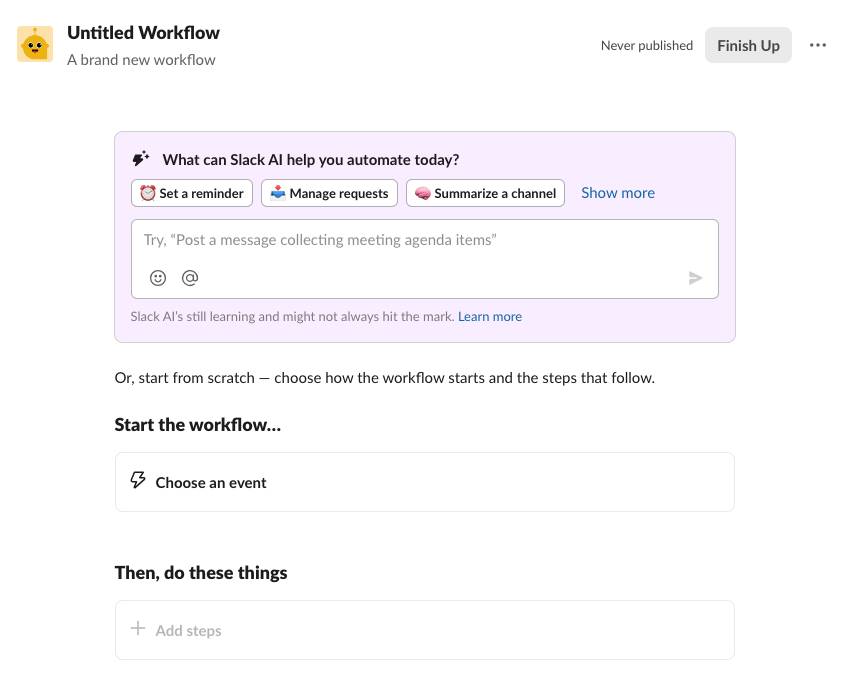
Start from Scratch
For more complex workflows, or for tasks that don’t already have a template, you can build a workflow from scratch. If you need some ideas, use Slack’s AI to create a workflow by choosing a prewritten prompt or by writing your own. You can write a simple natural language prompt like, “Send a welcome message to people that join a channel” and Slack automatically generates a workflow for you to customize.
Design a Product Feedback Workflow
While there are multiple workflow templates for providing feedback, we’ll use this use case to build a workflow from scratch.
The Use Case
You’re a product manager who's constantly receiving customer feedback about your product. This information comes from different sources, including customer support, sales, marketing, and engineering. The feedback is delivered in inconsistent formats such as Slack DMs, Slack channel messages, and Jira links, and at varying levels of detail. Sometimes it’s way too much information; other times it’s barely any information, so you have to ask time-consuming follow-up questions.
Set Up a Trigger
This is the perfect opportunity to standardize product feedback collection with Workflow Builder. Let’s get started.
- First, create a dedicated channel for collecting feedback. Perhaps you already have a feedback channel, or maybe you want to create one that’s specific to the product you’re working on, for example,
#feedback-product-name. If you really want to keep the conversation in the channel streamlined and focused, you could make it a read-only channel with instructions for people to submit feedback through your workflow.
- To create a new workflow, click your workspace name and select Tools | Workflow Builder. You can also:
- Select the + sign [alt: plus sign] and select Workflow.
- Select Automations and go to the Workflows tab.
- Type the
/workflowcommand in your message composer.
- Select the + sign [alt: plus sign] and select Workflow.
- Click New Workflow.
- Select Build Workflow to start from scratch.
- Edit the workflow details to:
- Give your workflow a name, for example:
Submit product feedback.
- Add a short description:
Fill out a short form to submit your product feedback to the feedback channel.
- You can upload a workflow image (optional).
- Click Save.
- Give your workflow a name, for example:
- Choose an event to trigger the workflow. In this case, we want to start the workflow From a link in Slack.

- Click Continue.
Add a Step to Fill Out a Form
Now that your trigger is set up, let’s add a sequence of steps to your workflow. When it comes to feedback, it’s best to set some parameters for the kind of feedback you want to collect. Prompt users to fill out a form with mandatory fields.
- In Workflow Builder, click Add Steps.
- Find Forms and click Collect info in a form.
- Give the form a title and add the questions you’d like answered. You can select from different answer types including Short answer, Dropdown, Multiple choice, Slack user or channel, and Date. You can also make certain questions mandatory or optional.
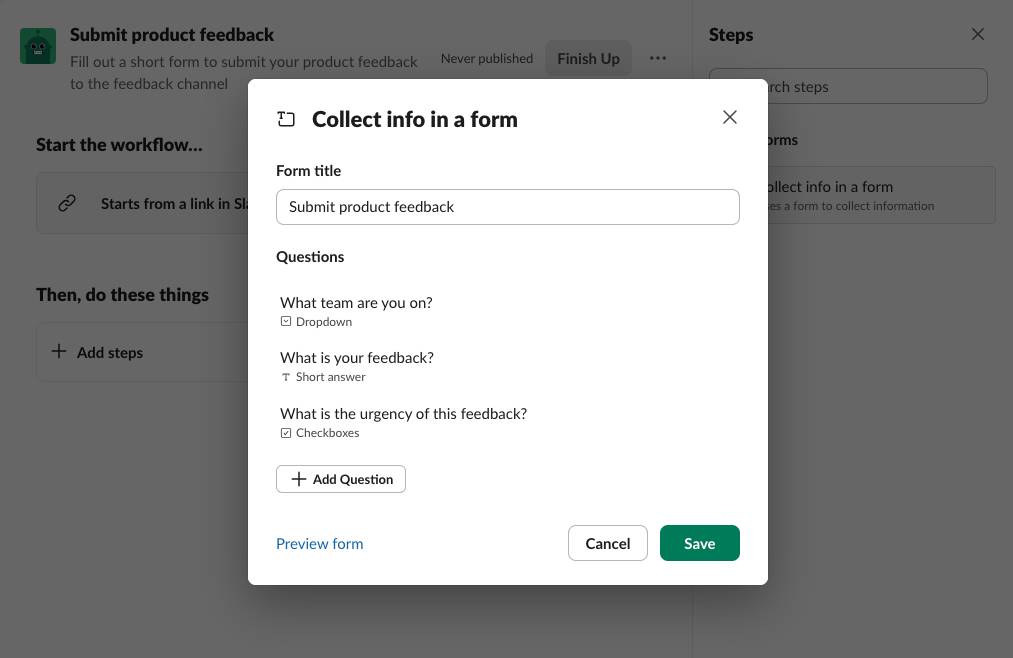
- Click Save.
Add Steps with Variable Data
Next, choose where to save form responses. It’s best to share feedback in-channel for others to read and to privately send the submitter a confirmation message. This is where variable data plays a big role.
- Click Add Steps in your workflow.
- Select Messages and click Send a message to a channel.
- Select a channel to send the message: Channel where the workflow was used.
- The form questions and responses auto-populate as variables in the body of the message. To add information to the channel message, consider tagging the submitter:
- Enter:
New Product Feedback submitted by - Click Insert a variable
- Select Person who submitted the form
- Enter:
- Click Save.
- In the Steps menu, select Messages and click Send a message to a person.
- Select a channel to send the message: Person who submitted the form.
- Add a message:
Thank you for submitting product feedback. You can see any updates or comments related to your feedback by following along in - Click Insert a variable.
- Select Channel where the workflow was used.
- Add a message:
- Click Save.
Workflow Builder gives you a preview of how each message will appear with placeholders for the variable data.

Your workflow doesn’t have to stop there. If you want to do more, you can also send this information into Google Sheets for easier tracking and analysis, to PagerDuty to spin up a new incident, or to Trello to create a new card on your product feedback board. This ensures your workflow is tailored to your specific processes and technology.
Publish Your Workflow
Once you’re satisfied with your workflow, simply click Finish Up and Publish. Voila! Your workflow is ready to be shared with others. If it starts with a link, make sure to share it in Slack so that people can find and use your new workflow. You learn about other ways for users to find your workflow in the next unit.
If you encounter an error publishing your workflow, try these common solutions:
- If you're using the Slack app, there may be a caching issue. Try publishing from the Slack browser.
- If your workflow references a specific user, make sure that user is a member of the workspace in which the workflow is being published.
- If you encounter an error when publishing a workflow that you imported originally as a template, make sure that the new workflow references valid channels and users. If a private channel is referenced, ensure the channel name is accurate.
You can now explain the options for creating new workflows and select the option that’s right for your use case. By designing a common workflow from scratch, you know how each component is used and configured to create a cohesive workflow from end-to-end. Now it’s time to share your workflow with a broader audience, monitor its usage, and make changes as needed.