Generate Sitemaps
Learning Objectives
After completing this unit, you’ll be able to:
- List three steps you take to configure Salesforce B2C Commerce sitemaps.
- List the three sitemap attributes that a feed uses.
- Describe how to run a sitemap job.
- Explain how sitemap generation works on instances.
- Explain how links per sitemap work.
Get Started with Sitemaps
Brandon Wilson, a Cloud Kicks merchandiser, is ready to configure his sitemaps. He wants to make sure that site crawlers get the info they need to drive shoppers to his company’s fabulous storefront. As we learned in the first unit, sitemaps are a standardized way to tell search engines about pages on a site that they might not otherwise find during the normal crawling process.
B2C Commerce generates a sitemap that’s compatible with the Sitemap Protocol 0.9 from sitemaps.org. This is the standard sitemap definition for Google, Yahoo!, and Microsoft (Bing). Brandon finds it easy to use sitemaps with B2C Commerce. Here’s his approach.
- Configure sitemap attributes in the respective data through a feed or manually in Business Manager.
-
Generate sitemaps in Business Manager.
-
Create an account with the search engine of your choice and verify site ownership.
As Cloud Kicks grows, Brandon might need to adjust the links per sitemap setting, which can range from 0 to 50,000. When a file, such as sitemap-1.xml, reaches the configured number, B2C Commerce creates another file, such as sitemap-2.xml. If your site has 25,000 links and you set this to 5,000, B2C Commerce creates 5 sitemap files. If you set it to 25,000, B2C Commerce creates just one one file.
Brandon configures sitemaps in staging and replicates them into development and production, following the best practice. Importing a catalog directly into production can cause issues, such as not generating SEO URLs.
Let’s go along with Brandon as he generates his sitemaps.
Generate Sitemaps
In this module, we assume you are a B2C Commerce merchandiser with the proper permissions to perform these tasks. If you’re not a B2C Commerce merchandiser, that’s OK. Read along to learn how your merchandiser would take these steps in a sandbox instance. Don’t try to follow our steps in your Trailhead Playground. B2C Commerce isn’t available in the Trailhead Playground.
If you have a sandbox instance of B2C Commerce, you can try out these steps in your sandbox. If you don’t have a sandbox, ask your manager if there is a sandbox that you can use.
Here’s how to configure sitemaps.
- In Business Manager, click App Launcher, and then select Merchant Tools | site | SEO | Sitemaps.
If you already have sitemap files, you see a list that includes sitemap index files and custom sitemaps. B2C Commerce keeps a sitemap until it generates a new one.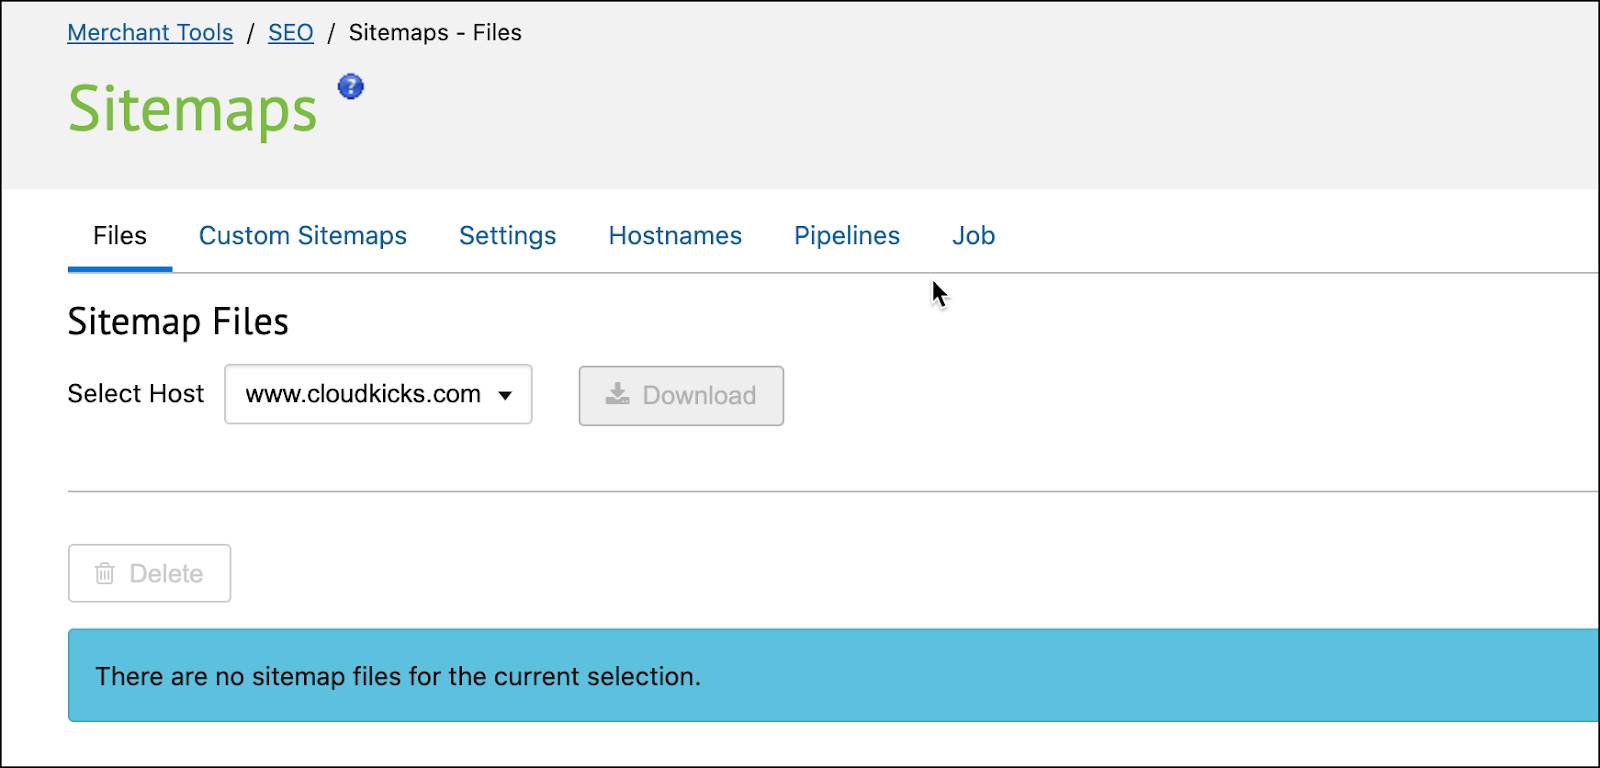
- Select the host: www.cloudkicks.com
All hostnames defined for a site are listed here (which will not redirect to another). Each hostname has its own sitemap files. If you don’t have a hostname, configure it in the hostname alias file.
- Click Download (if active) to download the sitemap files based on your host selection. (Sitemap files are linked to the storefront location.)
- Click the Settings tab.
On this tab you can create a sitemap or regenerate existing ones. You can split sitemap files or change settings (for example, file size, frequency, or view type).
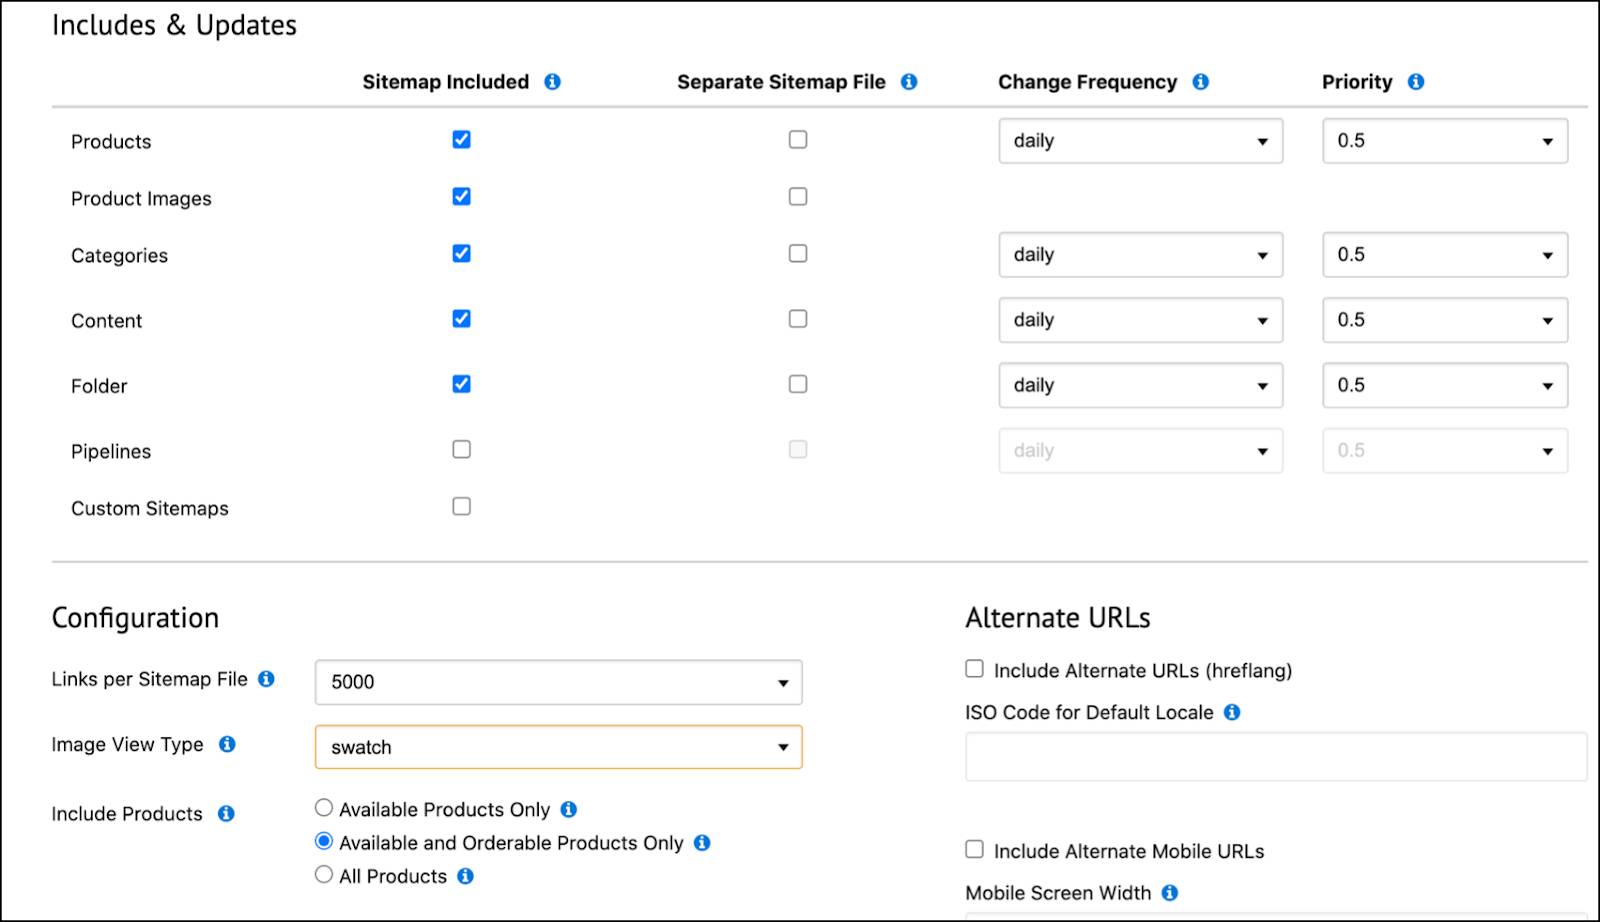
- In the Includes & Updates section, specify:
-
Sitemap Included
- Asset change frequency: daily
- Asset priority: 0.5
- In the Configuration section, specify:
- Links per Sitemap File:
5000 - Image View Type: swatch
- Include Products: Available and Orderable Products Only
- In the Alternate URLs section, enter:
- The ISO Code for the default locale:
en - The mobile screen width:
640
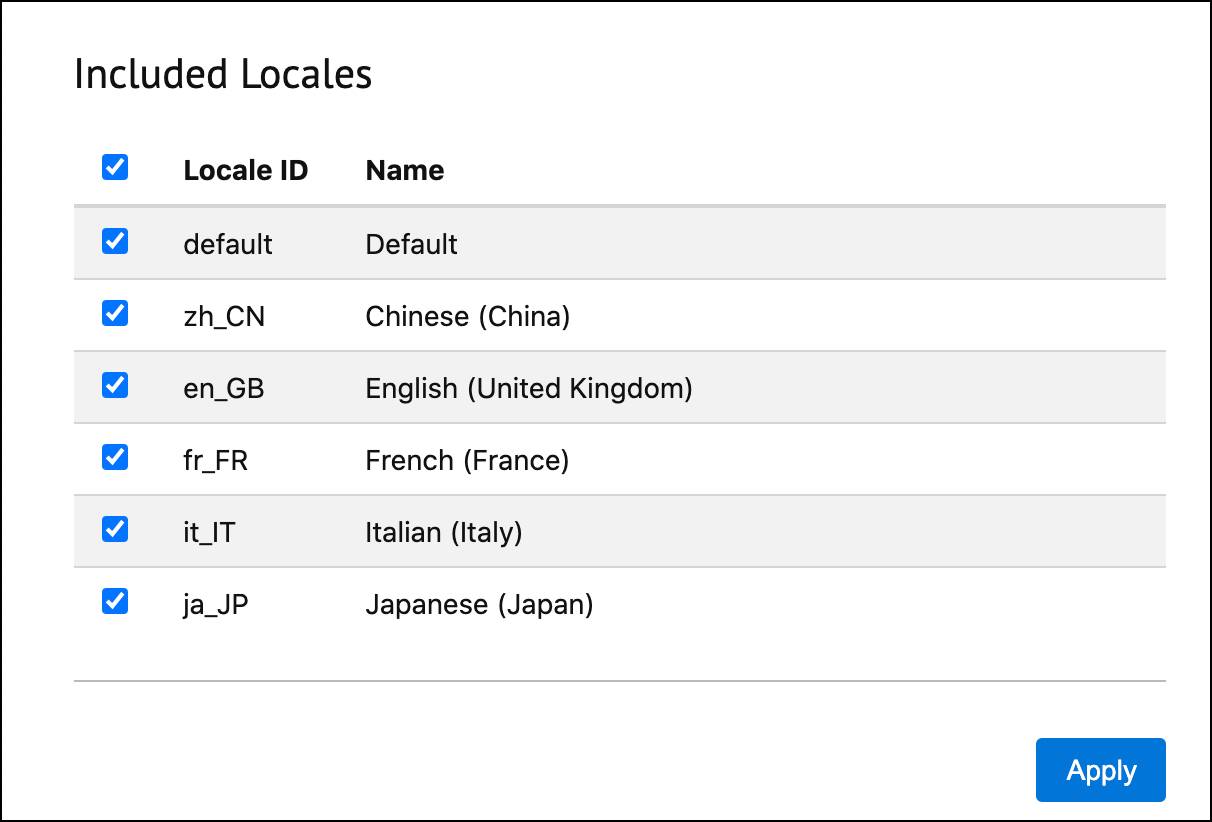
- In the Included Locales section, select the locales you want to include.
- Click Apply.
Generate a Custom Sitemap
Brandon wants to create a sitemap file for a set of products to test how the URLs look. B2C Commerce automatically adds these uploaded sitemap files to the index file, without overriding system-generated sitemaps.
Here’s how he does it.
- In Business Manager, click App Launcher, and then select Merchant Tools | site | SEO | Sitemaps..
- Click the Custom Sitemaps tab.
- Select the host. Sitemap files must be valid sitemap XML files.
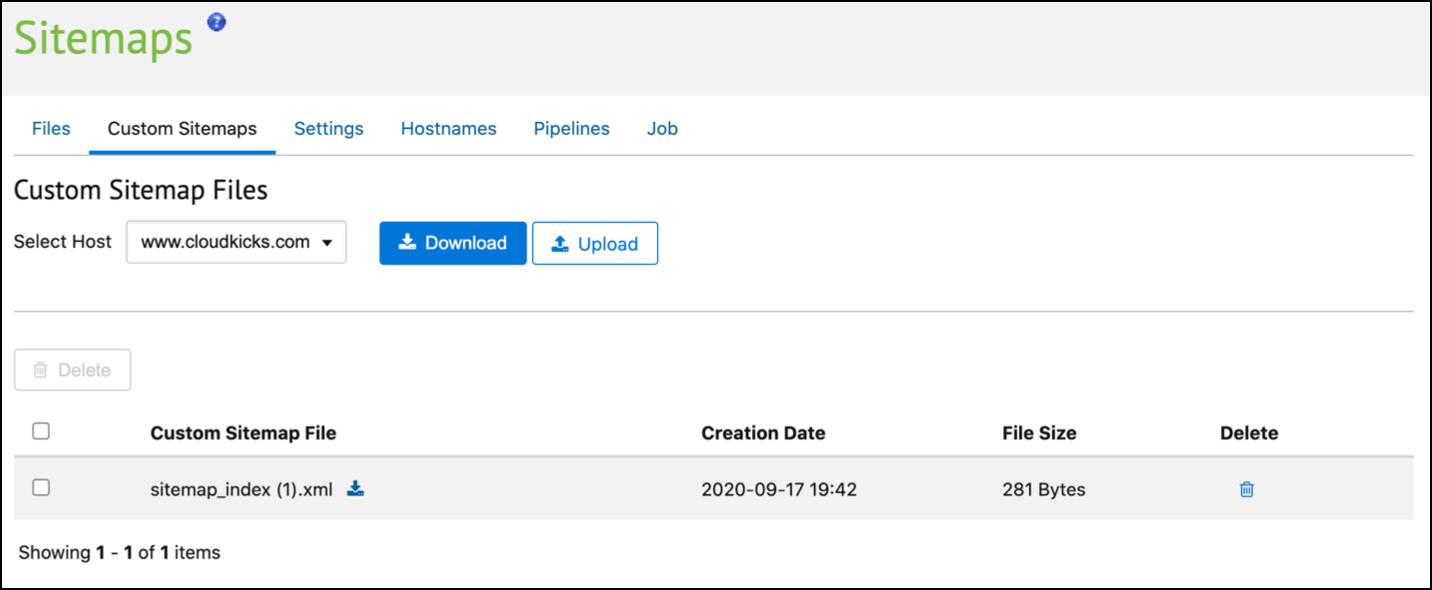
- Click Upload to upload one or more custom sitemap files.
Select XML text or all files.
Run a Feed
Brandon wants to populate sitemap attribute values on his production instance through the catalog and content import feeds. He starts by configuring sitemap attribute settings on his development instance. Then he exports them from the development instance and imports them into the staging and development instances. He can also use a custom import controller to create and populate the attributes.
The feed uses the sitemap-included-flag, sitemap-changefrequency, and sitemap-priority attributes, as described in the import/export XML schema of the catalog.xsd and library.xsd.

Run a Job
Brandon wants to see his sitemap details, such as number of products, images, categories, folders, and content assets that B2C Commerce assigned, skipped, and added. In Business Manager, he can run a job to do this. The resulting log file contains the info he wants and details on errors that occurred during sitemap generation, to help him diagnose problems.
He can configure Business Manager to run a job manually or on a schedule. When the job is finished, he can review the resulting log file.
Here’s what we recommend.
|
For storefronts...
|
Run the job...
|
|---|---|
With infrequent updates or for updates after major site changes where many page URLs have changed. |
Manually |
With daily or more frequent page updates. Schedule this job for low traffic times, such as the early morning, to avoid unnecessary CPU demands and memory consumption. A daily sitemap update or an update every other day is sufficient. |
Scheduled |
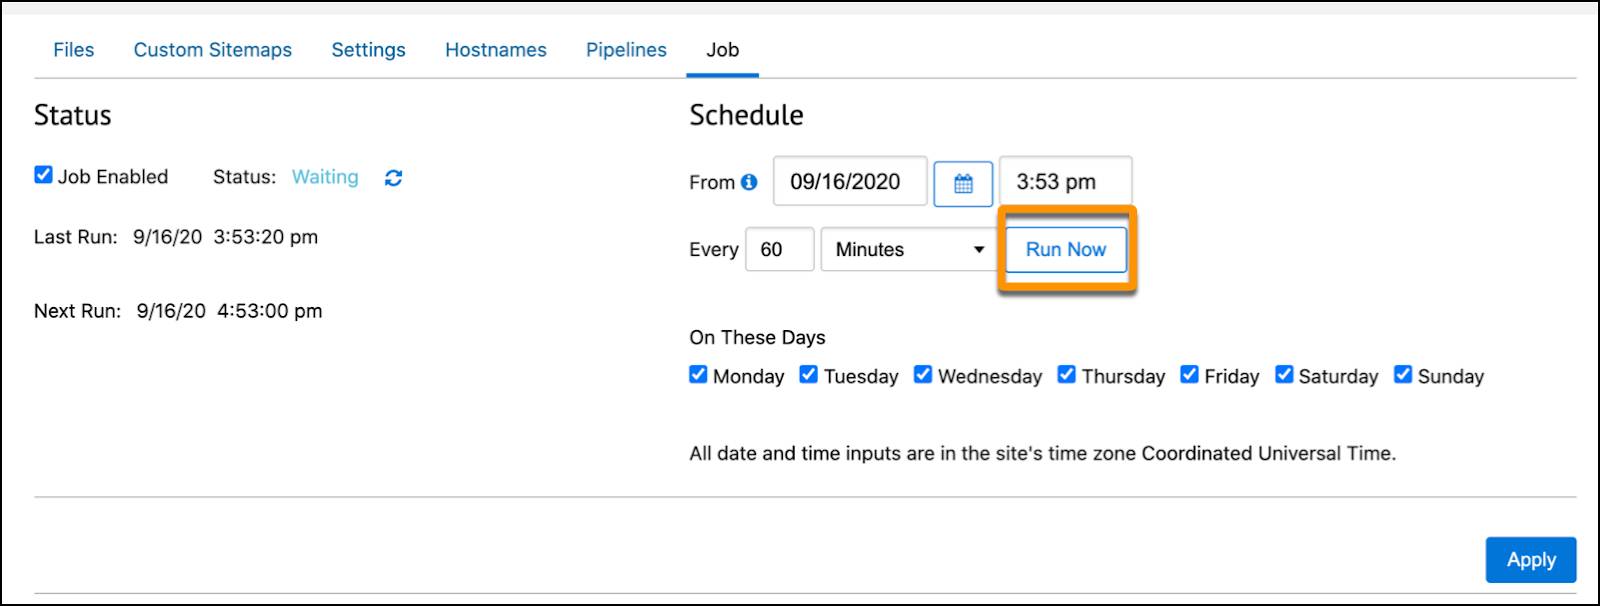
Brandon wants to kick off a job schedule for every day and then run a job manually to check the results immediately. Here’s how he does it.
- In Business Manager, click App Launcher, and then select Merchant Tools | site | SEO | Sitemaps.
- Click the Job tab.
- Schedule a job.
- Select Job Enabled.
- Select the starting date and time: 09/16/2020 and 3:53 pm.
- Select the interval: Every 60 minutes.
- Select every day.
- Click Apply.
- Select Job Enabled.
- Run a job manually: Click Run Now.
- Click Refresh to refresh the page and view the status.
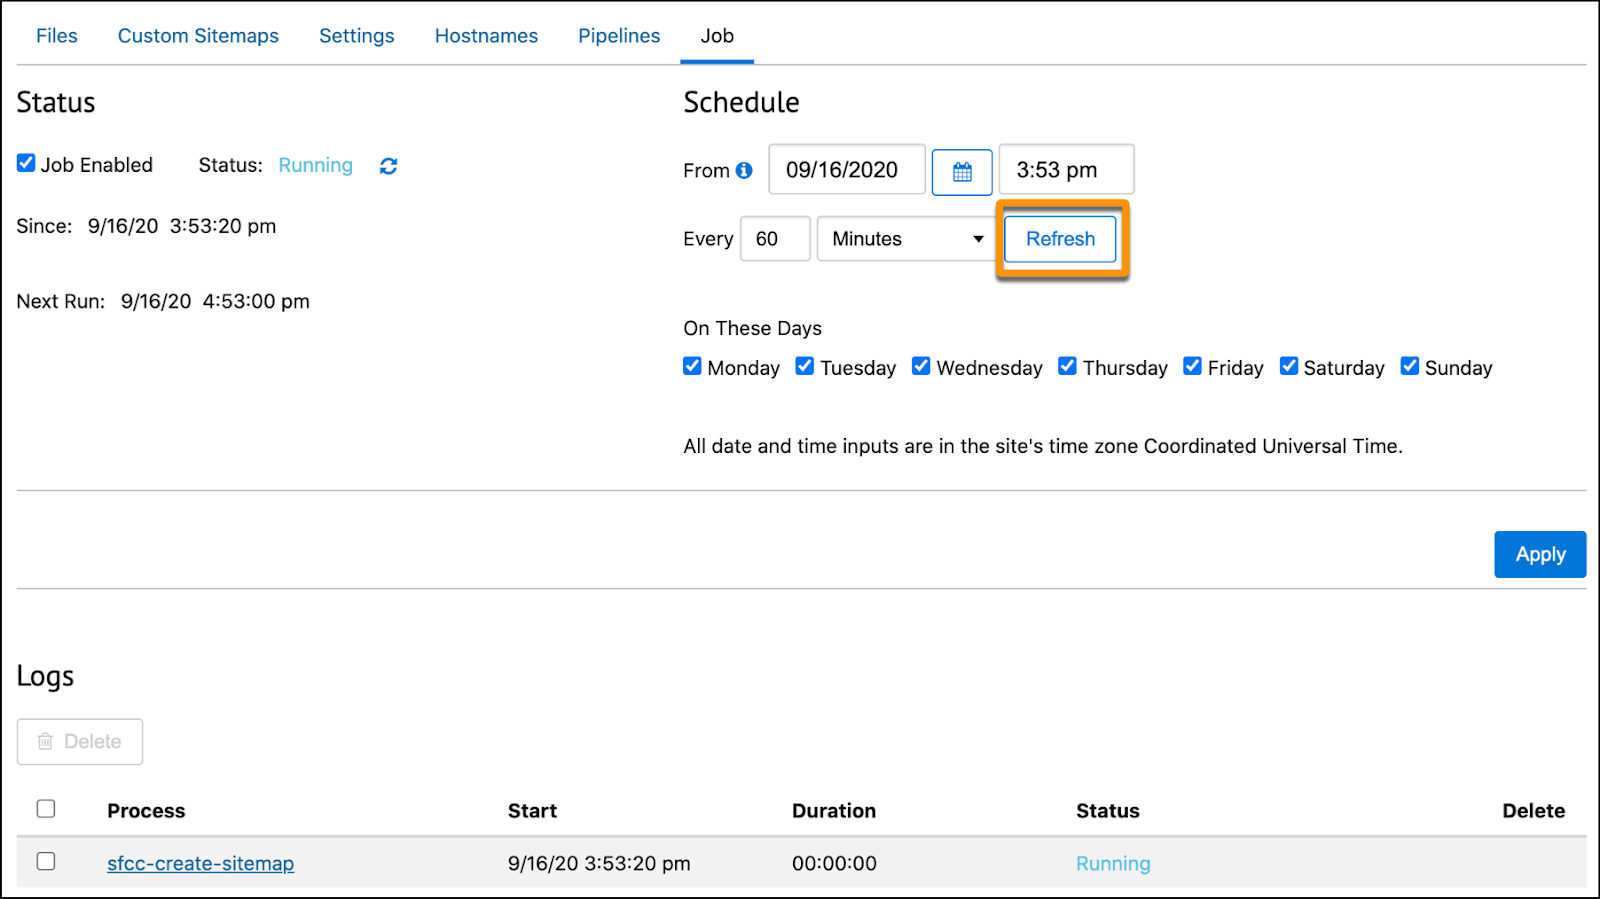
In the Logs section, you can see a status of Success or Error. This one looks great!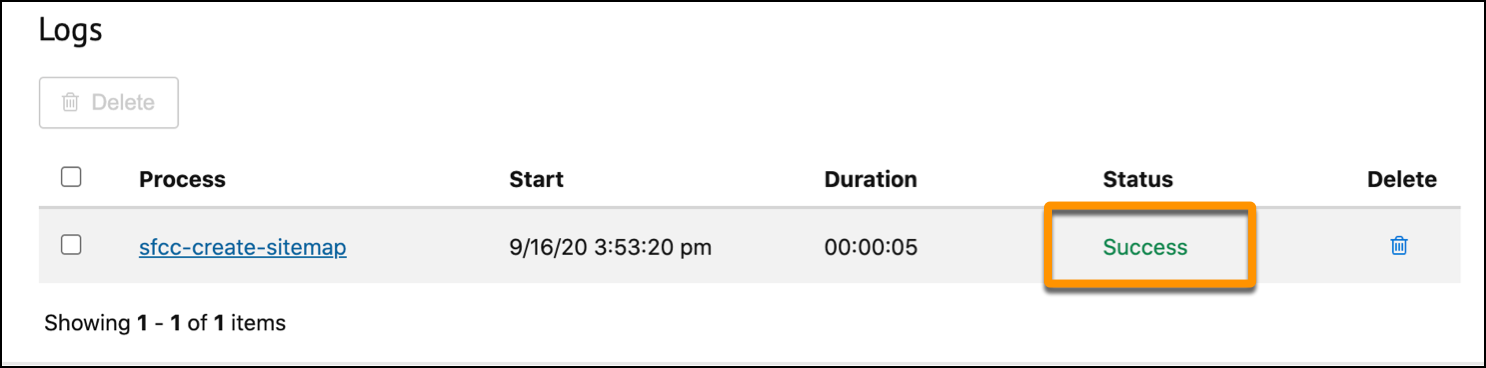
- View errors in the logfile section.
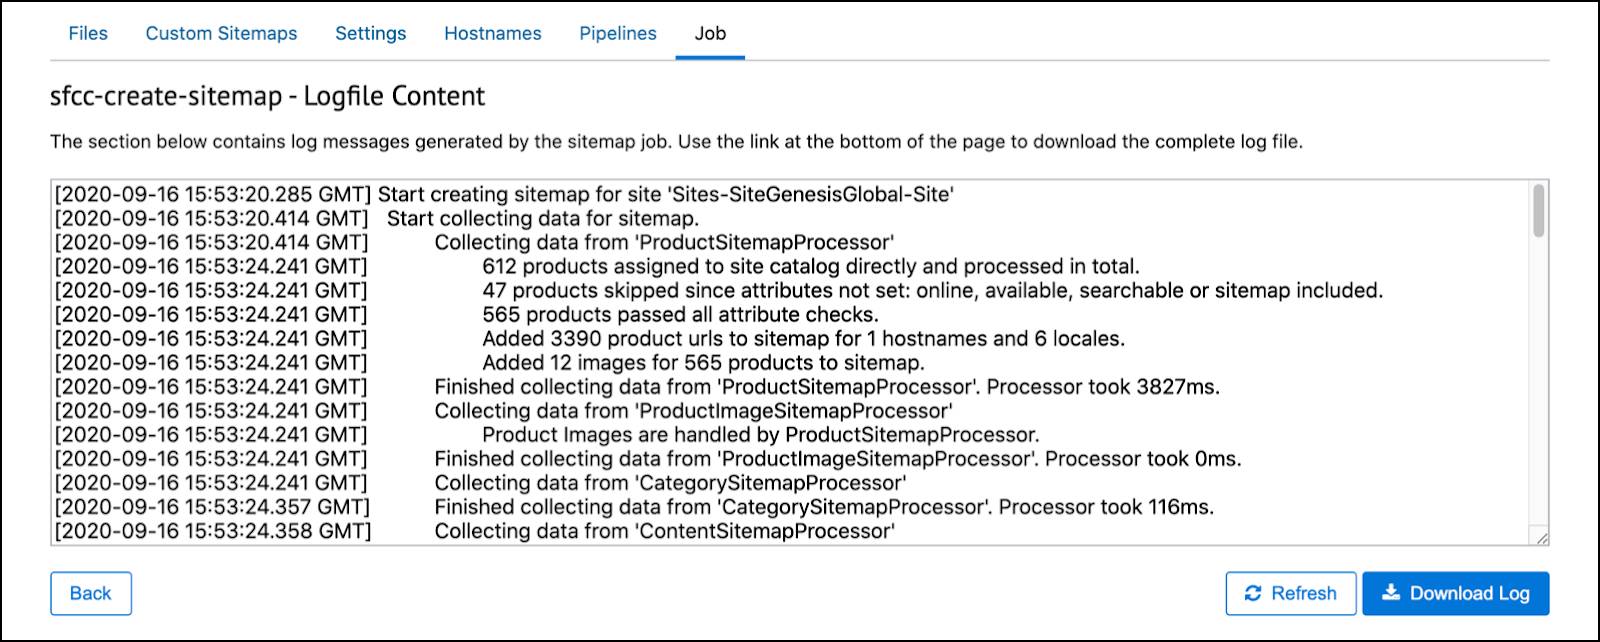
As the log file builds, Brandon follows along with the job process. He also sees the names of the products, categories, content, controllers, or folders included, and in the event of errors, the assets that caused them.
Next Steps
In this unit, you learned how to configure B2C Commerce sitemaps, how sitemap generation works, and how sitemaps work with instances and in feeds. Next, learn how to submit your sitemaps to search engines.
Resources
- Salesforce Help: Set Sitemap Attributes
- Salesforce Help: B2C Commerce import and export schemas
- Salesforce Help: Create Feeds for Sitemap Attributes
- Salesforce Help: Generate Sitemaps
- External Site: sitemaps.org