Access External Business Actions
Let’s build a flow that puts into practice what you've learned and set up so far. Ready to put your skills to the test and implement our business process? Here we go!

View External Services Actions in Flow
In the previous step, you registered an external service using the External Services wizard and viewed the External Services actions in the wizard. To see the actions, let’s jump into Flow Builder.
- Click the App Launcher (
 ).
).
- In the Search apps and items box, enter
autoand then select Automation.
- In the Flows panel, click New.
- Under Frequently Used, select Screen Flow.
- In the button bar, change the Auto-Layout setting to Free-Form.
- From the toolbox, with the Elements tab selected, drag Action onto the canvas.
- To see the actions imported by External Services based on the API spec we used in the previous step, change Filter By to Type, select External Service, and click in the search box.
- To see the actions grouped by an External Services registration (in this example, BankService), change Filter By to Category, select BankService, and click in the search box. When you’re done viewing the available BankService actions, we can move on.
- Click Cancel and return to Setup.
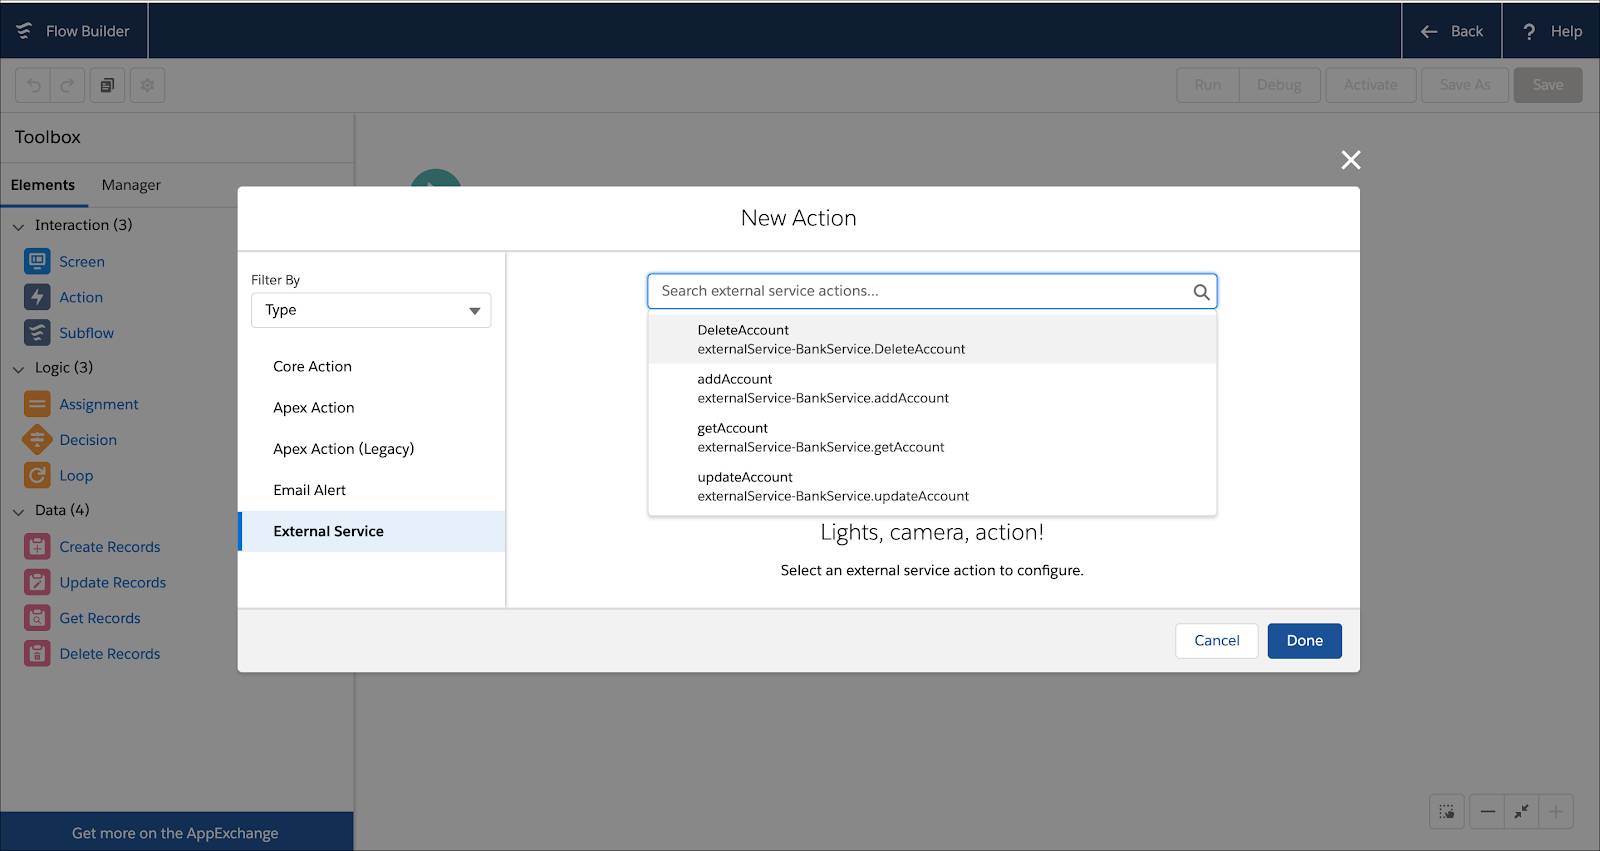
You can see the getAccount action that we looked at in the External Services wizard, along with addAccount, DeleteAccount, and updateAccount. These External Services actions are the API operations pertaining to our fictional bank that we can use in a flow to get information, add account records, and so forth.
External services that you create can have many more actions. It depends on the specific service that you use and how the API spec’s schema is defined for your use case. We’re about to use these actions in a flow of our own.
Create Custom Fields
First, let’s create two custom fields—Account Type and Account ID—on the User object. This provides fields in the user’s record to store the bank account type and bank account ID values that you retrieve from the bank service.
- From Setup, select Object Manager, then select User.
- Click Fields & Relationships, then click New.
- Under Data Type, select Text and click Next.
- For Field Label, enter
Account Type.
- For Length, enter
25.
- For Field Name, enter
Account_Type.
- Leave the rest of the defaults, and click Next.
- Make sure that the field-level security is set to visible for profiles you use in your org and click Next, then Save & New.
- Under Data Type, select Text and click Next.
- For Field Label, enter
Account ID.
- For Length, enter
25.
- For Field Name, enter
Account_ID.
- Leave the rest of the defaults, and click Next.
- Make sure that the field-level security is set to visible for profiles you use in your org and click Next.
- Click Save.
Create a User Record
Next, create a user record for your client, Maria Thompson.
- From Setup, enter
Usersin the Quick Find box, then select Users.
- Click New User.
- For First Name, enter
Maria - For Last Name, enter
Thompson - For User License, select Salesforce Platform.
- For Profile, select Standard Platform User.
- Since this is a test org, use your own email address.
- Enter a username that looks like an email address. Usernames must be unique across ALL of Salesforce. Choose a username like:
-
external.<yourlastname>@<yourcompany>.com
- …or create a username of your choice that is unique
- Click Save.
If you’re curious, you can now verify that your user, Maria Thompson, has the two new custom fields in her Salesforce user account (Account Type and Account ID). As you might expect, both fields are currently empty.
Maria Thompson would like to open a checking account at your bank. You’ve created a user for her in Salesforce (a necessary step, based on our business logic). Now let’s make it easy for bank reps to complete the new account creation process and use all the power of Salesforce to track new bank accounts.
Let’s get started on our flow.