Install Development Tools
Learning Objectives
In this project, you’ll:
- Install the recommended developer tools for creating and working with Lightning Web Components.
- Create a Lightning web component.
- Fix errors in your code using the provided developer tools.
- Configure a record layout to display your Lightning web component.
- Enable Local Dev in a Salesforce org.
You’ve learned about this programming model called Lightning Web Components, and now you want to start building your own web components. First, you need some tools to write Lightning web components.
While it’s true that you can create a Lightning web component with any text editor, you won’t get the support that a specialized set of tools provides. If you’re an experienced Salesforce developer looking to incorporate Lightning web components into your apps, you'll be more successful if you incorporate some new tools into your toolchain. And if you're new to Salesforce development and looking to get started building Lightning web components, you'll want to get familiar with the right toolchain for working on Salesforce projects.
Because Lightning Web Components is based on modern web standards, it’s only logical that the associated tooling is built on what are currently popular tools among web developers.
Create a New Trailhead Playground
For this project, you need to create a new Trailhead Playground. Scroll to the bottom of this page, click the playground name, then click Create Playground. It typically takes 3–4 minutes to create a new Trailhead Playground.
Note: Yes, we really mean a brand-new Trailhead playground! If you use an existing org or playground, you can run into problems completing the steps in this project.
Set Up the Salesforce CLI
Like many other programming languages and models, Salesforce includes a command-line interface (CLI). If you’ve ever used npm, Yarn, Gradle, or Maven, Salesforce CLI will seem familiar to you—just tailor-made for Salesforce development tasks.
Salesforce CLI allows you to interact with your Salesforce environments in many ways, like retrieving or pushing code or interacting with data. The CLI consists of several plugins. These plugins provide important specific functionality. For example, the plugin-org plugin provides the ability to manage Salesforce orgs, such as create a scratch org.

Installation
If you already have Salesforce CLI installed, you can skip this section. Follow these steps or see the Salesforce CLI Setup Guide for complete installation instructions.
- Install the CLI from https://developer.salesforce.com/tools/salesforcecli.
- Confirm the CLI is properly installed and on the latest version by running the following command from the command line:
sf update - You should see output like:
@salesforce/cli: Updating CLI….
You’re all set with Salesforce CLI. That was easy, wasn’t it?
Install Local Dev
Local Dev is a Salesforce CLI tool that lets you run a real-time preview of your Lightning web components in your browser. The preview updates automatically as you edit your components locally, so you don’t have to deploy code or manually refresh your browser page.
This feature is generally available for Lightning Experience apps (desktop and Salesforce Mobile App). You can also enable Local Dev for scratch orgs. For now, it’s beta for Experience Cloud Lightning Web Runtime Sites.
Installation
You have to install the Salesforce CLI before you can install Local Dev. Then, on the command line, run this to install Local Dev for a scratch or sandbox org:
Now on to the next tool in your toolbox as a new Lightning Web Components developer, the IDE.
Download and Configure Visual Studio Code
Visual Studio Code is the go-to code editor for Salesforce developers. It’s free, open-source, and available for Windows, Linux, and macOS. Visual Studio Code is a well-established IDE among web developers. Now it’s also an effective IDE for building Lightning web components, and Salesforce provides free extensions for Visual Studio Code that simplify your development experience even more. We also provide the Salesforce Extension Pack. The extension pack provides great tooling for developing on the Lightning Platform, and includes tools for working with Apex, Visualforce, and even a Replay Debugger.
Follow these instructions to install Visual Studio Code and the Salesforce Extension Pack.
- Download and install the latest version of Visual Studio Code for your operating system. If you already have Visual Studio Code installed, there’s no need to reinstall it.
- Launch Visual Studio Code.
- Click Extensions (
 ) in the sidebar.
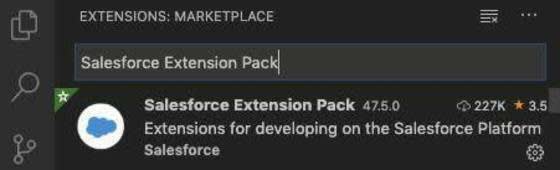
- Search for Salesforce Extension Pack and click Install. If you already have it installed, then just click the Reload button.
- Press Command + Shift + P on macOS or Ctrl + Shift + P on Windows or Linux to reveal the command palette. In the command palette, type
sfdxto display an initial list of available commands.
Done! You’ve installed all the tools you need to develop your first Lightning web component.
Activate Developer Hub
For this project you use your Trailhead Playground as your Developer Hub, and create a Lightning web component in a scratch org. But first let’s explain what a Developer Hub and a scratch org are.
A scratch org is a dedicated, configurable, short-term Salesforce environment that you can quickly spin up when starting a new project, a new feature branch, or a feature test.
A Developer Hub (Dev Hub) is the main Salesforce org that you and your team use to create and manage your scratch orgs.
- Launch your Trailhead Playground.
- Click Setup (
 ) and select Setup.
- From Setup, enter
Dev Hubin the Quick Find box and select Dev Hub.
- Click the slider to enable Dev Hub.
That’s it. You’ve set up your Dev Hub with Lightning Web Components enabled, and you’ve downloaded, installed, and configured the tools that you need. In the next step, you use those tools to create your first Lightning web component.