Create a Lightning Web Component
In this step, learn how to use the tools that you installed.
Create a Salesforce DX Project
The basic foundation for interacting with an org using Salesforce CLI is a Salesforce DX project. A project consists of several local configuration files and the code you want to deploy. In Salesforce terms, we call this code metadata, which is the foundation of the Salesforce Platform. If you're new to Salesforce, check out the Platform Developer Beginner trail to learn more about our metadata-driven approach.
To create a project:
- Open Visual Studio Code.
- Press Command + Shift + P on macOS or Ctrl + Shift + P on Windows or Linux, then type
create project.
- Select SFDX: Create Project, and press Enter.
- Leave the default project type selection Standard as is, and press Enter.
- Enter
trailheadas project name, and press Enter.
- Choose a directory on your local machine where the project will be stored. Click Create Project.
Great! You've created your first Salesforce DX project for working with Lightning Web Components. Visual Studio Code automatically opens the new project for you.
Authorize Your Dev Hub
The next step is to authorize a Dev Hub. If you're using a Trailhead Playground you can learn in Get Your Trailhead Playground Username and Password how to get the credentials for the next step.
- In Visual Studio Code, press Command + Shift + P on macOS or Ctrl + Shift + P on Windows or Linux.
- Type
sfdx.
- Select SFDX: Authorize a Dev Hub.
- Enter
trailheadOrgas the org alias and press Enter.
- Log in using your Dev Hub org credentials.
- Click Allow.
- After you authenticate in the browser, the CLI remembers your Dev Hub credentials. The success message should look like this:
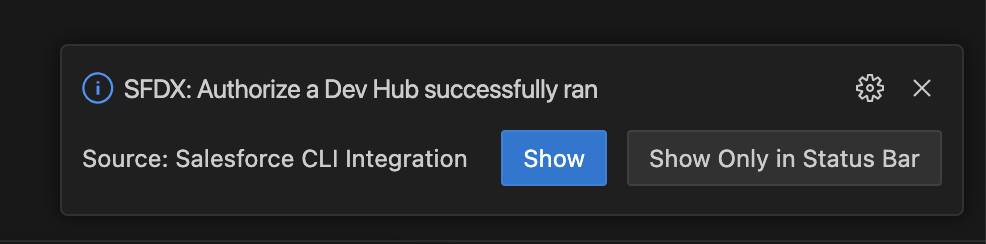
To authorize a Dev Hub is a precondition for creating a scratch org, which is an ephemeral environment for developing on the Salesforce Platform. We create one in the next step.
Create a Scratch Org
- In Visual Studio Code, click Command + Shift + P on macOS or Ctrl + Shift + P on Windows or Linux, then type
focus terminaland select Terminal: Focus Terminal.
- In your terminal, enter
sf org create scratch --definition-file config/project-scratch-def.json --alias scratchOrg --target-dev-hub trailheadOrg, and press Enter.
This CLI command creates a scratch org using your project-scratch-def.json file and the alias scratchOrg. Be patient. Creating a scratch org can take a minute. You should see this output in your terminal if the scratch org is created successfully.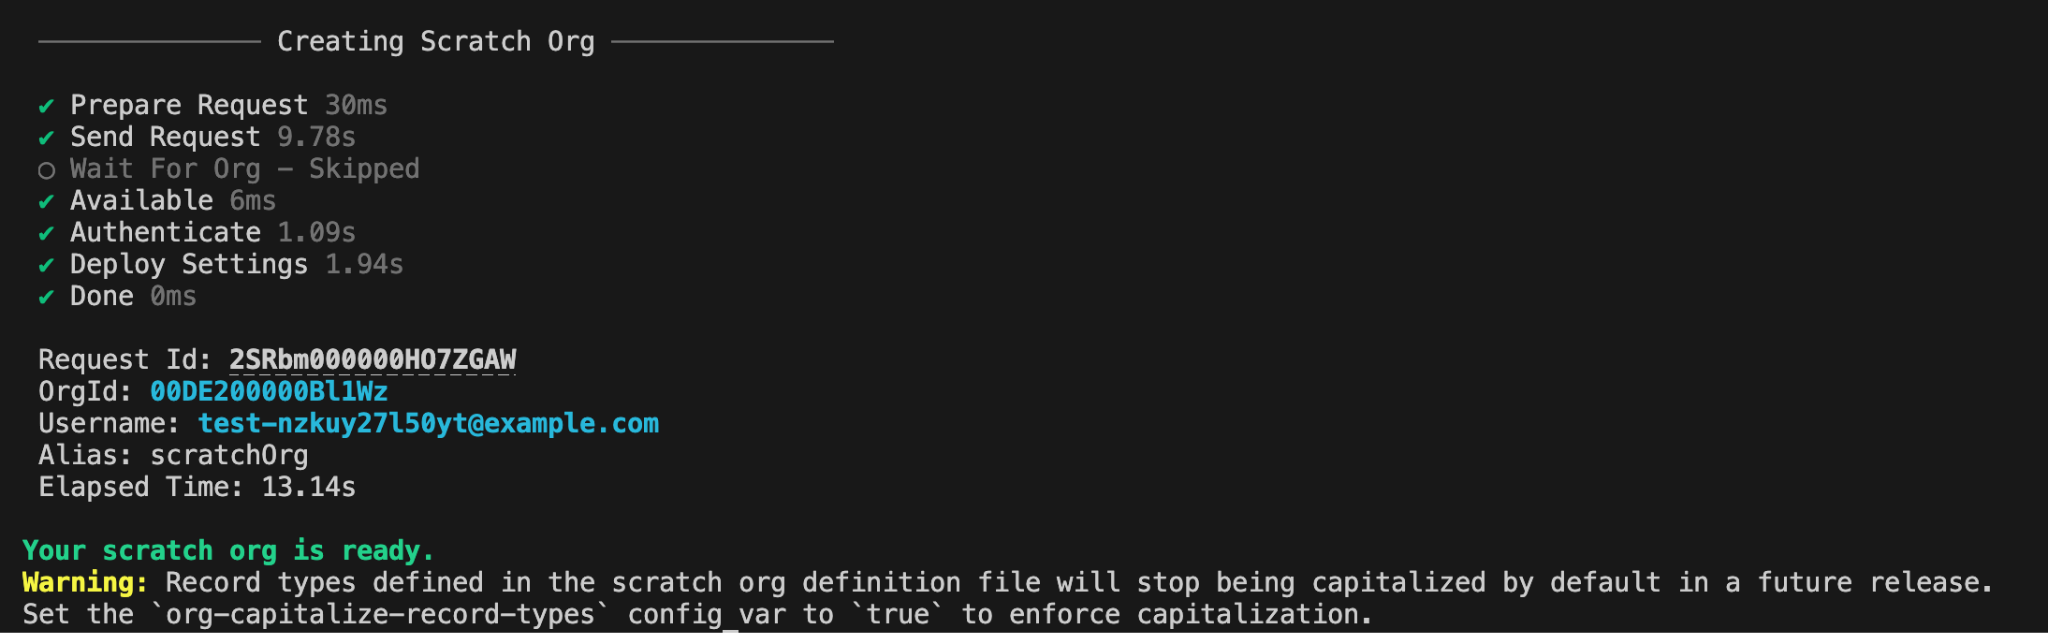
Now you're all set to develop your first Lightning web component. If you want to learn more about Salesforce DX check out App Development with Salesforce DX.
Create a Lightning Web Component
Creating a Lightning web component is a straightforward process. And Salesforce CLI already created a project structure that helps make getting started even easier.
The folder structure looks like this:
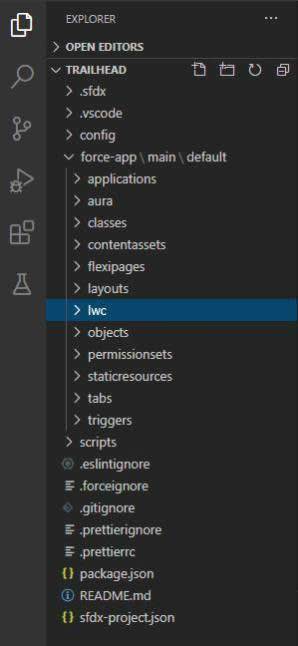
The project we created has a special folder, force-app/main/default. This folder, called a package directory, contains all the metadata for your current Salesforce DX project. Because Lightning web components are also metadata, they’re stored in a subfolder named lwc. In the next step, we add a Lightning web component to this folder.

We can use Visual Studio Code to create a Lightning web component, just as we did to create the Salesforce DX project. (You could use Salesforce CLI directly, but we'll use it through the embedded terminal in Visual Studio Code now.)
- Open Visual Studio Code.
- In Visual Studio Code, click Command + Shift + P on macOS or Ctrl + Shift + P on Windows or Linux, then type
focus terminaland select Terminal: Focus Terminal.
- In the Terminal tab, enter
sf lightning generate component -n myFirstWebComponent -d force-app/main/default/lwc --type lwc, and press Enter.
This creates the files for your first Lightning web component.
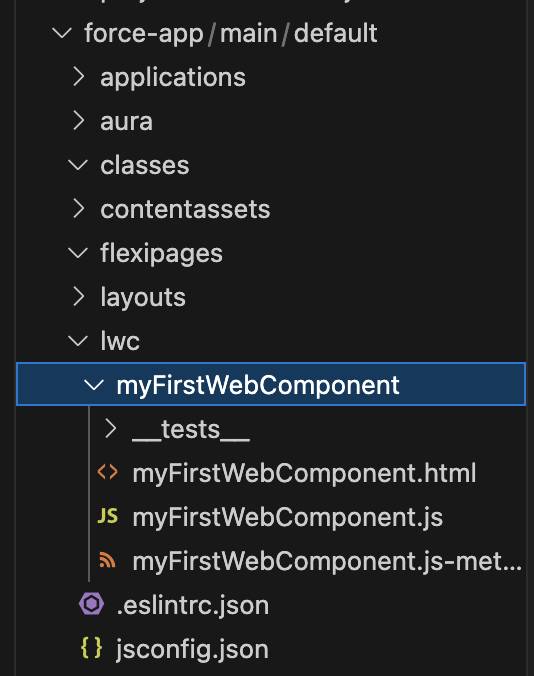
These are the parameters you used in the command.
-
-ndefines the name of the Lightning web component folder and its files.
-
-ddefines the target directory where the Lightning web component should be created. The target directory must be namedlwc.
-
--typespecifies that you want to create a Lightning web component.
Adding Code and Metadata to Your First Lightning Web Component
Let's take a look now at the files that make up a Lightning web component. For that you're going to copy and paste some HTML, JavaScript, and XML that we've prepared for you. We start with the myFirstWebComponent.js-meta.xml file.
- Open the myFirstWebComponent folder, which you just created in the
lwcsubfolder.
- Click myFirstWebComponent.js-meta.xml.
- Replace the entire contents of the XML file with this XML markup:
<?xml version="1.0" encoding="UTF-8"?>
<LightningComponentBundle xmlns="http://soap.sforce.com/2006/04/metadata">
    <apiVersion>64.0</apiVersion>
    <isExposed>true</isExposed>
    <targets>
        <target>lightning__AppPage</target>
        <target>lightning__RecordPage</target>
        <target>lightning__HomePage</target>
    </targets>
    <targetConfigs>
        <targetConfig targets="lightning__AppPage">
            <supportedFormFactors>
                <supportedFormFactor type="Small" />
                <supportedFormFactor type="Large" />
            </supportedFormFactors>
        </targetConfig>
        <targetConfig targets="lightning__RecordPage">
            <supportedFormFactors>
                <supportedFormFactor type="Small" />
                <supportedFormFactor type="Large" />
            </supportedFormFactors>
        </targetConfig>
        <targetConfig targets="lightning__HomePage">
            <supportedFormFactors>
                <supportedFormFactor type="Small" />
                <supportedFormFactor type="Large" />
            </supportedFormFactors>
        </targetConfig>
    </targetConfigs>
</LightningComponentBundle>- Press Command + S on macOS, or Ctrl + S on Windows or Linux, to save the file.
The file that you just updated is the metadata definition file. It contains several configuration elements that control, for example, where you can add it to the Salesforce user interface using Lightning App Builder (targets). You can read more about the metadata configuration options in the documentation.
Next we update the JavaScript file of your Lightning web component.
- In Visual Studio Code, click myFirstWebComponent.js.
- Replace the entire contents of the file with this code:
import { LightningElement } from 'lwc';
export default class MyFirstWebComponent extends LightningElement {
    @track
    contacts = [
        {
            Id: 1,
            Name: 'Amy Taylor',
            Title: 'VP of Engineering',
        },
        {
            Id: 2,
            Name: 'Michael Jones',
            Title: 'VP of Sales',
        },
        {
            Id: 3,
            Name: 'Jennifer Wu',
            Title: 'CEO',
        },
    ];
}
- Press Command + S on macOS, or Ctrl + S on Windows or Linux, to save the file.
After you save the file you'll immediately notice a few things.
- The annotated word @track is underlined with a red squiggly line.
- The JavaScript file name color in the explorer changed to red.
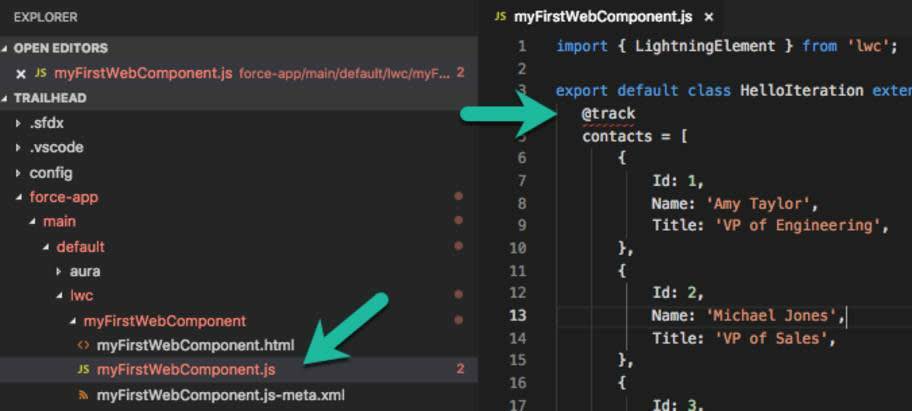
Both are indicators that something in the JavaScript code is not correct. As a good developer, you typically fix it right away.
But for now, you can ignore the issues. Instead, add HTML markup to the web components template file.
- In Visual Studio Code, click myFirstWebComponent.html.
- Replace the entire contents of this file with this code:
<template>
   <lightning-card title="ContactInformation" icon-name="custom:custom14">
      <div class="slds-m-around_medium">
         <template for:each={} for:item="contact">
            <div>
               {contact.Name}, {contact.Title}
            </div>
         </template>
      </div>
   </lightning-card>
</template>- Press Command + S on macOS, or Ctrl + S on Windows or Linux, to save the file.
Again, you see an indication that something in the HTML markup isn't as it should be.
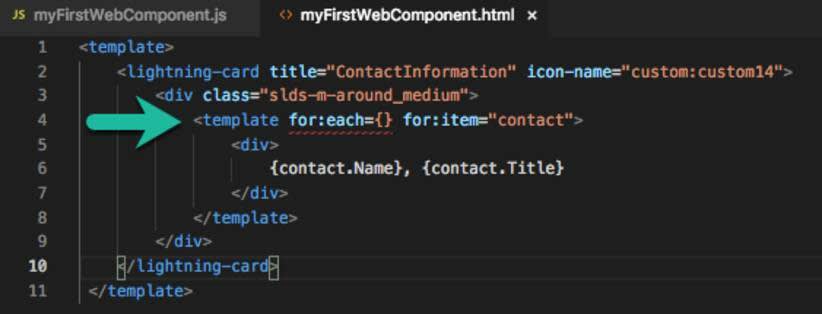
Let's also ignore this (for now).
Usually the next step would be to deploy your project to your org. But the code is full of errors, so the deployment would fail. You might or might not encounter failed deployments. It's important that you pay attention to any errors that are shown in the IDE and fix them right away.
In the next step, we fix our code.