Test Your Templates
Enter a Single Gift
With your templates in place, it’s time to test your work in Gift Entry. Start with a single gift.
- In Gift Entry, click New Single Gift.

- Take a moment to find the Source Code field on the page, then specify these details.
- Donor Type: Select Contact1
- Existing Donor Contact: Candace Evans.
- Donation Date: Select today
- Donation Amount:
100 - Source Code:
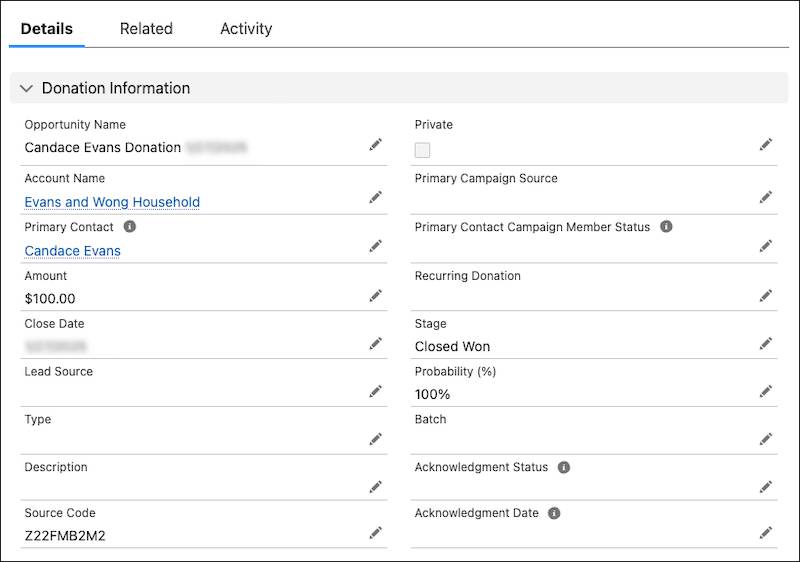
Z22FMB2M2Each character in a source code means something specific to the sent appeal.
- Save your work.
After a few moments for processing, you find yourself on your new opportunity record. Check it out.

Pretty neat, right? But do you know what’s really cool? Batch gifts.
Enter Gifts in a Batch
Test your Direct Mail template with a batch now. Batches help us enter several gifts at the same time. Each gift is then stored in a Data Import record before you send them all to their target objects with a single click.
- From the App Launcher (
 ), find and select Gift Entry.
- Click New Batch.

- Select the Direct Mail template, then click Next.
- Enter
Direct Mail Testas the Batch Name, then click Next.
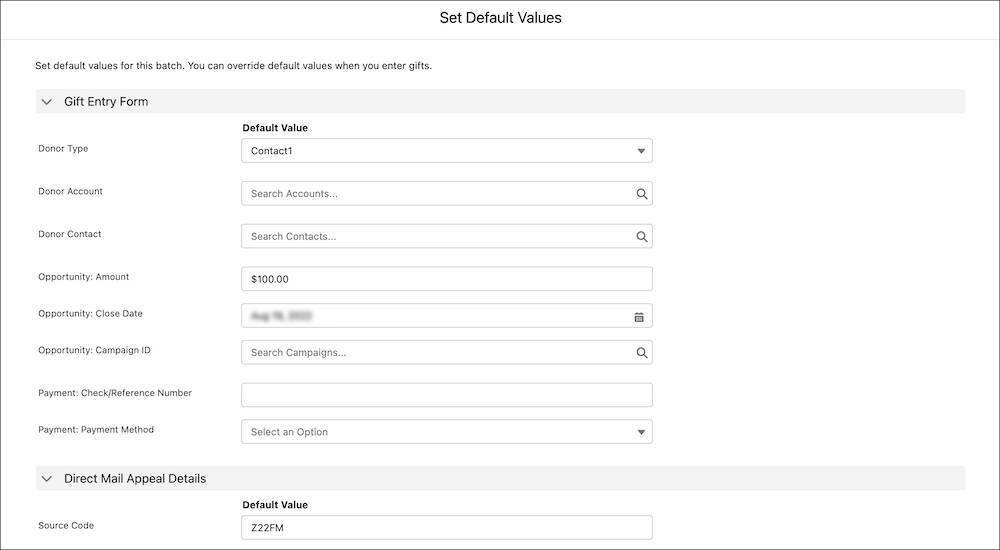
- Gift Entry’s batch gift tool enables you to set default values for the fields in the batch to save your team time on data entry. For example, all of the gifts may be from individuals (contact records), have the same close date, or be for the same amount in response to a specific ask. Set some defaults:
- Donor Type: Contact1, because all of these gifts are from individual donors.
- Opportunity: Amount:
100 - Opportunity: Close Date: Choose today
- Source Code:
Z22FM. Each of the source codes you enter might be different, but they all start with the same 5 characters, so you can save time and improve accuracy by setting this value here.
- Save your work,
- Enter the first gift, using the defaults:
- Donor Contact: Lisa Bullard
- Source Code: Add
A1M2to the end of the characters already in the field.
- Click Save & Enter New Gift.
- Enter the second gift, using the defaults:
- Donor Contact: Solitude Sokolov
- Source Code: Add
C3M1to the end of the characters already in the field.
- Click Save & Enter New Gift.
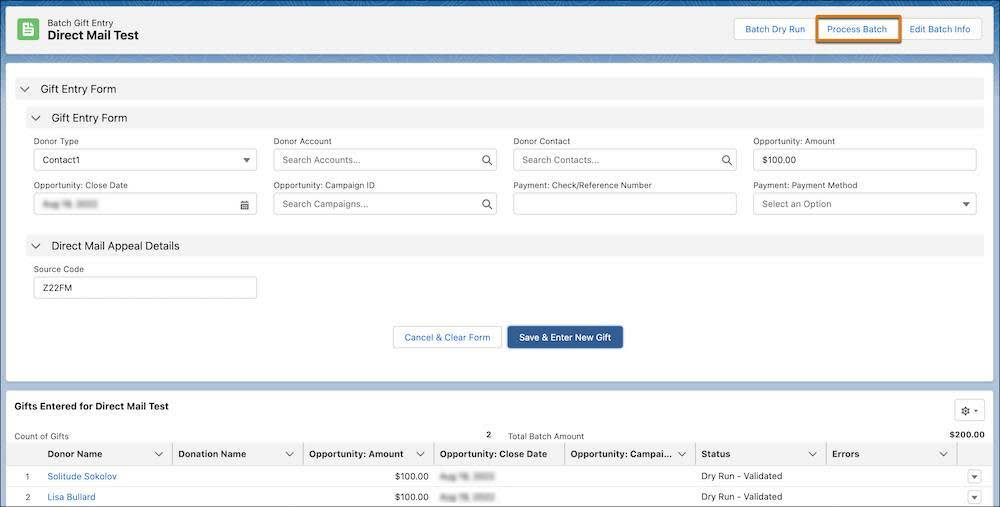
The Gifts Entered section, at the bottom of the page, displays a list of the gifts you entered in a table. Each of these gifts is stored in a data import record so you can check and review the details before sending them to their target opportunity records. We recommend checking the Status field to make sure that each record is validated by the Dry Run check that happens with each save.
Everything is OK here, so click Process Batch.

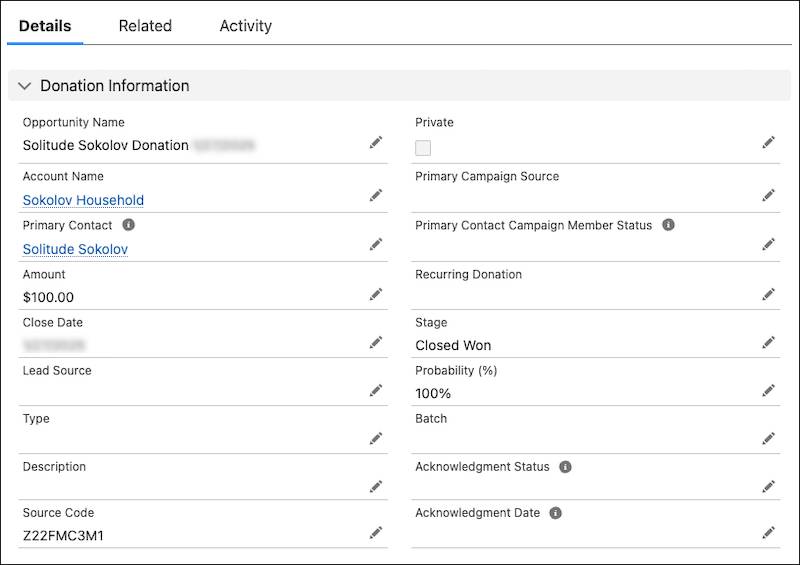
It may take a minute for the batch to process. When processing finishes, the table updates each record with a status of Imported and a link to the contact and created payment record. Click through one of the payment records to review the details, then click the related opportunity record listed on the payment to check it out.

Cool, right? You’ll grow to appreciate batch gift entry the more you use it. There's one more Gift Entry feature that can save your staff time and improve the reliability of your address data. You learn that configuration in the next step.
Verify your work here to move on to our last configuration step.
Resources