Create a Redemption Catalog and Decision Table
Redemption Process Overview
Here’s an overview of the things Linda must do to set up the redemption process.
- Create a custom object and then add redemption catalog data to it, such as details about the product or reward, partner name, and the points members get.
- Create a decision table to determine which fields from the custom object should be used as input and output.
- Set up a flow to verify whether a member has enough points to redeem the rewards.
- Create a redemption transaction journal to run the redemption.
Create a Redemption Catalog
Linda begins by creating a custom object, which she’ll use to store data about redemptions.
Create a Custom Object
- Click
 and select Setup.
- Click Object Manager.
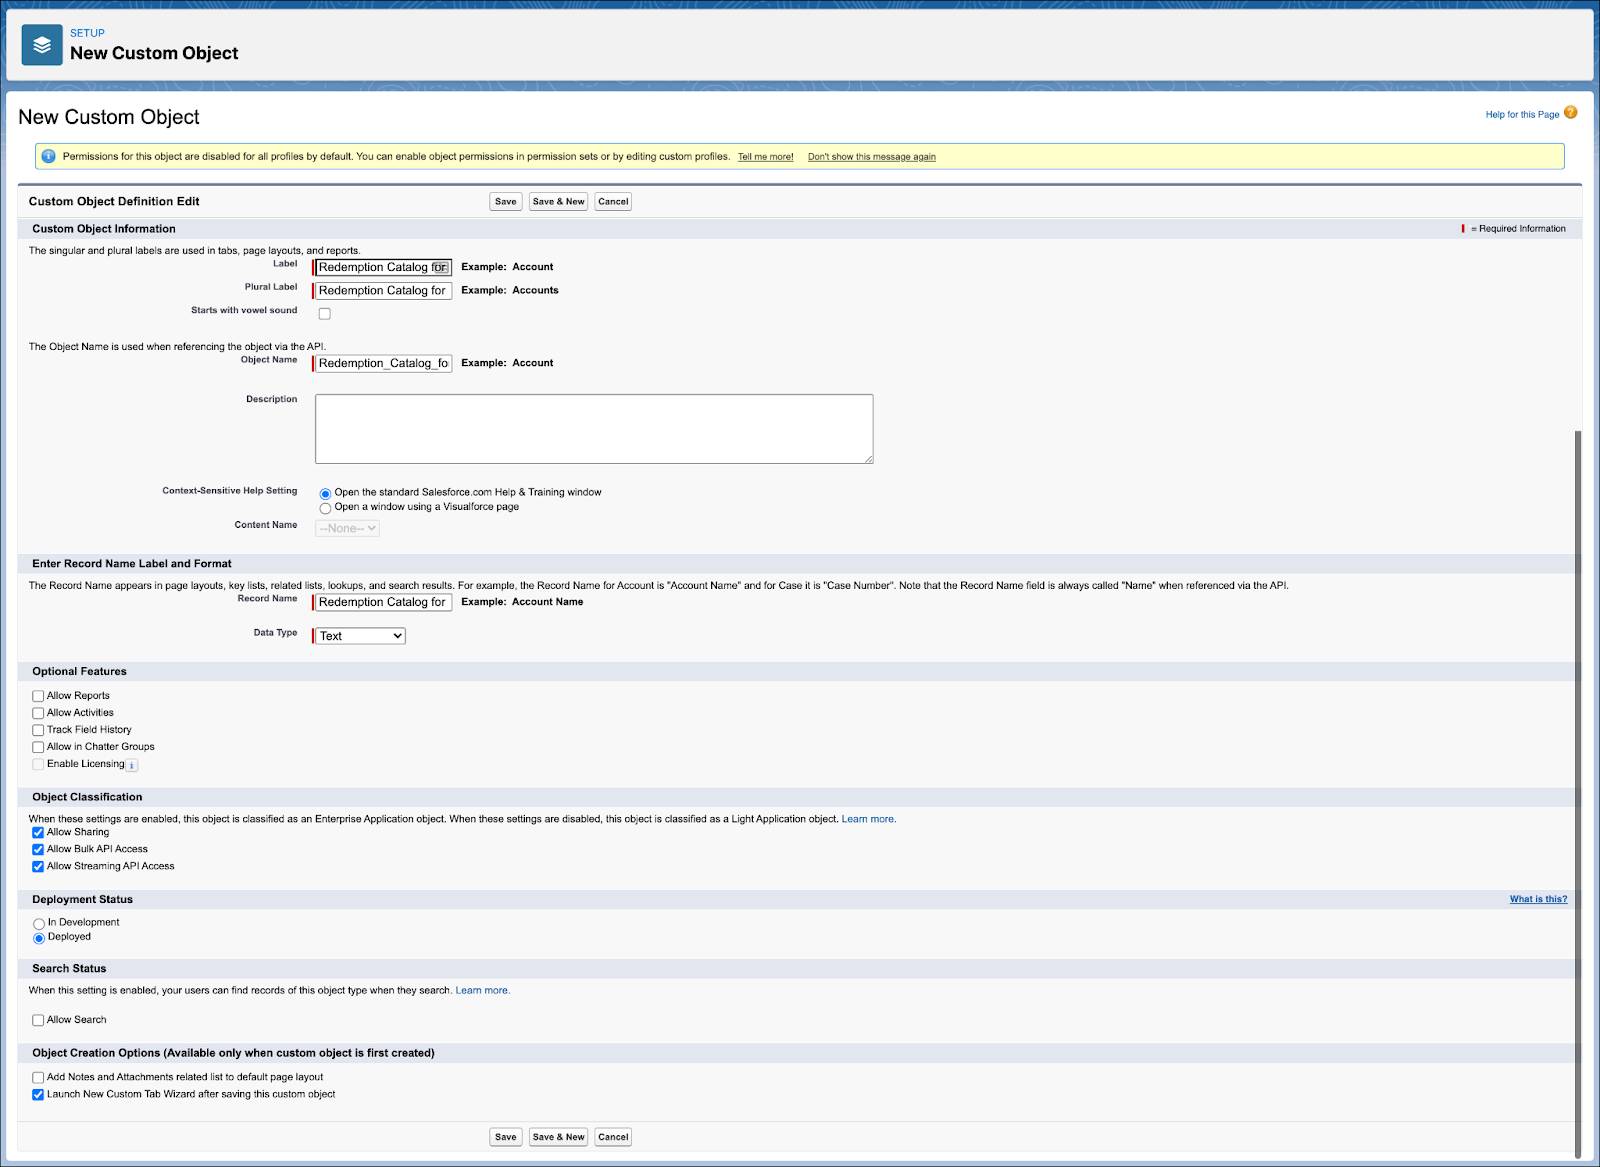
- Click Create and select Custom Object.
- Provide the following details.
- Label:
Redemption Catalog for Inner Circle - Plural Label:
Redemption Catalog for Inner Circle - In the Object Creation Options section, select Launch New Custom Tab Wizard after saving this custom object.
- Label:
- Click Save.

- Click the Tab Style lookup icon and select a tab style of your choice.
- Click Next.

- Click Next.
- Click Save.
Add Fields to the Custom Object
Linda adds fields to the custom object, which will be used for input and output in the decision table.
- Click Fields & Relationships.
- Click New.
- Select Lookup Relationship.
- Click Next.
- From the Related To list, select Loyalty Program Partner.
- Click Next.
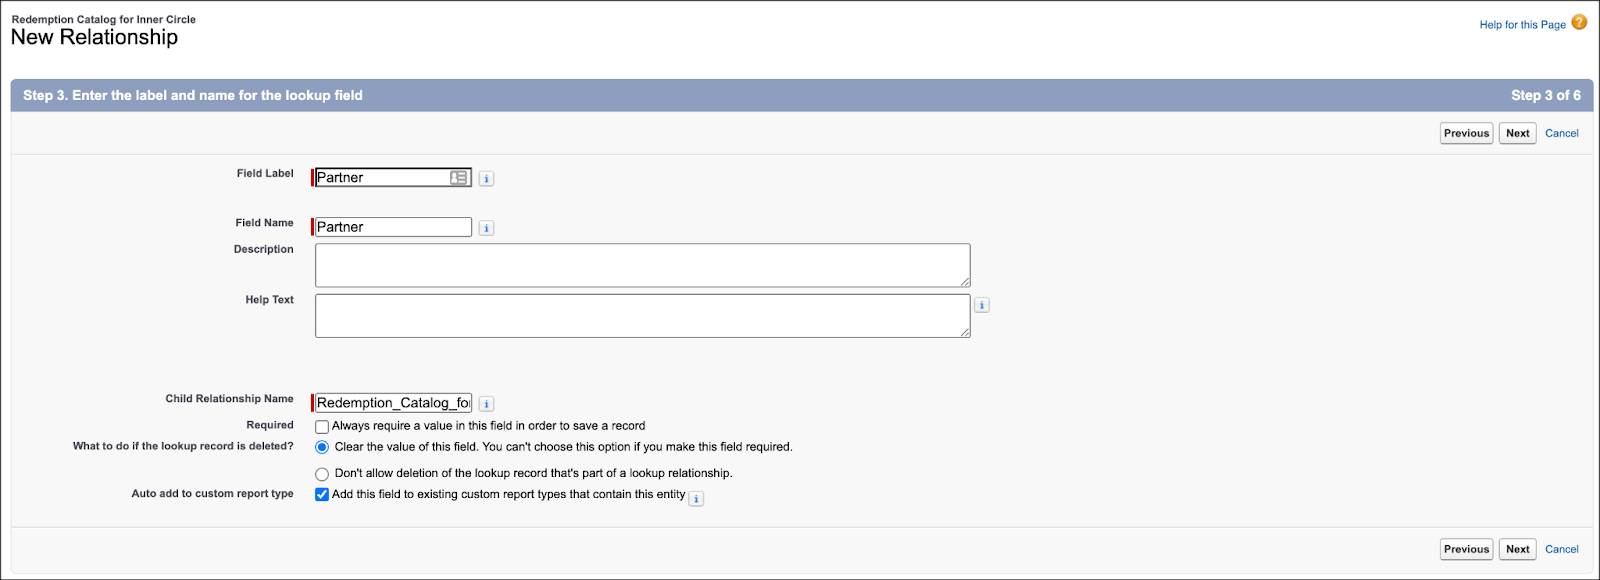
- Provide the following details.
- Field Label:
Partner - Field Name:
Partner
- Click Next three times.
- Click Save.
- Linda repeats steps 2 to 9 to add the remaining fields with the following details.
Data Type |
Related To |
Field Label |
Field Name |
|---|---|---|---|
Lookup Relationship |
Product |
Product |
Product |
Number |
Points |
Points |
|
Lookup Relationship |
Voucher Definition |
Voucher Definition |
Voucher_DefinitionId |
Enter Data in the Custom Object
Now that Linda has set up the required fields, she adds data related to the catalog: partners, products, and points associated with the products.
- Click
 and select Redemption Catalog for Inner Circle.
- Click New and provide the following details.
- Redemption Catalog for Inner Circle Name:
1 - Partner: Cloud Kicks
- Product: $20 voucher applicable on all footwear
- Points:
1000 - Voucher Definition: $20 voucher applicable on all footwear
- Click Save & New.
- Repeat steps 2 to 4 with the following details to create additional records (we won't check for these additional records in the hands-on challenge).
Name |
Partner |
Product |
Points |
Voucher Definition |
|---|---|---|---|---|
2 |
Cloud Kicks |
Jonah Steven range of sneakers |
5,000 |
|
3 |
Cloud Kicks |
Custom sneakers consultation |
4,000 |
|
4 |
Cloud Kicks |
$20 donation to a charity of your choice |
500 |
$20 donation to a charity of your choice |
5 |
Cloud Kicks |
Meet the founder |
2,000 |
|
6 |
NTO |
10% off sitewide |
500 |
10% off sitewide |
7 |
NTO |
$10 voucher applicable on jackets |
1,000 |
$10 voucher applicable on jackets |

Create a Decision Table
A decision table provides outcomes based on the rules defined in the custom object. To create the decision table, Linda selects the source object that contains the rules, the input fields from the object that the decision table should read, and the output field. The output field contains the values used to calculate the outcomes.
Here’s what she does.
- Click
 and select Setup.
- In the Setup Quick Find, search for and select Decision Tables.
- Click New and provide the following details.
- Name:
Redemption Catalog for Inner Circle - Description:
Redemption Catalog for Cloud Kicks’s Loyalty Program - Application Usage: Transaction Journal
- Decision Table Type: Standard

- Click Save and Next.
- Select Redemption Catalog for Inner Circle as the Source Object.
- Make the following selections in the Conditions section. Click Add Condition to add a new field selection.
Source Object Field |
Operator |
|---|---|
Partner__c |
Equals
|
Product__c |
Equals |
- Select these as the Source Object Field in the Results section. Click Add Results to add a new field selection.
-
Points__c
-
Voucher_DefinitionId__c
-
Points__c
- Click Save & Next twice.

- Click Finish.
- Click Activate.
Create Dataset Links
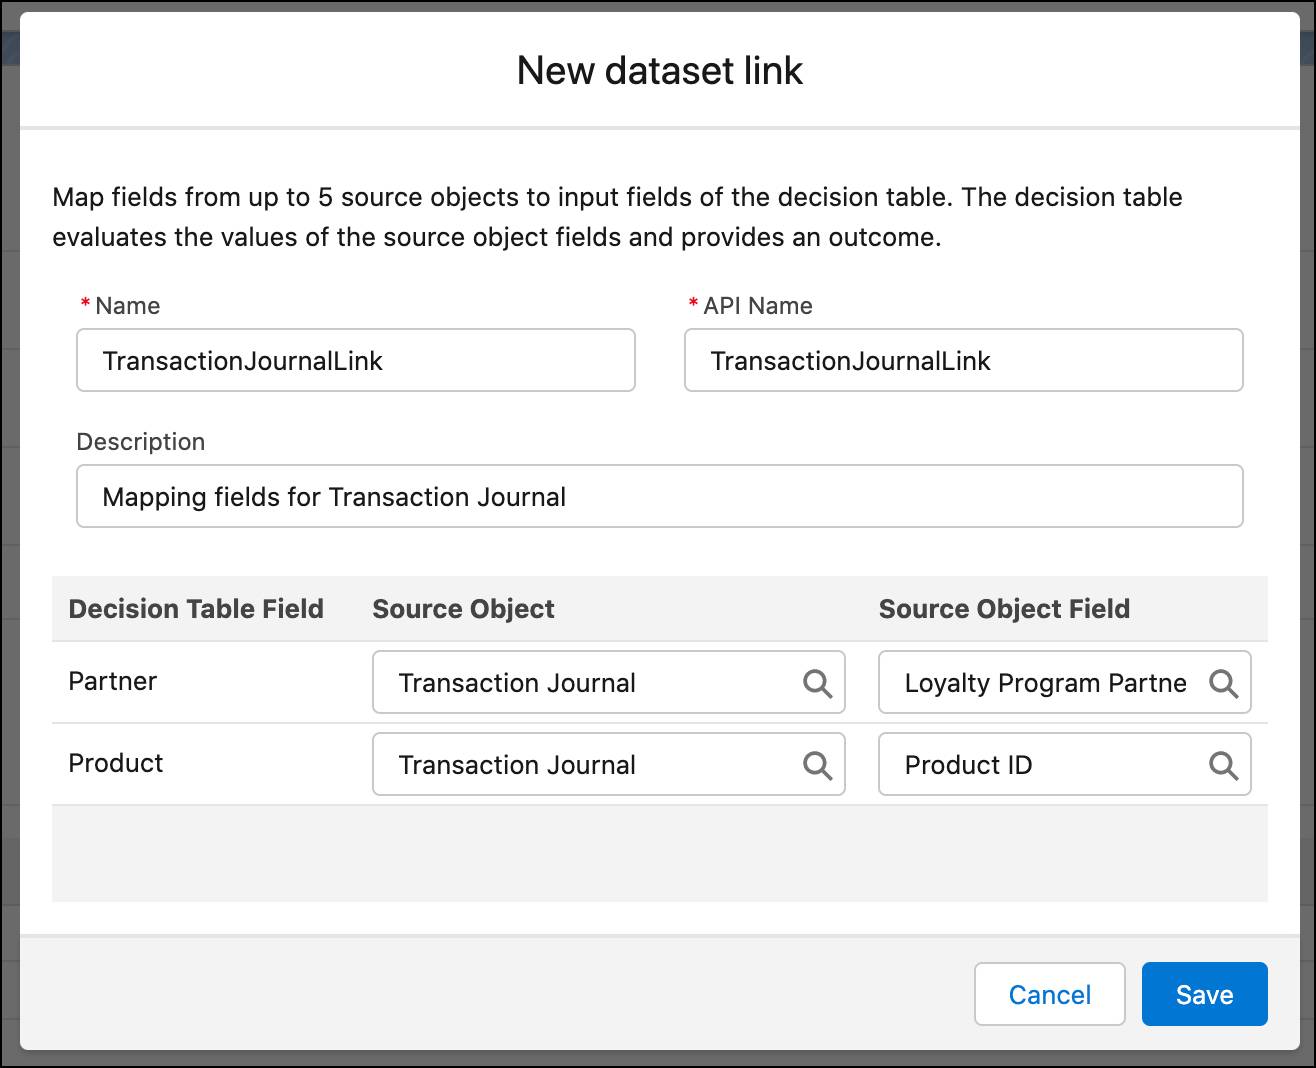
A dataset link defines a mapping between a decision table’s input fields and fields in a source object. Using a dataset link, Linda maps the decision table’s input fields, which are partner and product, with fields of the transaction journal object. The decision table will determine outcomes based on these field values. Here’s how.
- Click
 and select Setup.
- In the Setup Quick Find, search for and select Decision Tables.
- Select the Redemption Catalog for Inner Circle decision table.
- On the Dataset Links card, click New.
- Provide the following fields.
- Name:
TransactionJournalLink - Description:
Mapping fields for Transaction Journal
- Map the decision table fields to the corresponding fields of the transaction journal as follows.
Decision Table Field
Source Object
Source Object Field
Partner
Transaction Journal
Loyalty Program Partner ID
Product
Transaction Journal
Product ID
- Click Save.

So we’ve created the redemption catalog and decision table. In the next step, we set up a flow to verify whether a member has enough points to redeem the rewards. The flow will be based on the redemption catalog and decision table that we created.
Resources