Enable Digital Experiences and Set Permissions
Introduction
Ursa Major Solar, Inc., a growing supplier of solar components and systems based in the Southwest US, recently opened a second sales and distribution center in a neighboring state.
The owners of Ursa Major Solar realize they need a way for their customers to engage beyond the company’s social media platforms. They need to (solar) power up customer engagement and start a customer site using Experience Cloud. Customer sites give customers an easy way to interact with a company whenever and wherever they are. They can search for articles, ask questions, and get crowd-sourced answers.
This is where you come in. As Ursa Major Solar’s admin, you’re in charge of creating the company’s first customer site using Experience Cloud.
Follow Along with Trail Together
Want to follow along with an expert as you work through this step? Take a look at this video, part of the Trail Together series.
Enable Digital Experiences
Start by turning on the digital experience functionality in your org.
- Click the setup gear
 and select Setup.
- Enter
Experiencesin the Quick Find box and select Settings under Experiences.
- Select the Enable Digital Experiences checkbox.
- Click Save.
- Click OK on the confirmation message.
- If prompted, click Open on the popup box to navigate to this page.
Use the Knowledge Setup Flow
Now that the digital experiences functionality is turned on, enable Salesforce Knowledge. Salesforce Knowledge lets you create and manage a knowledge base with Ursa Major Solar's information, and securely share it when and where it's needed. Your Salesforce Knowledge base is built from knowledge articles, which are documents of information on anything from processes (like how to reset the solar inverter to its default) to frequently asked questions (like where to place a solar panel for maximum effectiveness). The Ursa Major Solar site can leverage these knowledge articles to assist customers.
Enabling Salesforce Knowledge and assigning Lightning Knowledge author access is done through the Knowledge Setup flow.
- From Setup, click the Home tab.
- Click View All in the Recommended Setup section.
- Enter
Knowledge Setupin the search bar and click Knowledge Setup.
- Click Start.
- Ensure your name is selected as a Lightning Knowledge Author.
- Click Next.
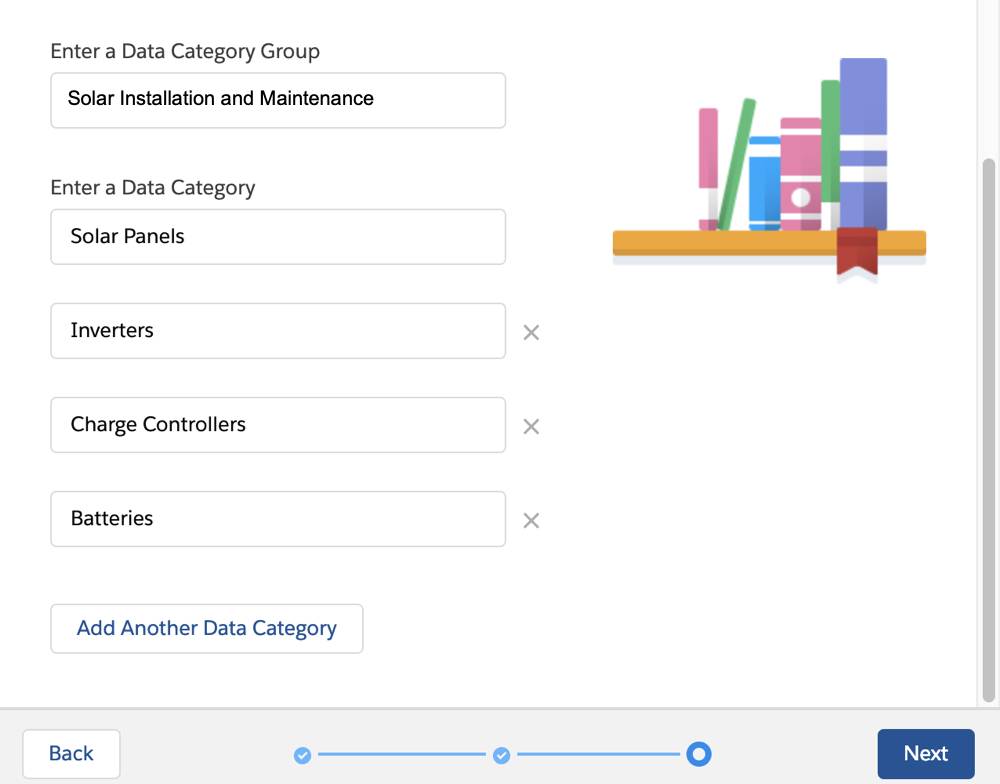
- Enter
Solar Installation and Maintenanceunder Enter a Data Category Group.
- Enter
Solar Panelsunder Enter a Data Category.
- Click Add Another Data Category.
- Enter
Inverters.
- Repeat the previous two steps and add
Charge ControllersandBatteriesdata categories.
 Note: Data categories are used to help classify and find articles, questions, or ideas.
- Click Next.
- Click Finish.
Create a Permission Set
Now that sites have been enabled, set the proper access permissions by creating the Customer Support Site Pilot Group permission set.
- From Setup, enter
Permission Setsin the Quick Find box and select Permission Sets.
- Click Knowledge LSF Permission Set.
- In the Apps section, click App Permissions.
- Click Edit.
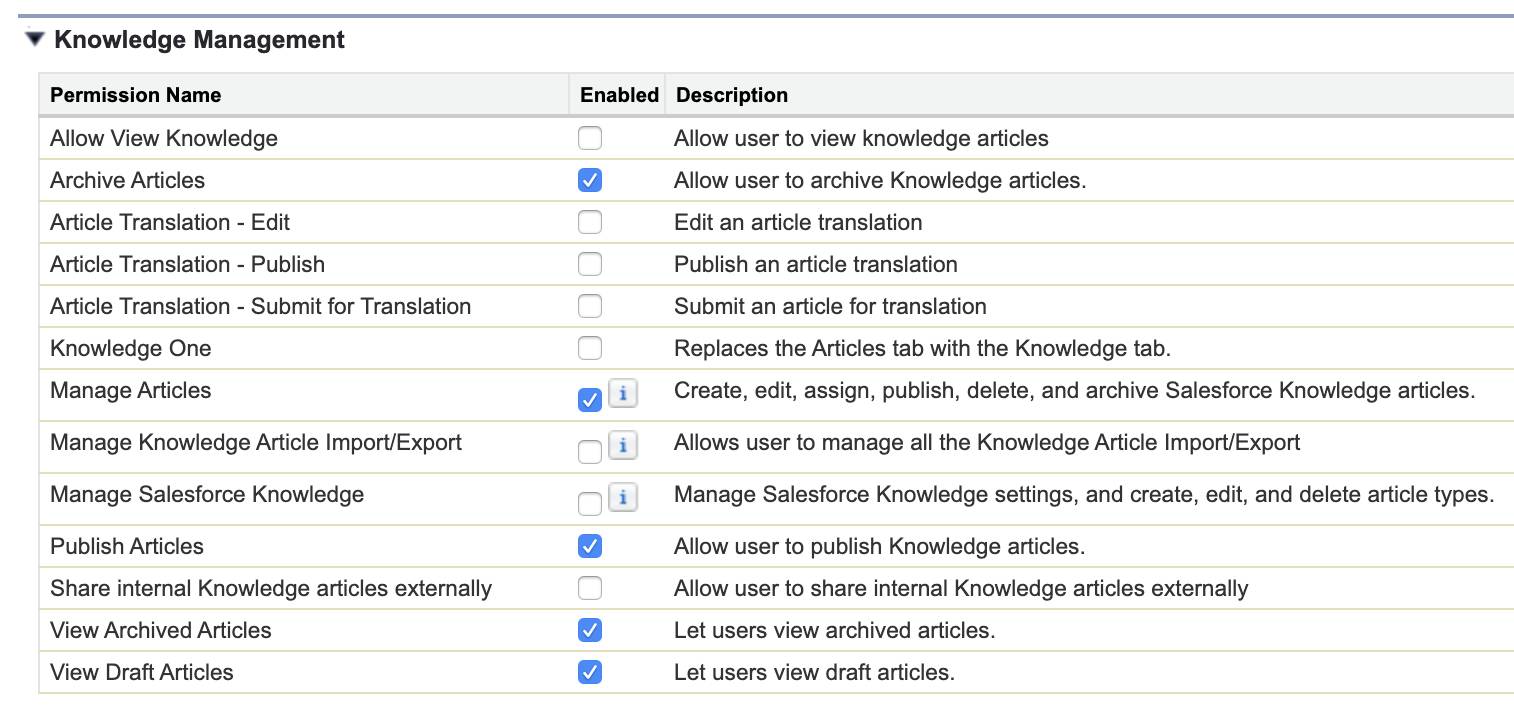
- In the Knowledge Management Section, enable Archive Articles, View Archived Articles, and View Draft Articles.
- Click Save and then click Save from the confirmation window.
- Click Clone.
- Delete current Label Name and enter
Customer Support Site Pilot Group - Delete current API Name and enter
Customer_Support_Site_Pilot_Group - Delete the current text in the Description and add the following:
Article access - archiving, managing, publishing, and viewing. - Click Save.
Enable Topics for Objects
There are many ways to organize content. With topics, you can classify and search Knowledge articles by assigning specific topic areas. Without enabling Salesforce Knowledge, articles can’t be displayed outside of your org.
This meets Ursa Major Solar's needs nicely, as they want to center conversations and knowledge articles around common topics. Over time, they want to give the community more control in determining those topics. But to start, they want to launch their site with a few topics they’ve decided are important. First, you have to enable topics for the Knowledge Object.
- Click the setup gear
 and select Setup.
- Enter
Topics for Objectsin Quick Find, then select Topics for Objects.
- Under Object, select Knowledge.
- Click Enable Topics.
- Click Save.
You come back to topics later when you’re configuring your site.
Create the Site
Site functionality is enabled and permissions have been set. The next step is to create the customer site and add a few images.
- Download this zip file to access images you will use for this project.
- Click the setup gear
 and select Setup.
- Within Setup, enter
Sitesin the Quick Find box and select All Sites.
- Click New.
- Click the Customer Service template.
- Click Get Started.
- In the name field, enter
Customer Support Site.
- In the Optional box, enter
customersupport.
- Click Create.
The next step is to set which profiles and permission sets will have access to this site.
- Click the Administration tile.
- Click Members.
- From the Select Profiles search picklist, click All.
- In the available profiles list, select Custom: Support Profile.
- Click Add to the right of the list.
Note: There should now be two profiles listed in Selected Profiles: System Administrator and the one just added.
- In the Available Permission Sets list, select Customer Support Site Pilot Group.
- Click the Add button to the right of the list.
- Click Save.
Now that permissions have been set, it’s time to adjust what users will see when logging in or registering.
- Click Login & Registration.
- Next to Logo File, click Choose File and navigate to the UrsaMajorSolarAssets folder you just downloaded (be sure to unzip the folder).
- Select the UrsaMajorLogo.png file and click Open.
- For Footer Text, enter
Ursa Major Solar.
- Click Save.
Next, adjust some of the site wide settings.
- Click Preferences.
-
Check the following boxes:
- General
- Show nicknames
- Give guest users access to public Chatter API requests
- Show all settings in Workspaces
- Experience Management
- Allow members to flag content
- Enable setup and display of reputation levels
- Exclude contributions to records when counting points toward reputation levels
-
Uncheck the following boxes:
- General
- Enable direct messages
- Experience Management
- Show number of people discussing suggested topics
- Click Save.
Organizing Content with Topics
Use topics to structure your site content or highlight key discussions. Topics expose Knowledge articles in a site. With topics, you can classify and search Knowledge articles by assigning specific topic areas.
- Click Administration in the upper left and select Content Management.
- At the top of the page, click the Topics tab.
- Click Navigational Topics.
- Enter the following information in the Enter a navigational topic... box (click Add after each entry):
Solar PanelsInvertersBatteries
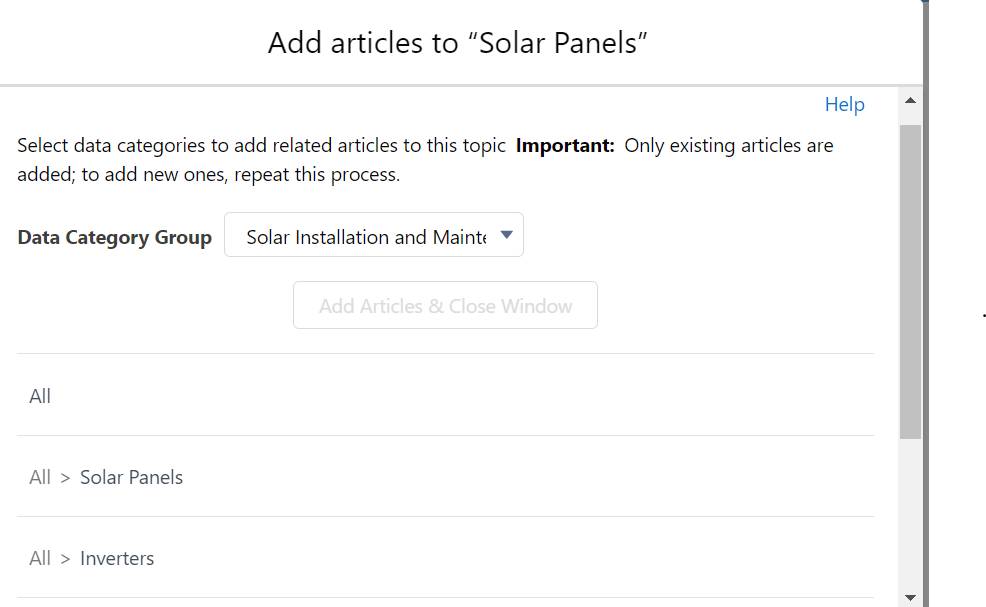
- Click the book icon
 to the right of each topic.
- For each category, click the corresponding set of articles, then click Add Articles & Close Window. For Example, click All > Solar Panels.
- Click Save.
- Click Featured Topics.
- Click in the Select a topic text box.
- Click Batteries and then click Add.
- Repeat for Inverters and Solar Panels.
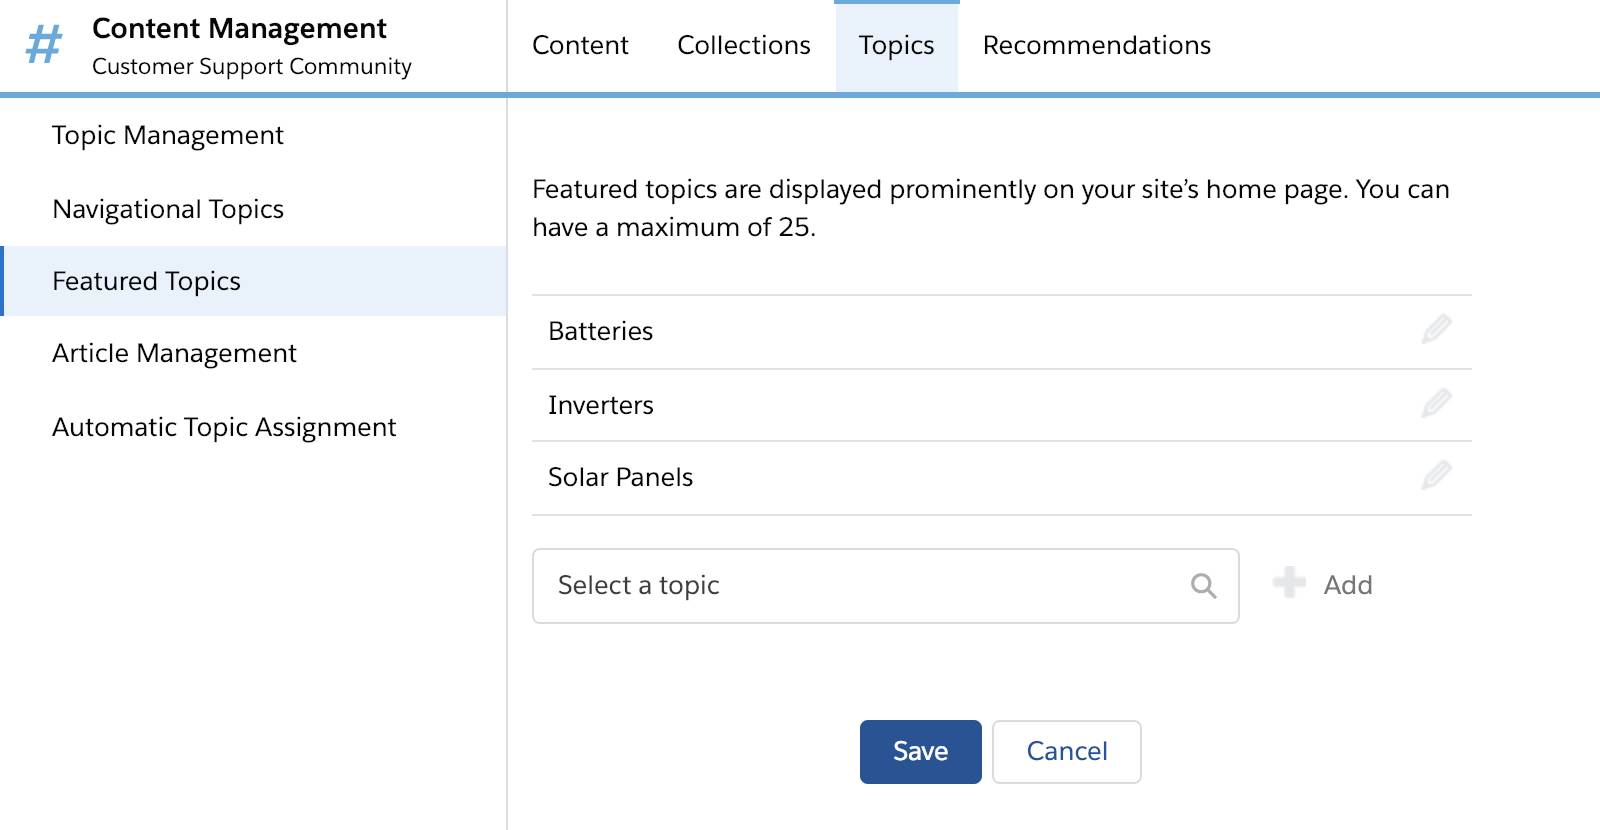
- Click Save.
You successfully created a new site, adjusted the permissions, and added topics for content organization. In the next step, customize the look and feel of the site to fit Ursa Major Solar’s needs.