Add a Quick Action
Follow Along with Trail Together
Want to follow along with an expert as you work through this step? Take a look at this video, part of the Trail Together series.
(This clip starts at the 10:30 minute mark, in case you want to rewind and watch the beginning of the step again.)
Accessibility
This unit requires some additional instructions for screen reader users. To access a detailed screen reader version of this unit, click the link below.
Open Trailhead screen reader instructions.
Introduction
When you create an app with the Salesforce Platform, you automatically create a mobile version of the app. As you might imagine, you can further customize the mobile app in many ways. In this step, you create a Quick Action.
Create a Quick Action
Quick Actions are things you want to do immediately from your mobile device. These actions live in a special place called the Publisher. You can customize the Publisher so that your most important actions are there at your fingertips.
First let's create the Quick Action.
- Click the setup gear
 and select Setup.
- Enter
Global Actionsin the Quick Find and select Global Actions.
- Click New Action.
- Leave the Action Type as Create a Record. In the Target Object field, choose Waypoint.
- In the Label field, enter
Waypoint. This automatically populates the Name field with Waypoint as well.
- Click Save.
- In the next Action Layout screen, leave Waypoint Name as the only field in the layout. Click Save.
Now you need to add that Quick Action to the Publisher. The Publisher Layout determines which Quick Actions you see in the Action bar.
- In Setup, click Home.
- Enter
Publisher Layoutsin the Quick Find and select Publisher Layouts.
- Next to Global Layout, click Edit.
The Global Publisher defaults to Salesforce Classic Quick Actions, but we want to use Lightning Experience Quick Actions instead, so we need to activate them.
- Hover your mouse over the Salesforce Mobile and Lightning Experience Actions section, then click the wrench icon in the lower right corner to activate Salesforce Mobile and Lightning Experience Actions
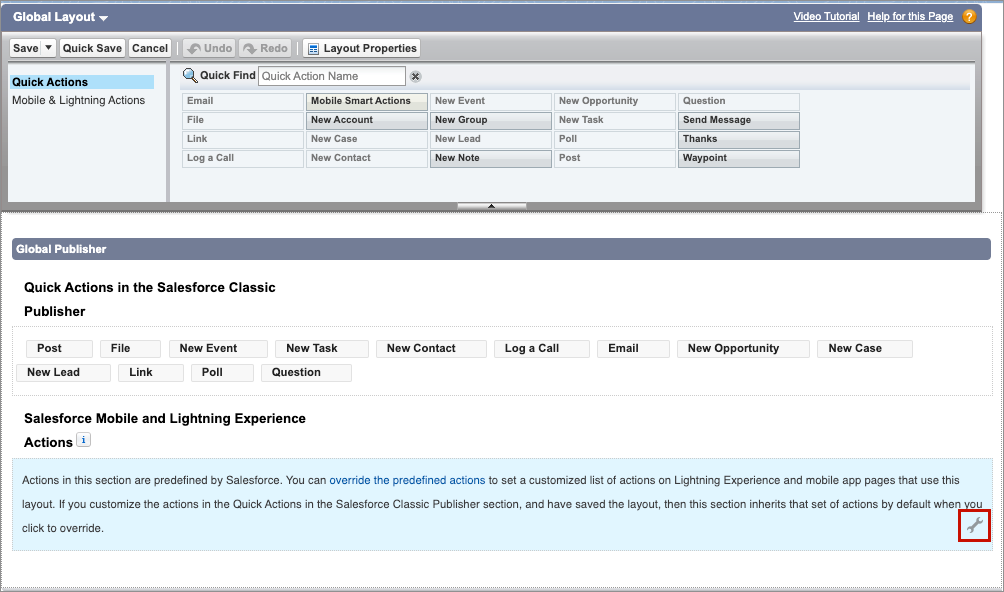
- In the Global Layout section, click Mobile & Lightning Actions to view the actions you just enabled.
- Salesforce puts several Quick Actions in the Publisher by default. Let’s start by removing a few that you might not need. Remove File by clicking it in the Global Publisher and dragging it up to the Global Layout area. Then remove New Case and New Lead (if present).
- Now add your Waypoint action by dragging it from the Global Layout and dropping it into the Salesforce Mobile and Lightning Experience Actions section of the Global Publisher below.
- You can move the actions around. Drag Waypoint so that it appears first.

- Click Save in the Global Layout.
Wow, you’ve done a lot in only a few minutes. You not only created an app, but you also customized the Salesforce mobile app as well.