Add Quick Actions and Activate the App
Add Quick Actions and Configure the Page
Quick actions allow users to quickly create and modify records. After you add the actions, you activate the Lightning Page as an app, which makes it available to mobile users.
- In the right sidebar, click Page to configure the app properties.
- At the bottom, click Select under Actions.
- Click Log a Call and use the right arrow to add the quick action to the Selected list. Repeat for New Case, New Lead, and New Task.
- Click OK to add the actions to your Lightning Page, and then click Save.
The Actions property at the bottom of the inspector now shows the actions that you added.
Activate the app, which automatically creates tabs and adds them to the Salesforce mobile app navigation.
- Click Activation....
- On the Page Settings tab, type
Field Sales Appfor the Name. It should already be defaulted in for you. Leave all other defaults as is.
- On the Mobile Navigation tab, click the Add page to app button and then drag the Field Sales App icon and place it below the Today icon.
- Click Save to activate.
Check Out Your New App
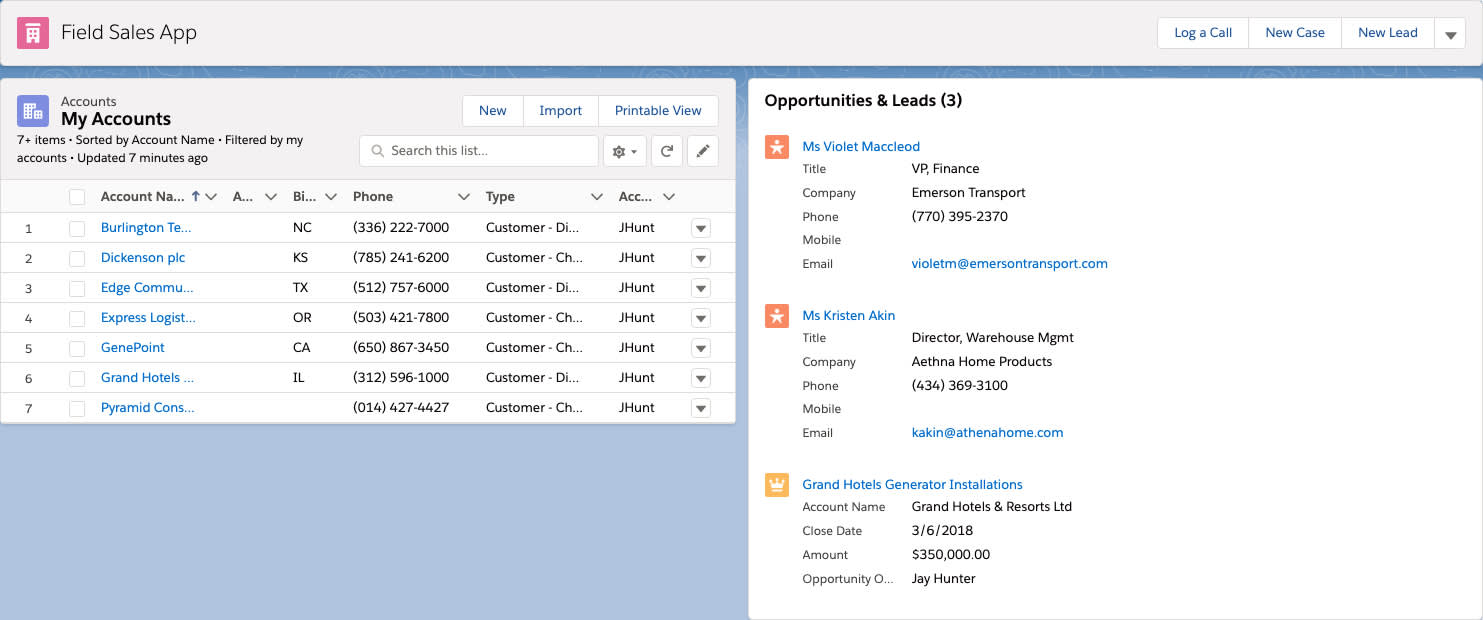
Congratulations, you just built a basic single-page Lightning App. Let's check it out and see how it looks.
- Click Back
 in the upper left to exit the Lightning App Builder.
- Click
 and type
 Field Salesinto the text box. Click Field Sales App.
Behold your new Field Sales App!

