Enable MFA for Select Users
Follow Along with Trail Together
Want to follow along with an expert as you work through this step? Take a look at this video, part of the Trail Together series.
(This clip starts at the 6:13 minute mark, in case you want to rewind and watch the beginning of the step again.)
Introduction
In this step, you learn how to enable MFA for select users by assigning them a user permission. Start by creating a user in your org. Let’s call her Sia Thripio. Then, create a permission set for multi-factor authentication and assign the permission set to Sia.
Create a User
- From Setup, enter
Usersin the Quick Find box, then select Users. - Click New User.
- In the first name field, enter
Sia. - In the last name field, enter
Thripio. - Enter your email address in the Email field. This setting is to get user notifications for Sia.
- Create a username for Sia and enter it in the Username field. It must be in email address format, but it doesn’t have to be a working email address. Make sure the email address is unique in your Trailhead Playground. Need ideas? Try using Sia’s first initial, last name, and the current date, like this: SThripio.12202020@trailhead.com.
- Edit or accept the nickname value.
- For User License, select Salesforce Platform.
- For Profile, select Standard Platform User.
- Deselect the options to receive Salesforce CRM content alerts. No need to clutter your inbox with unnecessary email from Salesforce.
- Scroll down to the bottom of the page and select Generate new password and notify user immediately.
- Click Save. Salesforce emails you a link to verify the user and set Sia’s password because you entered your email address in the Email field. Note: If you get an error that the username exists, create a user with a different name.
- Log in as Sia, and reset the password.
Create a Permission Set for Multi-Factor Authentication
Enable MFA for specific users by assigning them the Multi-Factor Authentication for User Interface Logins user permission. You can do this step by creating a permission set that you assign to users.
A permission set is a collection of settings and permissions that gives users access to various Salesforce features. Let’s create a permission set with the MFA permission.
- If you’re logged in as Sia, log out.
- Log in again as the system administrator of your Trailhead Playground.
- From Setup, enter
Permissionin the Quick Find box, then select Permission Sets. - Click New.
- Label the permission set
MFA Authorization for User Logins. - Use the autogenerated API name:
MFA_Authorization_for_User_Logins. - Click Save.
- Under System, click System Permissions.
![A page showing the details of a permission set.”]Now you’re on the detail page for the MFA Authorization for User Logins permission set.](https://res.cloudinary.com/hy4kyit2a/f_auto,fl_lossy,q_70/learn/projects/quick-start-turn-on-multi-factor-authentication/enable-multi-factor-authentication-for-select-users/images/3ad19e39873a22a938592649659aec37_f-17-f-1695-9-ba-7-4673-b-53-d-b-1-d-950198-dcd.png)
- Click Edit.
- Select Multi-Factor Authentication for User Interface Logins.
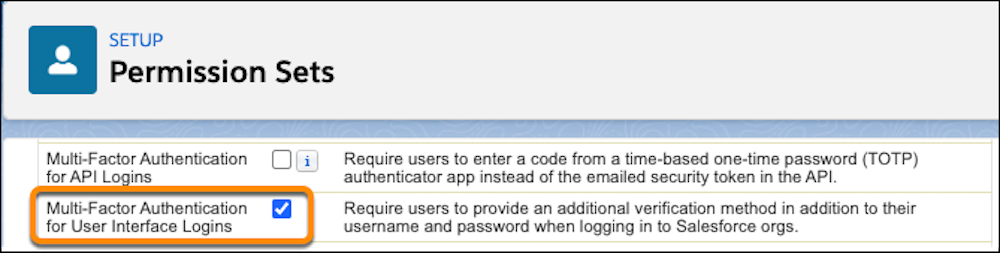
- Click Save, then click Save again to confirm permission changes.
You’re almost there! You just need to assign the permission set to Sia’s user.
Assign the Permission Set
For now, let’s assign the permission set just to Sia. Later, when you’re ready to roll out MFA more broadly, you can assign the same permission set to other users.
If you’re not on the detail page for your new permission set, navigate back there.
- On the detail page of the new permission set, click Manage Assignments.
- Click Add Assignments.
- On the list of users, select the checkbox next to Sia’s user. (You can assign up to 1,000 users at a time.)
- Click Next.
- Click Assign.
- Click Done.
Great! You’ve turned on multi-factor authentication for Sia. The next time Sia logs in, she’s prompted to provide a verification method as a second factor, in addition to her username and password.