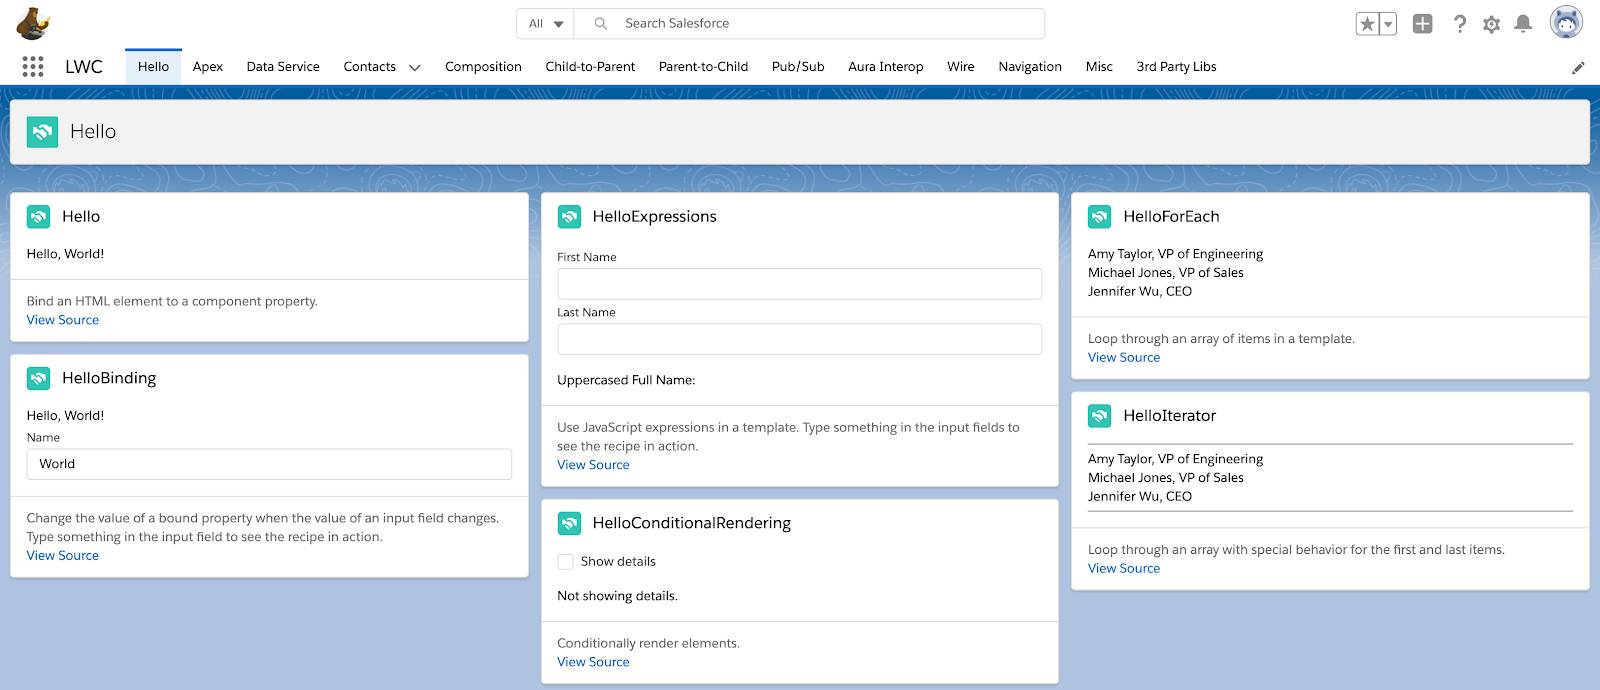
Deploy the LWC Recipes App
Learning Objectives
In this project, you’ll:
- Deploy the Lightning Web Components Recipes sample app.
- Learn three recipes.
Introduction to Lightning Web Components Recipes
Lightning Web Components leverage web standards to accelerate development on the Salesforce Platform. To help developers get a feel for what Lightning Web Components can do, we provide the LWC Recipes app. This app contains dozens of small components that illustrate how to accomplish certain tasks. For instance: Want to know how to tie your component to a server-side Apex controller? There’s a recipe for that. Want to know how to create a new-record form? You guessed it, there’s a recipe for that.
So how do you use LWC Recipes? We’re glad you asked. Let's get started with installing LWC Recipes.

About This Project
In this Quick Start project, you install a sample app from the Trailhead Sample Gallery . The sample app has examples that you can use to learn about Lightning Web Components. It also has code to give you a head start on developing your own Lightning Web Components.
If you’d like to tour the sample app gallery, see Quick Start: Explore the Sample App Gallery.
Before You Start
Before you take the steps in this hands-on project, make sure you complete Quick Start: Lightning Web Components. The first two steps of that badge walk through setting up your Salesforce DX development environment.
Note : To create and develop Lightning Web Components, you need a set of tools we call Salesforce DX (Developer Experience). It includes the Salesforce Command Line Interface (CLI) and Visual Studio Code, which, with the Salesforce Extension Pack, is the recommended code editor for developing on the Salesforce Platform.
To clone the repository that contains the sample app, you use Git, a version control system. Follow the instructions in this step to install Git. Then follow the instructions in the sample app readme file to clone the sample app repository and deploy the sample app to your Trailhead Playground.
Create a New Trailhead Playground
For this project, you need to create a new Trailhead Playground. Scroll to the bottom of this page, click the down arrow next to Launch, and select Create a Trailhead Playground. It typically takes 3–4 minutes to create a new Trailhead Playground.
Get Your Trailhead Playground Username and Password
Let's get started. Go to your Trailhead Playground. (If it’s not already open, scroll to the bottom of this page and click Launch.) If you see a tab in your org labeled Get Your Login Credentials, great! Skip ahead to step 1.
Otherwise, from the App Launcher ( ), find and open Playground Starter and follow the steps. If you don’t see the Playground Starter app, check out Find the Username and Password for Your Trailhead Playground on Salesforce Help.
- Click the Get Your Login Credentials tab and take note of your username.
- Click Reset My Password. This sends an email to the address associated with your username.
- Click the link in the email.
- Enter a new password, confirm it, and click Change Password.
Get Git Command Line
- Install Git from https://git-scm.com/downloads. Accept all of the default installation settings.
- Confirm that Git is installed. In Terminal (macOS) or Command Prompt (Windows), enter this command:
gitThe output should be a list of git commands.
Deploy the App
- Deploy the app to your Trailhead Playground org by following the instructions from the project readme.
Congratulations! You’ve successfully set up the LWC-Recipes sample app. In the next step, you walk through the app.
