Create a Hello World Lightning Web Component
Create a Salesforce DX Project
Now that you’ve set up your development environment, you can create a simple Lightning web component.
- In Visual Studio Code, open the Command Palette by pressing Ctrl+Shift+P (Windows) or Cmd+Shift+P (macOS).
- Type
SFDX.
- Select SFDX: Create Project.
- Press Enter to accept the standard option.
- Enter
HelloWorldLightningWebComponentas the project name.
- Press Enter.
- Select a folder to store the project.
- Click Create Project. You should see something like this as your base setup.


Authorize Your Trailhead Playground
- In Visual Studio Code, open the Command Palette by pressing Ctrl+Shift+P (Windows) or Cmd+Shift+P (macOS).
- Type
SFDX.
- Select SFDX: Authorize an Org.
- Press Enter to accept the Project Default login URL option.
- Press Enter to accept the default alias.
This opens the Salesforce login in a separate browser window.
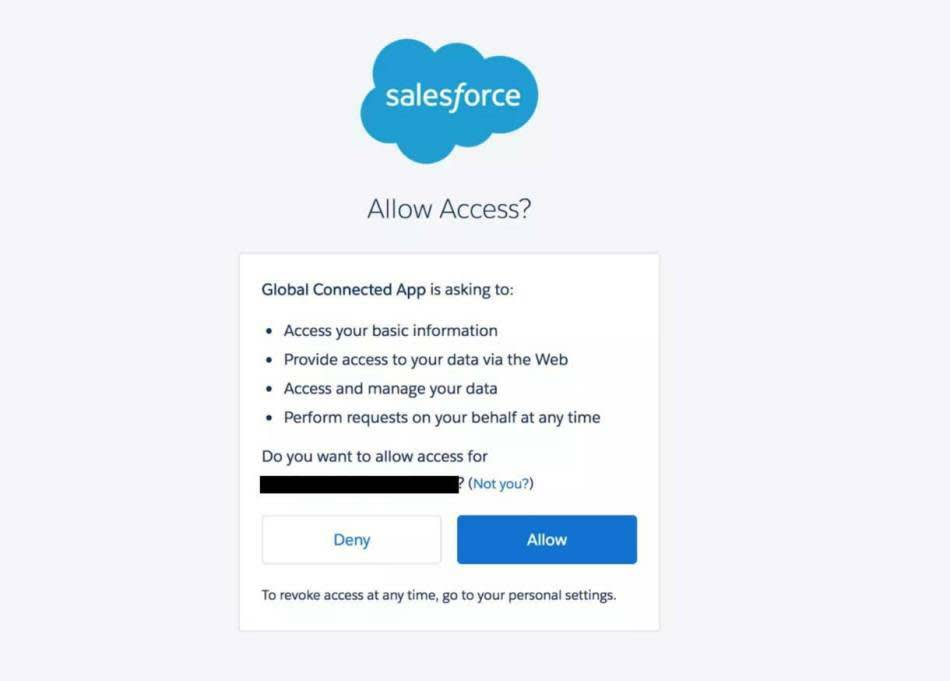
- Log in using your Trailhead Playground credentials.
- If prompted to allow access, click Allow.
- After you authenticate in the browser, the CLI remembers your credentials. The success message should look like this:

Create a Lightning Web Component
- In Visual Studio Code, open the Command Palette by pressing Ctrl+Shift+P (Windows) or Cmd+Shift+P (macOS).
- Type
SFDX.
- Select SFDX: Create Lightning Web Component.
- Enter
helloWorldfor the name of the new component.
- Press Enter to accept the default
force-app/main/default/lwc. - Press Enter.
- View the newly created files in Visual Studio Code.

- In the HTML file,
helloWorld.html, copy and paste the following code.<template> <lightning-card title="HelloWorld" icon-name="custom:custom14"> <div class="slds-m-around_medium"> <p>Hello, {greeting}!</p> <lightning-input label="Name" value={greeting} onchange={changeHandler}></lightning-input> </div> </lightning-card> </template> - Save the file.
- In the JavaScript file,
helloWorld.js, copy and paste the following code.import { LightningElement } from 'lwc'; export default class HelloWorld extends LightningElement { greeting = 'World'; changeHandler(event) { this.greeting = event.target.value; } } - Save the file.
- In the XML file
helloWorld.js-meta.xml, copy and paste the following code.<?xml version="1.0" encoding="UTF-8"?> <LightningComponentBundle xmlns="http://soap.sforce.com/2006/04/metadata" fqn="helloWorld"> <apiVersion>63.0</apiVersion> <isExposed>true</isExposed> <targets> <target>lightning__AppPage</target> <target>lightning__RecordPage</target> <target>lightning__HomePage</target> </targets> </LightningComponentBundle> - Save the file.
Deploy to Your Trailhead Playground
- Right-click the
defaultfolder underforce-app/main.
- Click SFDX: Deploy This Source to Org.
- In the Output tab of the integrated terminal, view the results of your deployment. If the command ran successfully, a Deployed Source message lists the three files that were uploaded to the org.
Add Component to App in Lightning Experience
- In Visual Studio Code, open the Command Palette by pressing Ctrl+Shift+P (Windows) or Cmd+Shift+P (macOS).
- Type
SFDX.
- Select SFDX: Open Default Org.
This opens your Trailhead Playground in a separate browser.
- Click
 then select Setup.
- In Quick Find, enter
Home, then select Home in the Feature Settings section.
- For Advanced Seller Home, toggle the setting to Inactive.
- In Quick Find, enter
Session, then select Session Settings.
- Un-check the box for Enable secure and persistent browser caching to improve performance. This allows you to see the changes to the page quicker.
- Click Save.
- From the App Launcher (
 ), find and select Sales.
- Click
 then select Edit Page.
- Drag the
helloWorldLightning web component from the Custom area of the Lightning Components list to the top of the Page Canvas.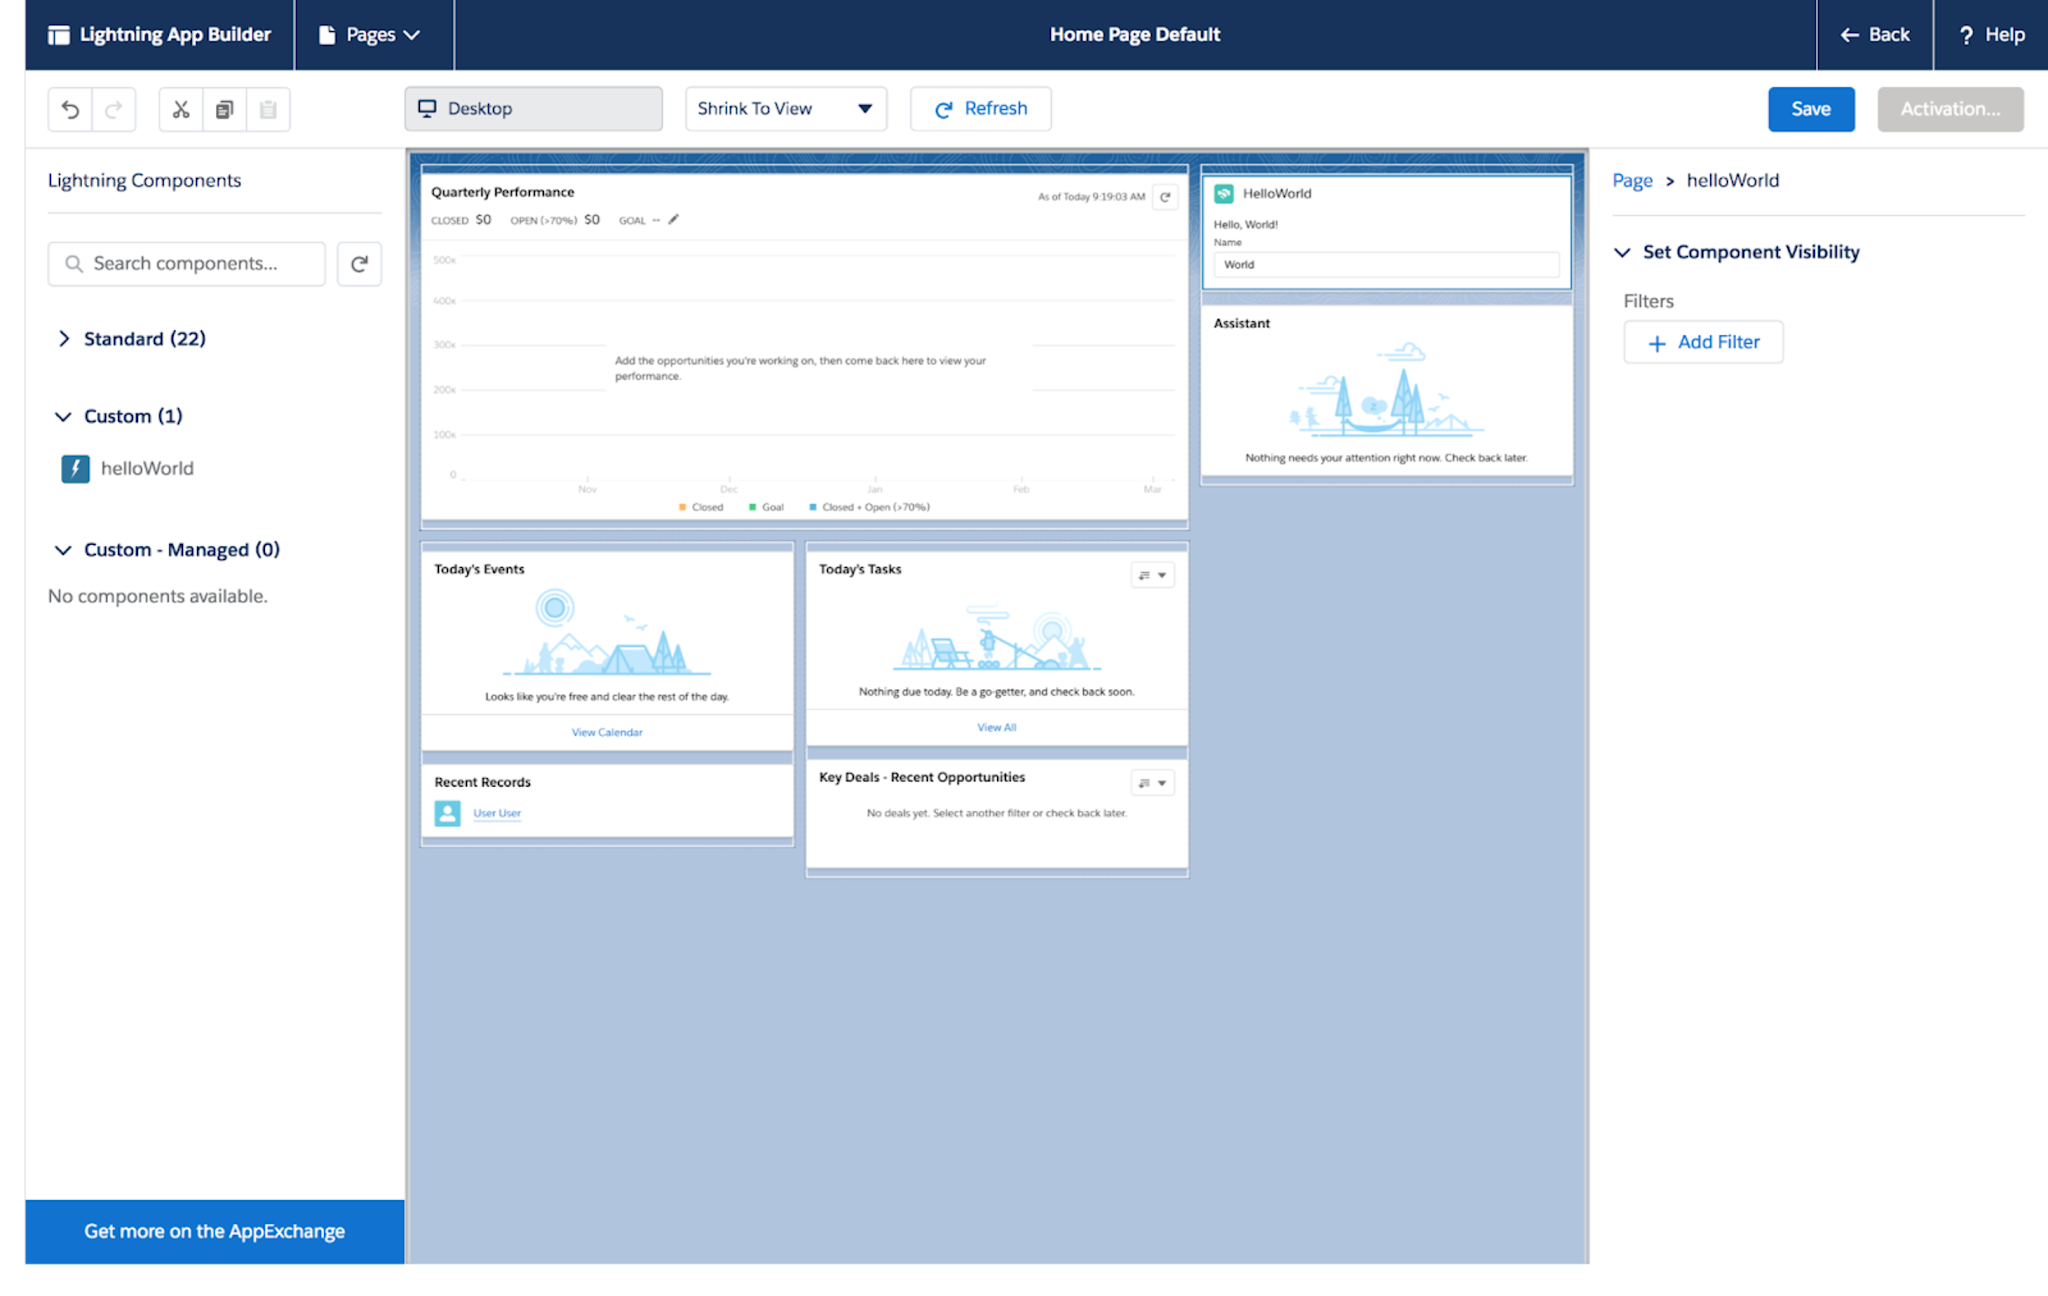
- Click Save.
- Click Activate.
- Click Assign as Org Default.
- Click Save.
- Click Save again, then click
 to return to the page.
- Refresh the page to view your new component.
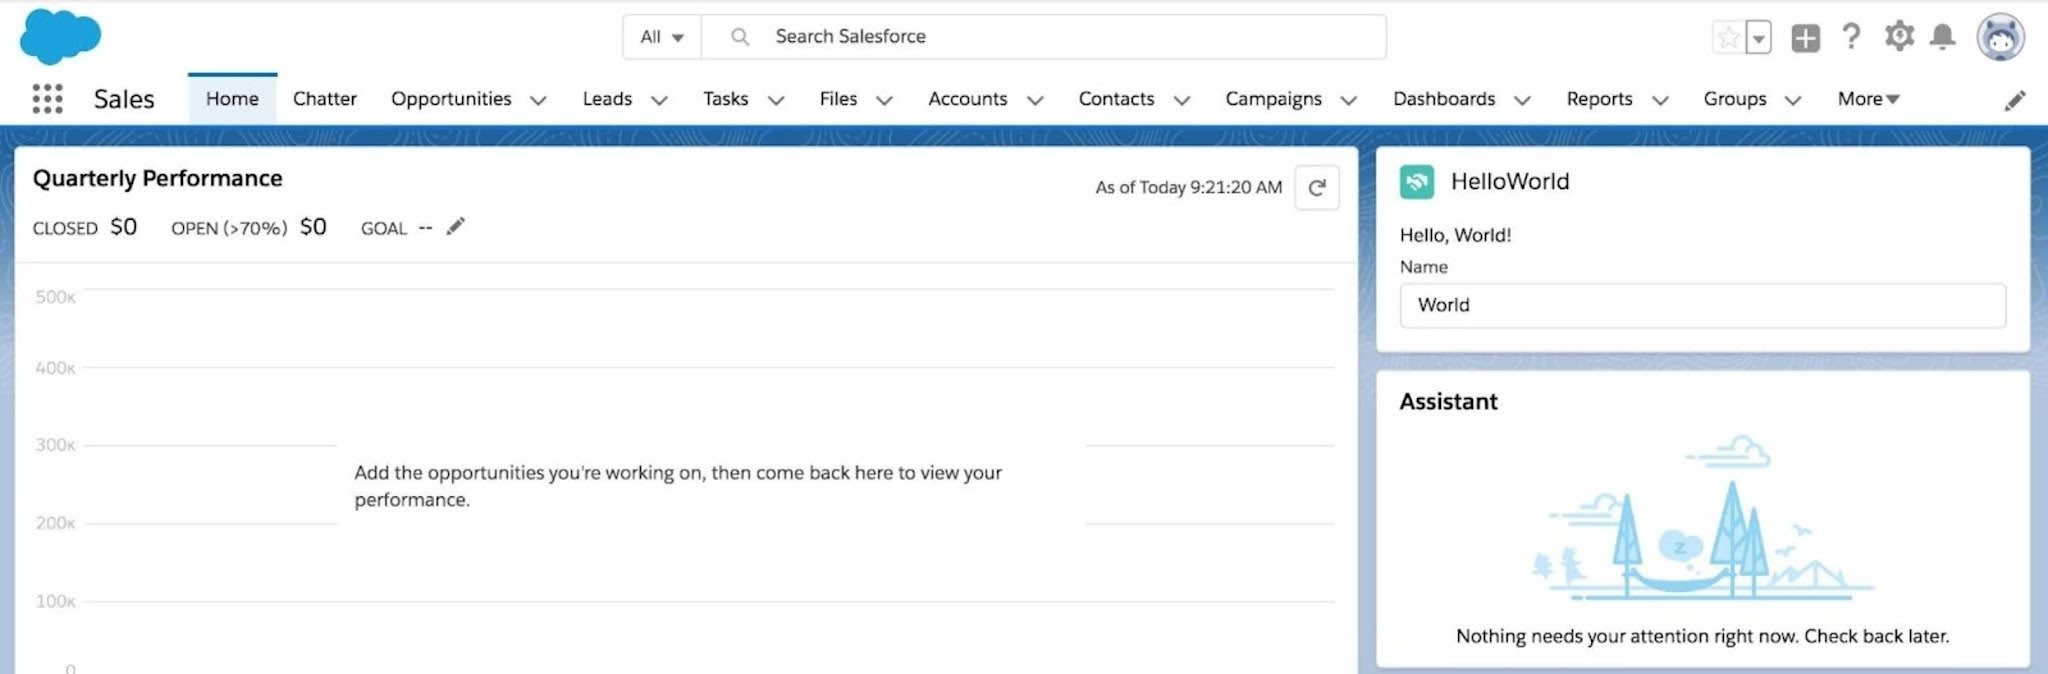
You’ve officially made your first Lightning web component!
What’s next?
Check out the code samples and SDK’s on https://developer.salesforce.com/code-samples-and-sdks. Add more to your helloWorld component, check out the other sample components, and build your own components! As you experiment, use the Component Reference to learn more about how to code Lightning web components.