Get to Know the Easy Spaces Sample App
Now that the app is deployed, let’s tour it. Start by exploring the Easy Spaces Lightning app with the Reservation Manager then the Space Designer.
Discover the Reservation Manager
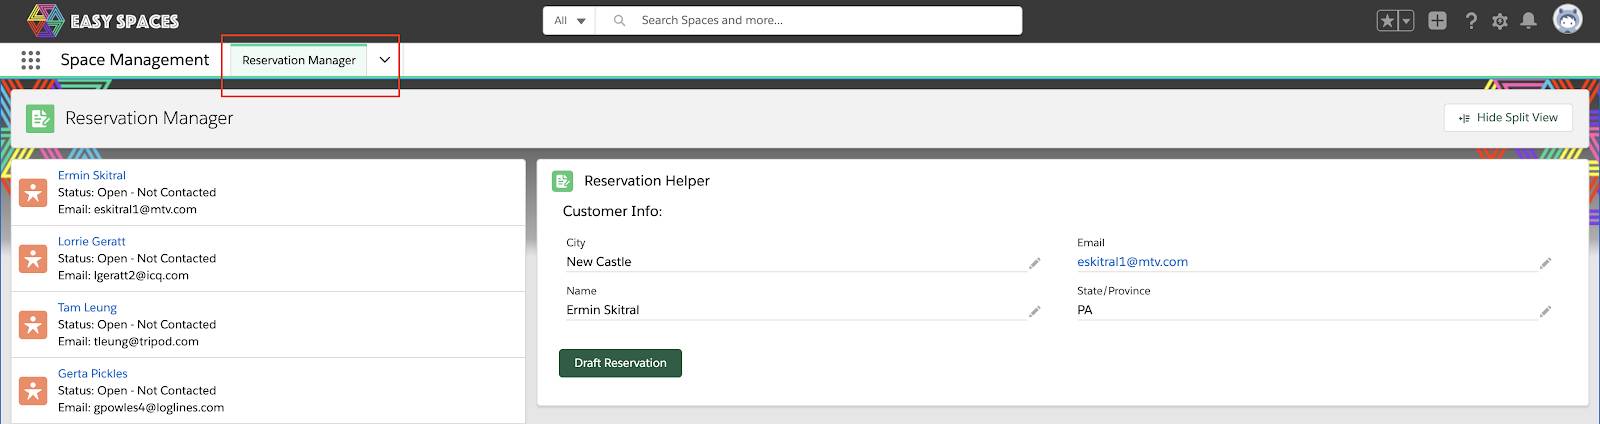
Easy Spaces agents can use the Reservation Manager to browse the list of leads and contacts that need reservations. The Reservation Manager is a Lightning page built with custom Lightning web components and flows.
To make a reservation, select a Lead or Contact card and create a draft reservation record to capture details like the date when space is needed, and the number of people for which the location needs to be reserved.
- From the App Launcher, find and select the Space Management app. This card opens the Lightning app. Notice that the app is a Salesforce Console app.
- Make sure that the Reservation Manager navigation item is selected in the navigation menu.
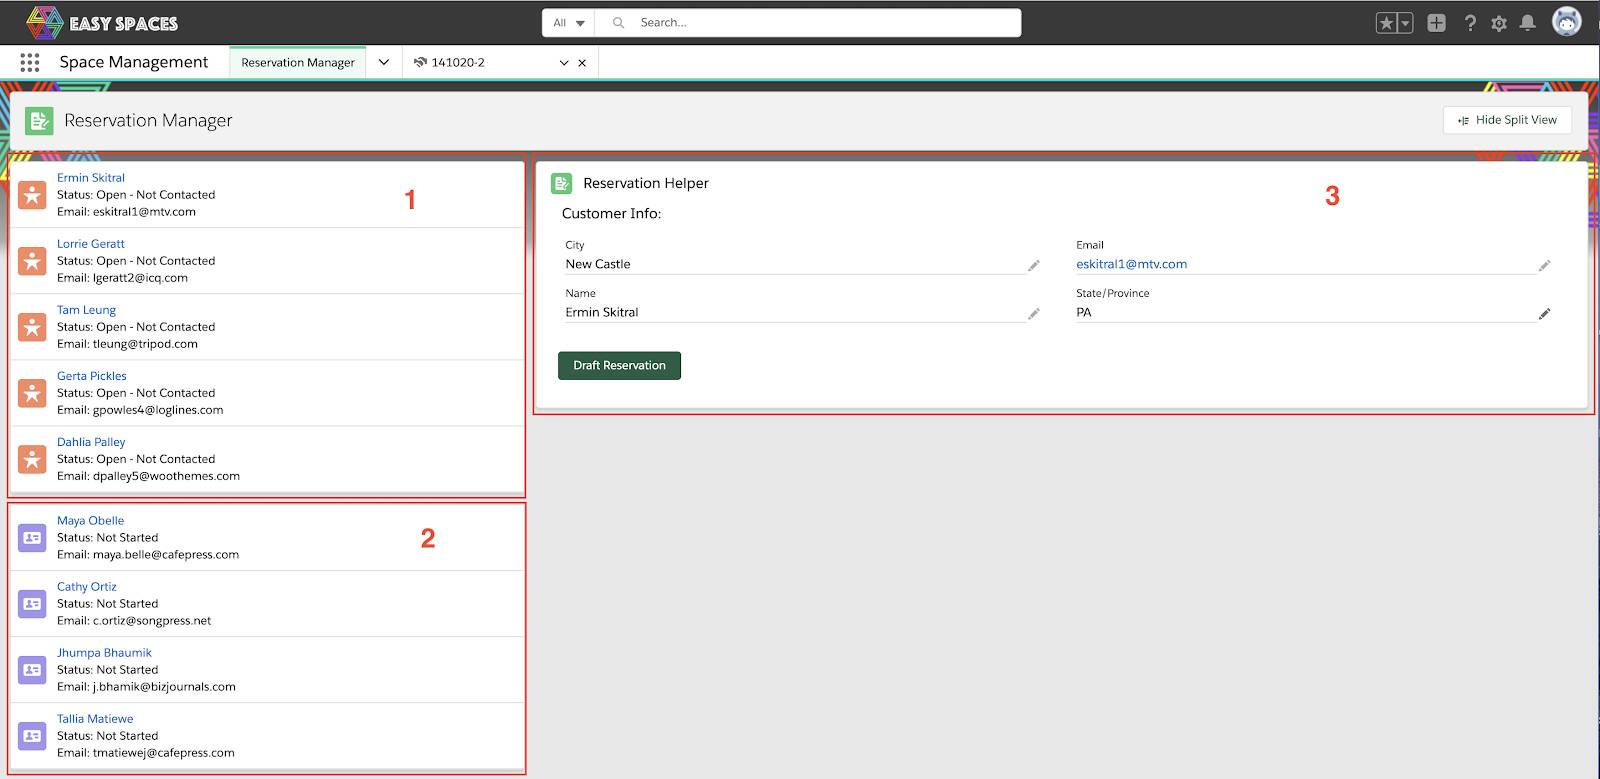
The page is a custom Lightning page template that contains three main components: a component that displays leads that need reservations (1), a component that displays contacts that require reservations (2), and a component that takes data inputs from agents to draft reservations (3).
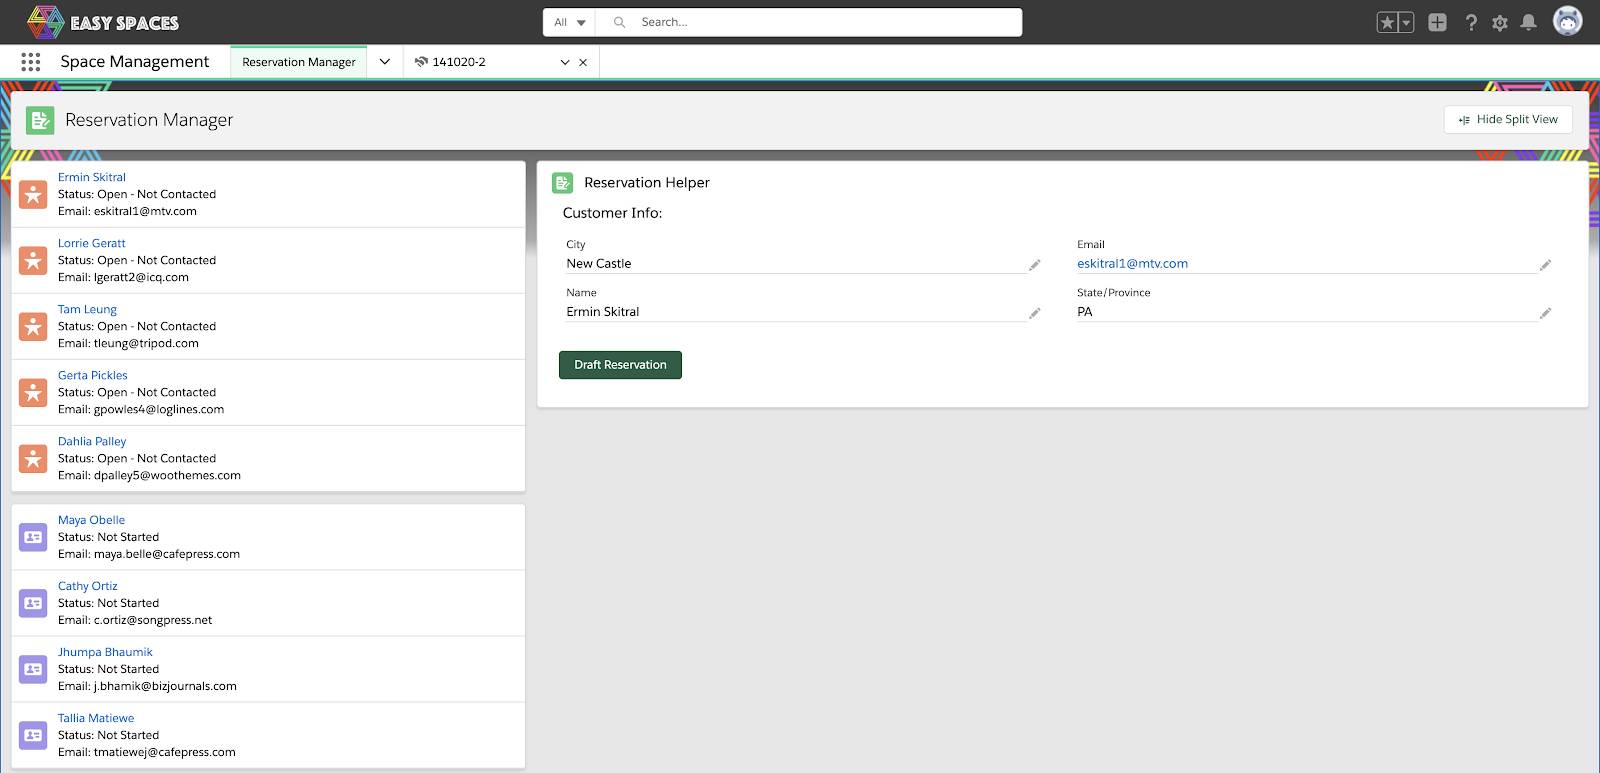
- From the Lead List, click on the Lead card. Make sure that the lead has City, State/Province, Name, and Email pre-populated.
- Click the Draft Reservation button and fill in the following reservation details. Feel free to modify these fields however you like.
- Where do they want the space?: Select any value from the picklist
- When do they need the space?: Oct 9, 2020
- For how many people?: 2-250
- How long do they want the space?: 7 days
-

- Click the Next button. Notice a new reservation record is created and the Details sub tab opens displaying the reservation detail page.
- Close the Reservation record sub tab and return to the Reservation Manager
- From the Contact List Component, select a Contact.
- Repeat steps 2 and 3, providing your own reservations details for the contact, and notice the new reservation record.
Discover the Spaces Designer
Now, let’s design a space for one of the draft reservations.
- Choose the Space Designer menu from the console app navigation item
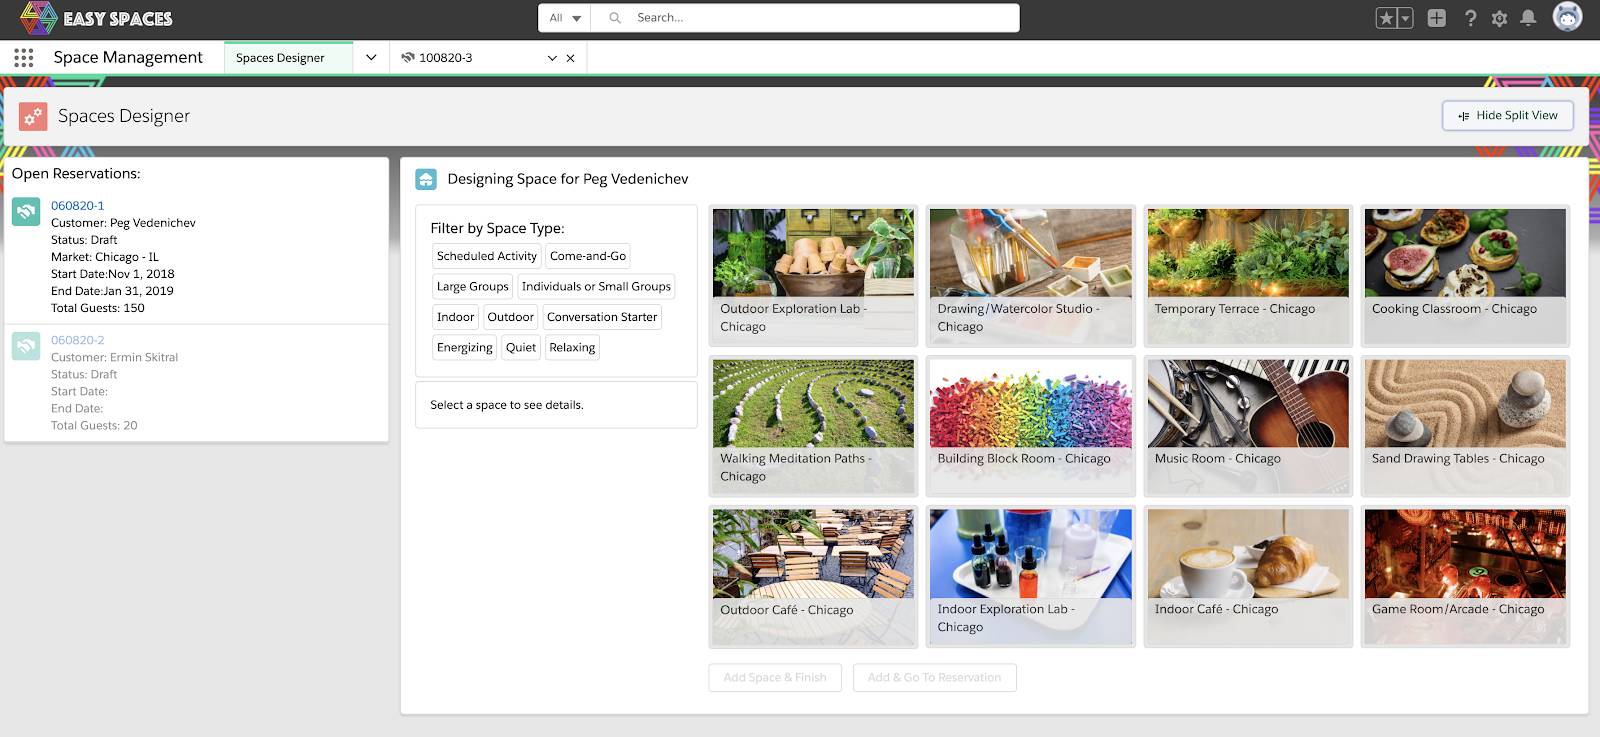
- From the Open Reservations list, click one of the Open Reservation items. (Note: Click in the detail area, not on the hyperlinked record name.)
- From Filter By Space Type, select Scheduled Activity and Large Groups.
- Select Outdoor Exploration Lab.
- Click Add and Go To Reservation.
Notice that you navigated to the reservation record and the reservation moved from the draft stage to the proposal ready stage. Also notice that the Open Reservations List items refreshed to show only reservations in draft state.

Feel free to design some more spaces from the open reservation list.
Now that you know how the Space Designer Lightning page works, let’s move on to the next section to explore the various unlocked packages that make up this app.