Create Insights Using Data Cloud
Learning Objectives
In this project, you’ll:
- Review insight functionality.
- Create a calculated insight with the builder.
- View your insights.
Configure Your Environment
This badge is part of a series covering Data Cloud concepts. In this project, you continue building out those concepts by focusing on calculated insights. To do that, first complete the Create a Data Stream in Data Cloud and Quick Start: Create an Identity Resolution Ruleset projects. These projects established the data and processes that are needed for the calculated insights you’re going to create. You use the same Developer Edition org from those projects to complete this one. These Developer Editions are only available for a limited period—be sure to complete this project before your org expires.
About Data Cloud Insights
After connecting, mapping, and unifying data, Data Cloud users can enhance their data by querying data and building insights that meet business use cases and goals. There are two types: calculated and streaming. Calculated insights allow for complex calculations based on stored data, and streaming insights are created based on real-time data.
In this project, we focus on calculated insights. You can use a calculated insight to define and calculate multidimensional metrics on your entire digital state in Data Cloud. These can be used in several ways.
- Evaluate performance at the channel level.
- Encapsulate business logic for common calculations (such as lifetime value).
- Understand purchasing and browsing behavior.
- Speed up queries by having calculations pre-aggregated.
- Enrich CRM data by using insights across Salesforce.
- Simplify segmentation.
- Visualize the insights in CRM Analytics to understand data patterns.
Review Terminology
This module uses some terms that are helpful to know about insights.
-
Measure: An aggregated value of attributes, for example a customer’s total amount spent or an average order amount.
-
Dimensions: A qualitative value used to categorize a measure. For example, if you want to see every customer’s total amount spent, the customer ID could be a dimension associated with the measure of the total amount spent.
-
Insight Builder: A tool that allows users to create insights with limited knowledge of SQL.
Verify Unification
To make sure the org you used in the previous project is ready for this challenge, let’s verify that the Identity Resolution rule from the Create an Identity Resolution Ruleset has run. It starts automatically. You know it’s done when data shows up in the Resolution Summary section.
- From your Developer Edition org, search for and select Data Cloud in the App Launcher.
- From Data Cloud, select the Identity Resolutions tab.
- Select the ruleset you created in the previous project.
- Verify data is showing.
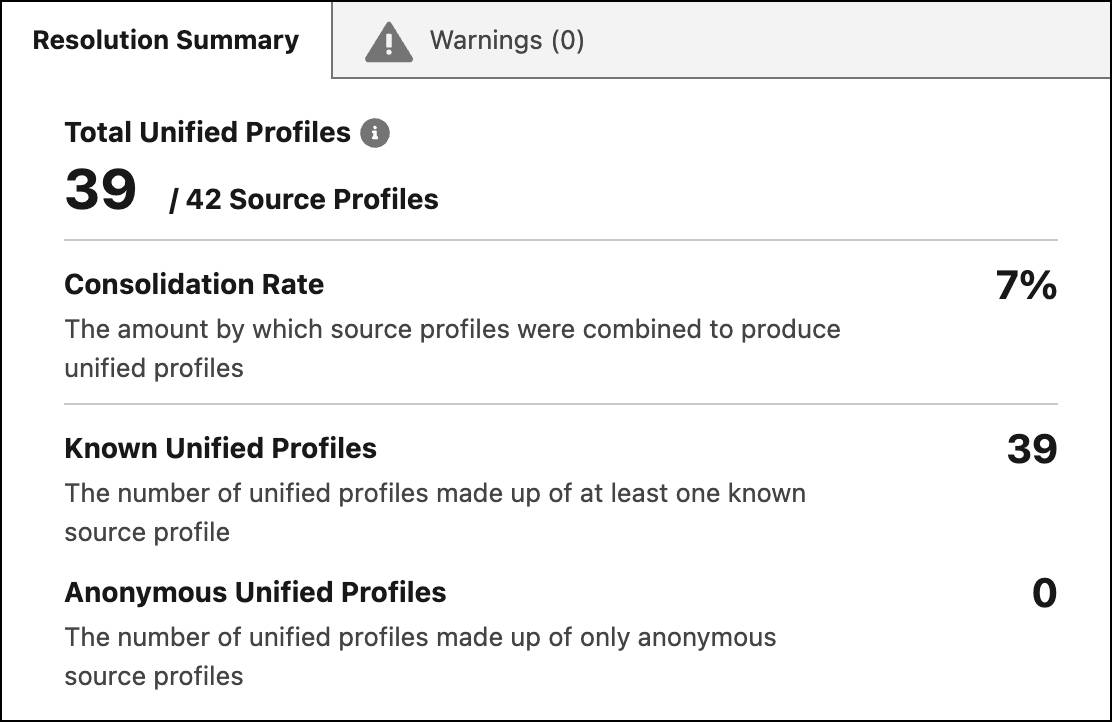
It may take some time, so if you don’t see data, try back later!
Create a Calculated Insight from the Builder
You create a simple calculation in this project—you calculate the number of cases by status for each Unified Individual. Because you only have one org, this is a simple calculation. However, if you have multiple orgs or even different service systems (for example, Zendesk), having a total number of cases across all orgs and systems can be very useful. Before we can create an insight, we need to add more data to Data Cloud.
Add a Data Stream for Case
- From Data Cloud, go to the Data Streams tab and click New.
- Select Salesforce CRM and click Next.
- Select All Objects and search for
Case.
- Select Case and click Next.
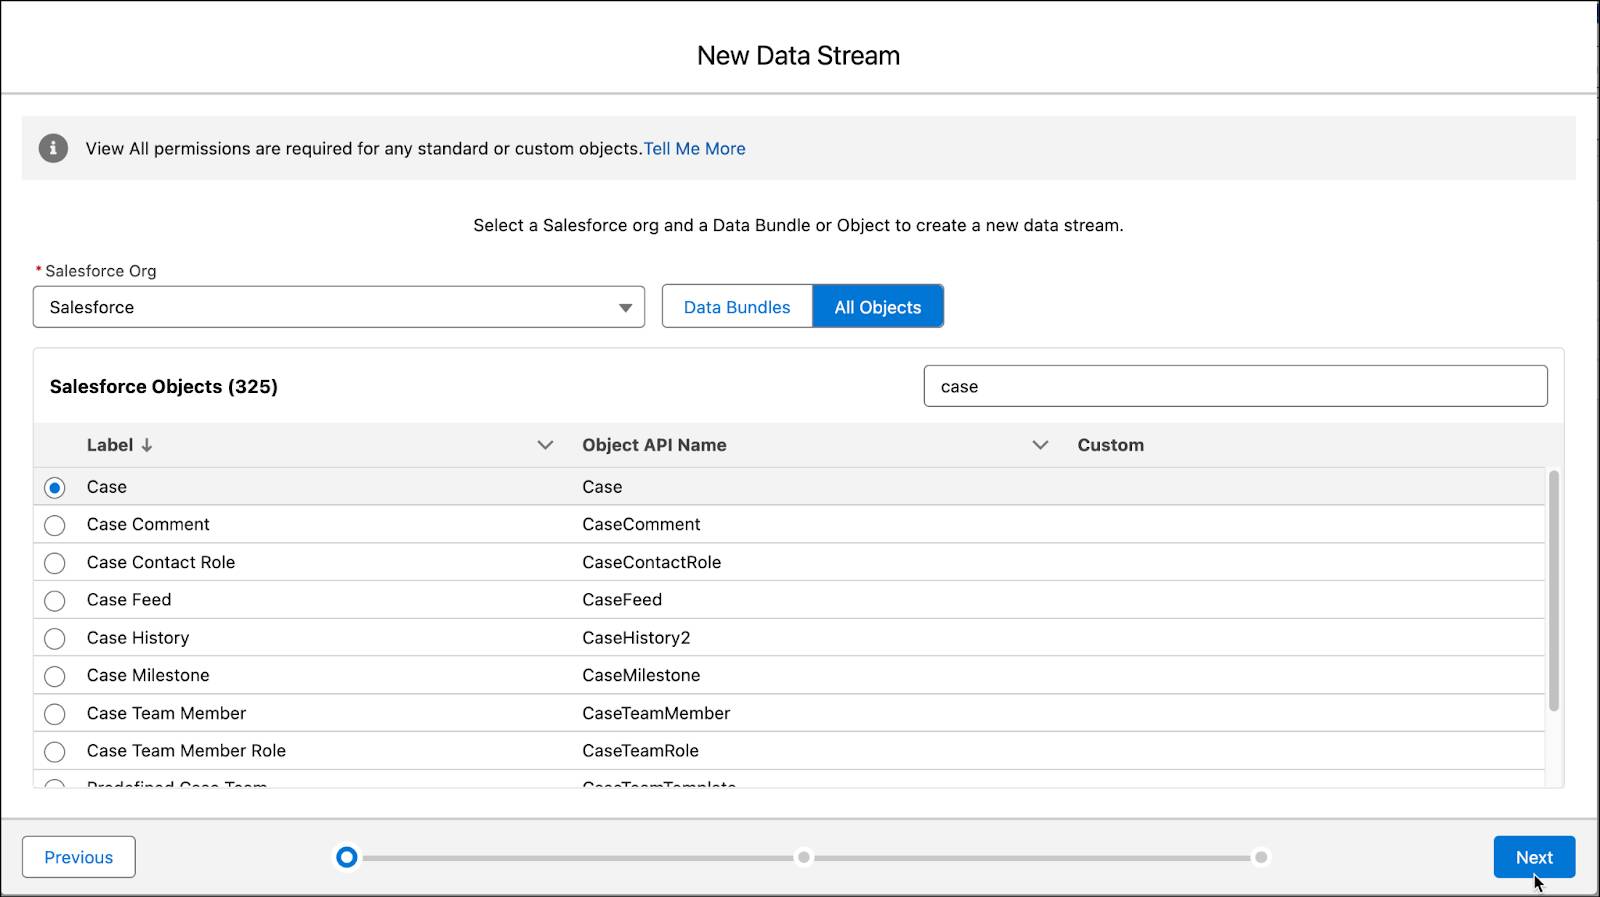
- Leave all data stream fields selected and click Next.
- Set the Category to Engagement (1) and set the Event Time Field to Created Date (2).
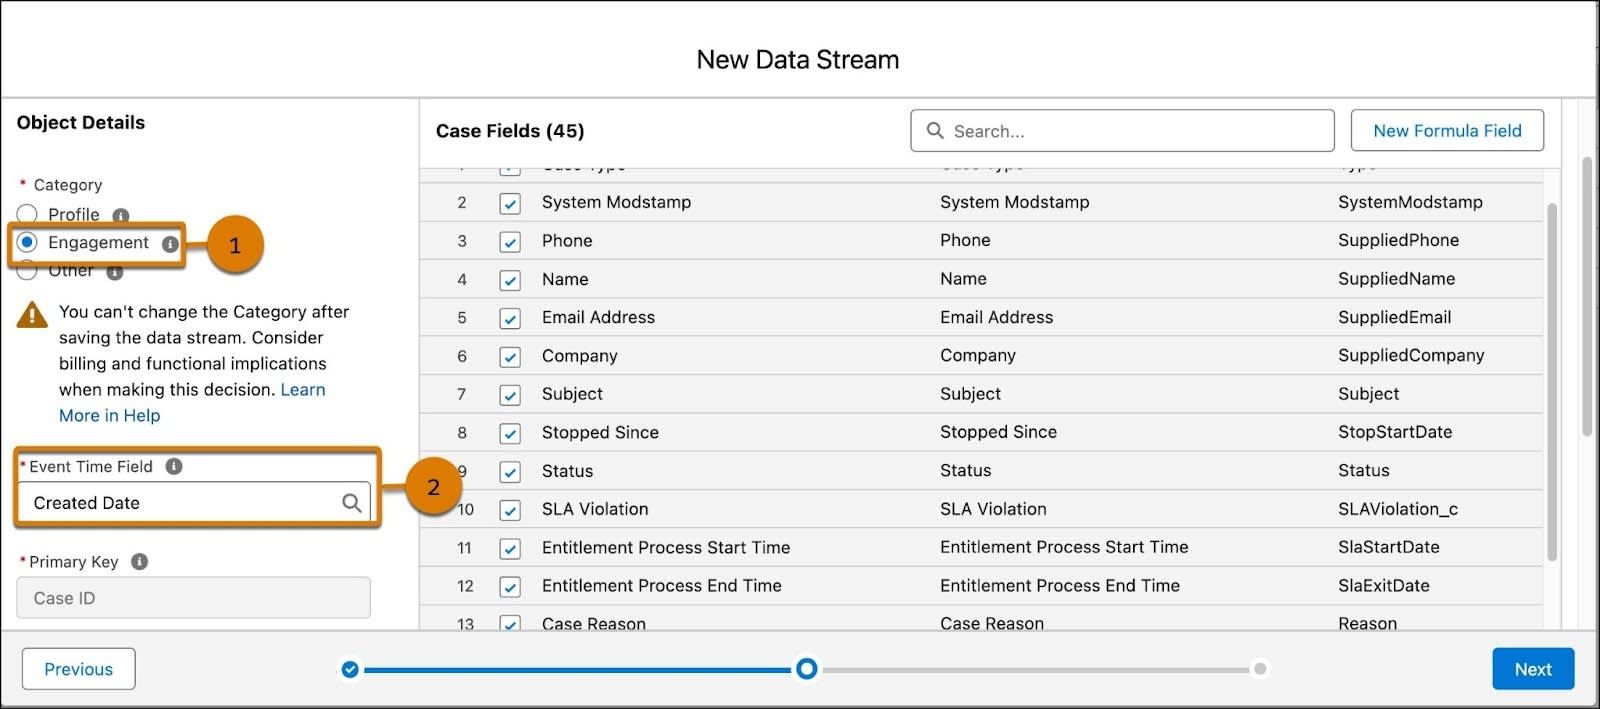
- Click Next.
- Keep the name (Case_Home) and default data space and click Deploy.
Map Case to a Data Model Object
Now you have a Data Stream and a corresponding data lake object (DLO). The next step is to map this DLO into one or more data model objects (DMO). Case is a Standard Object included in the Data Cloud Data Model, so map into that standard object. You can, of course, create custom objects or extend standard objects.
- On the Case data stream, in the Data Mapping section, click Start.
- From the Data Model entities area, click Select Objects.
- Search for Case in the Search field.
- Click the + icon (1) to add the Case standard object. If the + icon didn’t turn green, click it again.

- Click Done.
This automatically maps several fields.
- There are several more fields to map. Search for these fields in Case_Home and then map to the Case DMO.
-
Status to Case Status
-
Account Id to Account
-
Contact Id to Individual
- Click Save & Close.
Create the Calculated Insight
Now let’s create a calculated insight from this data.
- Go to the Calculated Insights tab and click New.
- With the default data space pre-chosen, select Create with Visual Builder and click Next.
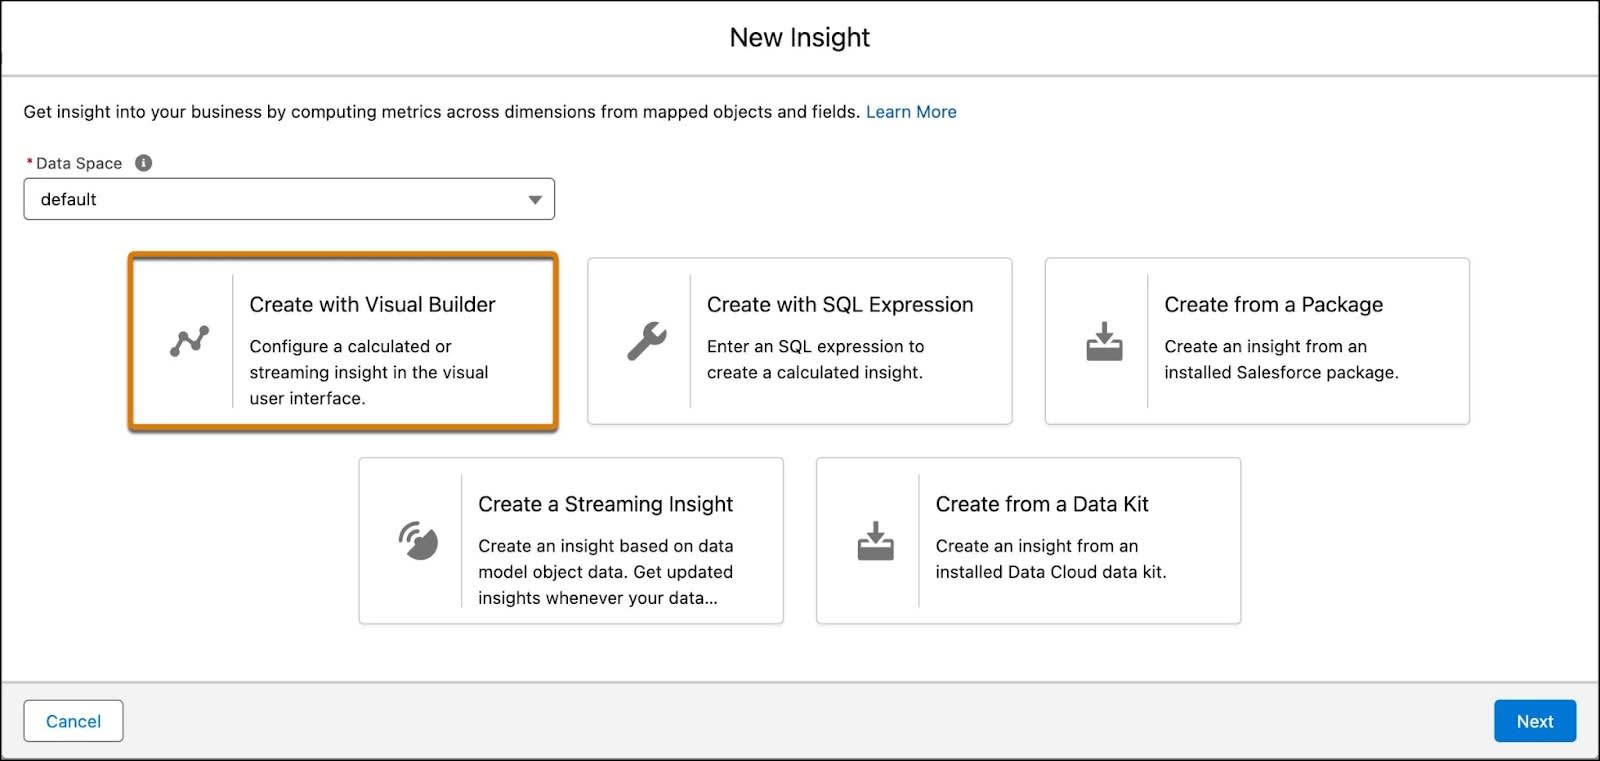
- Select Create a Calculated Insight and click Next.
- Search for and then select Unified Individual as your first object in the insight.

Unified Individual is the DMO created after running identity resolution rulesets and unifying individual data.
- Click Next.
Add a Join
- In the Visual Insights Builder, click the + next to Unified Individual and select Join.
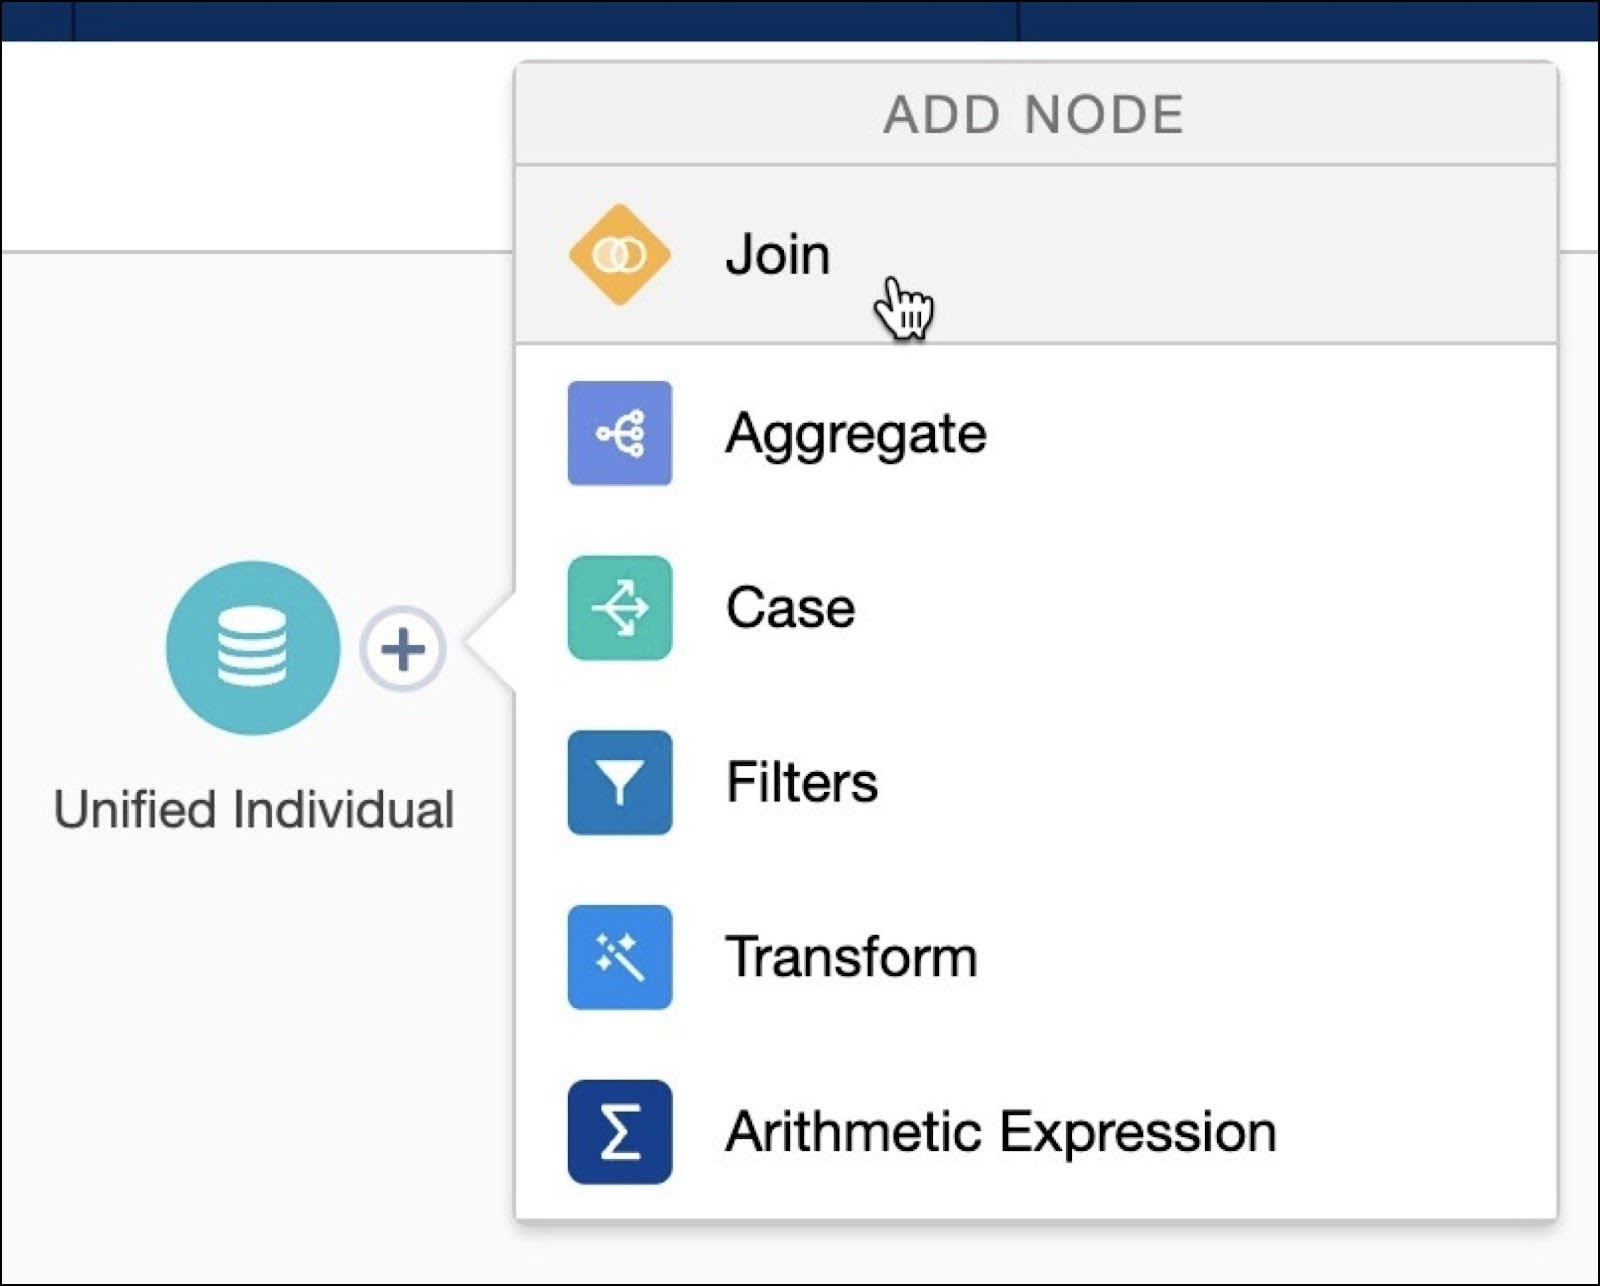
- Select Case and then click Next.
- Notice that this automatically adds and joins multiple objects to create a proper join from Unified Individual to Case.
- Click Apply (1) to verify your selection.
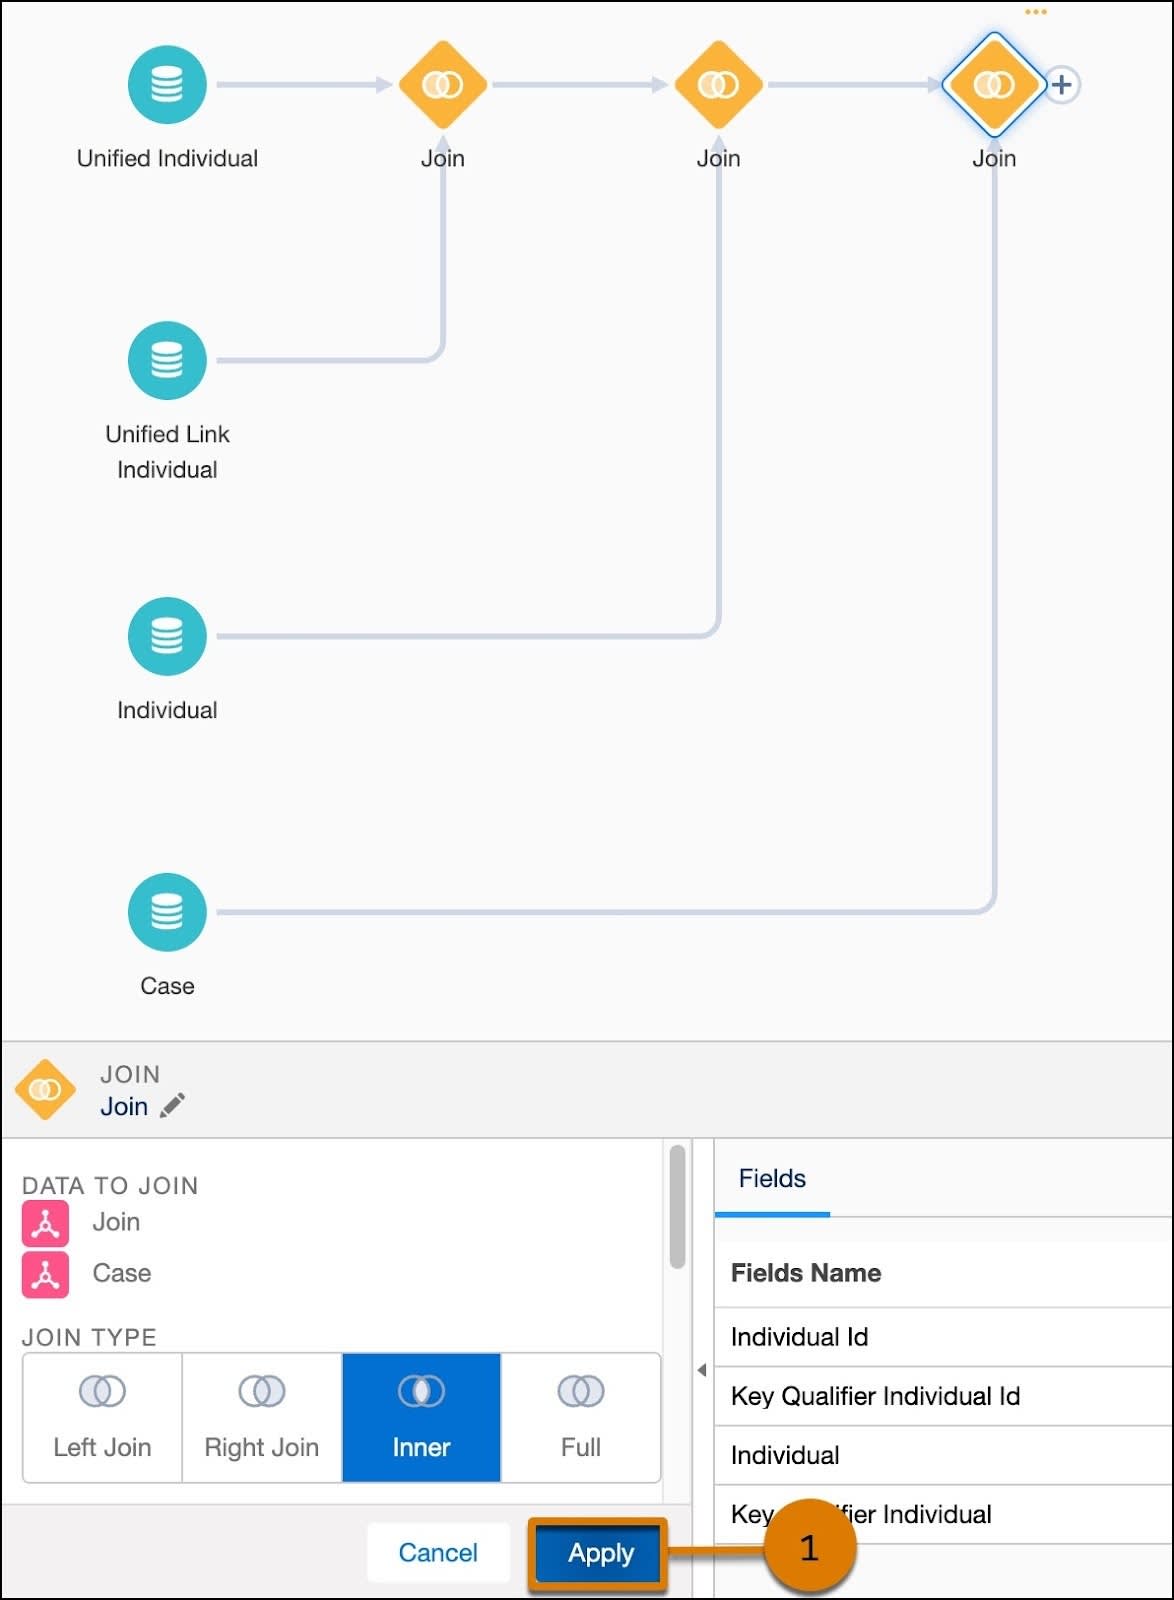
On the same canvas, you can continue building your insight.
Add an Aggregate
Let’s now add the metric we want to calculate, in this case the number of cases.
- Click the + on the last Join and select Aggregate.
- For Measures, click + (1). From the Count section, select Case Id (2).
- Tip: Use the search field to locate Case Id easily.
- Click Next (3).
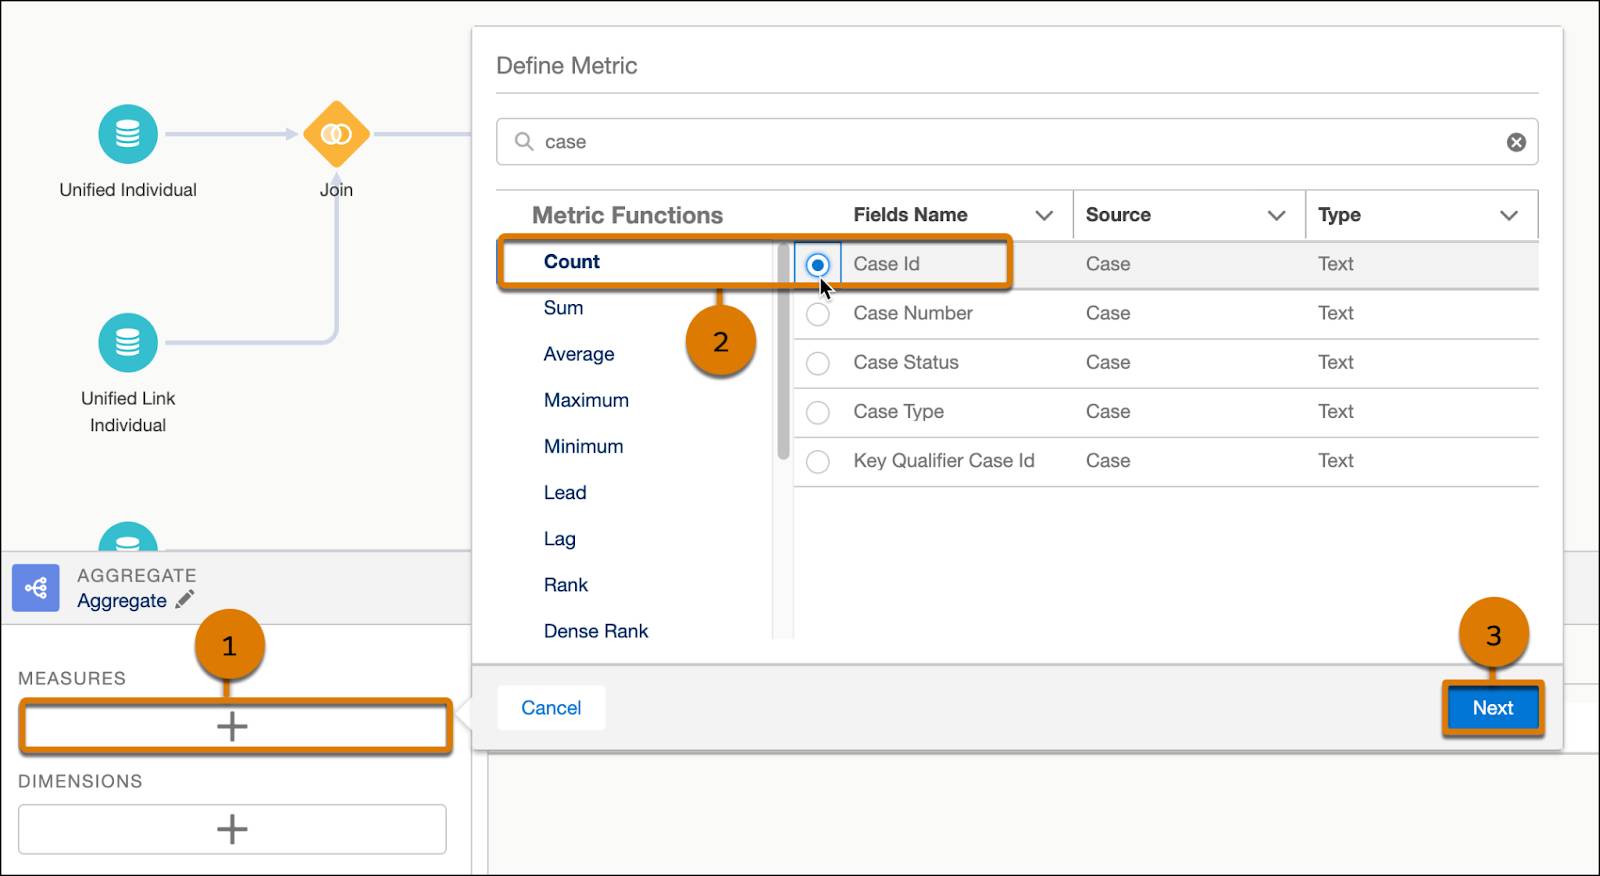
- For Metric Name enter
Count Case ID. Notice Metric API Name automatically populates withCount_Case_ID.
- Click Apply.
Add Dimensions
Next we add a dimension, which is how you group the data in an insight.
- For Dimensions, click + (under the Measures +) and add Unified Individual Id from the source, Unified Individual.
- Click Next.
- For Dimension Name enter
Unified Individual.
- Click Apply.
- Follow these steps to add Case Status named
Case Statusas a dimension.
- Click Apply for the Aggregate selections.
Save Your Work
- Select Save and Run.
- Name your calculated insight
Unified Individual Case Countsand click Next.
- Leave the schedule to the default, Not Scheduled, and click Enable.
- On the Calculated Insights tab, click Publish Now from the dropdown menu.
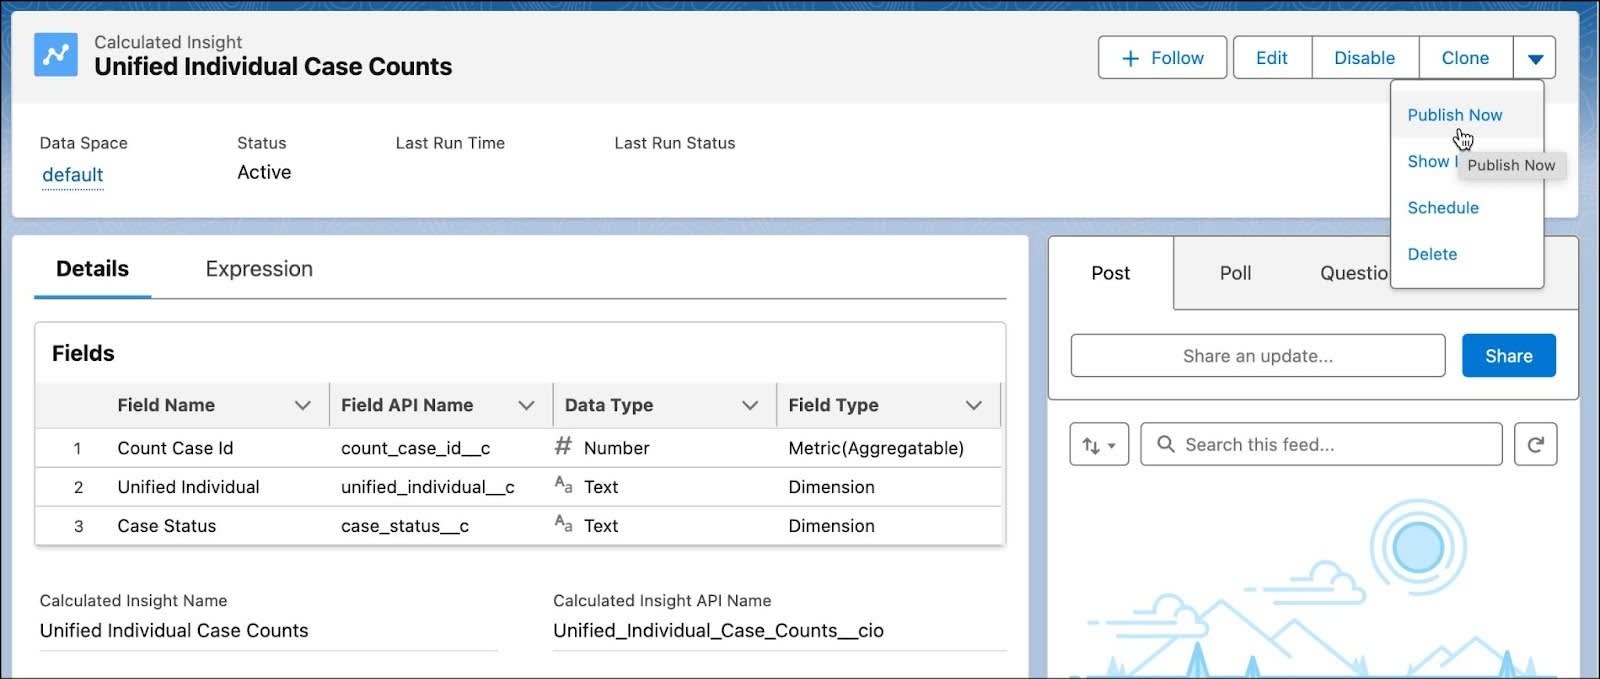
If you don’t see Publish Now, refresh your browser and then select Publish Now from the dropdown found on the Insights home page.

After you publish your calculated insight, wait for it to be available. After that, Data Cloud automatically manages your published insights. The insight is ready to use when the Status changes from Processing to Active.
By creating this calculated insight with a join and an aggregate, you have defined complex metrics to enrich your data. Calculated insights can be used to define segment criteria and personalization attributes for activation using metrics, dimensions, and filters. Use these direct and related attributes to build segments, or even clean data before you segment. You can also add them to activations to enable journey decisions and for message personalization in Marketing Cloud Engagement.
Verify Your Work
Now that you have an insight created, check your work and click Verify. For this exercise, we’re just checking that the insight was set up correctly–you don’t have to wait for the insight to process before you verify your work.
View Your Insight
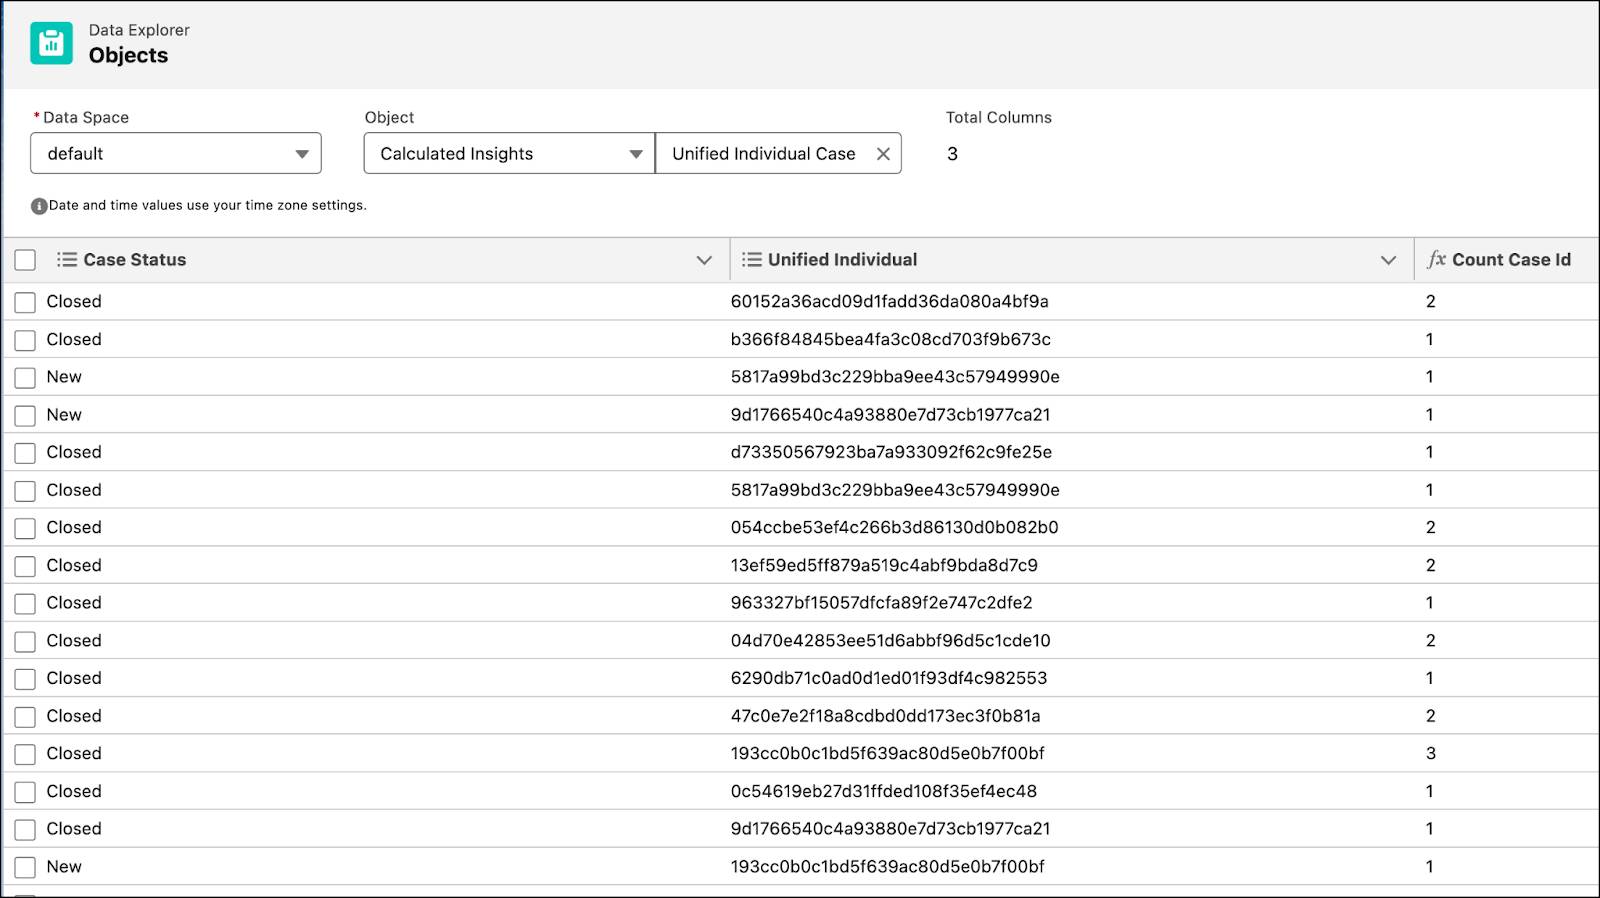
Once your insight has been processed, you can view the results in Data Explorer. Note: Even after the Calculated Insight is active, it still may take a few minutes for Data Explorer to return results. Also be sure you published your insight.
- Go to the Data Explorer tab.
- Select Calculated Insights from the dropdown.
- Then select the corresponding insight, Unified Individual Case Counts.
What’s Next?
So far you created data streams, identity rulesets, and a calculated insight to get and build the data you need to get the desired results. But what’s next? Why, segmenting those results, of course! Then you can use them to make decisions and create targeted lists. Keep practicing Data Cloud skills and to get started with segmentation, head to the next project Quick Start: Create a Data Cloud Segment.
Resources
- Trailhead: Data Cloud Insights
- Trailhead: Insights Builder in Data Cloud
- Salesforce Help: Data Cloud Resources
