Connect Flows to Agentforce with Actions
Learning Objectives
In this badge you’ll:
- Test agent actions with sample data in Agentforce Builder.
- Create a custom agent action to use Flow for automation.
Bring Agentforce into the Conversation
Generative AI has made it possible to interact with computers in the same way you interact with your friends and coworkers: with conversational language. And with our Agentforce platform, you can add the amazing power of generative AI to Salesforce so your customers and employees can interact conversationally, too.
Agentforce is a team of autonomous agents that help your Salesforce users with common business tasks, and it’s seamlessly built into the Salesforce Platform. Using everyday language, users can ask their Agentforce to get the latest hot leads, summarize a case, or draft an email to a potential customer.
As you learn in the Agentforce Basics Trailhead badge, actions are the building-blocks that allow an agent to engage naturally. Essentially, actions are jobs the agent performs. For example, an action called Query Records can find and retrieve Salesforce records based on a user’s request and conditions they specify. Agentforce comes with many actions you can use right out of the box, called standard actions, and together they allow for some really sophisticated engagement.
In this badge you explore standard agent actions, and learn how to test them in Agentforce Builder. Then you create a custom action that uses an existing flow that we’ve already set up to initiate a return for a recent order.
Sign Up for a Special Developer Edition Org
To complete this project you need to sign up for a special Agentforce-enabled Developer Edition org.
- Sign up for a special Developer Edition org. Fill out the form:
- For Email, enter an active email address.
- For Username, enter a username that looks like an email address and is unique, but it doesn't need to be a valid email account (for example, somethingfunny@example.com).
- For Email, enter an active email address.
- After you fill out the form, click Sign me up. A confirmation message appears.
- When you receive the activation email (this might take a few minutes), open it and click Verify Account.
- Complete your registration by setting your password and challenge question. Tip: Save your username, password, and login URL in a secure place—such as a password manager—for easy access later.
- You are logged in to your Developer Edition.
Now connect your new Developer Edition org to Trailhead.
- Make sure you’re logged in to your Trailhead account.
- In the Challenge section at the bottom of this page, click the org name and then click Connect Org.
- On the login screen, enter the username and password for the Developer Edition you just set up.
- On the Allow Access? screen, click Allow.
- On the Want to connect this org for hands-on challenges? screen, click Yes! Save it. You are redirected back to the challenge page and ready to use your new Developer Edition to earn this badge.
Enable Agentforce Studio
Let’s make sure Agentforce Studio is turned on in your new org.
- Click
 and click Setup. The Setup page opens in a new tab.
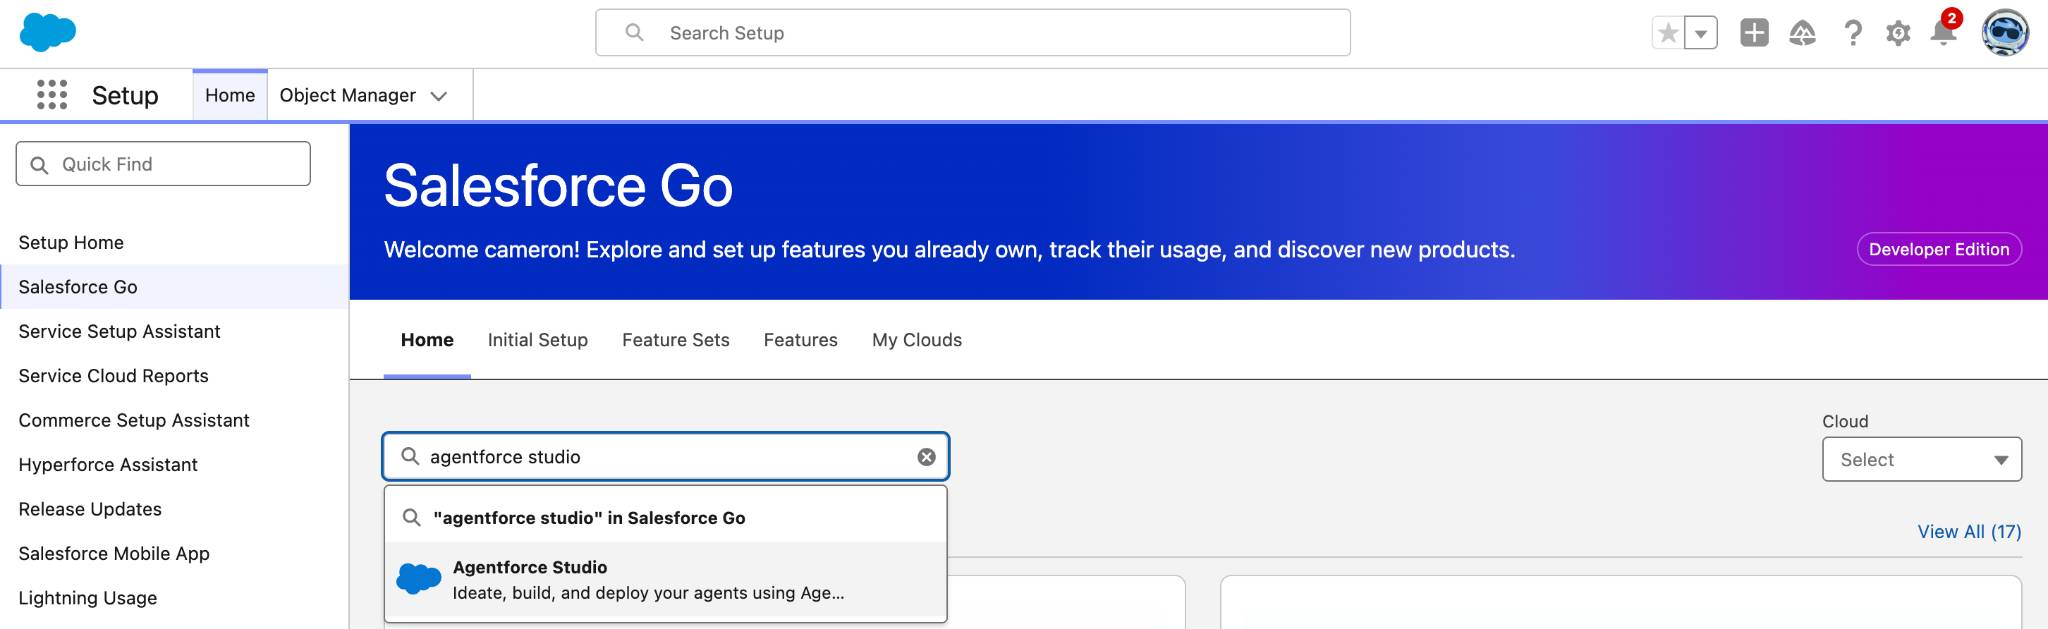
- In the Quick Find box, search for and select Salesforce Go.
- In the Search features... textbox, enter and select Agentforce Studio.
- Click Get Started.
- Click Turn On.
- Click Confirm.
- Wait just a moment until you see the Turn On button change to On, then refresh your browser.
Now, before you get into agent actions, you need to do a quick bit of housekeeping in our org. You’re going to familiarize yourself with the two records you work with in this project.
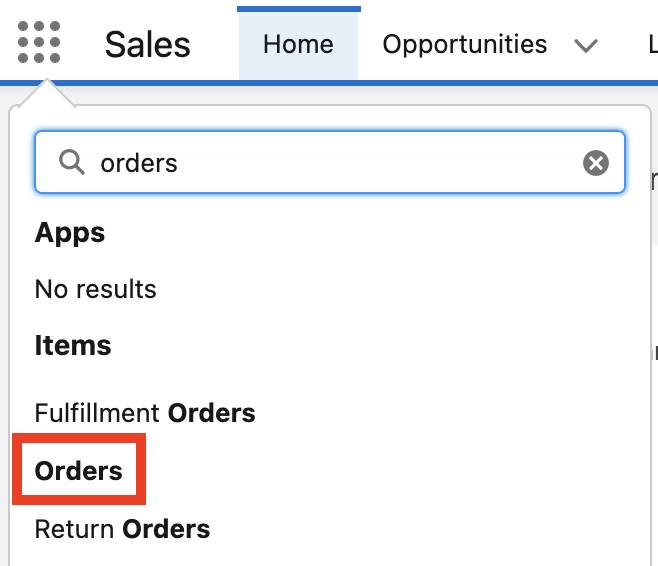
- Click
 , then search for and click Orders.
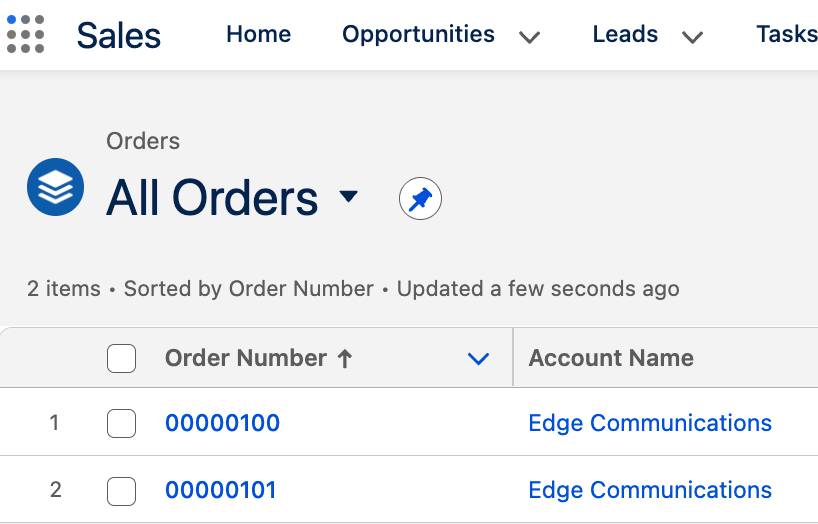
- Click the dropdown arrow next to Recently Viewed, then choose the All Orders list view. Two orders will appear, both for Edge Communications. They play a role later, so it’s good to verify they exist.
Add a Standard Subagent to Your Agent
Agentforce is already quite capable out of the box, thanks to the premade (standard) actions that you learned about at the start of this module. And because an agent can have many actions, they’re categorized under subagents. Subagents can hold any number of actions that perform related jobs, for example, actions related to managing an order.
As with actions, Agentforce Builder comes with many standard subagents already included. Let’s look at the agent and add a standard subagent that can hold standard and custom actions.
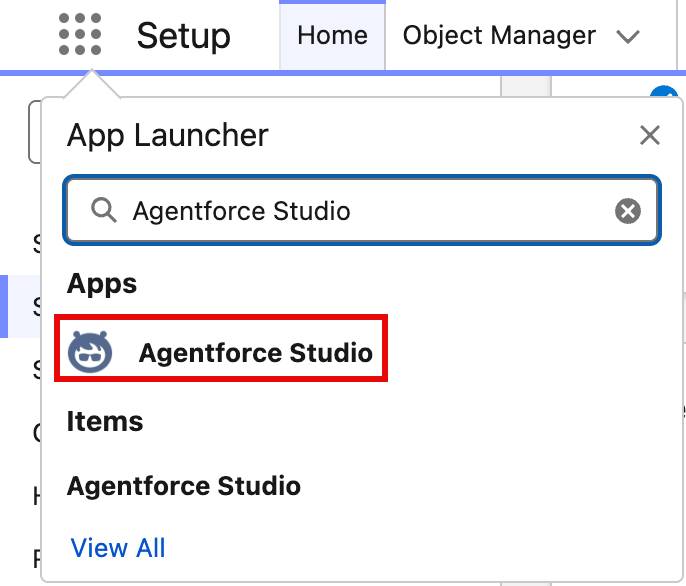
- Click
 again, then search for and select Agentforce Studio.
- Click Agents if it’s not already selected.
- In the Agent Name column, click Order Agent. If you don’t see it, refresh your browser window again.
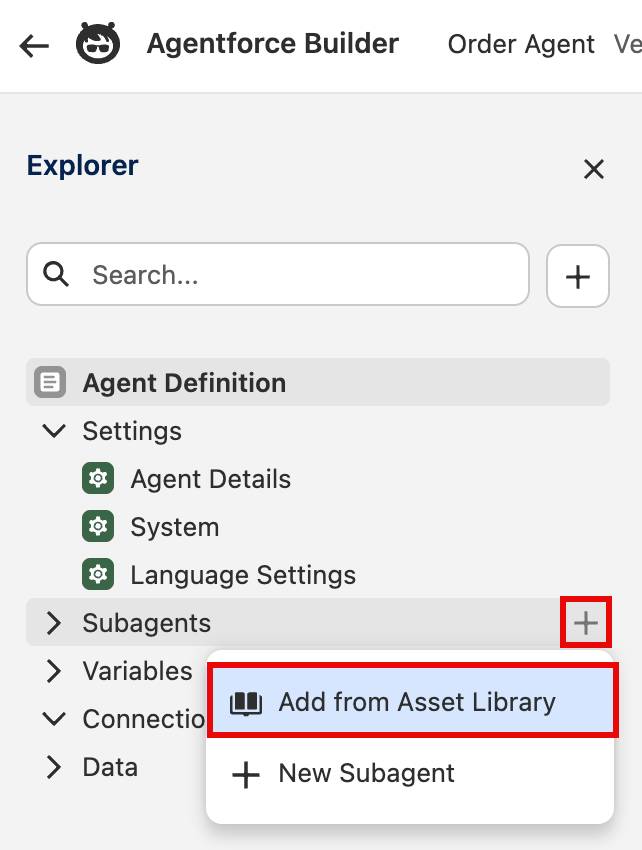
- In the Explorer pane, hover over Subagents, then click
 .
.
- Click Add from Asset Library.
- In the Subagents window, copy and paste
General CRMinto the Search subagents field.
- On the General CRM tile, click Select, then click Add to Agent.
- Click Save.
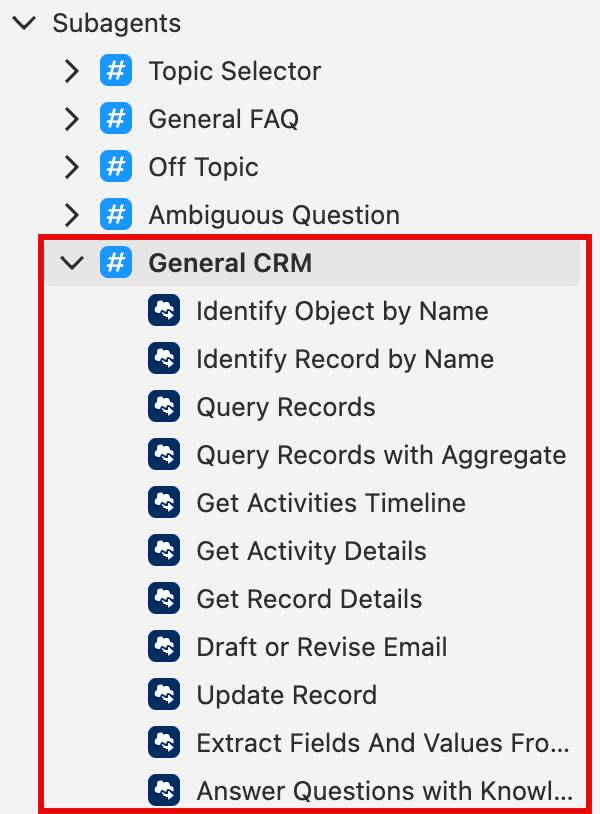
The General CRM subagent is added to the bottom of your Subagents list in the Explorer pane, and you can read the predefined subagent description and instructions in the center pane. Like many standard subagents you can choose from, the General CRM subagent comes prepopulated with quite a few standard actions. In the Explorer pane, click the arrow next to the General CRM subagent to see a list of the included standard actions.
Start a Conversation
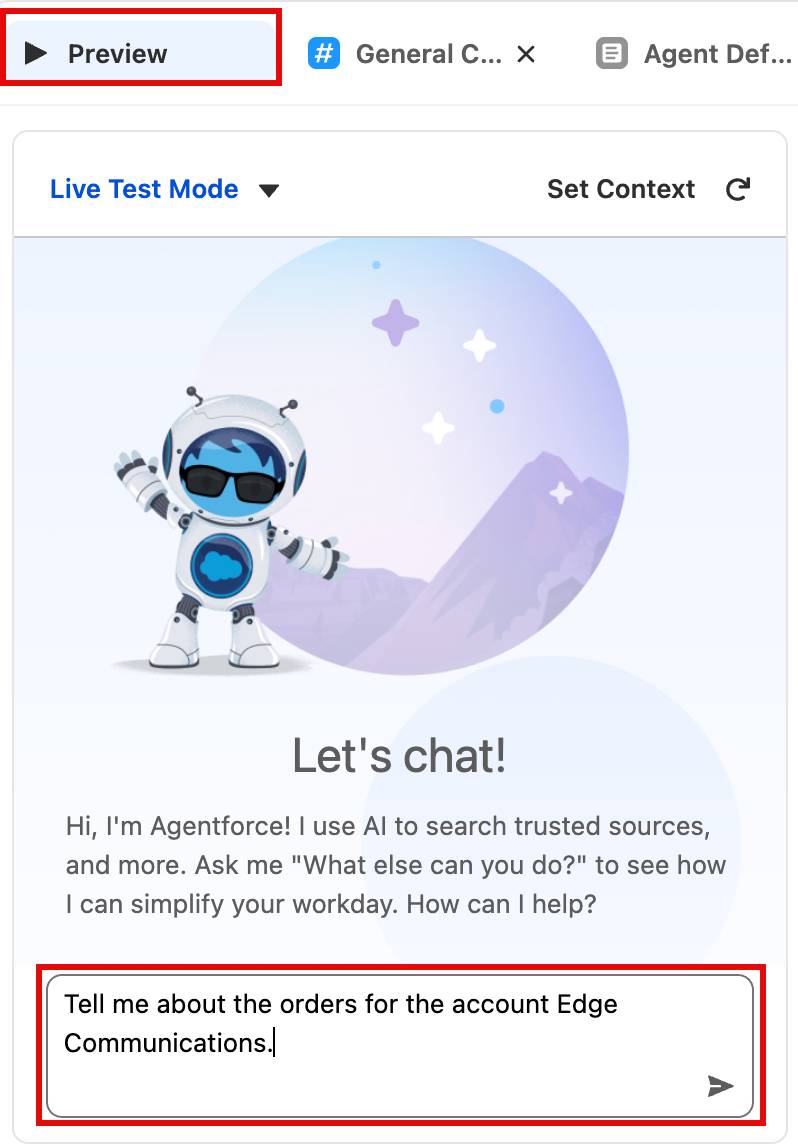
You can try out your agent and witness how it plans its response using real data in Live Test Mode. Let’s start a conversation by asking your agent to search and retrieve a record.
- Click
 .
.
- In the Live Test Mode pane, in the Describe your task or ask a question… field, copy and paste
Tell me about the orders for the account Edge Communications.Then press return (MacOS) or Enter (Windows).
Agentforce begins processing your request. It’s figuring out what you intend, and how to respond. In a moment you’ll get an answer that’s based on the available actions. Agentforce makes a call to a large language model (LLM), so you might find some questions return results that are a bit different than what you see in the screenshots.
If you get a message that Agentforce is having trouble, then click the Refresh button in the Conversation Preview window to try again. If Agentforce asks you to pick a record, select Edge Communications and click Submit.
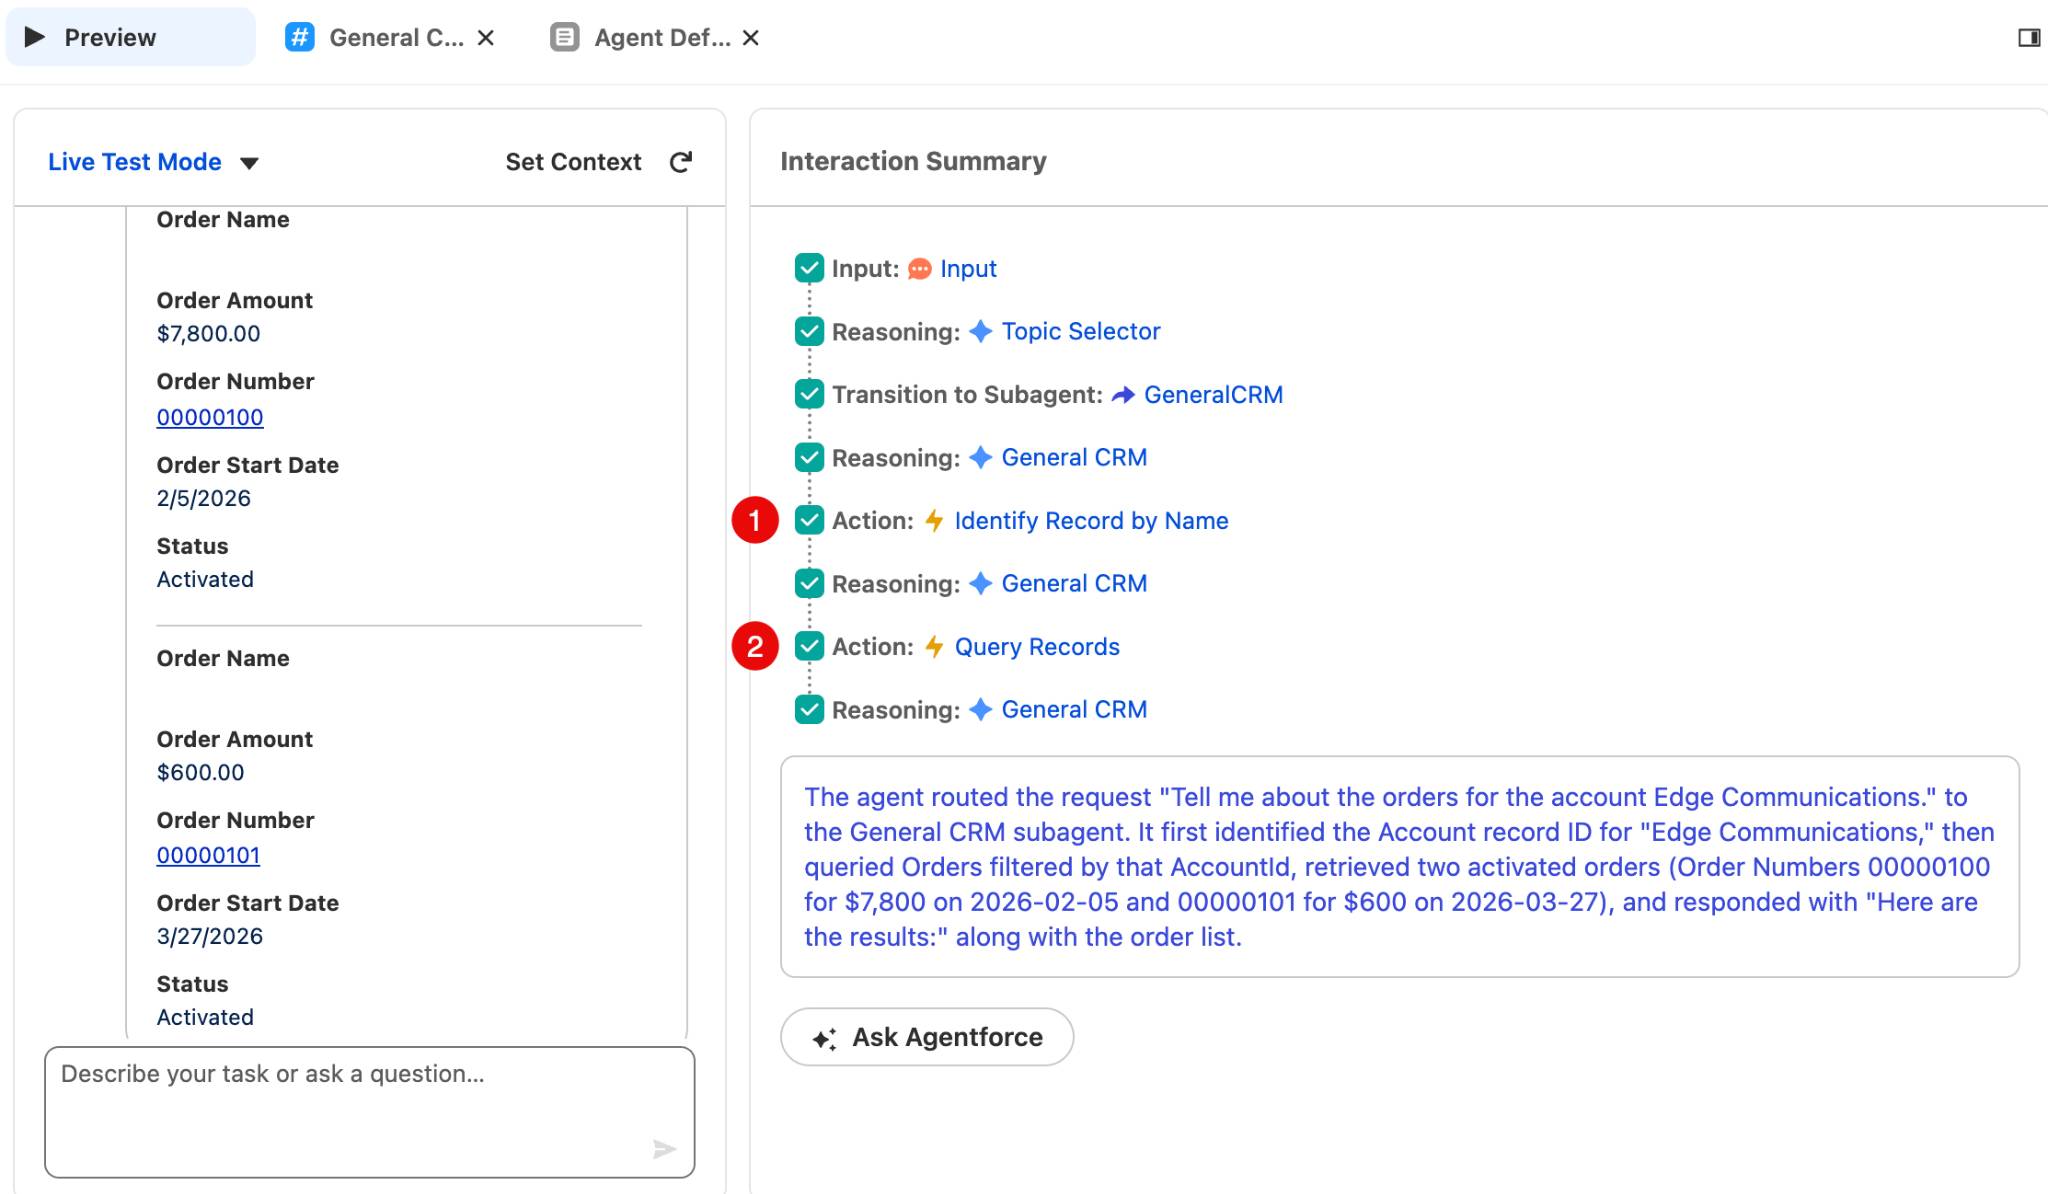
A lot happens when you ask this question. And in the Interaction Summary pane, you see the process your agent followed in order to respond.
For this request, your agent recognized that two actions were required. First, it needed to identify the correct account (1). Then, it needed to identify the correct records within the Accounts object (2).
The ability to reason and call the right actions is one of the things that make your agent especially good at maintaining its side of the conversation. Another important part of holding a conversation is remembering details that were brought up earlier. Agentforce can do that too! For example, you can ask it to provide more details about something it previously mentioned.
In the text field in the Live Test Mode pane copy and paste What is the oldest order? Then press return (MacOS) or Enter (Windows).
This time Agentforce uses the context of the conversation to understand that you are asking about orders specific to Edge Communications. After a moment, details of the oldest order appear.
Create a Custom Action
These standard actions can do a lot, but in this scenario you have a special process for handling order returns. In fact, you already have a flow that automates the process. (Team Trailhead made the flow for you in your Developer Edition org.)
You can use that flow to extend the capabilities of your agent, by creating a custom action that references the flow.
- Click the General CRM subagent, then click
 .
.
- Click New Action.
- In the Action Name field, copy and paste
Initiate Return.
- In the Description field, copy and paste
Initiate Return for requests to return or refund orders or products in an order. - For Reference Action Type, choose Flow.
- For Reference Action, choose Initiate Return.
This is the existing flow you’ve been using to initiate order returns.
- Click Create and Open.
- In the Description field (under Inputs), paste the following text:
Populate this input variable with an Order recordId. - Check Require Input to execute action.
- In the Description field (under Outputs), paste the following text:
This output indicates the status of the return request, whether it has been initiated, processed, or completed. - Check Show in conversation.
- Under Additional Settings, check the box labeled Show Loading text for this action and paste the following text:
Initiating your return or refund.
- Click Save (on the upper right side of the screen).
Excellent, your custom action has everything it needs. For this example, you supplied the descriptions because they’re critical to how the action functions. They’re part of the prompt that Agentforce sends to the LLM. You can learn all about what makes a great prompt in the Prompt Fundamentals badge. Then use the prompt engineering skills you learn to make the descriptions for your custom actions clear and complete. Now, you just have to commit this version of your agent and activate it.
- Click Commit Version, then in the popup, click Commit Version.
- Click Activate, then in the popup, click Activate.
Try It Out
Great, your agent can now use the Initiate Return action in a conversation. Let’s try it out as if you were an actual user.
- Click
 to exit Agentforce Builder.
- Click
 then search for and select Sales to open the Sales app.
Let’s start from the Home tab as if you were just starting your day.
- Click
 to open the Order Agent conversation window.
- To start your test, give your agent some context to work with by finding a specific order. In the conversation window, paste
What is the order with the most recent order start date? Please provide a clickable link to the order.Then press return (MacOS) or Enter (Windows).
After a moment it should display order 00000101, with a clickable link.
- Click order number 00000101. Edge Communications ordered these items accidentally, so let’s start a return. Sometimes in our practice environments the agent won’t provide a link to the record directly. If that is the case find order 00000101 from the Edge Communications account and open it manually. This won’t prevent you from completing the remaining steps.
- In the conversation window, type
Start a return for this order. Then press return (MacOS) or Enter (Windows).
Because your custom action has a clear and comprehensive description, your agent can identify it as the action you intend to take. So it kicks off the related flow, and gives you a status update.
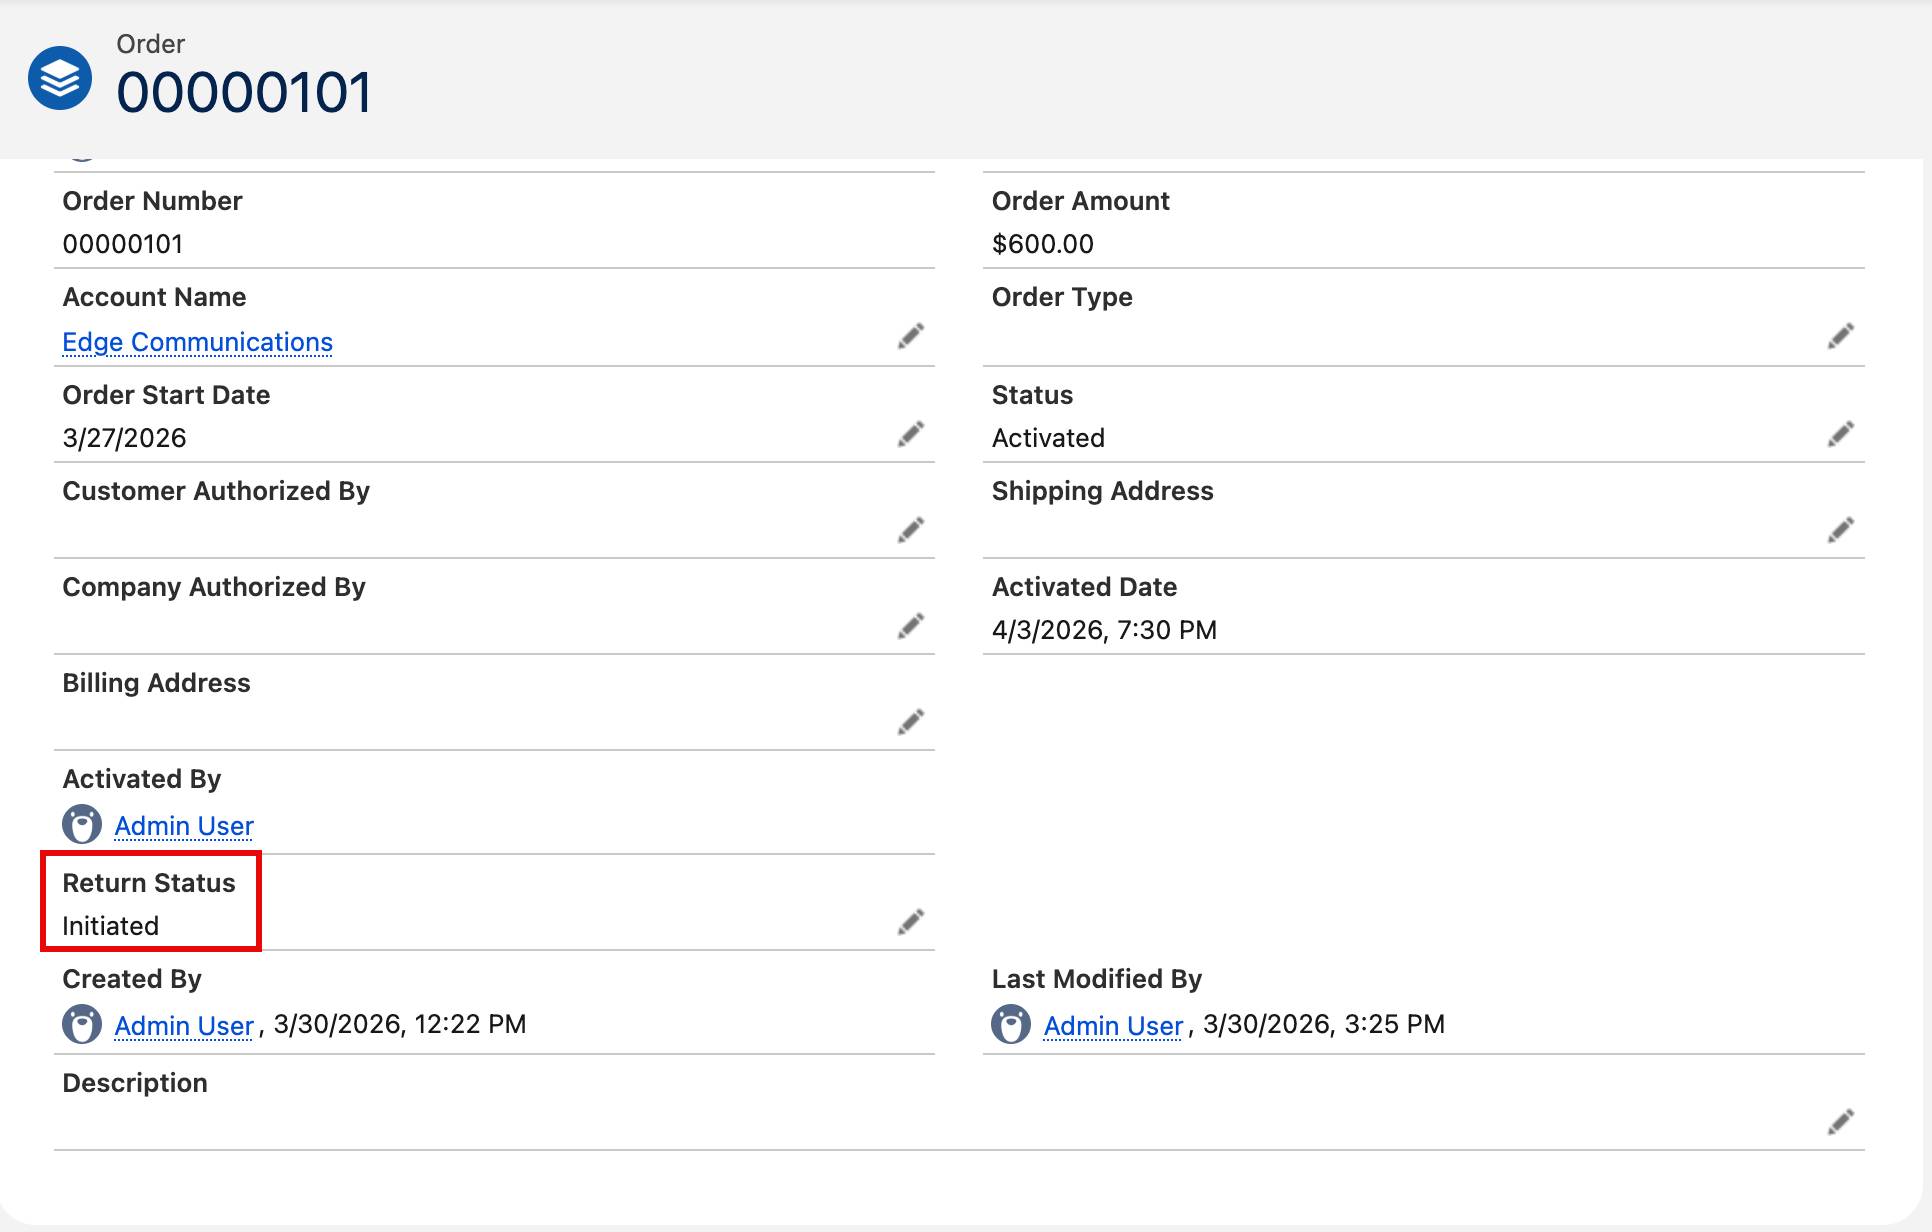
- In the Order window, click the Details tab. (If you don’t see the Details tab, make sure you’re in order number 00000101.)
If you scroll to the bottom of the page, you’ll find that the Return Status field has been updated to Initiated thanks to the Initiate Return flow.
With just a few clicks, you can incorporate existing automation into your agent’s catalog of actions. Now, automations and processes that are unique to your organization can be part of the conversation when interacting with Agentforce. Next, click Verify step to earn 100 points to check your work and earn your badge.