Create the Credentials
Learning Objectives
In this project, you'll:
- Define settings for requesting data from an external source.
- Create and assign a permission set that allows users to request external data.
- Build a flow that requests data from an external source.
Think of a time when you wanted to access data from another source inside your Salesforce org. With all the technicalities around finding an application programmer interface (API), setting up logins, getting access tokens, configuring the communication, and so on, it could be a daunting proposition. Fortunately, there's a feature in Flow Builder that enables admins to request external data declaratively.
The HTTP Callout Action
With the HTTP Callout action, you provide a few details and voilà! External data appears in your org. What are those details, you ask? Well, it varies from one data source to another, but generally speaking, you need the location (URL) for the external data and access to the external data (which usually requires some form of authentication).

How It Works
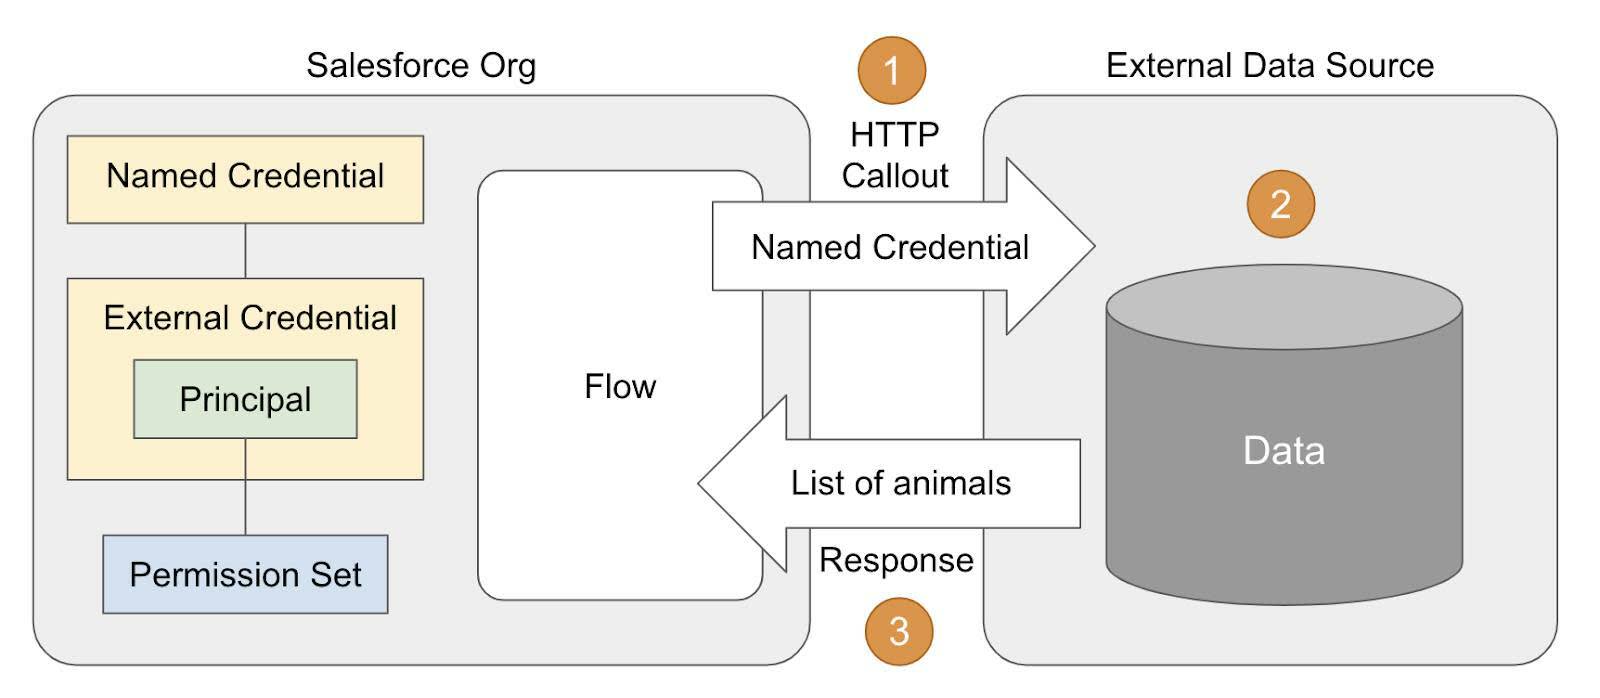
Here's a high-level overview of how a flow interacts with external data.
- The flow sends a request for data (that's the HTTP callout) to the external data source. The request contains the named credential.
- The credentials in the request are authenticated by the external data source.
- The external data source returns the data (in a response) to the flow that requested it.
How to Set It Up
To make all this possible, you define the information needed by the external data source. Later, your flow sends that information in the HTTP callout.
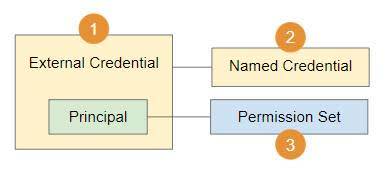
In your org, you define these settings.
- The named credential, which contains the URL of the external data source and is linked to the external credential.
- The external credential, which stores the authentication protocol used by the external data source to grant access to its data.
- The principal, which establishes the name you'll use when you create a permission set to grant users access to the external data. (It also stores any authentication parameters required by the external data source to grant access to its data, but we're not sending any parameters in this project.)
Create a New Trailhead Playground
For this project, you need to create a new Trailhead Playground. Scroll to the bottom of this page, click the playground name, then click Create Playground. It typically takes 2–3 minutes to create a new Trailhead Playground.
Process Overview
In this unit, we create the credentials and permission set. We build the flow and add an HTTP Callout action to it in the next unit.
- Create the external credential and its principal.
- Create a named credential and link the external credential to it.
- Create a permission set granting users access to the principal in the external credential.
Let's establish a named credential to hold the information we need to access the animals list.
Create the External Credential
- From Setup, enter
Namedin Quick Find and select Named Credentials.
- Select External Credentials.
- Click New.
- For Label, enter
Animals API External.
- For Name, enter
Animals_API_External.
- Set Authentication Protocol to Custom.
- Click Save.
- Under Principals, click New.
- For Parameter Name, enter
Animals API External.
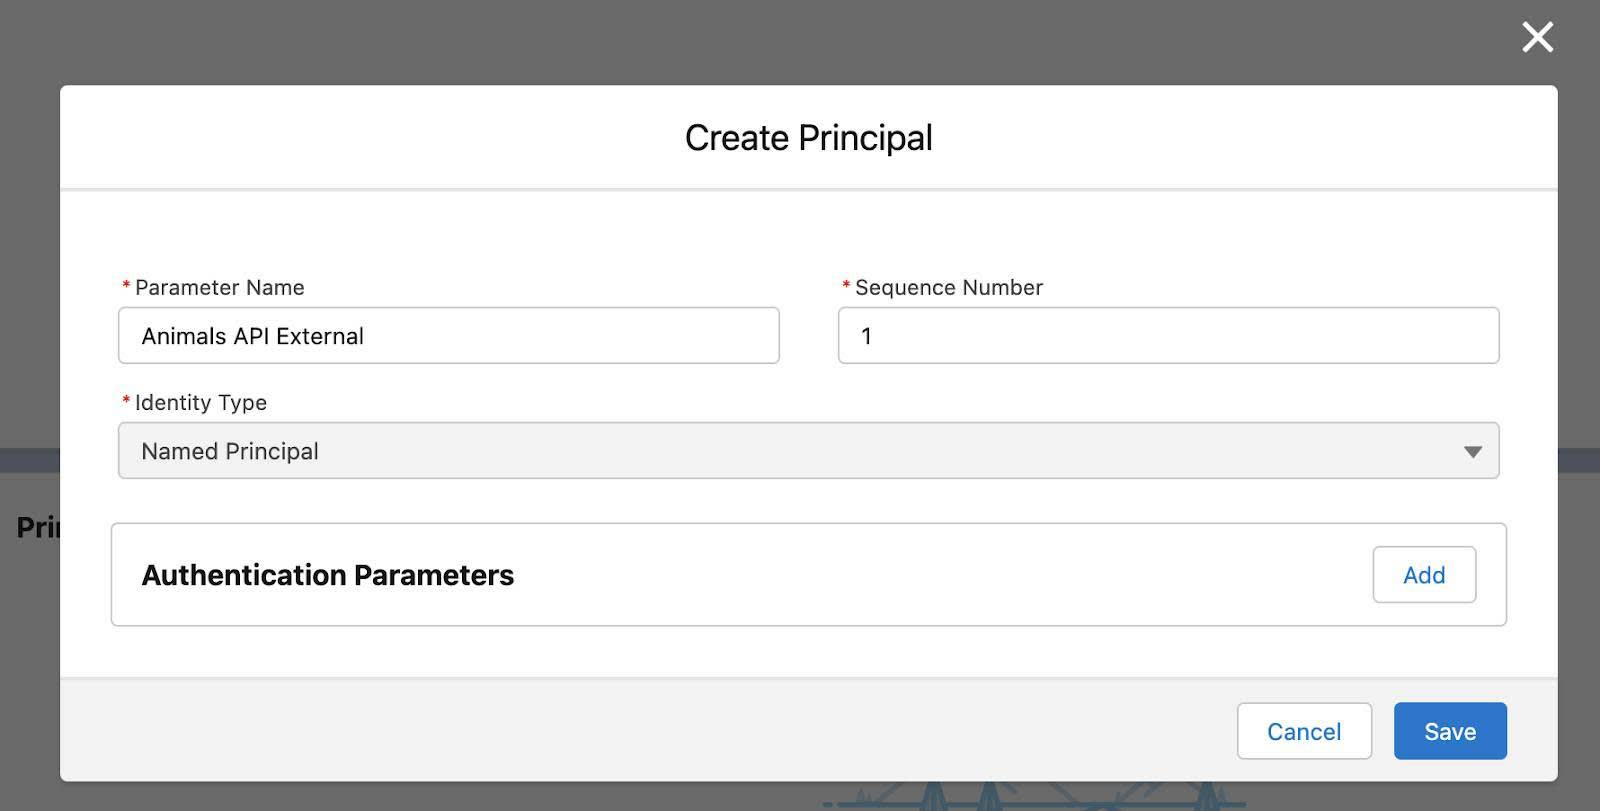
- Click Save.
Create the Named Credential
- Select Named Credentials.
- Click New.
- For Label, enter
Animals API Named.
- For Name, enter
Animals_API_Named.
- For URL, enter
https://th-apex-http-callout.herokuapp.com.
- For External Credential, select Animals API External.
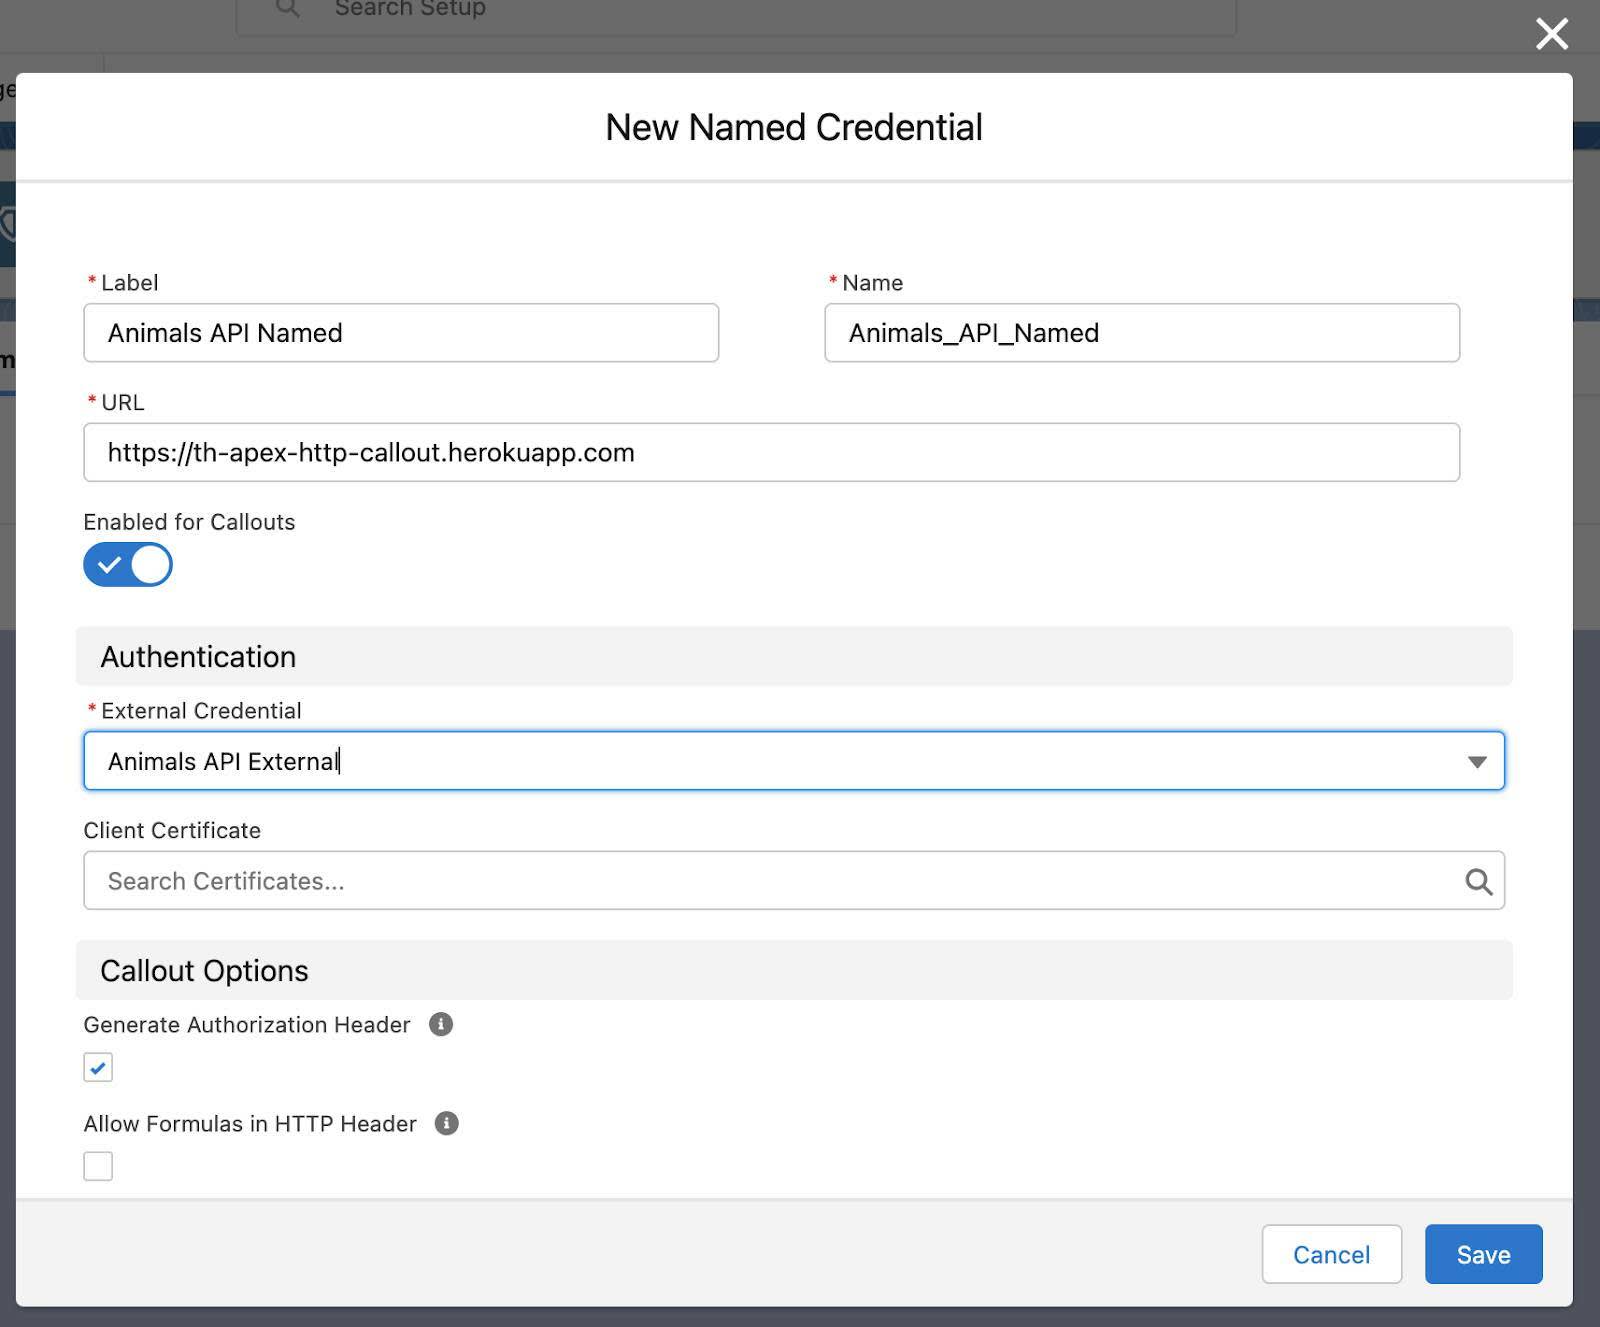
- Click Save.
Now your flow can connect to the external data source, but we need to give users permission to send the request for the animals data.
Create a Permission Set
Users need permission to use the named credential, so you create a permission set.
- In Setup, in the Quick Find box, enter
Permissionand then select Permission Sets.
- Click New.
- For Label, enter
Animals API.
API Name auto-fills with Animals_API.
- For Description, enter
Animals API callout permissions.
- Click Save.
- In the Apps section, select External Credential Principal Access.
- Click Edit.
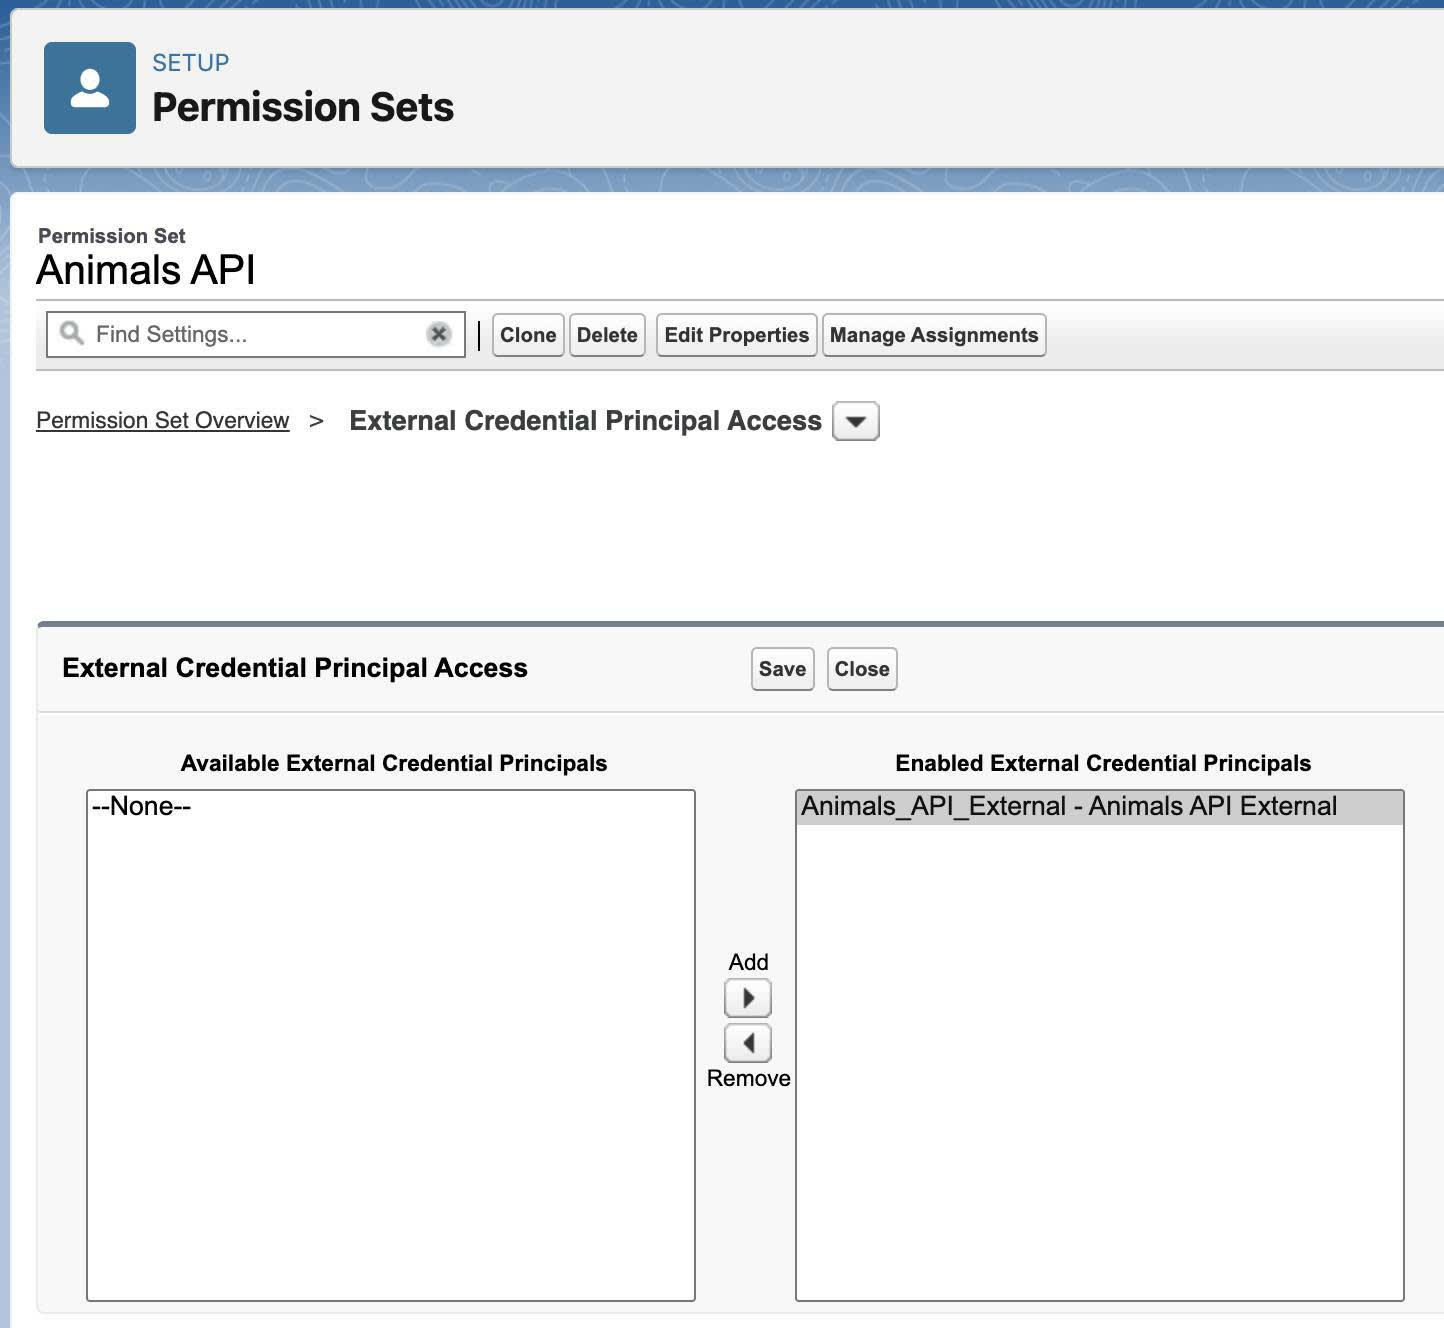
- Move the Animals API External option from Available External Credential Principals to Enabled External Credential Principals.
- Click Save.
Assign the Permission Set
Now you assign the new permission set to users.
- Click Manage Assignments.
- Click Add Assignment.
- Select your user.
- Click Next.
- Click Assign.
Well done! The credentials and permissions are all set and you are ready to build the flow. Let's tackle that next.
Resources
- Salesforce Help: Connecting to an API Without a Connector Using HTTP Callout
- Salesforce Help: Create Named Credentials and External Credentials
- Salesforce Help: Configure an HTTP Callout Action