Build Your First Agentforce Quoting Agent
Learning Objectives
In this badge, you’ll:
- Set up the Quote Management subagent and Quoting AI features.
- Enable your Quoting Agent.
Agentforce for Sales Can Help You Quote Faster
Built on the Salesforce trusted AI platform, Agentforce Sales helps you quickly generate quotes with accurate products and pricing. You can close deals faster by instantly generating personalized customer quotes and using unified transaction data and CRM. Agentforce creates, modifies, and summarizes quotes while maintaining role-based access permissions, ensuring seamless and secure collaboration between teams. It also follows product catalog and fulfillment rules to quote valid products, while pricing and discounting within system guardrails. This saves you time by cutting out extra work so you can focus on reviewing final quotes and sending them to your customers.
Sign Up for a Developer Edition Org with Quoting Agent Enabled
To complete this badge, you need a custom playground that contains the quoting agent capabilities and our sample data.
- Click Create Playground, and then click Yes, Create Playground.
- Your new org is automatically attached to your Trailhead account.
- Make note of your org's expiration date and complete this badge before then.
- Click Launch to open the playground.
Enable Quoting Agent Supporting Features
Before being able to generate quotes, you need to set up the Quoting Agent. First, you need to sync your pricing data in Agentforce Revenue to ensure that the latest pricing information is available in all decision tables and for all users.
- From the home page, click
 and click Setup.
- In the Quick Find box, search for and select Salesforce Pricing Setup.
- In the Sync Pricing Data section, click Sync.

- Click Confirm.
Next, Agentforce Studio in Salesforce Go.
- In the Setup Quick Find, search for and select Salesforce Go.
- In the Search features... textbox, enter and select Agentforce Studio.

- Click Get Started.
- Click Turn On.
- Click Confirm.
- Refresh your browser window.
Enable Sales Emails
- In the Quick Find box, search for and select Einstein for Sales.
- Click the Turn on Sales Emails toggle to the Enabled position. While you’re waiting for the data to load, you can move on to the next step.

- Refresh your browser window.
Create the Quoting Agent
- Click
 to open the App Launcher, then search for and select Agentforce Studio.
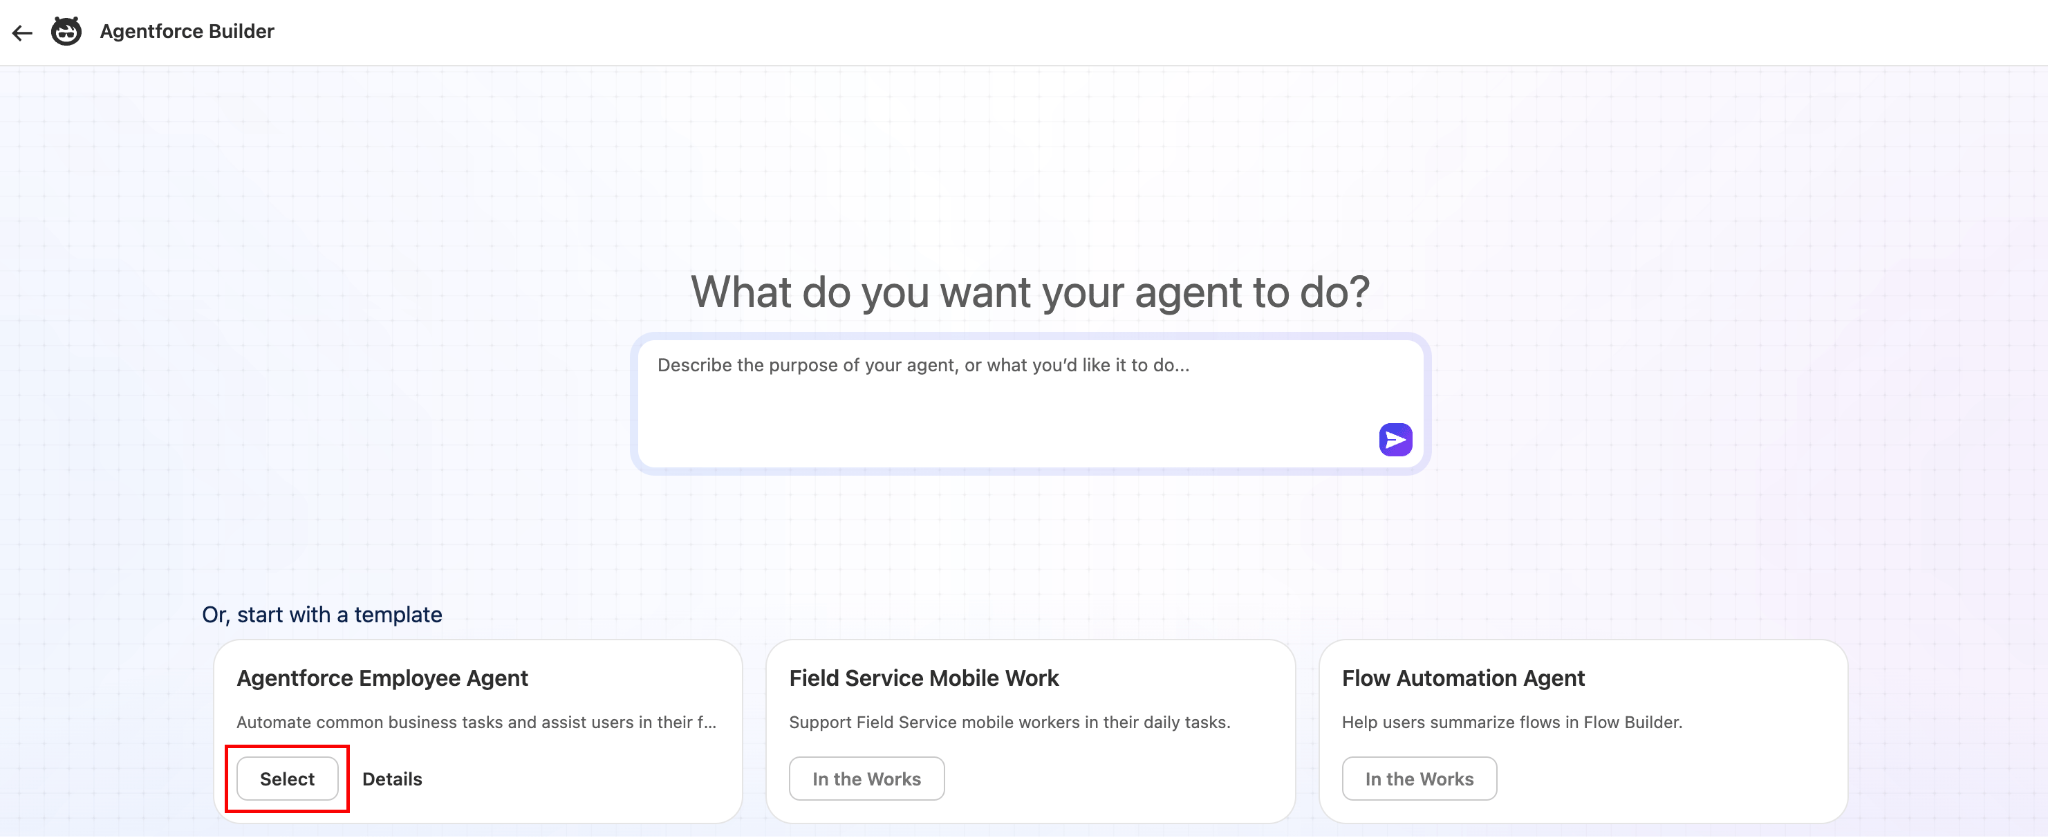
- Click New Agent. Agentforce Builder opens in a new tab.
- Click Select in the Agentforce Employee Agent tile.
- On the Name your agent screen, enter these details:
-
Name:
Quoting Agent -
API Name:
Quoting_Agent
-
Name:
- Click Let’s Go.
Adjust the Subagents
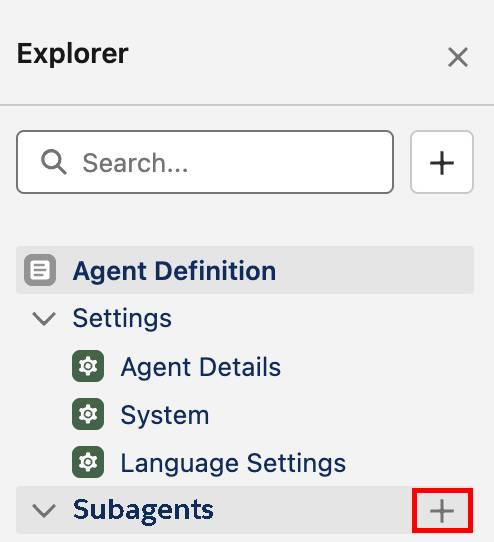
Next, you need to add the Quote Management subagent to your agent and remove the General FAQ subagent. Agentforce Quoting uses the instructions in the Quote Management subagent and actions based on Salesforce flows to generate and manage quotes.
- In the Explorer panel, click the plus icon next to Subagents.
- Select Add from Asset Library.
- Enter
quotein the Search subagents… input.
- Click Select under Quote Management.
- Click Add to Agent.
The General FAQ subagent is not needed so the next step is to remove it from the agent.
- Click the three dots next to the General FAQ subagent.

- Select Delete.
- Click Yes, Delete.
- Click Save (upper right corner of the screen).
- Click Commit Version and then click Commit Version again to confirm. Note: If you get an error, trying refreshing the page and trying again.

- Click Activate and then click Activate again to confirm.
Your agent is now active. Great job! Your agent is ready to use. The last step is to grant your sales reps access to the agent and see the quoting agent in action.
Provide Sales Reps Access to the Agent
Now that your agent is ready to go, it’s time to make sure your sales reps have access to use it. You can update the permissions within an existing custom permission set assigned to these users. But for this exercise, you create a new custom permission set that you assign to yourself.
- If you’re still in the Agentforce Builder screen, click the back arrow to return to the home page.
- From the home page, click
 and click Setup.
- In the Quick Find box, search for and select Permission Sets.
- Click New.

- Enter
Agentforce Userfor the Label. The API should autopopulate toAgentforce_User.
- Leave the description blank.
- Leave the License as None.

- Click Save.
- To assign it to your user, scroll to the bottom of the page and click Agent Access.

- Click Edit.

- Select Quoting Agent and click Add.

- Click Save.
- Click Manage Assignments and click Add Assignment.
- Select the OrgFarm EPIC user and click Next.
- Click Assign.
- Click Done.
Great work! You set up and enabled your Quoting Agent.
Generate a Quote
Agentforce Quoting uses the user’s responses to create quotes for new business and quotes for amendments to assets. It can also be used to update quotes, using the actions in the Quote Management subagent. It’s time to use the agent.
For this activity, using Agentforce Quoting, you create two versions of a quote with different discount amounts on a single product.
- Click
 to open the App Launcher. Search for and select Revenue Cloud.
- From the Revenue Cloud home page, click the Accounts tab. Change the view to All Accounts.
- Select EdgeMX from the list of accounts.
- Click the Agentforce icon
 in the top right corner of the screen. The Agentforce conversation panel opens.
- Copy and paste this into the conversation panel:
Hi! Can you please create a quote for this account with 15 units of the Headset product. Please apply a 15% discount.- If prompted, select or enter Office Upgrade as the Opportunity for the Agent and answer the prompts to proceed.
- Enter
Please show me the quote. If you would like to review the quote, click the Quote Name. If the agent fails to present the quote, ask for it again.
- Copy and paste this into the conversation panel to update the discounts:
Please change the discount to 10% for the first product.
- If necessary, confirm with the agent and ask again
Please show me the quote. Note: Notice that the discount has been adjusted to 10%.
- Close the Agentforce conversation panel.
- In the org search bar, enter
Office Upgradeto search for the Office Upgrade Opportunity.

- Click the Related tab to review the quote.
- Scroll down to the Quotes section and select the listed quote.
- Click the down arrow in the upper right corner and select Email Quote.

- When prompted, click No, Send through Salesforce.
Send Your Quote to the Customer
- Enter the following information for the email:
- In the To input box, search and select Rose Gonzalez.
- Subject:
New quote for your office upgrade
- In the To input box, search and select Rose Gonzalez.
- Click Draft with AI.
- In the Use pre-made instructions… search, select Create Quote Email from the dropdown list of email templates.
- Select the quote for Office Upgrade as your quote.
- Click Continue to draft the email using generative AI. If you don’t see anything in the email body, that might just mean it’s taking time to load. Continue to the next step to send. This will not prevent you from passing the challenge.
- Click Done to confirm.
- Review the content. Note: As this is a training environment, no need to actually send this email.
You did it! Using Agentforce, you built your first Quoting Agent and used it to generate a new quote that you could email directly to the customer. Now you’re ready to streamline your sales process with fast and easy quoting!