Set Organization-Wide Defaults and Create a Role Hierarchy
Introduction
You have now assigned users to their correct roles. The meeting moves on to data access review, and you discuss what individual records users should be able to view and edit in each object they have access to on their profile. You have established a baseline level of access so that users have the correct level of access to the records they need. However, the discussion now concerns how this will impact the directors and VPs, who will no longer have all the access they need.
Create Custom Objects and Set the Organization-Wide Defaults
- From Setup, click Object Manager.
- Select Create and choose Custom Object.
- Complete the Custom Object Information for Applicant with these details.
Field
Value
Label
ApplicantPlural Label
ApplicantsStarts with vowel sound
Select the checkbox
Object Name
ApplicantRecord Name
Applicant NameData Type
Text
Allow Reports
Select the checkbox
Allow Search
Select the checkbox
- Click Save & New.
- Complete the Custom Object Information for Interviewer with these details.
Field
Value
Label
InterviewerPlural Label
InterviewersStarts with vowel sound
Select the checkbox
Object Name
InterviewerRecord Name
Interviewer NameData Type
Text
Allow Reports
Select the checkbox
Allow Search
Select the checkbox
- Click Save & New.
- Complete the Custom Object Information for Position with these details.
Field
Value
Label
PositionPlural Label
PositionsObject Name
PositionRecord Name
Position NameData Type
Text
Allow Reports
Select the checkbox
Allow Search
Select the checkbox
- Click Save.
Create a status field on the Position custom object.
- From the Position custom object you just created, click Fields & Relationships.
- Click New and choose Picklist as the data type.
- Click Next.
- For Field Label, enter
Status.
- For values, select Enter values, with each value separated by a new line.
- Enter the following values in the box, each value separate by a new line.
NewOpenClosed
- Select Restrict picklist to the values defined in the value set.
- Click Next, Next and Save.
- From Setup, click the Home tab and enter
Sharing Settingsin the Quick Find box, and select Sharing Settings.
- Click Edit and edit the access settings.
- Set Applicant, Interviewer, and Position default internal access to private.
- Click Save.
Note: You will receive a notification that your change is being processed, "One or more sharing operations has been initiated. See below for additional details. Certain operations may not be available."
Create a Role Hierarchy
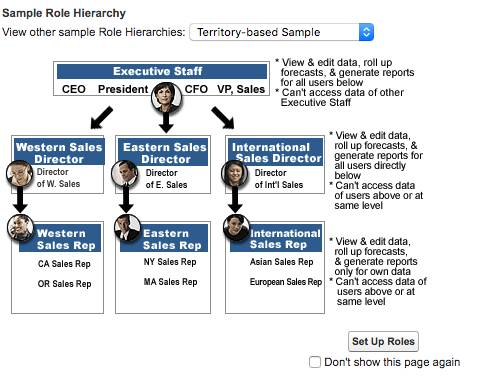
Build out the role hierarchy.

- From Setup, enter
Rolesin the Quick Find box, and select Roles.
- Select Set Up Roles and click Expand All.
- Below CEO, click Add Role, and then complete the new role details.
- Label:
VP of Services - Role Name as displayed on reports:
VP of Services
- Click Save & New.
- Complete the next new role information.
- Label:
Accounts Receivable - This role reports to: VP of Services
- Role Name as displayed on reports:
Accounts Receivable
- Click Save & New.
- Complete the next new role information.
- Label:
Customer Support Director - This role reports to: VP of Services
- Role Name as displayed on reports:
Customer Support Director
- Click Save & New.
- Complete the next new role information.
- Label:
Customer Support Rep - This role reports to: Customer Support Director
- Role Name as displayed on reports:
Customer Support Rep
- Click Save & New.
- Complete the next new role information.
- Label:
Sales Engineer - This role reports to: Director, Direct Sales
- Role Name as displayed on reports:
Sales Engineer
- Click Save & New.
- Complete the next new role information.
- Label:
Recruiter - This role reports to: SVP, Human Resources
- Role Name as displayed on reports:
Recruiter
- Click Save.
Assign Users to Their Roles
Now that you've set up some new roles, assign them to users.
- From Setup, enter
Rolesin the Quick Find box, and select Roles.
- Select Set Up Roles and click Expand All.
- Next to VP of Services, click Assign.
- From the Available Users Picklist, select All Users and select Noah Larkin.
- Click the Add arrow
 and click Save.

- Next to Accounts Receivable, click Assign.
- From the Available Users Picklist, select All Users and select Maya Lorrette.
- Click the Add arrow
 and click Save.
- Next to Sales Engineer, click Assign.
- From the Available Users list, select All Users and select Amy Daniels.
- Click the Add arrow
 and click Save.
- Repeat the same steps to add Ted Kim to the Recruiter role and your name to the Customer Support Rep role.
Great work! You just created custom objects for Applicants, Interviewers, and Positions. Now those records are ready to be shared. In the next step, you set up opportunity sharing rules to allow members of the recruitment team to share information about applicants.