Set Up Stores and Locations
Learning Objectives
In this project, you’ll:
- Create retail stores, store groups, and in-store locations.
- Associate products, assortments, promotions, and planograms to relevant stores.
- Set up store assets in retail stores.
- Define tasks, metrics, and retail store KPIs for retail execution.
- Create action plan templates and visits to perform store audits.
- Perform tasks in the mobile app to successfully complete a visit.
Before You Get Started
To make the most of this project, make sure you complete the Retail Execution in Agentforce Consumer Goods and Agentforce Consumer Goods Data Model modules. This project builds on the steps and the concepts that are covered in those two modules.

Step Into the Shoes of a Sales Manager
Gustavo is a sales manager at Alpine Group Nutrition & Beverage. He manages a team of field reps who carry out store audits primarily in the American West region. Gustavo helps Alpine Group drive incremental sales and deliver the desired brand experience inside retail channel partner stores.
In this project we give you a chance to impersonate a sales manager in the world of retail execution. Yes, you can get hands-on, do all that Gustavo does, and see how it feels to be a key player that helps drive the performance of a company.
What does being a sales manager entail? A sales manager drives efficiency for the field reps by optimizing their store routes, visit plans, and tasks. A sales manager also prepares a strategy to keep the retail stores well-stocked at all times and make life easier for field reps by bringing all pieces of retail execution together. Gustavo’s motto is to deliver the right products and services to the customer at the right time and empower reps to execute better.
To become a master of retail execution, we’ll walk through these tasks in the upcoming steps.
- Create stores and store groups
- Manage products
- Track promotions and planograms
- Keep shelves and other in-store locations updated
- Create metrics that help assess merchandising activities
- Facilitate orders and create surveys for pre-sales activities
- Create tasks and reusable templates for visit management
- Manage auditory specifications with store KPIs
- Create visits and assign them to reps
What Lies Ahead
In this project, we work within a framework where Gustavo primarily deals with the key account Northern Trail Outfitters (NTO). If you’ve taken Retail Execution in Agentforce Consumer Goods module, you know that NTO is a trusted retail channel partner for the Alpine Group. They have a large chain of mid-size stores and supermarkets around the country and proudly sell and showcase Alpine’s newest and best-selling products ranging from energy drinks and athleisure to superfoods.
Fatima Daniel, the admin at Alpine Group, has already set up and configured the org. To learn more about these configurations, check out Retail Execution in Agentforce Consumer Goods module.
Gustavo’s focus is to lay the foundation pieces for optimum retail execution and store management. For this, he manages stores, tasks, products, promotions, metrics, and a lot more. And you can do the same through this project!
So get ready to hit the ground running. First, sign up for an org that has Agentforce Consumer Goods enabled with all admin configurations and special sample data in place.
Sign Up for a Developer Edition Org with Agentforce Consumer Goods
To complete this project, you need a special Developer Edition org that contains Agentforce Consumer Goods and our sample data. Get the free Developer Edition and connect it to Trailhead now so you can complete the challenges in this project.
- Sign up for a free Developer Edition org with Agentforce Consumer Goods.
- Fill out the form. For Email, enter an active email address. For Username, enter a username that looks like an email address and is unique, but it doesn’t need to be a valid email account (for example, yourname@retail4ever.com).
- Click Sign me up. A confirmation message appears.
- When you receive the activation email (this can take a few minutes), open it and click Verify Account.
- Complete your registration by setting your password and challenge question.
Tip: Write down your username, password, and login URL for easy access later.
You are logged in to your Developer Edition.
Now connect your new Developer Edition org to Trailhead.
- Log in to Trailhead, click your Trailhead profile avatar, then select Hands-On Orgs.
- Click Connect Org.
- Enter your new Developer Edition org username and password, and click Log In.
- On the Allow Access? screen, click Allow.
- On the Want to connect this org for hands-on challenges? screen, click Yes! Save it.
Now that you have a Agentforce Consumer Goods-enabled org, you’re ready to try the steps in this project—and learn how to blaze new trails with your accounts.
Manage Store Groups
Gustavo has recently found out that Northern Trail Outfitters is planning to expand their business by setting up a new store. NTO is keen to continue their partnership with Alpine Group and wants to sell the latest and most popular Alpine products in the new store. Gustavo also learns that this retail store will have its own warehouse close to the store location and would like the products to be delivered directly to that warehouse.
Alpine Group already sells into different types of NTO stores. While some are mid-size stores, others are specialty stores showcasing the latest products of Alpine Group targeted towards health-conscious, athletic consumers. Gustavo also has to consider that while some NTO sites are actual retail stores where promotions are conducted and planogram audits play a big role, others are warehouse locations where products are delivered and inventory audits are carried out.
Gustavo already uses the NTO Specialty Stores store group for the most important stores such as showrooms and flagship stores.

He decides to create another store group for low-priority sites such as warehouses, and stores which don’t require frequent merchandising audits.
Here’s how he does it:
- Click
 , and find and select Retail Store Groups.
- Click New.
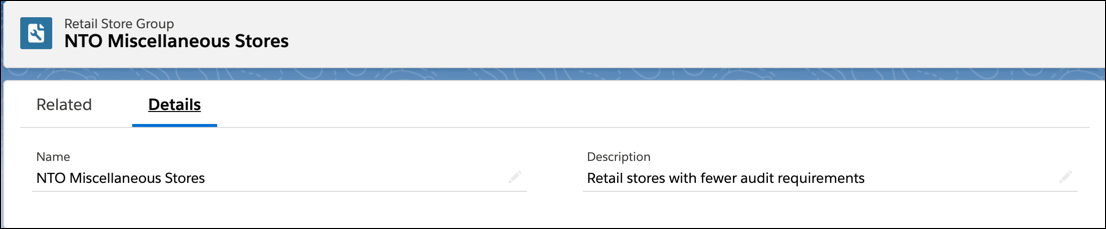
- For Name, enter
NTO Miscellaneous Stores.
- For Description, enter
Retail stores with fewer audit requirements.
- Click Save.
Now it’s time for Gustavo to create the individual store records for the new store sites.
Pin Down Locations and Retail Store Groups
First, Gustavo creates two separate Location records for the new retail store and its warehouse because it’s not likely that the same rep would pay a visit to both locations. While a field rep may visit the retail store for the merchandising activities, another rep may visit the warehouse to deliver the out-of-stock products or do an inventory check. Gustavo can specify map coordinates, driving instructions, type of location, address, and other details that help in creating a field rep’s route.
Here’s how he defines a Location record:
- Click
 , and find and select Locations.
- Click New.
- For Location Name, enter
NTO Store - Bryant Street Site.
- Enter
37.772591in the Latitude field.
- Enter
122.404437in the Longitude field.
- Select Site as the Location Type.
- For Time Zone, select your current timezone.
- In the Driving Directions field, enter
840 Brannan Street, San Francisco, CA 94103.
- Click Save & New.

Gustavo has successfully created the location for the new retail store. Next, he creates another location record to define the warehouse.
- Repeat steps 3-6 with the following details:
- Location Name:
NTO Store - Bryant Street Warehouse - Location Type as Warehouse
- Select the check box Inventory Location

Gustavo swiftly moves on to create the retail store records. A retail store record allows you to define granular details such as store type, priority, delivery method, and so on.
Here’s how you create a retail store record:
- Click
 , and find and select Retail Stores.
- Click New.
- For Name, enter
NTO Store - Bryant Street.
- For Location, search and select NTO Store - Bryant Street Site.
- For Account, search and select Northern Trail Outfitters.
- For Retail Store Group, search and select NTO Specialty Stores.
- For Store Type, select Regular Store.
- For Priority, select High.
- For the Payment Method, select Credit.
- For Preferred Visit Hours, select NTO Business Hours.
- For Primary Contact, search and select Tyree Zilnicki.
- Click Save & New.

- Repeat steps 3-12 with the following details:
- Name:
NTO Warehouse - Bryant Street - Location: NTO Store - Bryant Street Warehouse
- Account: Northern Trail Outfitters
- Retail Store Group: NTO Miscellaneous Stores.
- Store Type: Van Store
- Priority: Low
- Payment Method: Cash
- Delivery Frequency Type: Weekly
Gustavo has successfully created two retail store locations and their individual records. He has also added them to different store groups based on business requirements.

Now it’s time to pay attention to what goes on inside a retail store.