Place Products in the Stores
Create In-Store Locations
Remember Dorothea, the business architect for Alpine Group, from the Agentforce Consumer Goods Base Data Model module?
She understood that to ease the work of sales managers like Gustavo, she must create different categories of in-store locations. Most stores in a particular store group have similar layouts, and sales managers try to maximise impact by placing products, planograms, and promotions uniformly in all stores.
So, for example, Gustavo always places newly launched products near the primary shelf of Aisle 1 so that they catch the eye of customers right when they enter an NTO specialty store. He also knows that Alpine Group’s most popular products, energy drinks, must always be placed near the checkout counters so that customers can pick one up on their way out!
Dorothea created these in-store location category field values:
- Checkout Counters
- Primary Shelves
- Endcap Displays
Now it’s time for Gustavo to create the in-store location records for the NTO Store - Bryant Street store and associate them to these categories.
- Click
 , and find and select Retail Stores.
- Click the NTO Store - Bryant Street record.
- In the Related tab, click New on the In-store Locations related list and provide these details:
- Name:
Primary Shelf_Bryant Street - In-store Location Type: Shelf
- Category: Primary Shelves
- Click Save.
- Repeat steps 2-4 to create these additional in-store location records:
Endcaps for promotional displays_Bryant Street
- In-store Location Type: Other
- Category: Endcap Displays
Checkout Counter_Bryant Street
- In-store Location Type: Other
- Category: Checkout Counters
Here’s how it looks:

Gustavo also wants to create a Backroom in-store location for the NTO Warehouse - Bryant Street record.
- Click
 , and find and select Retail Stores.
- Click the NTO Warehouse - Bryant Street record.
- In the Related tab, click New on the In-store Locations related list, and provide these details:
- Name:
Back room for inventory - In-store Location Type: Backroom
- Category: Backrooms
- Click Save.

Now that Gustavo has figured out the store location and layout, he’s moving on to what’s placed in those stores. Alpine Group sells a wide range of products and brands, and not all products are sold to a specific NTO outlet. Once a month, Gustavo rearranges product assortments for the retail stores based on new product introductions, renewed sales agreements, and so on.
Follow him closely as he makes these decisions.
Store Assortments and Products
In meetings with NTO executives, Gustavo learns that NTO is looking to buy a specific range of food products from Alpine Group because the demand for nutritious products is quite high. Many of the NTO specialty stores cater to health-conscious consumers who have very specific requirements. Before Alpine Group used Agentforce Consumer Goods, it was a nightmare for Gustavo to manually keep track of individual products sold to different retail outlets. It’s a lot easier now because he can simply create assortments and associate them to retail stores. Let’s see how he does it:
- Click
 , and find and select Assortments. (You can also find and select the Consumer Goods app from the App Launcher and select Assortments from the navigation bar.)
- Click New, and enter these details:
- Name:
NTO Specialty Assortment - Description:
Products sold at NTO specialty stores. Products include nutritious cereal products, energy bars, summer coolers, and energy drinks.
- Click Save.

Now Gustavo can simply add this assortment to not just one store, but to the entire retail store group. This ensures that the same set of products are sold at all NTO specialty stores that are either flagship stores or regular stores. It also ensures that the price is uniform across these stores.
- Click
 , and find and select Retail Store Groups.
- Select the NTO Specialty Stores record from the All Retail Store Groups list view.
- In the Store Assortments Related list, click Add, and provide these details:
- Assortment:
NTO Specialty Assortment - Start Date: The first day of the current month
- Click Save.

What’s Your Product Category?
Recently, there’s a lot of buzz in Alpine Group because they’re gearing up for a new product introduction, the launch of the Alpine YetiBar energy bar. It has all the right nutrients and tastes really good! Gustavo wants to add this product to the existing product category of energy bars and then add this product to the NTO Presidio outlet because they have shown a keen interest in buying this product.
First, he creates the new product record:
- Click
 , and find and select Products.
- Click New, and provide these details:
- Quantity Unit of Measure: Pack of 6
- Product Name:
Alpine YetiBar - Select the checkbox Active.
- Click Save.

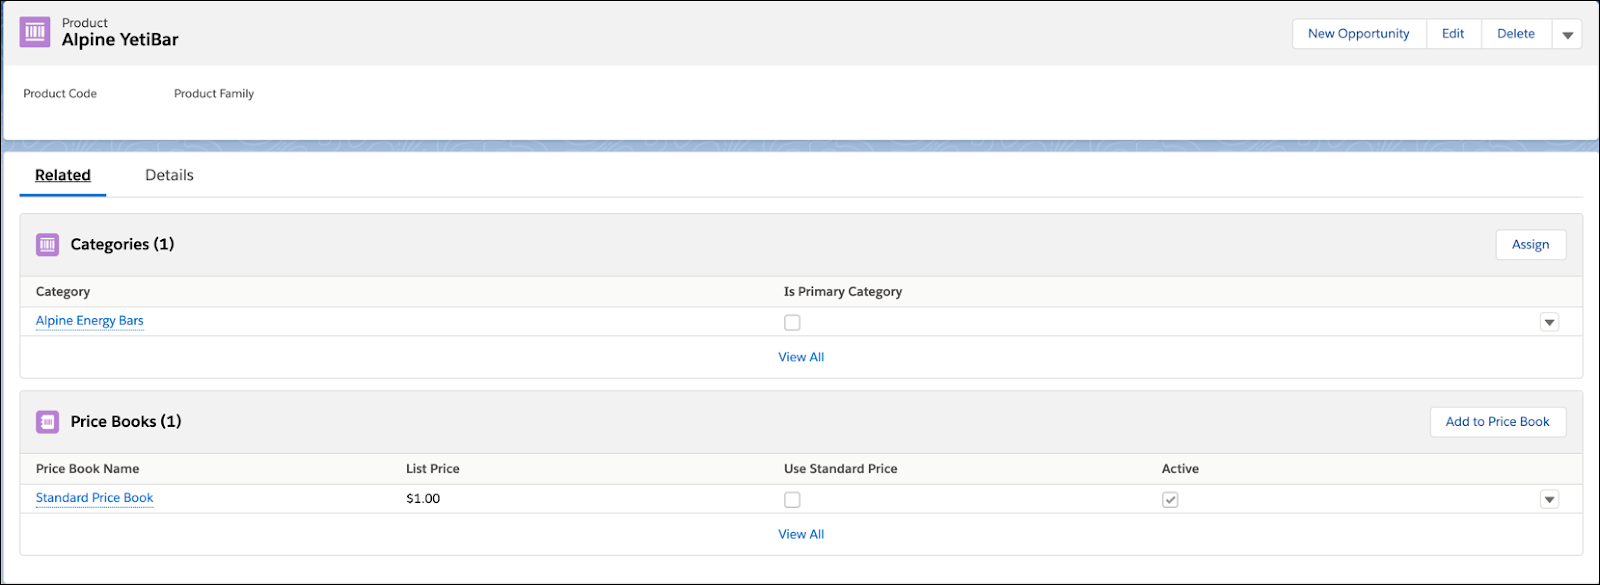
Next, he assigns a price to the product and adds it to an existing category.
- In the Related tab of the Alpine YetiBar product, click Add Standard Price on the Price Books related list.
- Enter
1as the List Price. Click Save.
- In the Related tab of the Alpine YetiBar product, click Assign on the Categories related list.
- For Category, select Alpine Energy Bars.
- Click Save.
Add Products to an Assortment
Now Gustavo adds products to the assortment he created earlier. He knows that in specialty stores there’s no demand for certain products such as the Alpine Bran Cereal. He must choose products carefully.
- Click
 , and find and select Assortments.
- Click the NTO Specialty Assortment record.
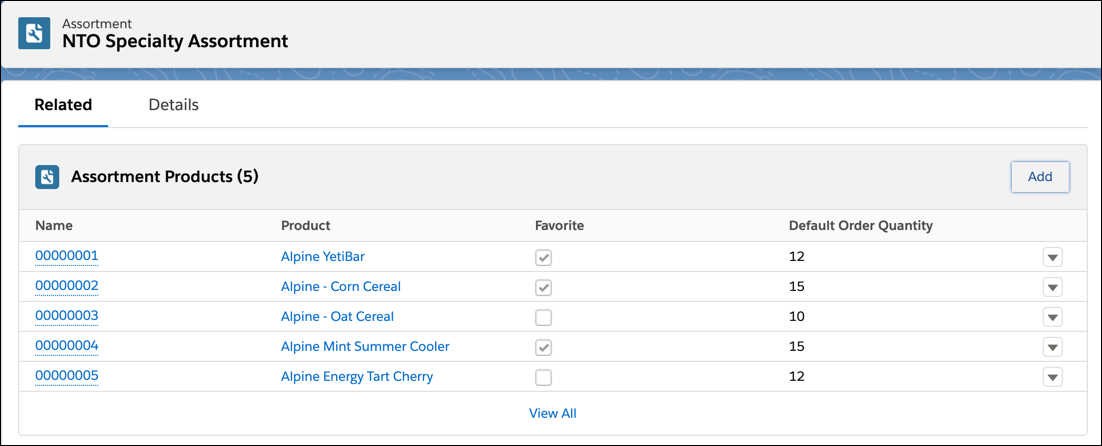
- In the Related tab, click Add on the Assortment Products related list, and provide these details:
- Product: Alpine YetiBar
- Select checkbox Favorite
- Enter
12as the Default Order Quantity
- Click Save & New.
- Repeat steps 3-4 to add the following products:
-
Alpine - Corn Cereal
- Default Order Quantity:
15 - Select checkbox Favorite
-
Alpine - Oat Cereal
- Default Order Quantity:
10
-
Alpine Mint Summer Cooler
- Default Order Quantity:
15 - Select checkbox Favorite
-
Alpine Energy Tart Cherry
- Default Order Quantity:
12
When reps take orders for out-of-stock products during store visits, they can sort by favorite products. This ensures that the most popular products are always replenished and shelves are never empty! Reps can also save time by always ordering the default order quantity. Stores usually prefer a uniform quantity for all product deliveries.
Place Products on the Shelf
Gustavo wants to place the new product Alpine YetiBar on the primary shelves of a retail store to ensure maximum attention. He has associated the products to an assortment, and an assortment to a store group, but this is a more granular association. He adds the Alpine YetiBar to an in-store location.
- Click
 , and find and select Retail Stores.
- Click the NTO Store - Bryant Street record.
- In the Related tab, click the Primary Shelf_Bryant Street link in the In-store Locations related list.
- In the Related tab of the Primary Shelf_Bryant Street record, click Add on the Store Products related list.
- In the New Store Product popup, provide the following:
- Product: Alpine YetiBar
- Start Date: Any date in the past.
- Favorite: Select the checkbox.
- Default Order Quantity:
12

Moving On…
Gustavo has successfully managed his stores and products. But retail execution is all about the actual pre-sales and merchandising activities that field reps perform in stores.
Products and store layouts play a big part in retail execution, but so do promotions, planograms, surveys, and asset checks. Let’s check out how those are managed with Agentforce Consumer Goods.