Create a Work Type
Learning Objectives
In this project, you’ll:
- Create a new work type template.
- Assign required skills and parts to the template.
- Customize the work order layout.
- Create a new work order with work order line items.
- Wrap up the work order and track the products consumed.
- Create a service report template.
- Create a service report to send to your customer.
Sign Up for a Developer Edition Org with Field Service
To complete this project, you need a special Developer Edition org that contains Field Service and our sample data. Get the free Developer Edition and connect it to Trailhead now so you can complete the challenges in this project. Note that this Developer Edition is designed to work with the challenges in this badge, and may not work for other badges. Always check that you’re using the Trailhead Playground or special Developer Edition org that we recommend.
- Sign up for a free Developer Edition org to customize the Field Service Center on Trailhead.
- Fill out the form.
- For Email, enter an active email address.
- For Username, enter a username that looks like an email address and is unique, but it doesn't need to be a valid email account (for example, yourname@test.com).
- For Email, enter an active email address.
- After you fill out the form, click Sign me up. A confirmation message appears.
- When you receive the activation email (this might take a few minutes), open it and click Verify Account.
- Complete your registration by setting your password and challenge question. Tip: Save your username, password, and login URL in a secure place—such as a password manager—for easy access later.
- You are logged in to your Developer Edition.
Now connect your new Developer Edition org to Trailhead.
- Make sure you're logged in to your Trailhead account.
- In the Challenge section at the bottom of this page, click the playground name and then click Connect Org.
- On the login screen, enter the username and password for the Developer Edition you just set up.
- On the Allow Access? screen, click Allow.
- On the Want to connect this org for hands-on challenges? screen, click Yes! Save it. You are redirected back to the challenge page and ready to use your new Developer Edition to earn this badge.
Create a New Work Type Template
Field Service is centered around work orders, which agents can create from work type templates. Work types are easy templates you can create for common jobs that your mobile workforce performs.
For example, your company is a high-speed cable provider, and installing cable is a job that your field techs do almost every day. In this project, you create a work type template for installing cable, so that agents can quickly create work orders when cable install jobs come in. Then, acting as an agent, you create a work order and add the approximate time and specify the parts and skills required to do the job so the right mobile resource is assigned the task. After you create the work order, you act as a dispatcher and assign it to service appointments and resources. Finally, you set the work order as complete and create a service report to send to your customer.
Let’s get started by creating a basic work type.
- From your special Developer Edition org, click the App Launcher
 , and find and select Work Types.
- Click New.
- For Work Type Name, enter
Cable Install.
- In the Description text box, enter
Install connection cable. (We won’t be checking for this in the challenge below)
- For Estimated Duration, enter
2.
- In Duration Type, select Hours. Because your field technicians usually install cable in under 2 hours.
- Check Auto-Create Service Appointment. This means that every time a work order is created with this work type, a service appointment is created.
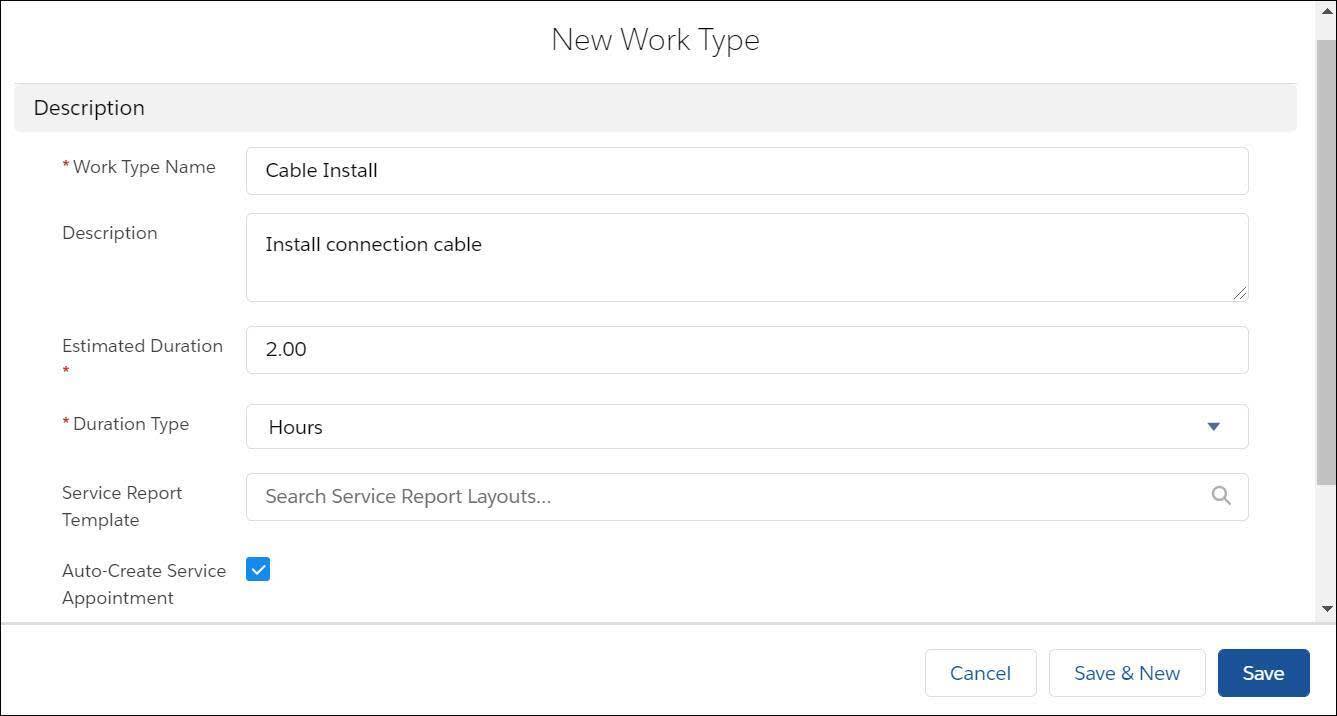
- Click Save.
That’s a basic work type. Now you can add the required skills and parts.
Assign Required Skills
Your mobile workforce has great skills, but they don’t all have the same skills. Each work type requires a different skill set to complete the task and make your customers happy. You want to relate the required field service skills to the Cable Install work type.
Start by creating a skill. Skills are super easy to create, but remember that after you create a skill, you can't delete it.
- Click
 and select Setup.
- Enter
skillsin the Quick Find box, then select Skills under Skill Settings.
- Click New.
- For Name, enter
Cable Install.
- In the Description text box, enter
Laying Cable. (We won’t be checking for this in the challenge below)
- Skip the Assign Users and Assign Profiles sections, which are specific to Chat.

- Click Save.
You can now assign the skill to service resources and list it as required on work types, work orders, and work order line items.
- From the App Launcher, find and select Service Resources.
- Change the list view from Recently Viewed to All Service Resources.
- Click Jane Cando in the Name column.
- Go to the Related tab.
- In the Service Resource Skills related list, click New.
- Use the Skill lookup to select Cable Install.
- Enter skill level
95. (Skill level can range from 0 to 99.99. The way your organization calculates skill level is up to you.)
- Enter a start date. For simplicity, click the date to the right of the dialog to automatically enter today’s date.
- Click Save & New.
Now assign the skill to a different user, without leaving this dialog box!
- Click the X in the Service Resource field.
- Select Matheus Gonçalves in the list of service resources.
- Use the Skill lookup to select Cable Install.
- Enter skill level
99.99.
- Enter a start date. For simplicity, click the date to the right of the dialog to automatically enter today’s date.
- Click Save.
Now assign this skill as a required skill on your Cable Install work type.
- From the App Launcher, find and select Work Types.
- Click Cable Install.
- Go to the Related tab.
- In the Skill Requirements related list, click New.
- In the Skill Required list, select Cable Install.
- Enter a skill level of
75.
- Click Save.
Cable installation is now listed as a required skill on the Cable Install work type.
Identify Required Parts
Your field service jobs need the right parts. Identifying required parts in field service starts with associating your products with a field service location, such as a warehouse, utility van, or tool box. In Field Service, this relationship between a part and a location is known as a Product Item. To start, you need a product and a location.
- From the App Launcher, find and select Products.
- Click New.
- For Product Name, enter
Cable (100 ft).
- Check Active.
- In the Product Description text box, enter
100 foot connection cable.
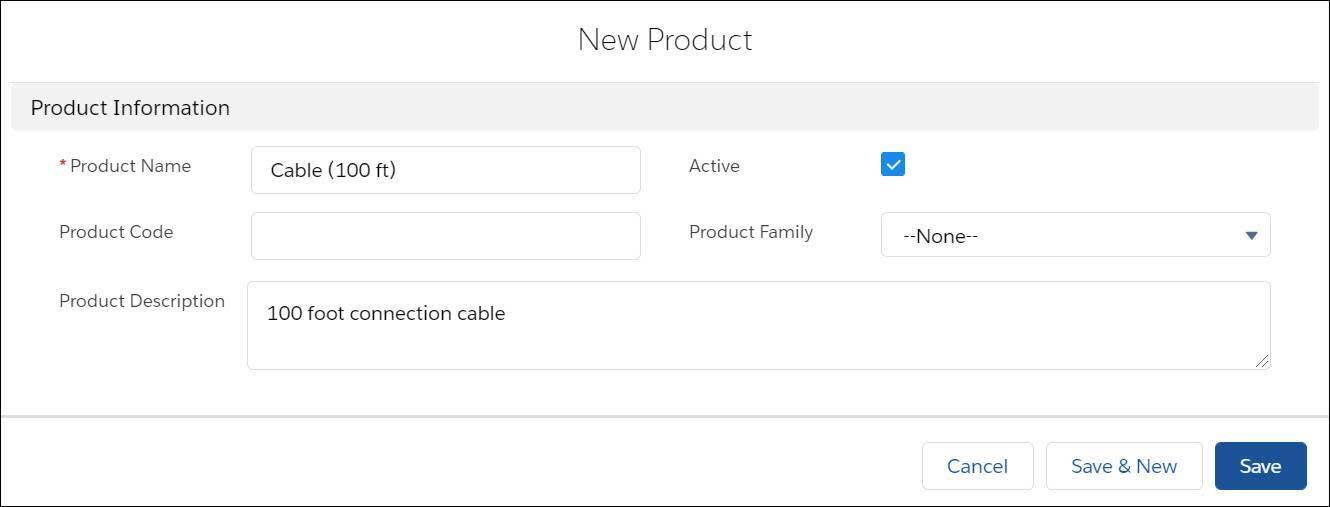
- Click Save.
Now you need an inventory location. Let’s start by preparing the location page layout.
- From the Object Manager in Setup, enter
locationin the Quick Find box.
- Click Location in the Label column.
- Click Page Layouts.
- Click Location Layout in the Page Layout Name column.
- Drag the Inventory Location field to the Information section.

- Click Save.
Next, create a location to represent Jane Cando’s service wagon.
- From the App Launcher, find and select Locations.
- Click New.
- For Location Name, enter
Jane’s Wagon.
- For Location Type, select Space.
- For Time Zone, select Pacific Time (America/Los_Angeles).
- Select Inventory Location.
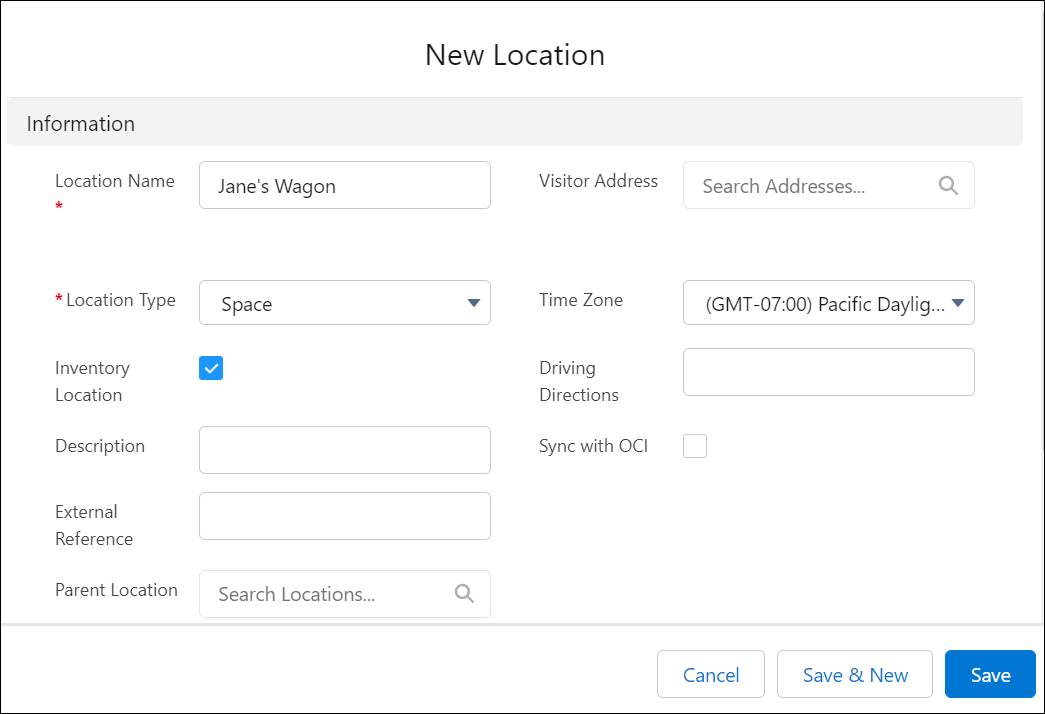
- Click Save.
Now, associate the location with a service territory.
First, let's add the Service Territory Locations to the Related Lists section.
- From the Object Manager in Setup, find and select Location.
- Click Page Layouts.
- Click Location Layout.
- In the palette, click Related Lists.
- Drag Service Territory Locations to the Related Lists section.
- Click Save.
- If you get a message about overwriting user settings, click Yes.
Let's connect the location with the service territory. Note: If you just added the Service Territory Locations related list but don’t see it, log out and then log in again.
- From the App Launcher, find and select Service Territories.
- Change the list view from Recently Viewed to All Service Territories.
- Click San Francisco Area.
- Go to the Related tab.
- In the Service Territory Locations related list, click New.
- For Service Territory, make sure that San Francisco Area is selected.
- For Location, select Jane’s Wagon.
- Click Save.
Now, let’s add a product that’s needed to complete the work.
- From the App Launcher, find and select Product Items.
- Click New.
- For Product Name, select Cable (100 ft).
- For Location, select Jane’s Wagon.
- Enter
50as the Quantity on Hand in Jane’s wagon.
- Select Each for Quantity Unit of Measure.

- Click Save.
Now make this part a required product on your Cable Install work type.
- From the App Launcher, find and select Work Types.
- Click Cable Install.
- Go to the Related tab.
- In the Products Required related list, click New.
- In the Product Required lookup, select Cable (100 ft).
- For Quantity Required, enter
1.
- For Quantity Unit of Measure, select Each.

- Click Save.
You can also attach knowledge articles to work types to put the right specs and instructions at your team’s fingertips. A work type’s attached articles show up on work orders and work order line items that use the work type.
Resources
- Salesforce Help: Create Work Types for Field Service
- Salesforce Help: Work Type Fields for Field Service
- Salesforce Help: Create Skills for Field Service
- Salesforce Help: Add Required Skills to Work Orders or Work Types for Field Service
- Salesforce Help: Set Up Your Field Service Inventory