Create a Hello World Lightning Web Component
Learning Objectives
In this project, you’ll:
- Build a set of simple Lightning web components.
- Retrieve and display data from a single record, and then from a list of records.
- Encapsulate functionality into child components.
- Use events for cross-component communication.
Introduction
In this project you experiment with the basic concepts of Lightning Web Components by creating an app that lets park rangers track bears.
Lightning Web Components is the new programming model for building Lightning components. It uses the latest web standards and can interoperate with the original Aura programming model.
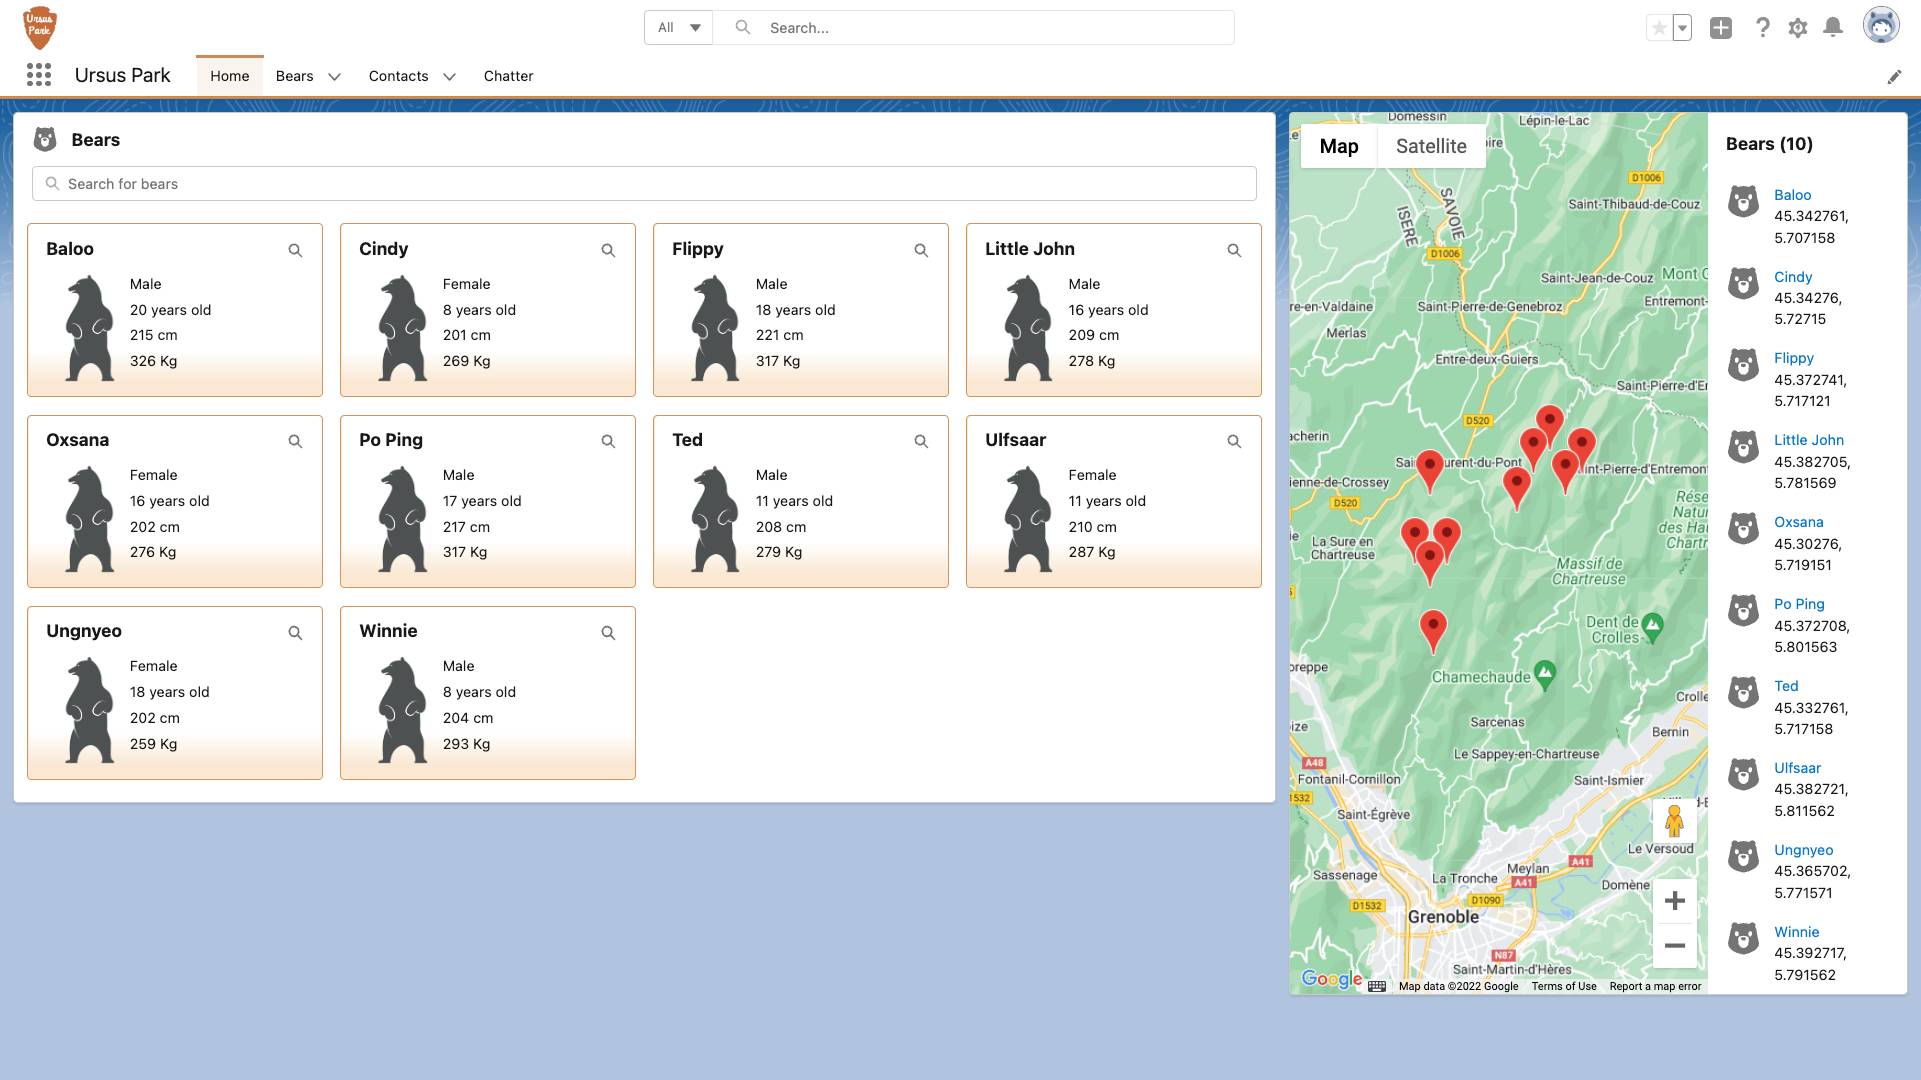
In this project you work for Ursus Park, a fictitious national park. The application you create allows rangers to track bears that are wandering in the park.
Before You Begin
Before you take on this project, make sure you complete these steps from Quick Start: Lightning Web Components. You won't be able to complete this project if you haven't completed the steps in the Quick Start.
Make sure you’ve installed VS Code as well as the Salesforce CLI.
Setup Your Trailhead Playground
- To create a new Trailhead Playground, click the dropdown at the end of this step and select Create a Trailhead Playground.
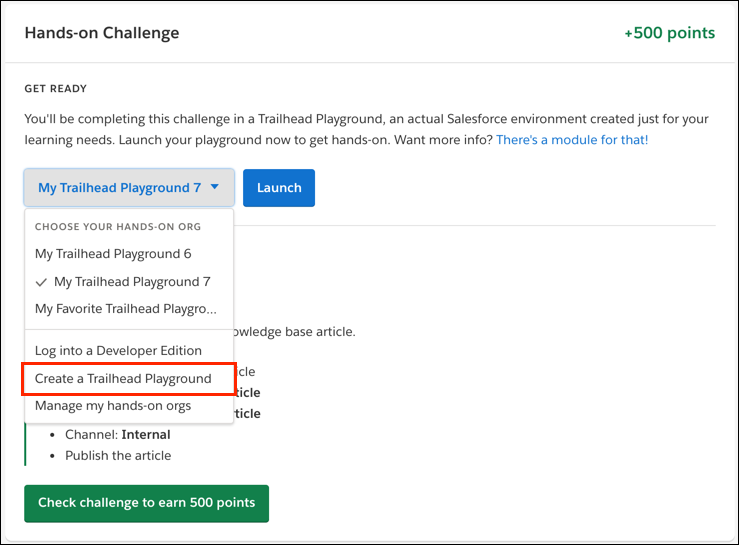
- Once you have a Trailhead Playground, click Launch.
If you see a tab in your org labeled Get Your Login Credentials, great! Follow the steps below.
If not, open the App Launcher ( ![]() ), find and select Playground Starter and follow the steps. If you don’t see the Playground Starter app, check out Find the Username and Password for Your Trailhead Playground on Salesforce Help.
), find and select Playground Starter and follow the steps. If you don’t see the Playground Starter app, check out Find the Username and Password for Your Trailhead Playground on Salesforce Help.
- Click the Get Your Login Credentials tab and take note of your username.
- Click Reset My Password. This sends an email to the address associated with your username.
- Click the link in the email.
- Enter a new password, confirm it, and click Change Password.
Set Up the Ursus Park App
- Open a command prompt, such as cmd on Windows or Terminal on MacOS.
- Clone the Ursus Park app git repository.
git clone https://github.com/trailheadapps/build-apps-with-lwc.git
The repository contains the Ursus Park app, a Bear object with a set of fields, record and page layouts, and Apex code that retrieves bear records and sample bear records. This project base helps us focus on the Lightning Web Component development. Note that VS Code has integrated Git support, and you can also install it directly from the open source site here: https://git-scm.com/ - Navigate to the new build-apps-with-lwc directory.
cd build-apps-with-lwc
- Authorize your Trailhead Playground with the Salesforce CLI, save it with a
bear-trackingalias and set the current user as the default user:sf org login web -s -a bear-tracking
- When a browser window with the Salesforce login page opens, enter your Trailhead Playground credentials.
- Deploy the app code to the org.
sf project deploy start -d force-app/main/default
- Assign the Ursus Park User permission set to the current user.
sf org assign permset -n Ursus_Park_User
- Import the sample data.
sf data import tree -p data/plan.json
- Open the org in a browser.
sf org open
- From the App Launcher (
 ), find and select Ursus Park. This opens the Lightning application.
 - Click the Bears tab and ensure that it’s populated with some sample data.
Create a Hello World Lightning Web Component with Static HTML
Let’s create our first Lightning web component: a simple hello world component.
- Open VS Code.
- Add the project folder you just cloned from GitHub by clicking File > Open Folder and navigating to the
build-apps-with-lwcfolder. - In the sidebar, expand the
force-app/main/defaultfolder. - Right-click the
force-app/main/default/lwcfolder, click SFDX: Create Lightning Web Component and name the componenthelloWebComponent.
Alternatively, you can achieve the same result by runningsf lightning generate component --type lwc -n helloWebComponent -d force-app/main/default/lwcin a command prompt. - Replace the contents of
helloWebComponent.htmlwith the following markup.<template> <lightning-card title="Lightning Web Component" icon-name="custom:custom14"> <div class="slds-var-m-around_medium"> <h2>Hello World!</h2> </div> </lightning-card> </template>
This markup defines a card base component with static text. - Edit the
helloWebComponent.js-meta.xmlfile, and replace<isExposed>false</isExposed>with these lines.<isExposed>true</isExposed> <targets> <target>lightning__AppPage</target> <target>lightning__RecordPage</target> <target>lightning__HomePage</target> </targets>
These extra lines allow you to add the component to any type of Lightning page in the Lightning App Builder. - Deploy the updated code to the org. In VS Code, right-click the default folder and click SFDX: Deploy Source to Org.
Add the Hello World Component to a Page
Now that we have implemented our component, let’s add it to a page to view it.
- Open the org in a browser:
sf org open
- From the App Launcher (
 ), find and select Ursus Park. This opens the app Home page.
 - Click the gear icon (
 ) and select Edit Page.
 - Under Custom Components, find your helloWebComponent component and drag it to the top of the right-hand column.
- Click Save.
- Since this is the first time we’ve modified the standard Home page, we need to activate the updated page so that our users can see what we’ve done. Click Activate.
- Click App Default tab.
- Click Assign to Apps.
- Check Ursus Park.
- Click Next and then Save.
- Click Back
 to return to the Home page.
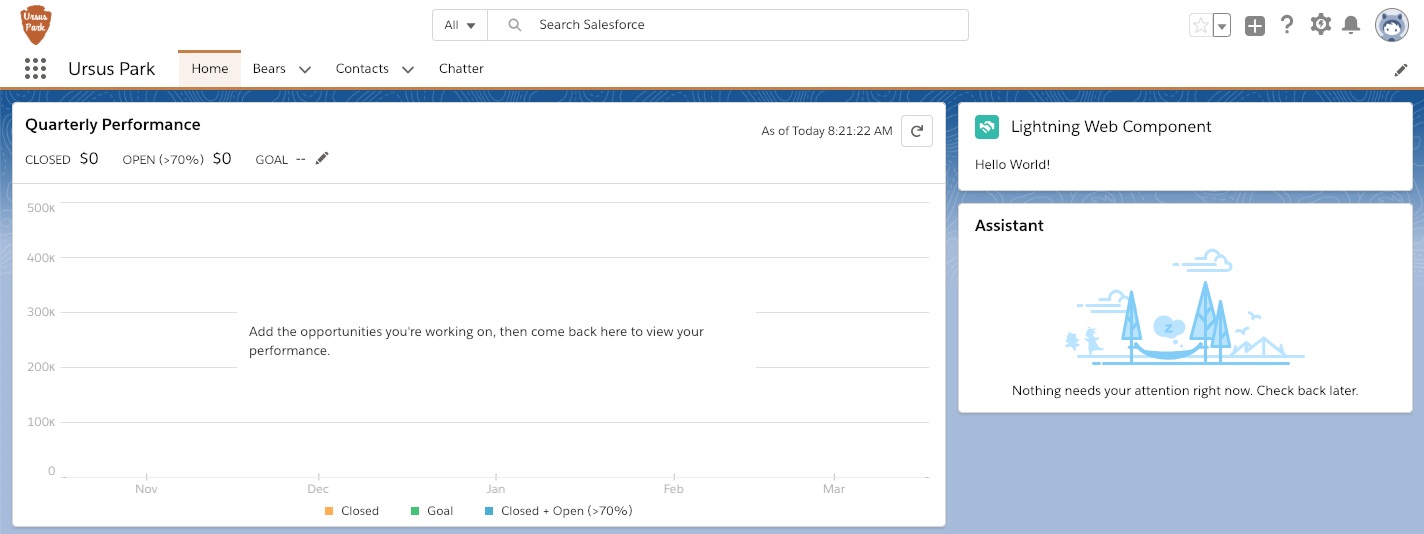
Congratulations! You’ve just created your first Lightning web component and added it to a page in Lightning Experience. This first version doesn’t do much, so let’s turn it into something a bit more dynamic.
Use Data Binding
Let’s add some data to our component. We’ll work with one-way data binding. We start by displaying read-only data then make it editable.
- In VS Code, click
helloWebComponent.htmlto edit it. Replace<h2>Hello World!</h2>with<h2>Hello {greeting}!</h2>. This adds a binding to agreetingproperty that we define in the next step. - Edit
helloWebComponent.jsand replace its contents with the following.import { LightningElement } from 'lwc'; export default class HelloWebComponent extends LightningElement { greeting = 'Trailblazer'; }This declares and initializes agreetingproperty. This property is reactive. In other words, whenever the value ofgreetingchanges, the component’s HTML template is automatically refreshed. - Deploy the updated code to the org. Right-click the default folder and click SFDX: Deploy Source to Org.
- In the org, refresh the Ursus Park Home page and notice that your component changed (it's now displaying “Hello Trailblazer!” instead of “Hello World!”).
Well done! You have achieved data binding: the greeting property is read and displayed, but it cannot be modified by the user for now.
Let’s go one step further and make the data editable by adding an input field.
- In VS Code, edit
helloWebComponent.htmland add the following line under<h2>Hello {greeting}!</h2>:<lightning-input label="Name" value={greeting} onchange={handleGreetingChange} ></lightning-input>This code adds a text input field styled with SLDS. The input is initialized with thegreetingproperty. Whenever the input changes, it calls ahandleGreetingChangeJavaScript function that we define in the next step. - Edit
helloWebComponent.jsand add the following lines undergreeting = 'Trailblazer';.handleGreetingChange(event) { this.greeting = event.target.value; }This defines a function that captures a value from an event (input change event coming from the input field) and assigns it to thegreetingproperty. - Deploy the updated code to the org. Right-click the default folder and click SFDX: Deploy Source to Org.
- In the org, refresh the Home page and notice how your component is instantly updated when you edit the text field.
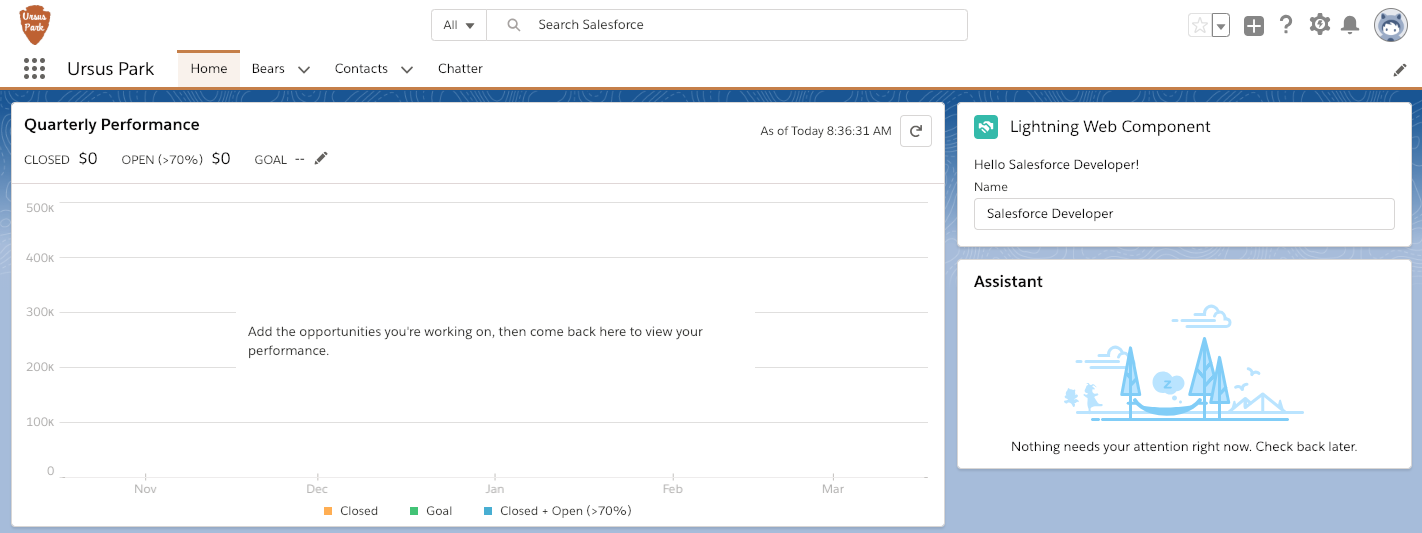
You have established data binding and made your data editable. The greeting property is displayed and automatically refreshed whenever you change its value with the input field.
Displaying a property is a start, but what if you need to transform its value before rendering it? Lightning Web Components have you covered with expressions.
Use Expressions
Let’s get into some more advanced topics and use an expression to display a dynamic value. We’ll add an expression that returns a greeting message with your name in capital letters.
- In VS Code, edit
helloWebComponent.htmland replacetitle="Lightning Web Component"withtitle={capitalizedGreeting}. - Replace
<h2>Hello {greeting}!</h2>with<p>Today is {currentDate}</p>. - Edit
helloWebComponent.jsand add the following lines above thehandleGreetingChangefunction block.currentDate = new Date().toDateString(); get capitalizedGreeting() { return `Hello ${this.greeting.toUpperCase()}!`; }This defines acurrentDateclass property and acapitalizedGreetinggetter function. These getter functions are called expressions. They are used to display values just like properties, but expression values can be calculated based on some logic written in a function. Unlike properties, expressions aren't reactive: they are automatically reevaluated each time the component rerenders. This holds true whether their value has changed or not. When a user types something in the input of the component, thehandleGreetingChangeevent handler function updates the value of thegreetingproperty. Sincegreetingis reactive, it triggers a rerender, which forces the reevaluation of expressions. Note that we declared acurrentDateclass property to hold and display the current date instead of using an expression. We could also write an expression with justreturn new Date().toDateString();but using a property has the benefit of not creating a newDateobject for each rerender. - Deploy the updated code to the org. Right-click the default folder and click SFDX: Deploy Source to Org.
- In the org, refresh the Home page and notice how the expressions are displayed.
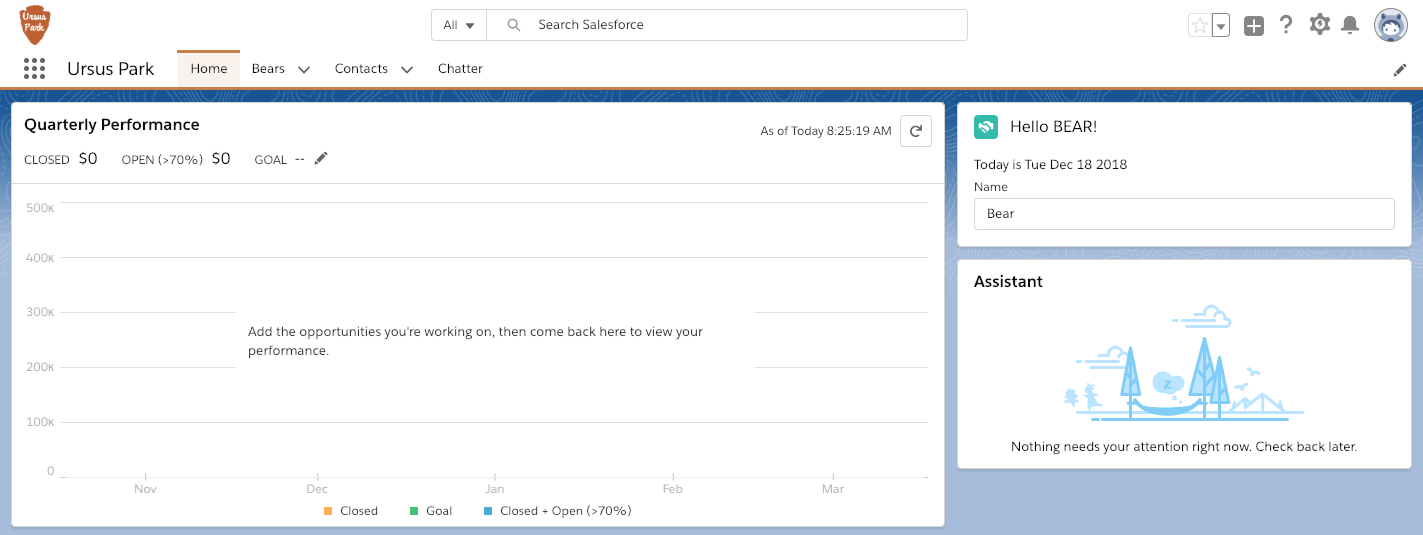
As you can see, expressions allow us to keep component templates clear of logic. In fact, using expressions is the only way to transform a property value before displaying it.
That’s it for this step. You’ve set up a basic hello world component with base components, data binding, and expressions.
Now that we’ve covered the basics, let’s move on to something more exciting.
