Create Custom Profiles
Learning Objectives
In this project, you’ll:
- Update field-level security and create permission sets in an HR recruiting app so that sensitive data can be viewed only by those who need it.
- Further restrict data access in the app by changing sharing settings.
Introduction
For this project, you continue customizing AW Computing’s Recruiting app, which the HR team uses as they work to place applicants into open positions in the company. Ling Wu, the vice president of HR, wants to be sure that those who are using the app only see the data they need to see.
The first step is creating an HR Recruiter profile and setting up the required data access according to Ling’s specifications. It’s best practice to not assign standard profiles to users. Instead, even if you’re not making any changes, clone the Standard Profiles and assign the clones to users. That way, if a user needs permissions or access to a custom object in the future, the cloned profiles can be updated easily.

Create Profiles
Before creating the new profile, customize how profiles are viewed.
- From Setup, enter
User Management Settingsin the Quick Find box, and select User Management Settings.
- Set Enhanced Profile User Interface to Disabled (if it’s not already).
Now create an HR Recruiter profile and set its object permissions.
- From Setup, enter
Profilesin the Quick Find box, and select Profiles.
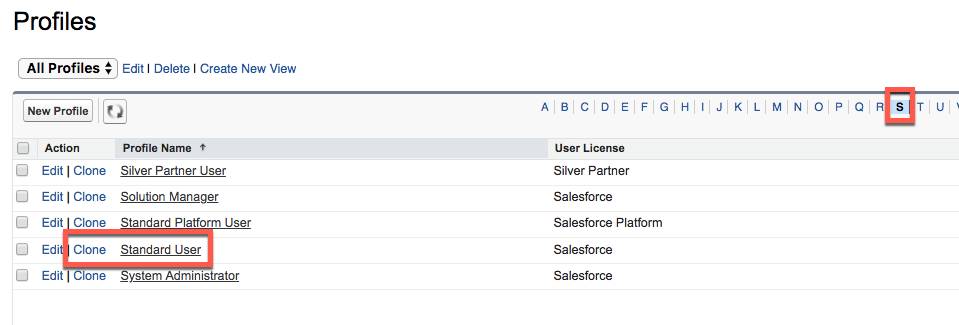
- From the list of profiles, find Standard User.
- Click Clone.
- For Profile Name, enter
HR Recruiter.
- Click Save.
- While still on the HR Recruiter profile page, click Edit.
- Scroll down to Custom Object Permissions and change the Basic Access for each object to reflect the table below.
Object
Read
Create
Edit
Delete
Candidates
✓
✓
✓
Interviewers
✓
✓
✓
✓
Job Applications
✓
✓
✓
✓
Job Postings
✓
✓
✓
✓
Job Posting Sites
✓
✓
✓
✓
Positions
✓
✓
✓
Reviews
✓
✓
✓
✓
- Click Save.
Now that you’ve created a new profile with the access Ling Wu requested, move on to the next step, where you continue tightening data security by adjusting field-level security, creating permission sets, and creating sharing settings.