Get Started with Anypoint Connectors
Learning Objectives
In this project, you’ll:
- Connect your instance of Anypoint Platform to Trailhead.
- Create a new org.
- Deploy your integration in Anypoint Platform.
- Test your integration in Salesforce.
Design an Application Network
One of the most common applications found in organizations is a database. A database is an organized collection of structured information stored in a computer system. MuleSoft Anypoint Platform allows you to integrate a database with other applications. In fact, Anypoint Platform allows you to integrate any number of applications, data sources, and devices with each other.
As a best practice, you should employ a methodical approach to connecting data between applications through reusable Mule applications.
The following diagram is an example of an application network. For our purposes, it’s not important to know any details about the applications. The items outside the horizontal gray swimlanes are systems that need to be connected. The items inside the swimlanes are reusable Mule applications that connect to the external systems and to each other. In general, one Mule application should be the interface for one external system. You then build other Mule apps that combine data from these systems to meet your business needs.
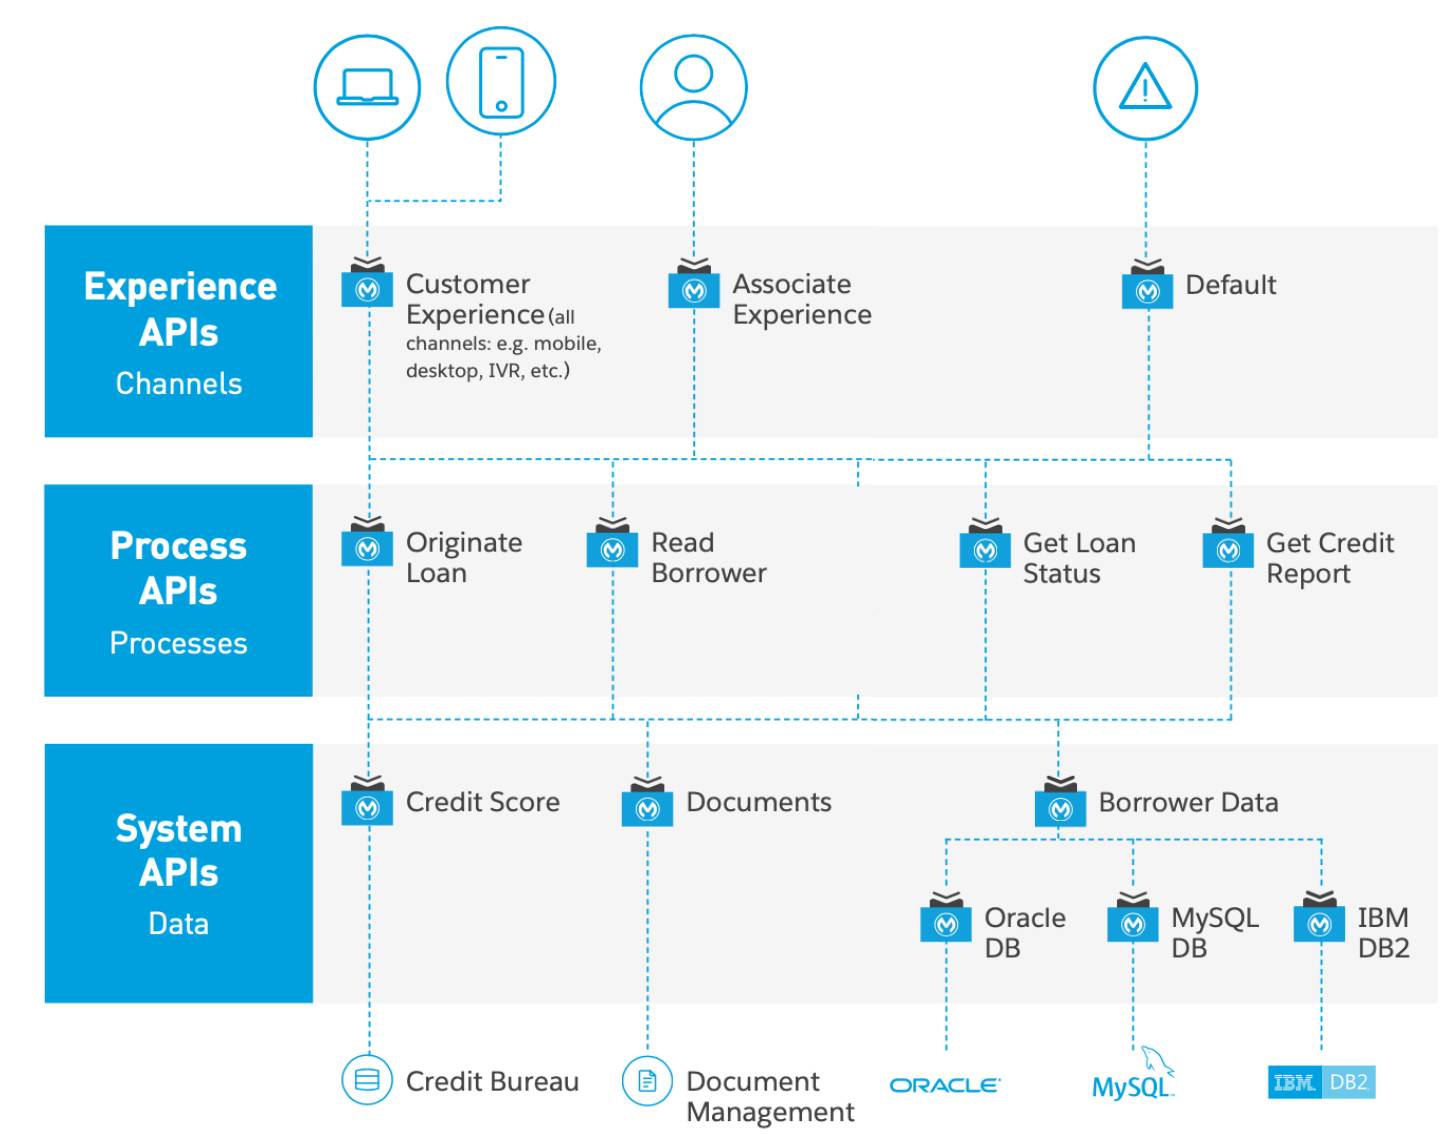
You write Mule applications on Anypoint Platform. When writing Mule apps, use Anypoint Connectors to integrate your app with third-party systems. Connectors abstract the technical details involved with connecting to a target system.
Amazon DynamoDB is an example of a third-party system. It is a fully managed NoSQL database service that provides fast and predictable performance with seamless scalability. Anypoint Connector for Amazon DynamoDB provides connectivity to the Amazon DynamoDB API.
Don’t worry if you don’t have access to a DynamoDB instance. You can still complete this project. If you want to try out this project with Amazon DynamoDB, you need the following.
- An Access key and Secret key obtained from AWS IAM
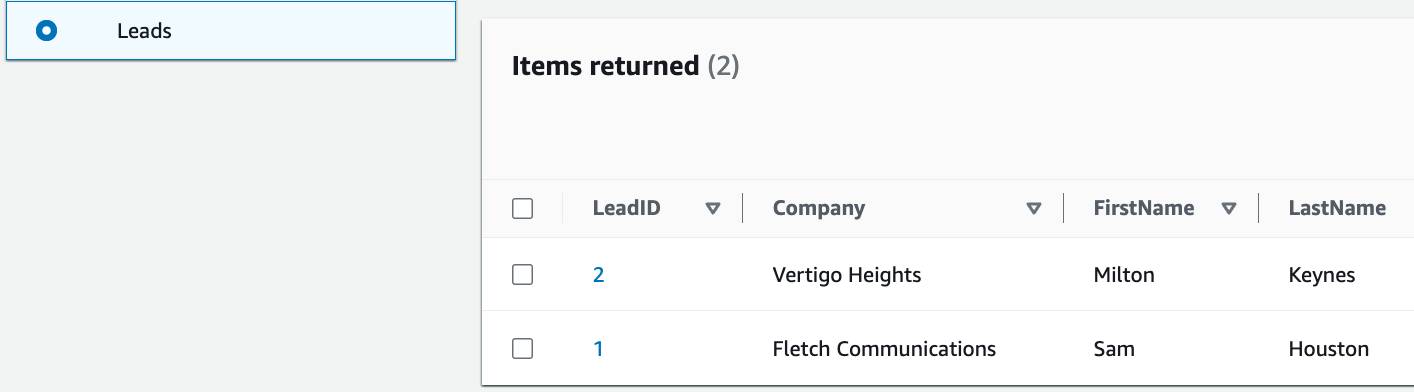
- A table named Leads with the Partition key set to LeadID (String)
- A couple of records, as shown in the following screenshot
Integration Challenge
Leaders at the shoe company Cloud Kicks would like to use Salesforce lead nurturing tools to engage with potential customers (leads) as they interact with Cloud Kicks’s marketing assets. However, leads are stored in Amazon DynamoDB. So the leaders task Cloud Kick’s integration team, led by Linda Rosenberg, with creating an integration between Salesforce and Amazon DynamoDB. Linda knows that developing custom, one-off integrations is time-consuming, error-prone, unscalable, and not reusable. This creates a maintenance nightmare for Linda.
Integration Solution
The good news is that Linda can accomplish the mission in a matter of minutes with Anypoint Platform. What’s more, the Mule apps her team builds can be reused time and again by other parts of the organization.
In an ideal world, Linda would create a separate Mule app for each system. One to be an interface for Salesforce and another to be an interface for DynamoDB. A third Mule app would move data between the systems. However, following the recommended practice would make the solution a little complex. Because Linda is just being introduced to Anypoint Platform, she uses a simple solution. She is ready to set up her Anypoint Platform account.
Set Up Your Anypoint Platform Account
First, sign up for a free 30-day Anypoint Platform account, so you can start working with Anypoint Platform.
- Go to https://anypoint.mulesoft.com/login/signup.
- Fill out the form. For Email, enter an active email address.
- After you fill out the form, click Accept and create account.
- A Verify Email message will appear. Click Verify Email.
- Enter the verification code from your email account. Click Confirm.
Now connect your new Anypoint Platform account to Trailhead.
- Make sure you’re logged in to your Trailhead account.
- In the Challenge section at the bottom of this page, click Connect Anypoint Account.
- On the Authorize App screen, click Grant Access to Account.
Click Verify Step to go to the next step in the project, where you create an org for your integration.
Resources
-
MuleSoft: Introduction to Anypoint Connectors
-
Video: Automate Anything, Empower Everyone with MuleSoft | Salesforce Demo