Prepare to Install EDA
Learning Objectives:
In this project, you’ll:
- Discover why you should install Education Data Architecture (EDA) into a Trailhead Playground.
- Install EDA into a Playground using the EDA installer.
If you want to install EDA into a sandbox or developer environment, review the resources listed at the end of this unit.

What is EDA?
Education Data Architecture (EDA) is the foundation of Agentforce Education. Developed in collaboration with our education partners and customer community, EDA is a flexible data architecture designed to configure Agentforce Education.
So, what exactly do we mean by “data architecture?” Basically, we’re talking about a series of industry standard objects built on the Salesforce Platform that model student relationships as well as affiliations to courses, extracurricular activities, and more. With EDA, institutions can leverage a common language and configuration across the entire learner lifecycle without having to spend resources customizing Agentforce Education. It also includes early warning management including attendance, term grades, prospective employers, and more.

If you’ve had a chance to check out the Education Data Architecture Basics module in Trailhead, you might remember we compared EDA to the dreamiest kitchen pantry ever featured on your favorite home improvement show. Picture it: it’s stocked with exactly the items you need and they’re all organized and easy to see. With EDA, admins can reach into their perfect pantries and find just what they’re looking for without losing valuable time rummaging around.
Why Do I Need to Install EDA Into a Trailhead Playground?
Just like many other apps, EDA is a managed package. A managed package is a neatly wrapped bundle of customized Salesforce components like objects, page layouts, and report types, as well as affiliations to courses, extracurricular activities, and lots more.
To get all these customizations into your Salesforce production org (an "org" is shorthand for your instance of Salesforce), the package must be installed on top of the Enterprise Edition of Salesforce. However, in order to explore EDA through Trailhead hands-on challenges and projects, you need to install EDA into a Trailhead Playground. That's what we're going to show you how to do in this project.
What’s a Trailhead Playground, Again?
Much like a real playground, a Trailhead Playground is a test environment where you can explore and make customizations without impacting anything else (meaning your “production org,” the place where your organization has active users accessing live data). When you first log in to Trailhead, one Playground is created for you, but you can have up to 10 active Trailhead Playgrounds at any given time. A Trailhead Playground can only be opened from Trailhead, and as long as you keep using it, access to your Playground never expires. To learn more about Playgrounds, see the Trailhead Playground Management module listed in the Resources section below.
Create a Trailhead Playground
Before you can install EDA into a Trailhead Playground, you first need to create the Playground itself.
- Log in to Trailhead (if you haven’t already) and scroll to the bottom of this page (yep, this page, the one you're on right now).
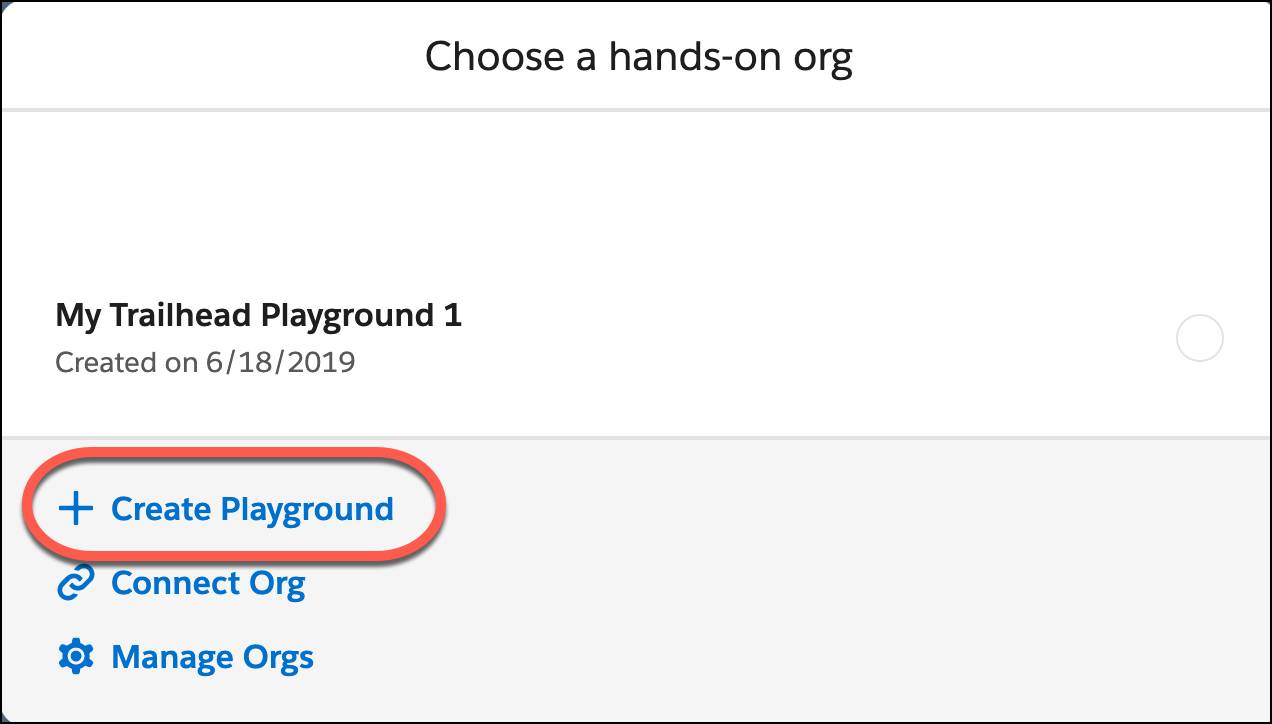
- Click the dropdown menu next to the Launch button, or the name of your most recently visited existing Trailhead Playground, and select + Create Playground.
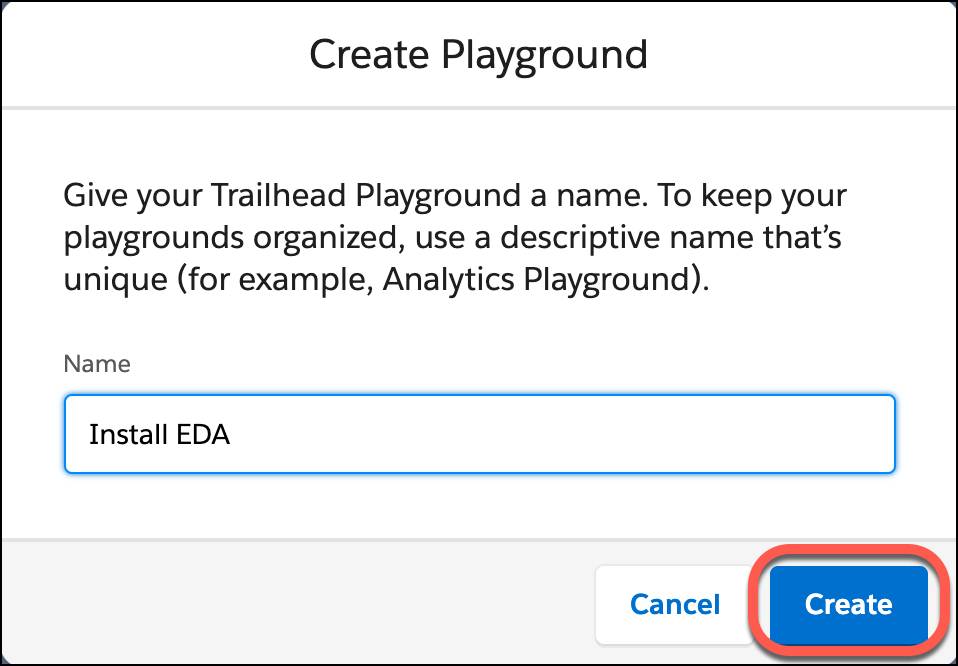
- Give your Playground a specific name so you can find it easily in the future. For this project, name this new Playground
Install EDA.
- Click Create. This process takes a few minutes. While you’re waiting, check out some other awesome Trailhead content.
- If you created the Playground with the fun name Trailhead generated and you need to rename your Playground, you can do that once it's created by following these steps.
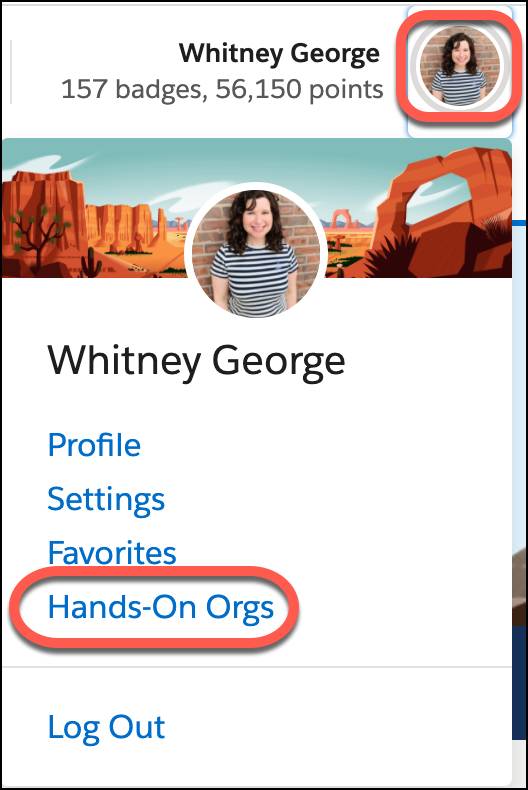
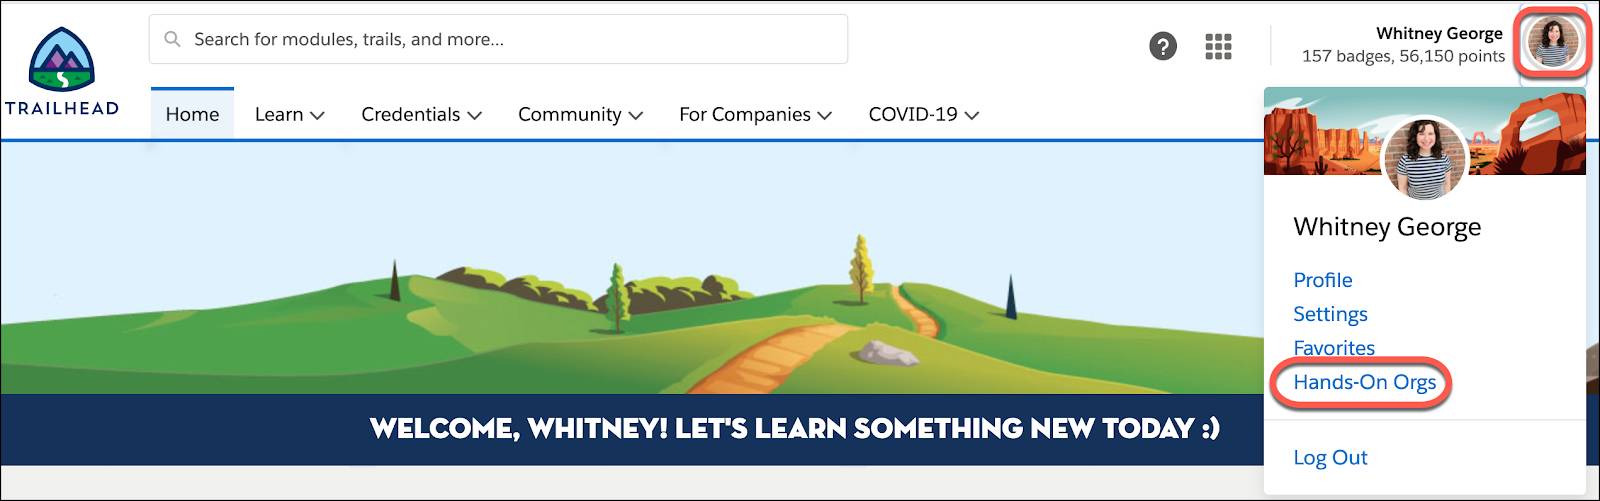
- Click your photo (or the user icon if you don’t have a picture) in the top corner of the page to open your personal settings menu. Click Hands-on Orgs.
- Click the Rename button associated with the playground you want to rename.
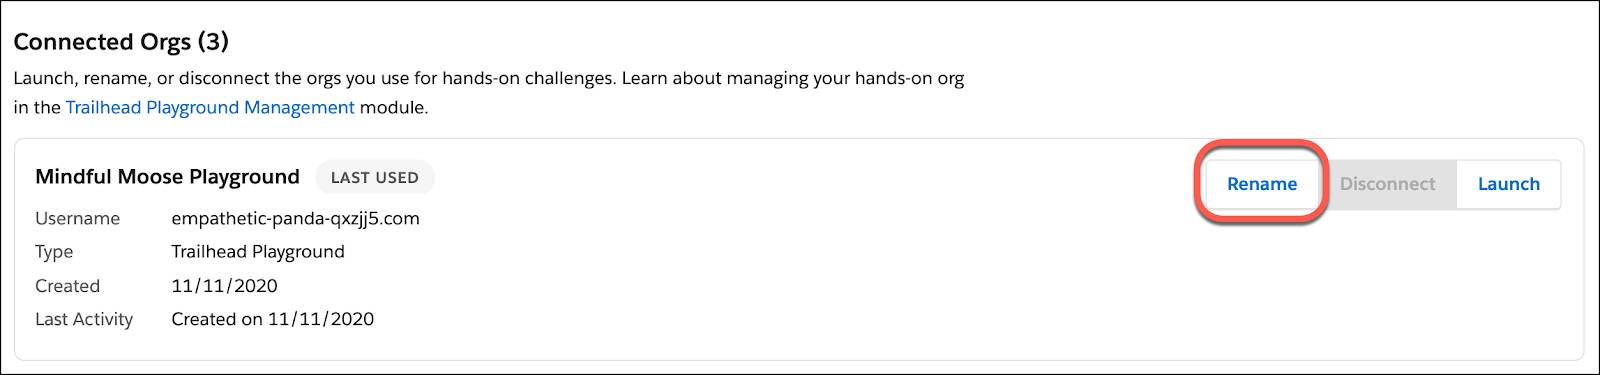
c. In the Rename pop-up, name this playgroundInstall EDA.
d. Click Save.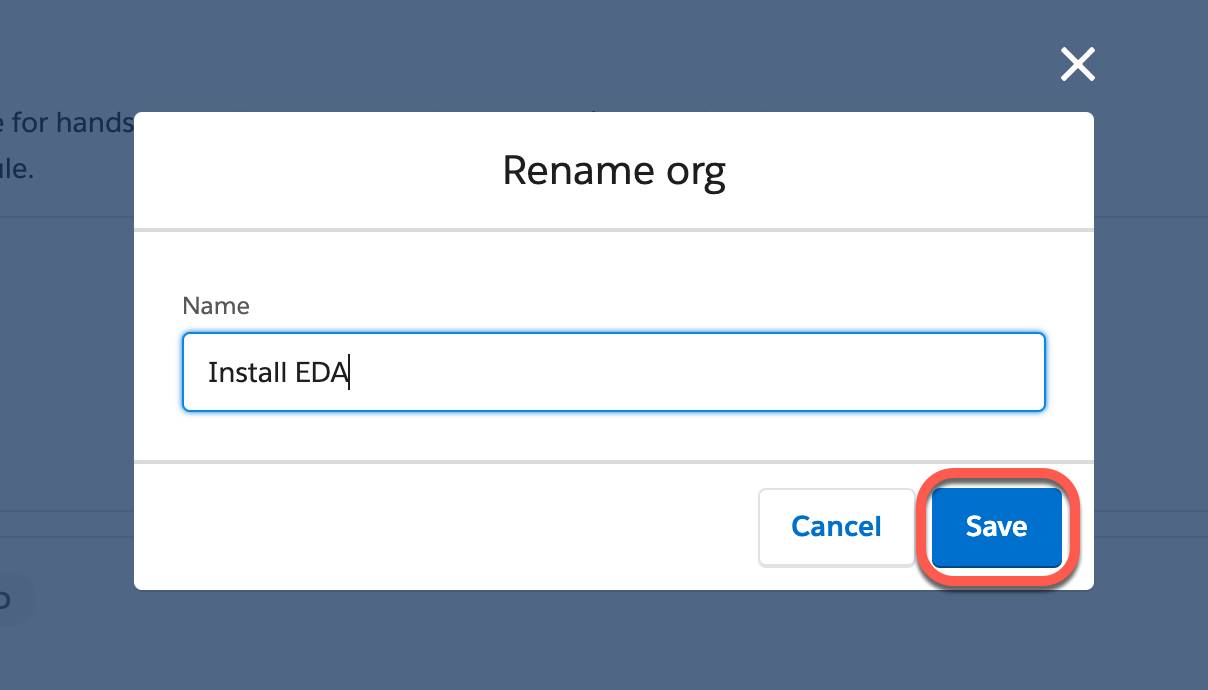
Now you’re ready to launch your new Playground.
Find Your Username and Reset Your Password
While it’s very thoughtful of Trailhead to automatically create your Playground and generate a username and password for you, it means you need to follow a few more steps to find this information. You’ll need your assigned username to initiate this project, and it’s best practice to reset the password before installing EDA into a Trailhead Playground.
To retrieve your Playground username and reset your password:
- Log in to Trailhead (if you haven’t already). Click your photo and select Hands-on Orgs.
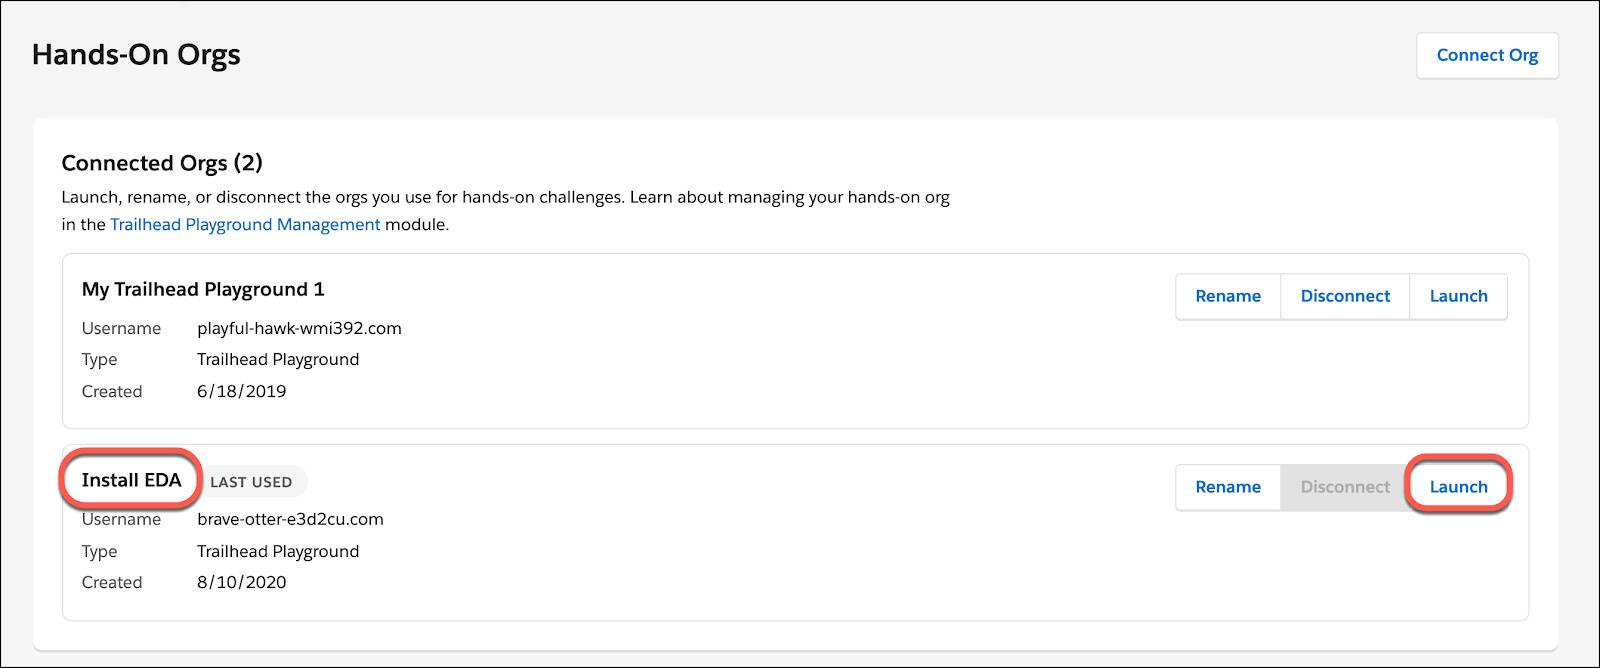
- From the Salesforce Hands-on Orgs page, click the Launch button for the Install EDA Trailhead Playground to open this Playground in a new browser tab. Voila! You’re now logged in to your new Install EDA Playground.
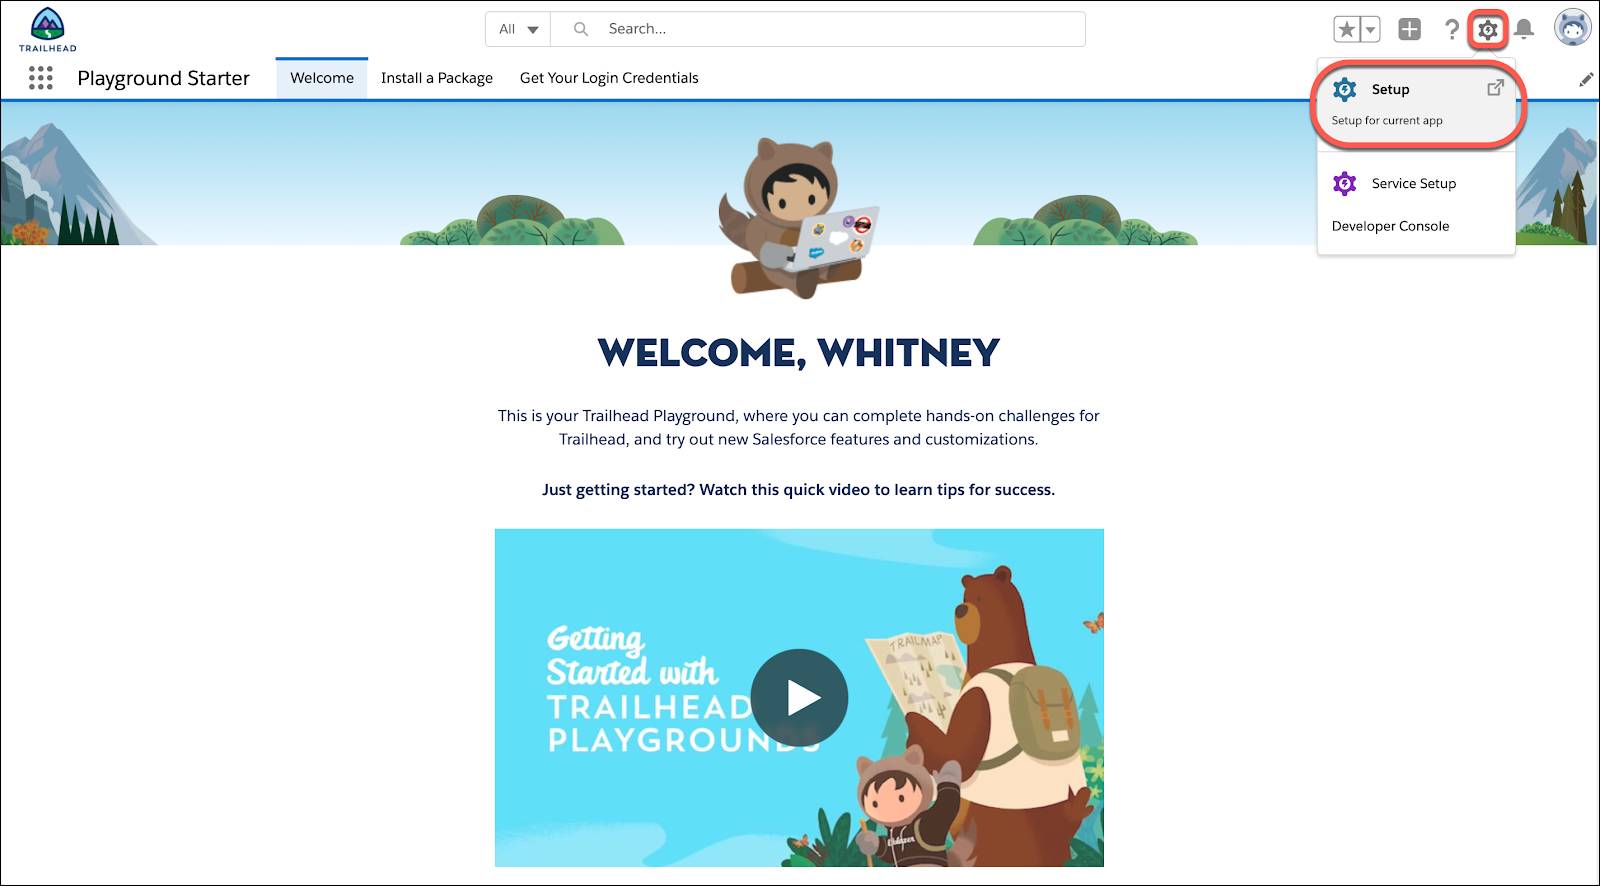
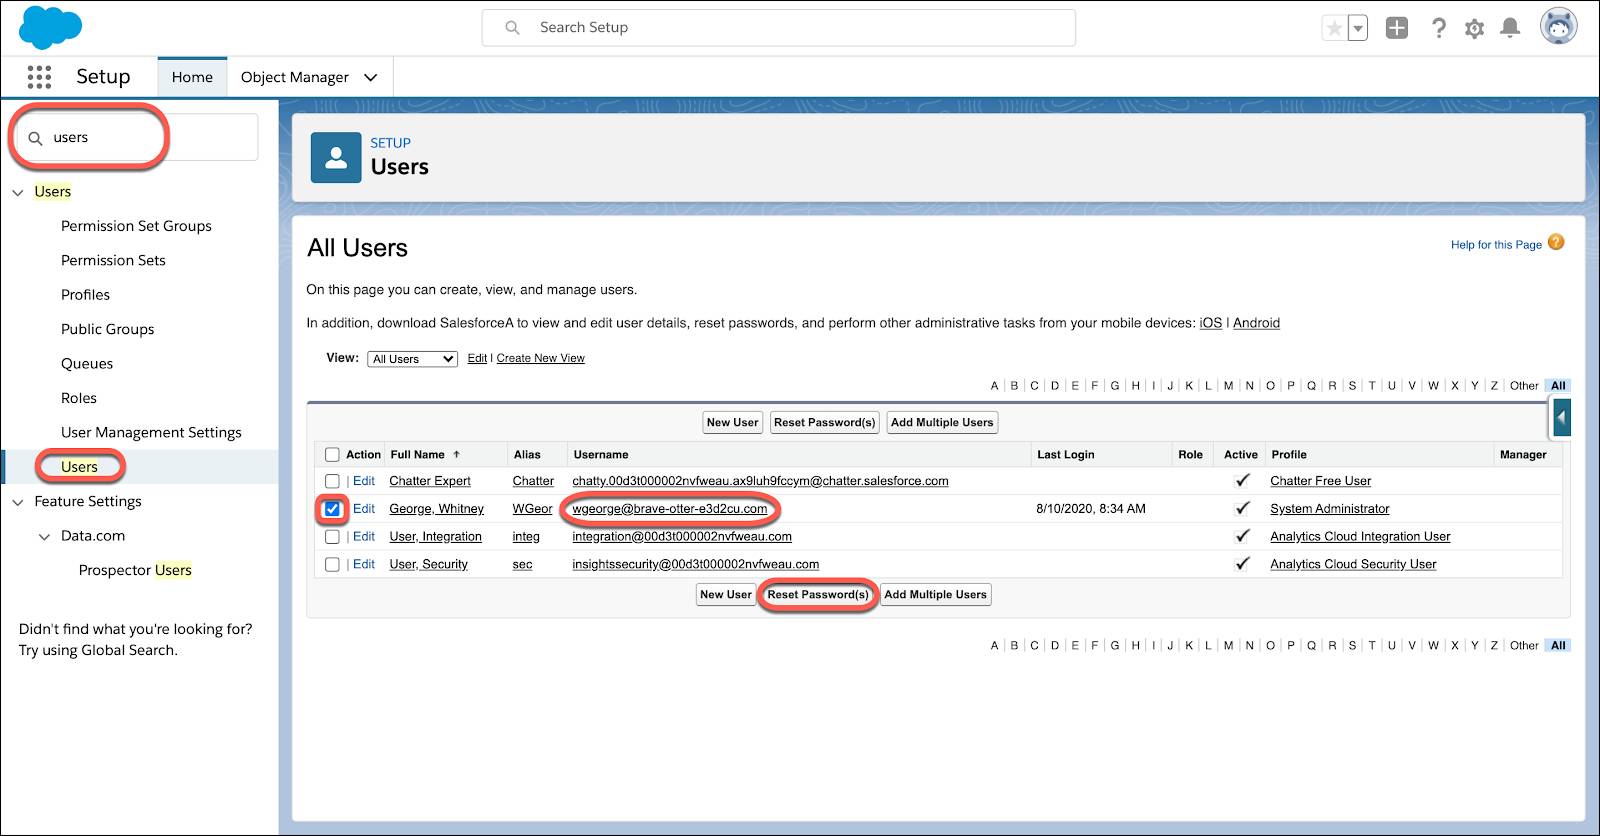
- In this new browser tab, click the Setup gear and select Setup.
- Type
usersin the Quick Find box. Click Users from the menu.
- Find your name on the list of users and check the box next to your name. Make note of the username; this is the username for your Install EDA Trailhead Playground.
- Click Reset Password(s) and OK. This will send a password reset email to the email address associated with your username.
- Open your email, find the password reset message, and click the link in the email. Be sure to check your spam folder if you don't see this message.
- Click Reset Password and set your new password.
- Click Change Password.
Now you have your username and password for your brand new Install EDA Trailhead Playground. Be sure to write this information down somewhere safe and keep it close by for the next step.
Click the verify button to go to the next step in the project.
Resources
- Trailhead: Agentforce Education Basics
- Trailhead: Education Data Architecture Basics
- Trailhead: Trailhead Playground Management
- Salesforce Help: Install EDA
- Salesforce Help: Reset Passwords for Your Users