Build Lookup Logic to Find the Account Associated with This Opportunity
Create the Flow and Add Variables
Your sales reps will use a custom button to launch the flow. When clicked, the custom button calls the flow by its URL. When you use a custom button, you can append extra information, like field values, to the end of the URL. These values are known as URL parameters. URL parameters don’t support record variables, however, so for now we’ll use a regular flow variable.
Create a flow and configure it to receive an account ID and an opportunity ID. Later, the flow uses those IDs to determine which discount to apply and where to apply it.
- Click the App Launcher (
 ).
).
- In the Search apps and items box, enter
autoand then select Automation.
- In the Flows panel, click New.
- Under Frequently Used, select Autolaunched Flow (No Trigger).
Create an Opportunity Variable
Let’s create a variable to store the opportunity’s ID.
- Click
 to toggle the Toolbox.
- In the Manager tab, click New Resource.
- Configure the resource as a text variable.
- For Resource Type, select Variable.
- For API Name, enter
OpportunityId.
- For Description, enter
Stores the ID number of the opportunity that triggered the flow.
- For Data Type, select Text.
- Check the Available for Input checkbox.
- For Resource Type, select Variable.

- Click Done.
Create an Account Variable
Next, create a variable to store the account ID.
- In the Manager tab, click New Resource.
- Configure the resource as a text variable.
- For Resource Type, select Variable.
- For API Name, enter
AccountId.
- For Description, enter
Stores the ID number of the account associated with the opportunity.
- For Data Type, select Text.
- Check the Available for Input checkbox.
- For Resource Type, select Variable.
- Click Done.
- Verify that the OpportunityId and AccountId variables have been created. They should be listed under Variables.

Save the Flow
Now it’s time to save the flow and define its key properties: name, description, type, and more.
- On the button bar, click Save.
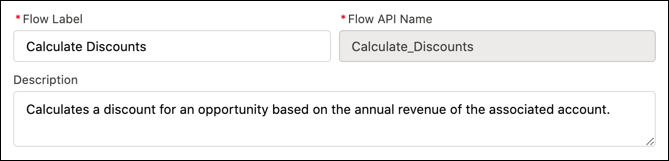
- For Flow Label, enter
Calculate Discounts.
The Flow API Name field automatically populates based on this entry.
- For Description, enter
Calculates a discount for an opportunity based on the annual revenue of the associated account.
- Click Save. An error appears, but that’s to be expected! After all, we haven’t added any elements yet. Dismiss the error.
Find the Account Associated with the Opportunity
To determine which discount to apply, the flow needs to know the account’s annual revenue. The flow has the ID of the account—it’s one of the values that the button passes into the flow. So it uses that ID to look up the account’s annual revenue in Salesforce. The Get Records element in Flow Builder lets you look up data in Salesforce. So let’s focus on Get Records.
In a Get Records element, the flow does two things. First, it looks up a Salesforce record by using criteria you set. Here, the flow finds an account record whose ID matches the flow variable AccountId. Second, the Get Records element automatically stores all the record values in a flow variable. When the flow moves to the next element, the values are assigned to the variable. This way, the flow can use that information to decide something later. Here, the Get Records element saves the value of the account’s AnnualRevenue field, in addition to other values.
- On the flow canvas, on the path after the Start element, click
 .
.
- Click Get Records.
- For Label, enter
Find Related Account.
- For Object, select Account.
This Get Records search is limited to account records.
- Set Condition Requirements to All Conditions Are Met (AND).
- Configure the filter fields.
- For Field, select Account ID.
- For Operator, select Equals.
- For Value, select AccountId.
- For Field, select Account ID.
Here's what the first part of the overlay should look like.

- Click Save.