Build Logic to Determine the Right Discount to Apply
Determine the Right Discount to Apply
Next, the flow needs to determine the discount to apply. In their new discounting program, Acme Wireless awards discounts based on the account’s annual revenue: the higher the revenue, the larger the discount. In this step, a Decision element routes the flow along one of several paths—also known as outcomes—depending on annual revenue.
Create three outcomes based on annual revenue.
-
Full Discount: Applied when the account’s annual revenue is greater than $200,000,000
-
Partial Discount: Applied when the account’s annual revenue is between $100,000,000 and $200,000,000
-
No Discount (default): Applied when neither of the other outcomes’ conditions are met
Here’s how to accomplish these outcomes.
- After the Find Related Account element, click
 .
.
- Click Decision.
- For Label, enter
Determine Discount.
Now, create an outcome for the full discount.
- Under OUTCOME DETAILS, for Label, enter
Full Discount.
- For Condition Requirements to Execute Outcome, select All Conditions Are Met (AND).
- Configure the condition requirements.
- In the Resource field, type
Account, select Account from Find Related Account, then select AnnualRevenue.
- For Operator, select Greater Than.
- For Value, enter
200000000.
- In the Resource field, type
These criteria tell the element to route the flow along the Full Discount path only if the annual revenue of the account is greater than $200,000,000.

Next, create an outcome for the partial discount. This outcome is based on the annual revenue being between two values, so use two criteria.
- Next to OUTCOME ORDER, click
 .
.
- For Label, enter
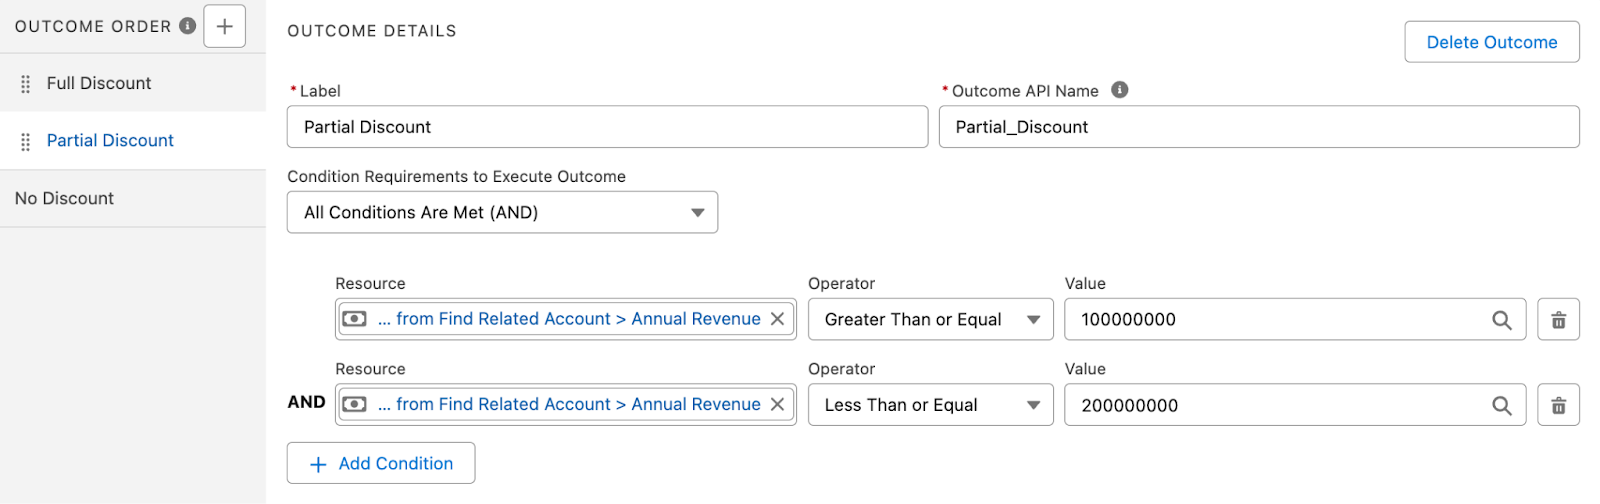
Partial Discount.
- For Condition Requirements to Execute Outcome, select All Conditions Are Met (AND).
- Configure the condition requirement for the lower revenue limit.
- For Resource, select Account from Find Related Account, then select AnnualRevenue.
- For Operator, select Greater Than or Equal.
- For Value, enter
100000000.
- For Resource, select Account from Find Related Account, then select AnnualRevenue.
- Click Add Condition.
When you add a condition, Flow Builder applies the boolean operator AND by default. If you want the flow to take this path, every condition must be true. Here, AND is exactly what you want: only apply a partial discount when the annual revenue is above the lower revenue limit AND below the upper revenue limit.

Finally, configure the condition requirement for the upper revenue limit.
- For Resource, select Account from Find Related Account, then select AnnualRevenue.
- For Operator, select Less Than or Equal.
- For Value, enter
200000000.
These criteria tell the element to route the flow along the partial discount path only if the annual revenue of the account is greater than or equal to $100,000,000 and less than or equal to $200,000,000.
- Click Default Outcome.
This outcome occurs if the account’s annual revenue doesn’t meet the criteria for a full discount or a partial discount.
- For Label, enter
No Discount.
- Just to be safe, save your progress.
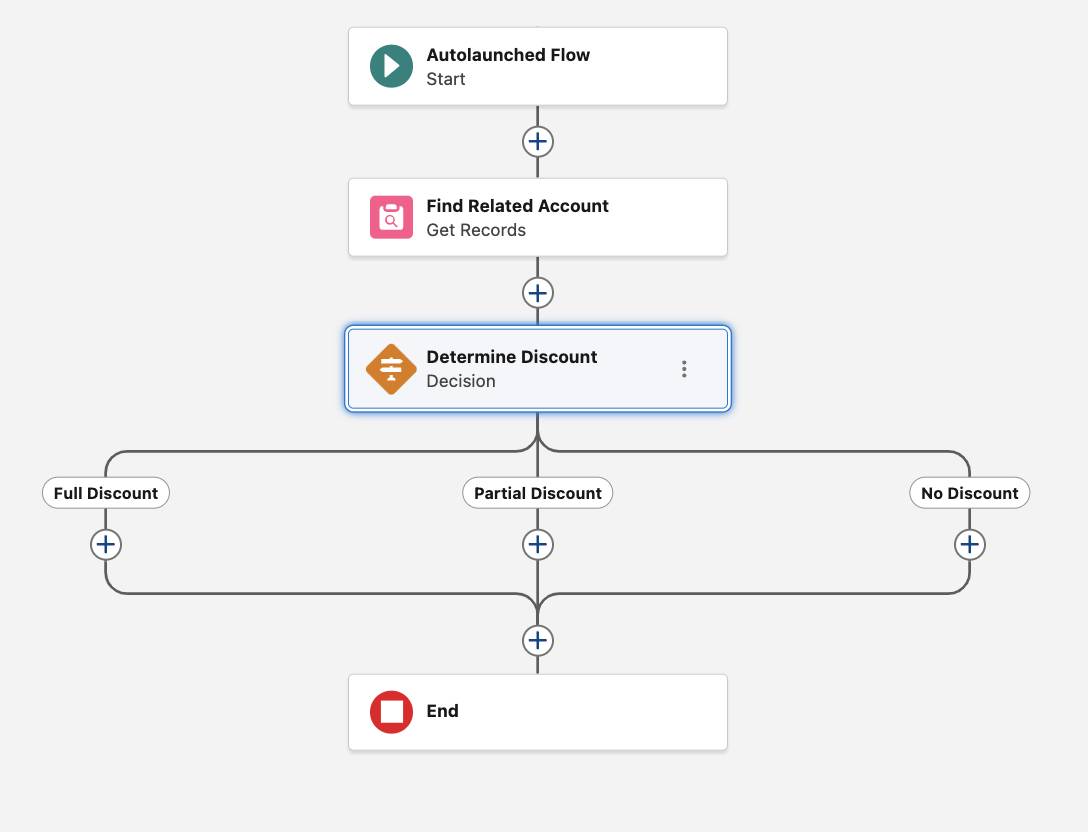
Here’s what your flow should look like.
Assign Numerical Values to Discounts
At this point, the flow knows the annual revenue of the account and can use that value to determine the right kind of discount. But the discounts—full, partial, or no—are abstract. To be useful, each discount needs to link to a numerical value: 10%, 5%, and 0%.
Here, you’ll create a variable in which to store the discount values. Then you’ll use Assignment elements to update that variable with the right percentage based on the outcome: full, partial, or none. To change a variable’s value, you’ll use the Assignment element’s Equals operator. It sets a variable to a value, such as a number or string.
Full Discount
- On the Full Discount path, click
 .
.
- Click Assignment.
- For Label, enter
Discount is 10%.
- For Variable, select New Resource.
You need a variable to store the discount percentage for all the Decision element’s outcomes. Thankfully, you can create a variable without leaving the Assignment element in progress.- For Resource Type, select Variable.
- For API Name, enter
Discount.
- For Description, enter
Stores the discount percentage in whole number format.
- For Data Type, select Number.
- For Decimal Places, enter
2.
- Leave Available for Input and Available for Output unchecked.
- Click Done.
- For Resource Type, select Variable.
You’ll use this variable to update the opportunity later. Just like the term variable suggests, its value varies based on the opportunity’s assigned discount.
- Back in the Assignment element, for Operator, select Equals.
- For Value, enter
10.

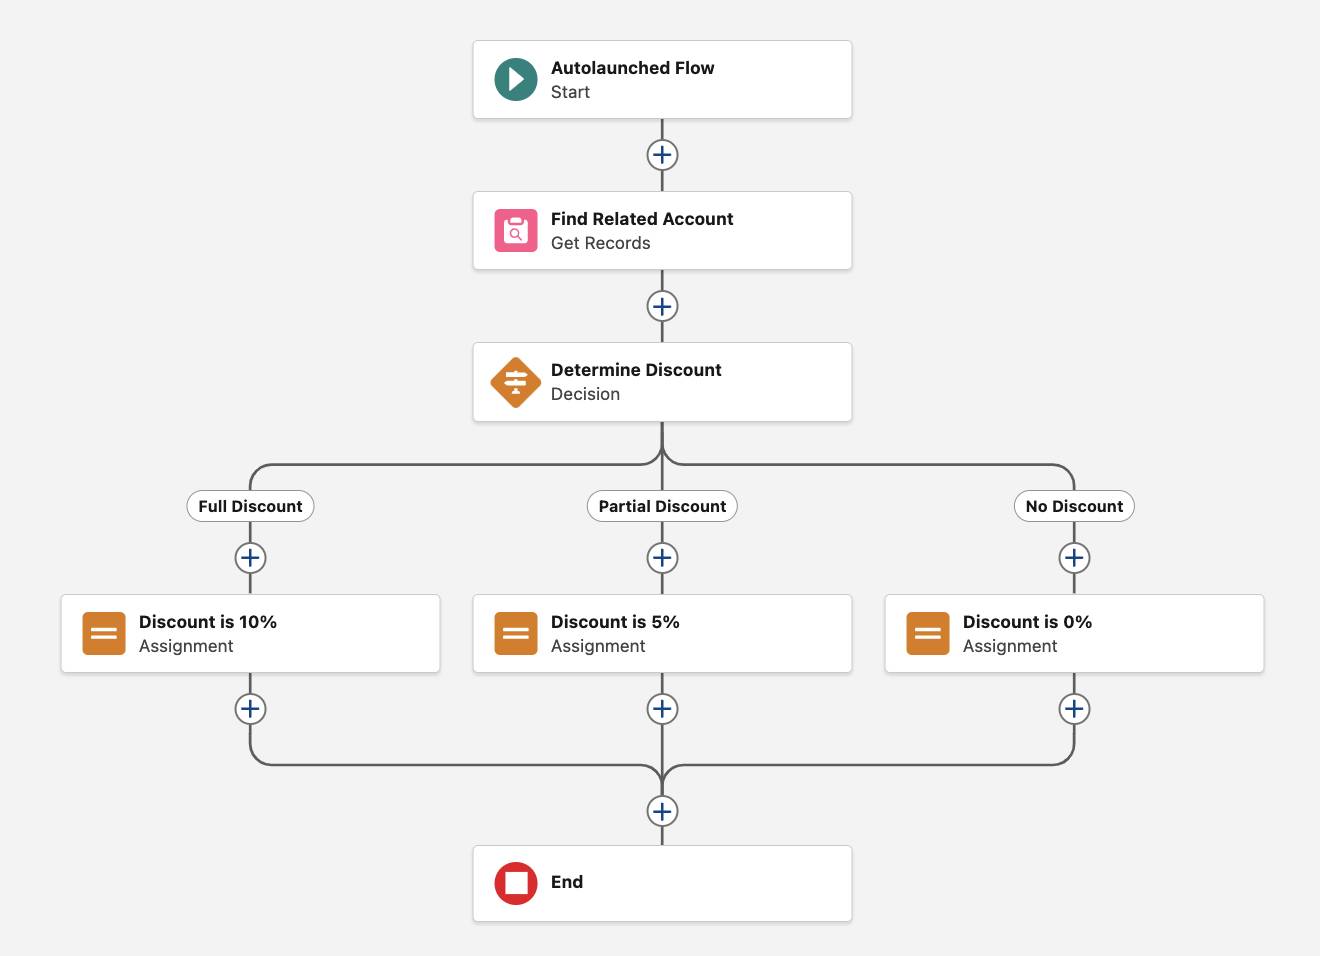
Here’s what your flow should look like.

Partial Discount
A full discount isn’t the only possible outcome in this flow, so let’s configure another assignment—this one for when a partial discount is appropriate.
- On the Partial Discount path, click
 .
.
- Click Assignment.
- For Label, enter
Discount is 5%.
- For Variable, select the Discount variable.
- For Operator, select Equals.
- For Value, enter
5.

Here’s what your flow should look like.

No Discount
One last outcome to take care of! You need an Assignment element to cover the scenario where the opportunity isn’t eligible for a discount.
- On the No Discount path, click
 .
.
- Click Assignment.
- For Label, enter
Discount is 0%.
- For Variable, select Discount.
- For Operator, select Equals.
- For Value, enter
0.
Here's what the Set Variable Values overlay should look like.

- Save the flow.
Here’s what your flow should look like.