Map a Custom Object
Capturing Data in Custom Objects
It’s time to tackle the other challenge at No More Homelessness (NMH): tracking information gathered from donor surveys, if the survey has been completed, and if it's been acknowledged. NMH’s solution is to create a custom object and import what they've tracked in spreadsheets.
In this step you follow as Gorav, NMH’s fearless admin, creates a custom object and associated fields, modifies the NPSP Data Import staging object, and maps the fields for the importer. If some of the steps here sound familiar, that’s because you’re following the same steps you did previously with fields on a standard object, but for fields on a custom object instead.

Create the Custom Object and Fields
First, create the custom object.
- In Setup, click Object Manager.
- Click Create, and select Custom Object.
- Specify this information:
- Label:
Donor Survey - Plural Label:
Donor Surveys - Object Name:
Donor_Survey(This should populate automatically.)
- Description:
For tracking donor surveys and acknowledgements.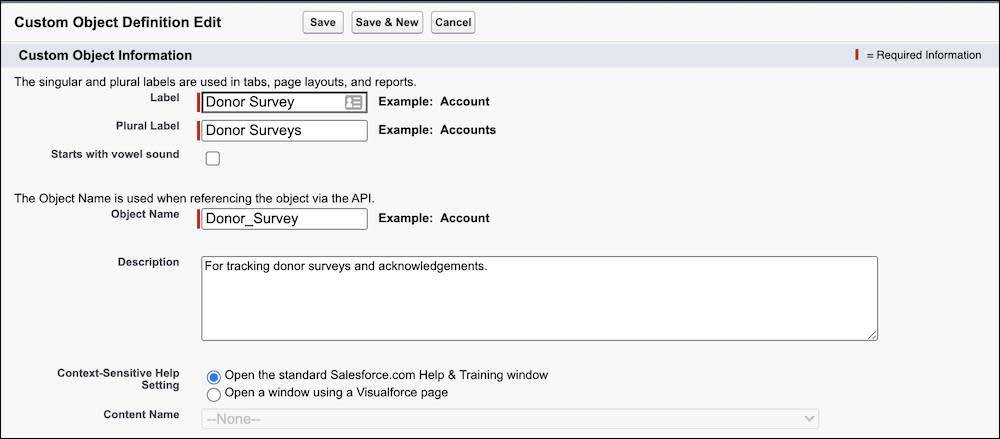
- In Enter Record Name Label and Format, specify these details:
- Record Name:
Survey Number
- Data Type: Auto Number
- Display Format:
DS-{0000}
- Starting Number:
0001
- Record Name:
- Select Allow Reports.
- Select Allow Activities.
- In the Object Creation Options section, check Launch New Custom Tab Wizard after saving this custom object.
- Label:
- Click Save.
- Click on Tab Style and select an icon such as Form.
- Click Next.
- Click Next.
- Save your work.
The donor survey object is now created. Next, add two fields to this object. The first is a picklist for which you want to create a new picklist value set.
- From Setup, in the Quick Find box, enter
picklist, and then select Picklist Value Sets.
- In the Global Value Sets list, click New.
- Specify these details:
- Label:
Survey Status
- Name:
Survey_Status(This should populate automatically.)
- Values: Enter these values, one per line:
Sent
Completed
Thanked
- Label:
- Save your work.
Now, you’re ready to add the fields.
- Click Object Manager in Setup.
- Find and select the Donor Survey object.
- Click Fields & Relationships.
- Click New.
- Select Lookup Relationship, and click Next.
- Select Contact in the Related To field, and click Next.
- Leave the Field Label as
Contactand Field Name asContact, and click Next.
- Click Next, then Next, then Save & New to create the next field.
- Select Picklist, and click Next.
- Enter these details:
- Field Label:
Status
- Leave Use global picklist value set selected, and then select Survey Status from the picklist.
- Field Name:
Status(This should populate automatically.)
- Click Next, then Next, then Save.
NMH would need other fields to make this object useful, but let’s stop here to focus on mapping.
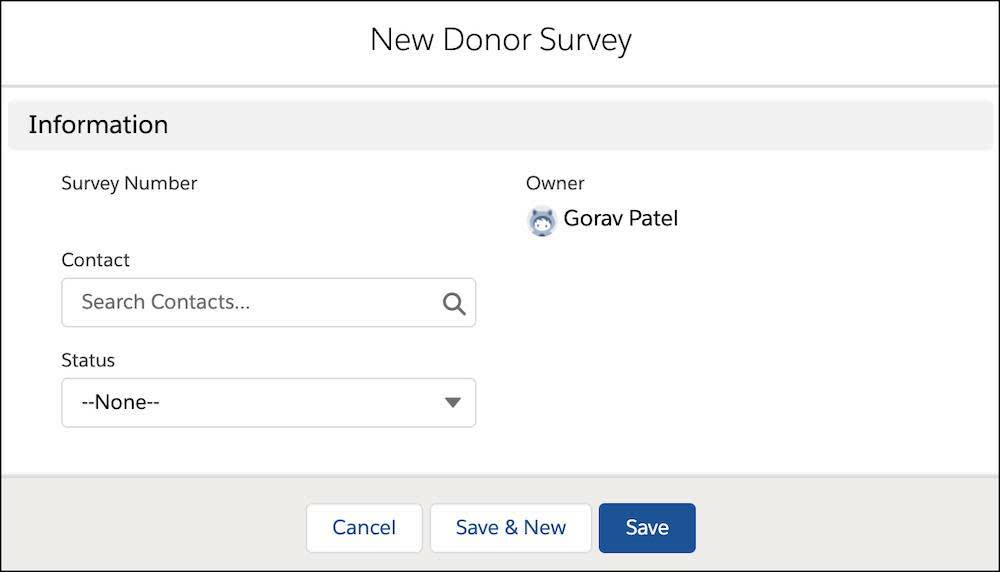
Check out the new object by clicking the App Launcher (  ), then finding and selecting Donor Surveys. None exist yet, so click New to check that all of your new fields are there as you’d expect.
Create Staging Fields
Now you need to modify the NPSP Data Import object to add one of the new fields you just created. Why only one? Because your new donor survey object uses lookup fields to connect to contact records and those are already in the NPSP Data Import object. You will map them later.
Create the staging field you need now for the status.
- Go to Setup, then click Object Manager.
- Find and select the NPSP Data Import object.
- Click Fields & Relationships.
- Click New.
- Select Picklist, and click Next.
- Enter these details:
- Field Label:
Donor Survey Status
- Values: Leave Use global picklist value set selected, and then select Survey Status from the picklist.
- Field Name:
Donor_Survey_Status(This should populate automatically.)
- Click Next, then Next, then Save.
You also want to create two new system fields to capture information about the target records processed by NPSP Data Importer: a status field that indicates if the dry run or import was successful and a lookup field that links you to the final imported record.
- Starting from the Fields & Relationships tab on NPSP Data Import record in the Object Manager, click New.
- Select Text, and click Next.
- Enter these values:
- Field Label:
Donor Survey Import Status - Length:
255(You must enter this max allowable value of 255 for a text field for all Import Status fields.)
- Field Name:
Donor_Survey_Import_Status(This should populate automatically.)
- Click Next, then Next, then Save & New to create the next field.
- Select Lookup Relationship, and click Next.
- In the Related To field, select Donor Survey and click Next.
- Change the Field Label to
Donor Survey Importedand press the tab key to populate the Field Name withDonor_Survey_Imported, then click Next.
- Click Next, then Next, then Save.
Clean Up the Page Layout
While you’re on the NPSP Data Import object in the Object Manager, clean up the page layout so it’s easy to find your new fields. Taking the time to order your NPSP Data Import page layout can help you quickly review imported data and save you time later on.
- Click Page Layouts.
- Click Data Import Layout.
- Add a new section. With Fields highlighted at the top of the screen, click and drag the Section element onto the page after the Donation Information section.

- Name your section
Donor Survey Informationand click OK.
- Our new fields appear by default in the Information section at the top of the page. You can click and drag these to your new section from here, or click the remove button (
 ) and then drag them from the top Fields area to the new section.
- Save your work.
If you go to one of the NPSP Data Import records you were working with before, the new section should look something like this.

Create Advanced Mappings
With all of your fields in place and the page layout cleaned up, it’s time to connect the donor survey object and the NPSP Data Import object with Advanced Mapping.
Remember when you mapped your new and standard fields for Contact1 and Contact2? You modified an existing object group. Because you are mapping a new object, you need to create a new object group first.
- From the App Launcher (
 ), find and select NPSP Settings.
- Click System Tools.
- Click Advanced Mapping for Data Import & Gift Entry.
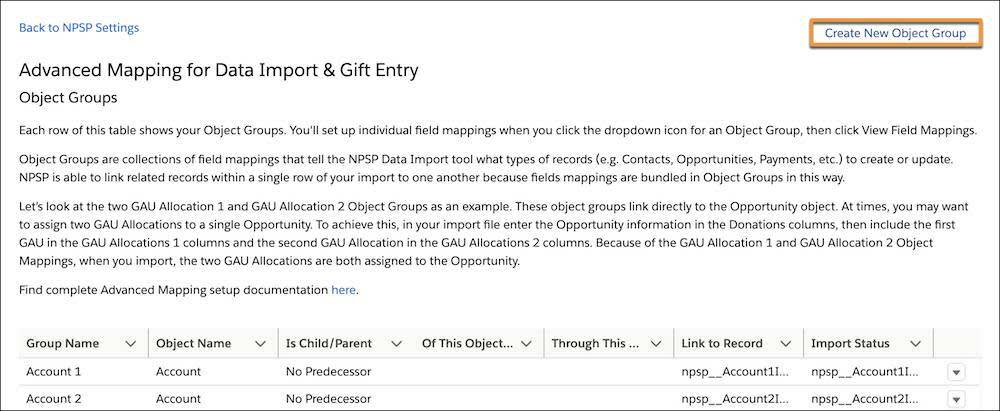
- Click Configure Advanced Mapping.
- Click Create New Object Group.
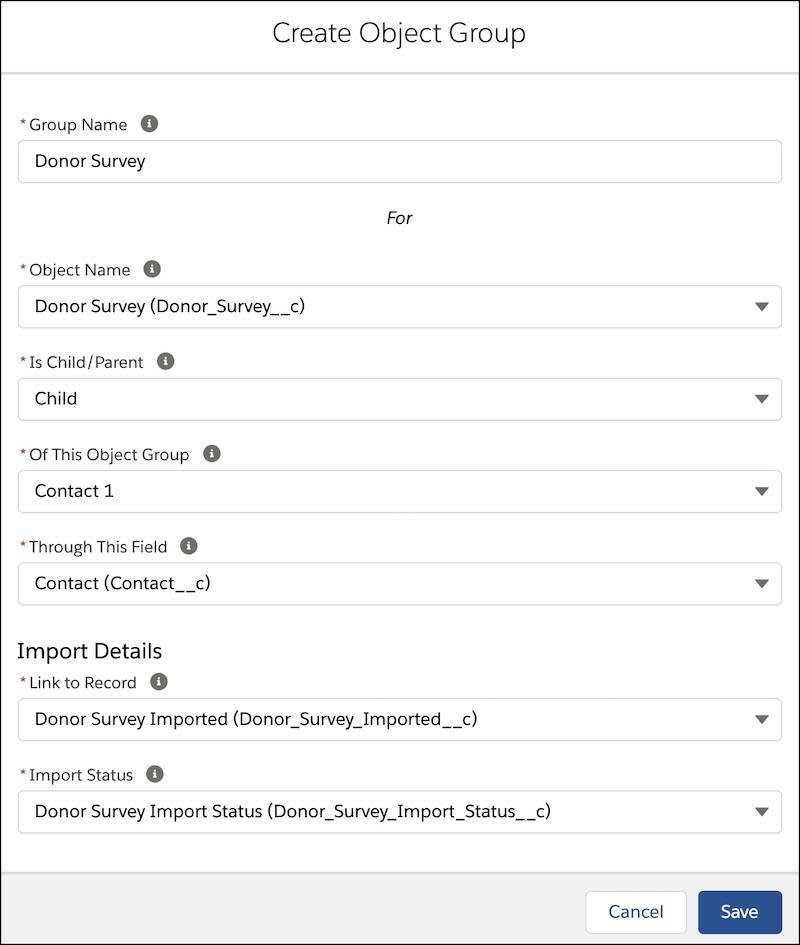
- Specify these details:
- Group Name:
Donor Survey - Object Name: Donor Survey (Donor_Survey__c)
- Is Child/Parent: Child
- Of This Object Group: Contact 1
- Through This Field: Contact (Contact__c)
- Link to Record: Donor Survey Imported (Donor_Survey_Imported__c)
- Import Status: Donor Survey Import Status (Donor_Survey_Import_Status__c)
- Save your work.
It may take a few seconds to process the new object group. Once that process is complete, it’s time to add the field mappings.
- In the Donor Survey row, click the menu arrow (
 ) and select View Field Mappings.
- Click Create New Field Mapping.
- Find and select Donor Survey Status (Donor_Survey_Status__c) as the source.
- Find and select Status (Status__c) as the target.
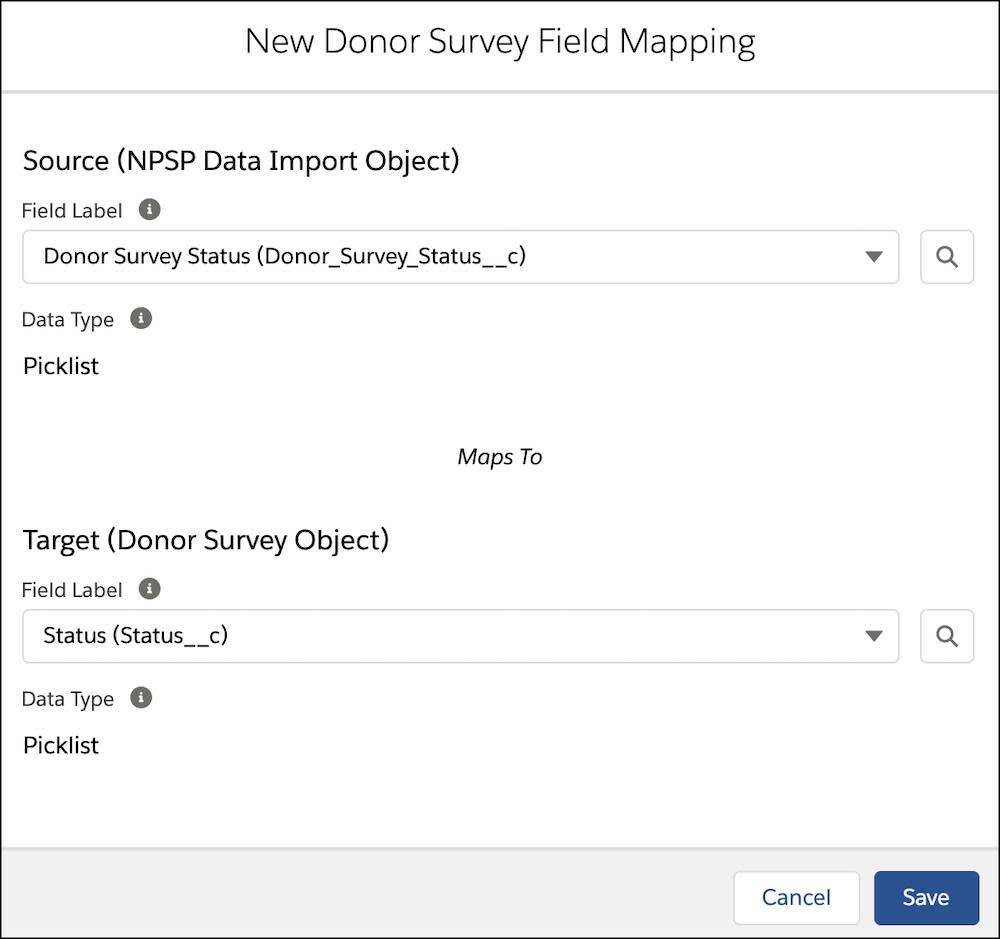
- Save your work.
You created the new custom target object and fields, created staging fields on the NPSP Data Import object, and created your mapping. Now, get your data ready and bring it into Salesforce.
You tackle that in the next step, but before you move on, make sure that you select the Trailhead Playground where you followed along with this step and click Verify.
Resources
- Salesforce Help: Connect a New Object in Advanced Mapping
- Salesforce: AppExchange
- Trailhead: Custom Objects: Quick Look
- Trailhead: Custom Fields: Quick Look
