Unify Your Data
Learning Objectives
In this step, you’ll:
- Create an identity resolution ruleset.
- Validate the output data.
Unify Your Data
Unifying data using identity resolution is an essential step in turning bits of data into deep insights. But to take advantage of identity resolution, you need to first define the rules that Data 360 uses to determine which records match and which bits of data are included in a customer’s unified profile.
When setting up a ruleset, you need to decide how data is matched and reconciled. This ensures confidence in the quality of your unified profile data, whether you prioritize high consolidation rates or take a more conservative approach. When rulesets are run, unified link objects act as a bridge between your source data and your unified profile data. This ensures that you can always track the origin of each piece of a unified profile back to its original source.

Map Required Fields
To see if you missed any required fields for identity resolution, look for an icon with a warning.
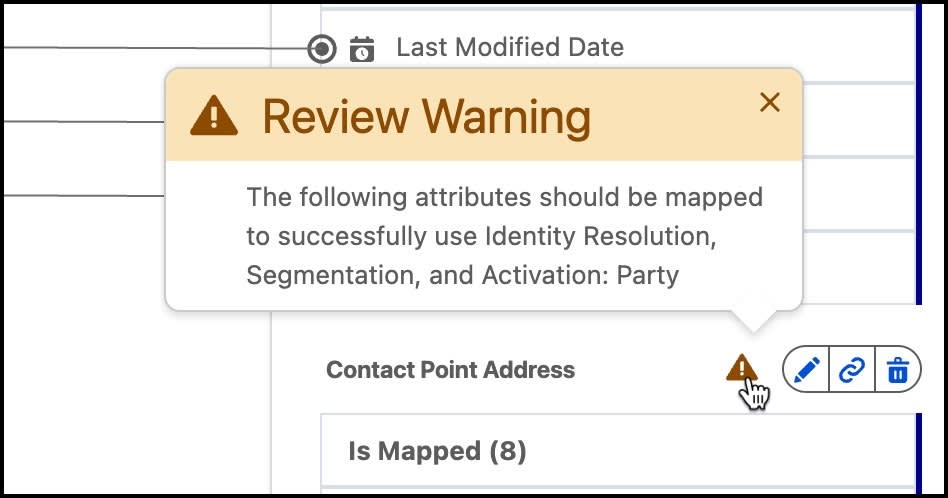
- From Data Streams, select the Contact_Home data stream.
- Under Data Mapping, click Review.
- Following similar steps to above, map Phone from the Contact_Home DLO to Formatted E164 Phone Number under the Contact Point Phone entity.
- Click Save & Close.
Create an Identity Resolution Ruleset
For this project, you create one ruleset that matches source records from the Individual object. Once rulesets are run, unified individual profiles are created, along with the Unified Individual object, unified link objects, and unified contact point objects.
- From Data Cloud, select the Identity Resolutions tab and click New.
- Select Create New Ruleset and click Next.
- With the default Data Space selected, choose Individual from the Primary Data Model Object dropdown. Individual is also preselected in the next field.
- Since you’re only running one ruleset in this practice org, keep the Ruleset Id blank and click Next.
- Name the ruleset
Individual Match.
- To reduce costs by limiting jobs, ensure that Run jobs automatically is disabled. Additionally, click the toggle for Use case sensitive matching to link Individual ID and Fully Qualified Key option to disable it.
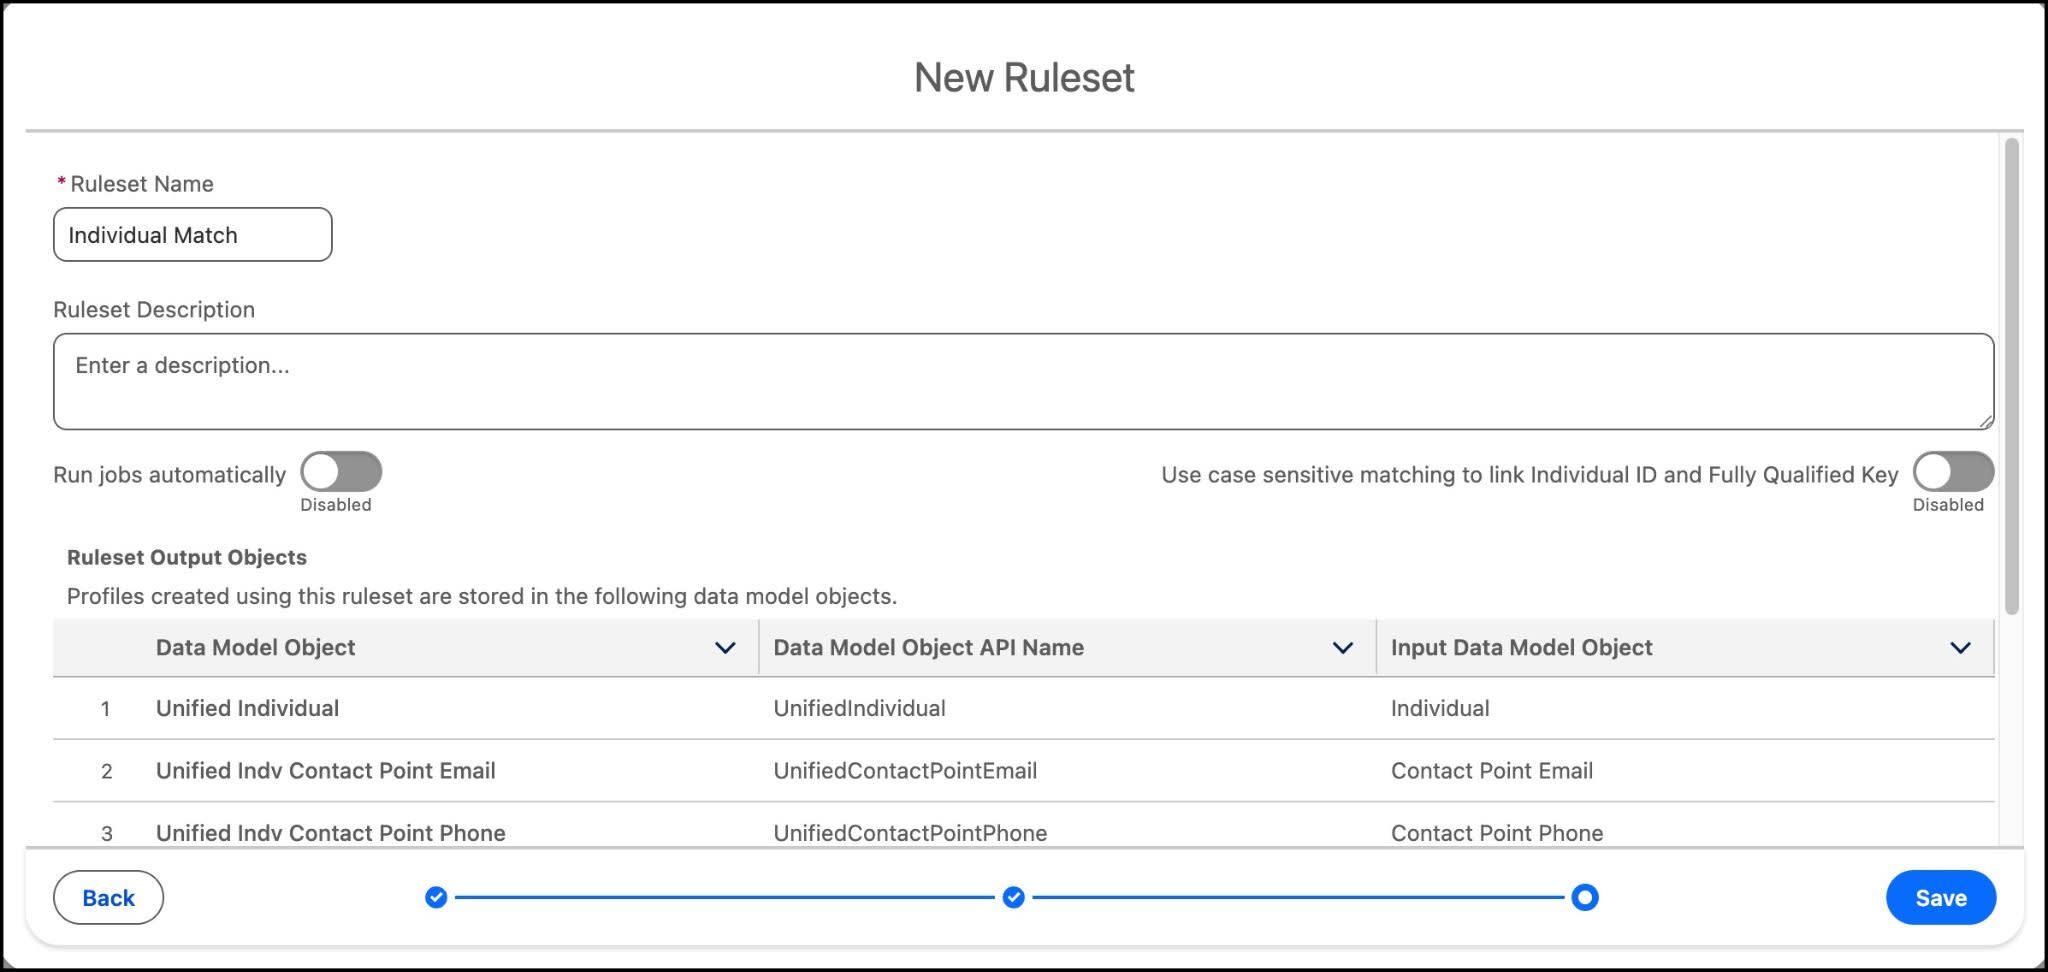
- Click Save.
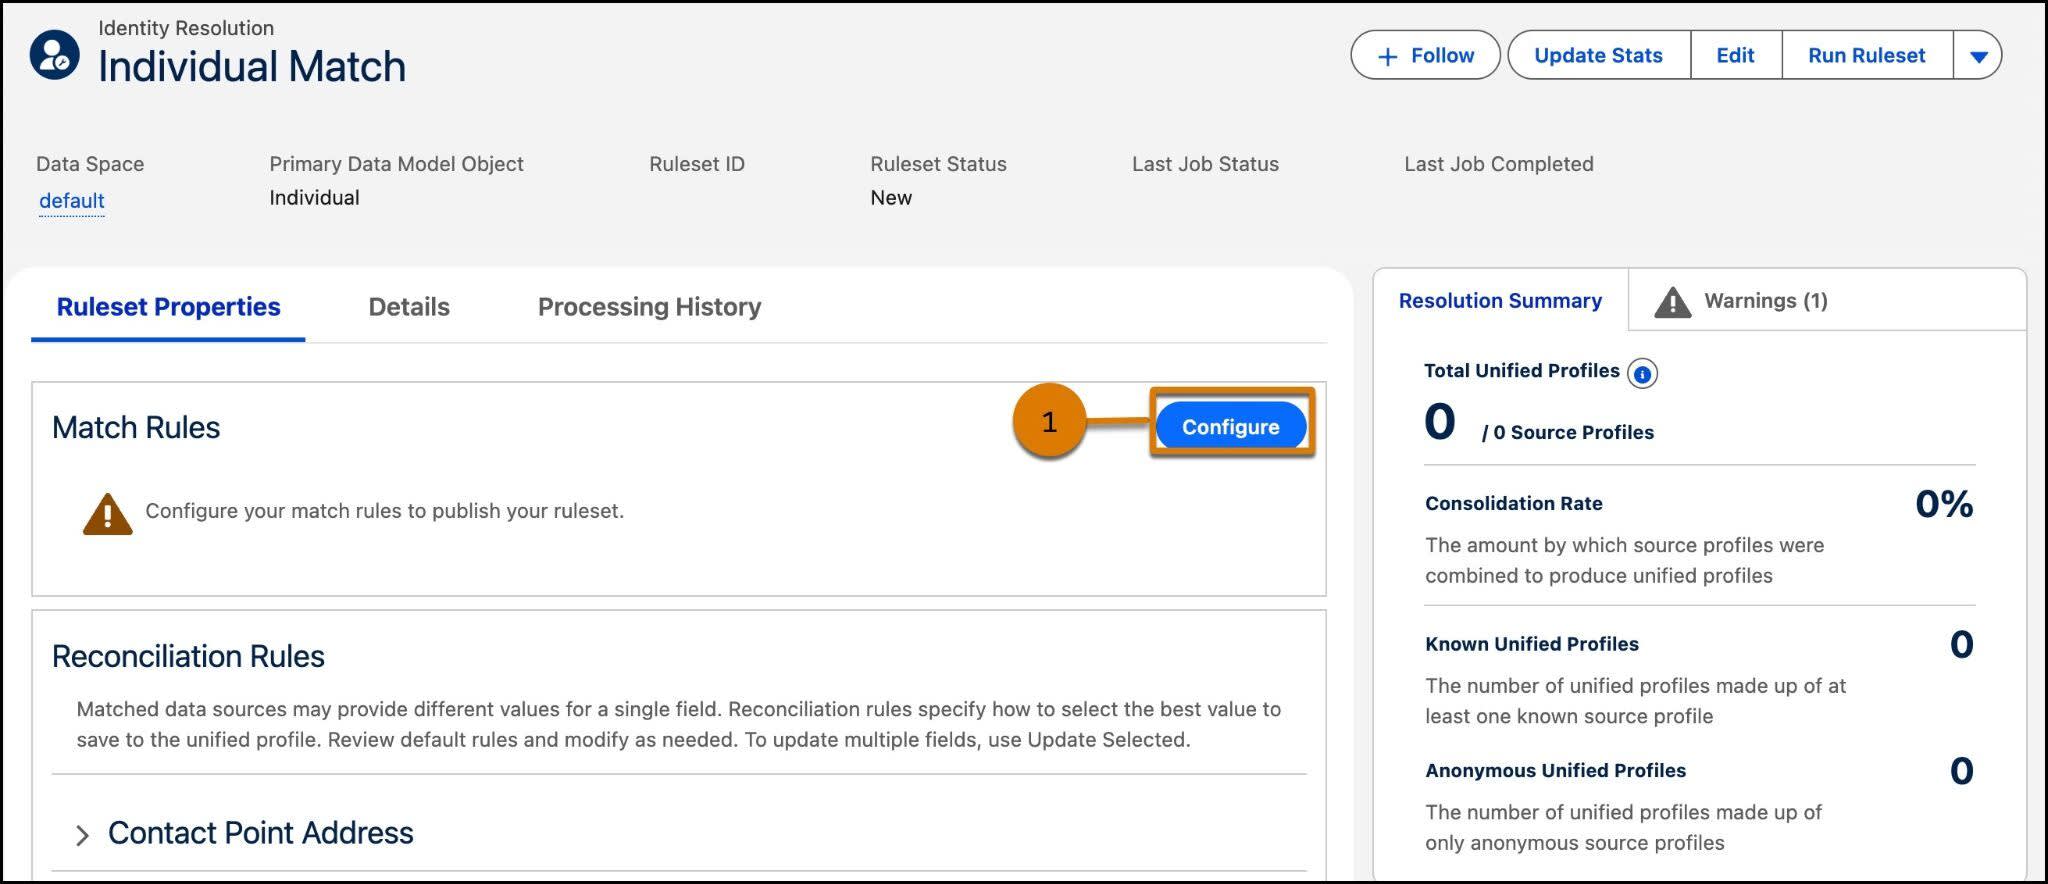
Configure
Once saved, it’s time to configure your rules.
- From the Ruleset Properties panel under Match Rules, click Configure (1).
- Review the instructions to learn more about how match rules work and then click Next.
- Click Configure to select your first match rule.
- Select Fuzzy Name and Normalized Address and click Next.
- Because some cities can be misspelled, change the Match Method for City from Exact to Fuzzy - Medium Precision.

- Click Next.
- Click Add Match Rule to add another rule.
- Select Fuzzy Name and Normalized Phone and Normalized Email and click Next.
- To customize your rule and find more matches, let’s remove Last Name by clicking the trashcan
 .
.

- Click Next.
- Once done, click Save.
Review Reconciliation Rule Concepts
When matches are found for fields where it makes sense to have only one piece of data, such as a person’s first name, the reconciliation rule determines which record contributes a value to the First Name field in the unified profile. For example, suppose your source data includes three records with similar names associated with the same email address: Liz Berkeley, Elizabeth Berkeley, and Eliza Berkeley with email address, eberkeley@example.com. They’re matched through the Fuzzy Name and Normalized Email match rule. Data 360 creates one unified profile to store data from these matching records and it’s the reconciliation rule that tells Data 360 which first name to use for that record.
Since data from the source records isn’t altered, the unified link object links the unified profile to all three first names, but only one can be used as the “First Name” in the unified profile. If the reconciliation rule is set to Most Recent, then identity resolution uses the name from the source record that was updated most recently. In the example of an ID field, prioritizing ID values based on the object the ID came from, may help you standardize IDs in your unified profiles.
Data can be reconciled based on frequency of a value, recency, or based on the object it came from. If fields have similar data, such as an id, you’ll get a warning to select what source to use for the unified profile.
Update Reconciliation Rules
- Click the Warnings tab on the right side of the page to address the warning about the reconciliation rule for Individual.Individual Id. You get a warning if you’re missing required fields, so review this section to make sure your mappings are complete.

- Click Individual.Individual Id to modify the Reconciliation Rules.

- Select the checkbox next to Individual ID and then click Update Selected or click the field link
- Disable the Default Reconciliation Rule (1) and then set the Field Reconciliation Rule to Source Priority.
- Use the arrows (2) to ensure that the Contact_Home object is first in priority, followed by the Lead_Home object.
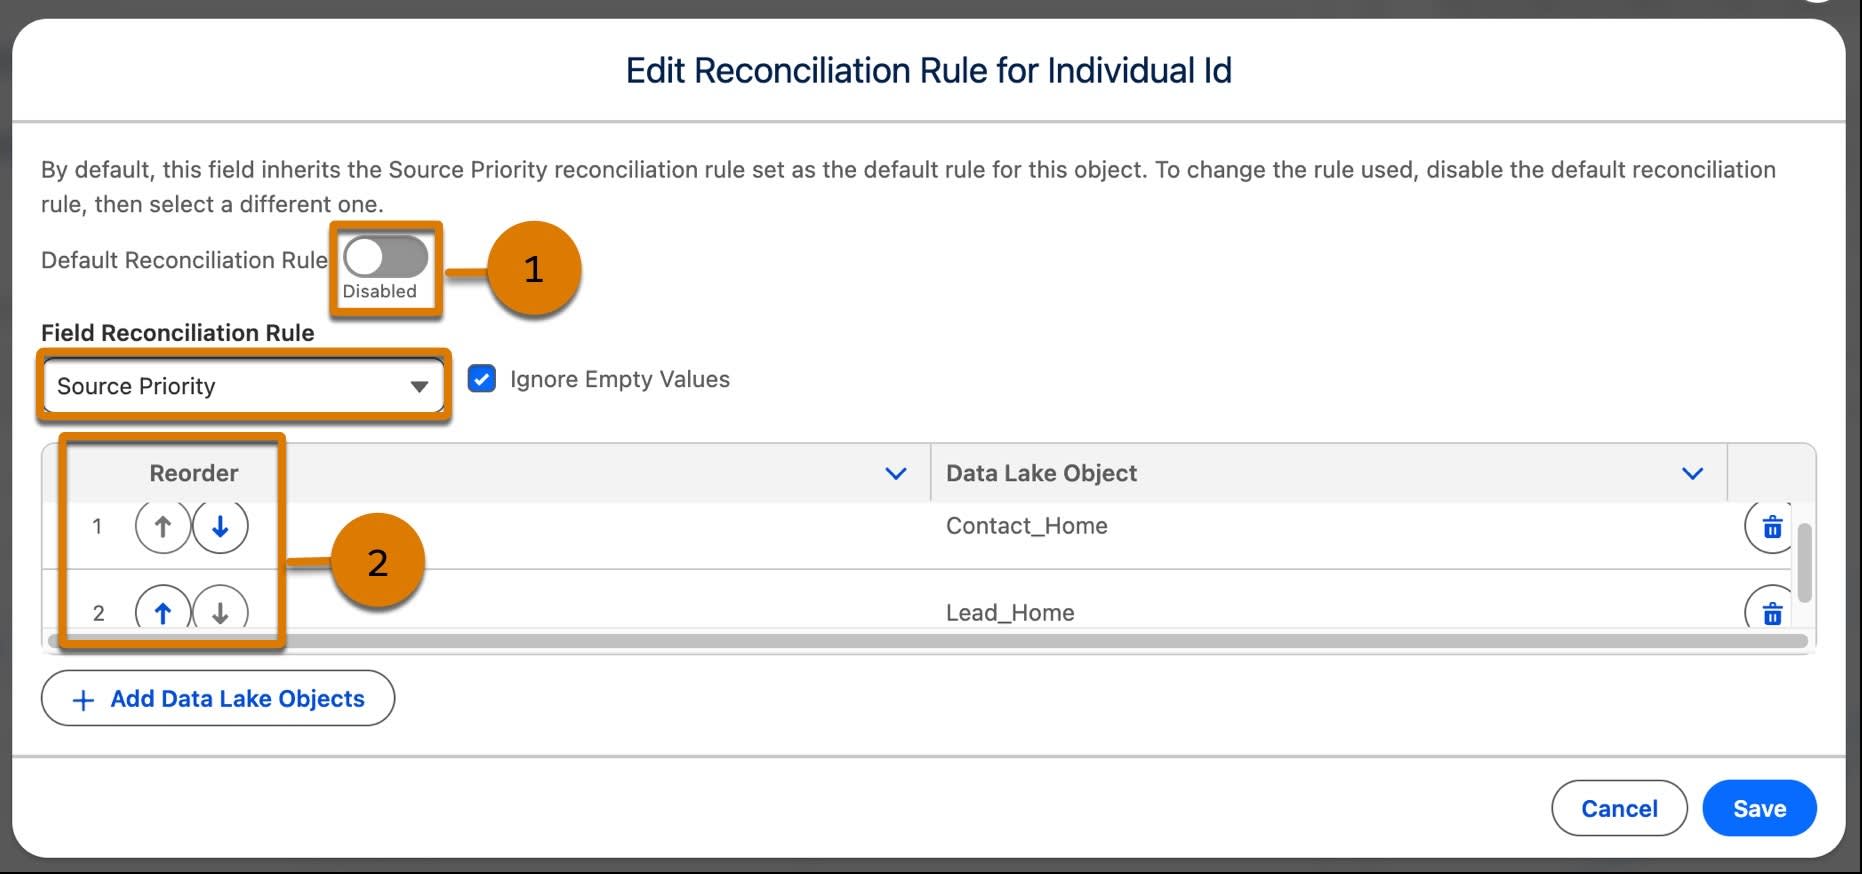
- Click Save.
- Click Run Ruleset (1).

Verify Your Work
Now that you have a ruleset, updated reconciliation rules, and ran your ruleset, check your work by clicking Verify step to earn 100 points. For this exercise, you check that the rule was set up correctly. You don't have to wait for identity resolution to run your ruleset before you check your work.
Resources