Create a Slack App
Create Your Say Hello App
You need to create a new Slack app next. For this project, you use a manifest. Manifests are YAML or JSON files that contain configurations for Slack apps or workflows. This will help speed up your work.
-
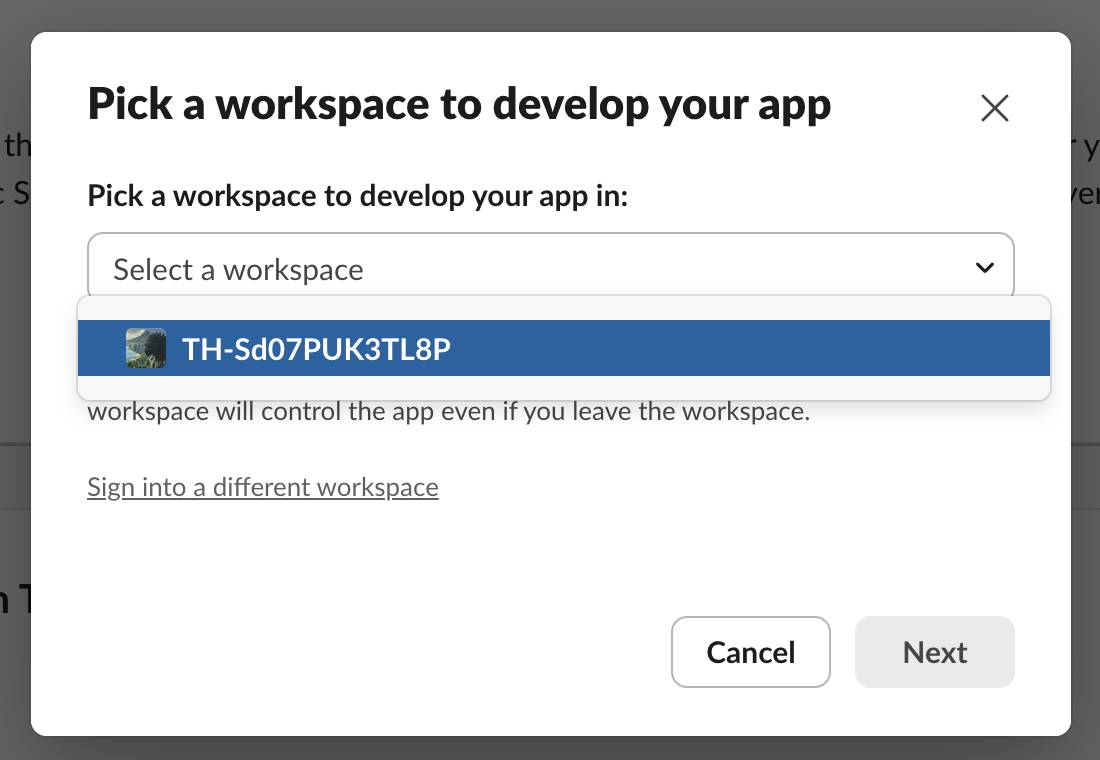
Click here to create a new Slack app using our manifest template. It may take a moment, but the link opens a dropdown to select the development workspace where you build and test your app.
- Select your workspace. Ensure it’s your Trailhead Slack Developer playground.
- Then, click Next. In this example, our playground workspace is selected.
- After you’ve selected your workspace, you see another popup: Review summary & create your app. This has information about the permissions and events your app will contain. You can review OAuth, Features, and Settings, but we cover these in more detail later. Go ahead and click Create.
- You automatically go to the Basic Information page for your app, currently called Sample app. Click Got It on the welcome message.
- You may see a few more helpful popups, click Got It on these messages.
- You may see a few more helpful popups, click Got It on these messages.
Update Your App
Your app has some basic configuration and permissions already set up. But there’s still work to be done.
- Scroll down to the Display Information section and update the app’s name, short description, and background color as follows:
- App name:
Say Hello - Short description:
Onboarding companion. - Background color:
#2c2d30
- App name:
- Then, click Save Changes.

The Basic Information page contains an overview of your app in addition to important credentials you need to use the Events and Web APIs, like the Signing Secret under the App Credentials header. If you want to, you can also update the app icon.
Change How Users See Your App
Now, let’s update how users see the app in Slack.
- Navigate to App Home on the sidebar, under the Features menu.
- Scroll to Your App’s Presence in Slack.
- Click Edit.
- Update the bot’s name and default.
- Display Name (Bot Name):
Say Hello - Default username:
say_hello
- Display Name (Bot Name):
- Then, click Save.

Other than updating the bot and default names, App Home is where you can update what users can see when they click on your app in Slack, like Home and Messages. We explore other configuration options next.

Request Scopes and Install Your App
Permission scopes give your app permission to make Web API calls in the installed workspace (post a message, for example). You can select the scopes to add to your app by navigating to the OAuth & Permissions page.
- From your app’s page, select OAuth & Permissions from the sidebar.
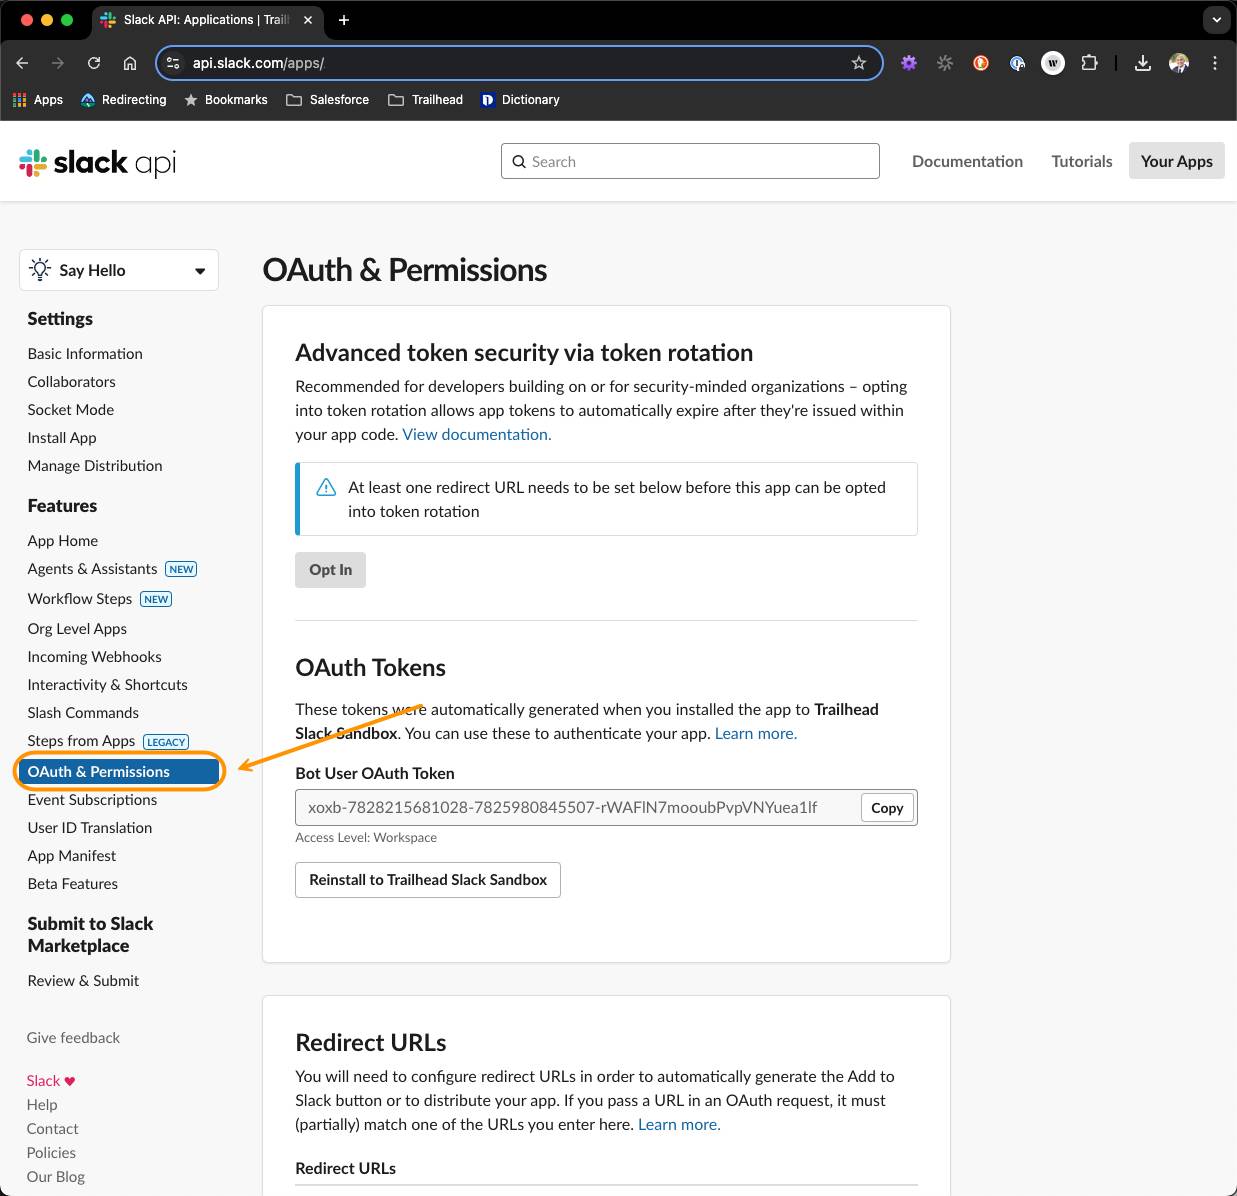
- Scroll down to Scopes. Here you see the Bot Token Scopes channels:history and chat:write, which were included as part of creating your app from the manifest. These scopes grant your app the permission to read and post messages in public channels of which it’s a member.
- Head back to the top of the OAuth & Permissions page.
- Under OAuth Tokens, click Install to WORKSPACE. Instead of WORKSPACE, you should see your workspace name.
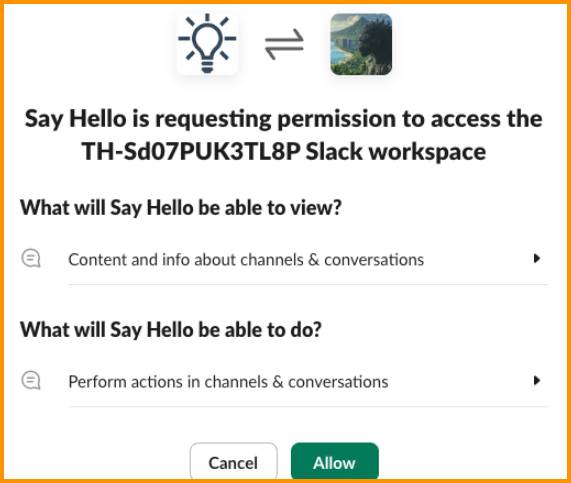
- Then, click Allow.
Upon installation, you’ll land back on the OAuth & Permissions page where you’ll see a new Bot User OAuth Access Token.
Access tokens are critical for the security of your app. They represent the permissions granted to your app by the installing user (in this case yourself). Remember to keep your access token a secret. At a minimum you should avoid checking your access token into public version control, and access it via an environment variable. The API documentation also contains a list of security best practices.
Add Your App to a Channel
Before you host, develop, and test your app, which we cover in the next step, add it to a public channel, so team members can interact with it.
- Open your Slack workspace.
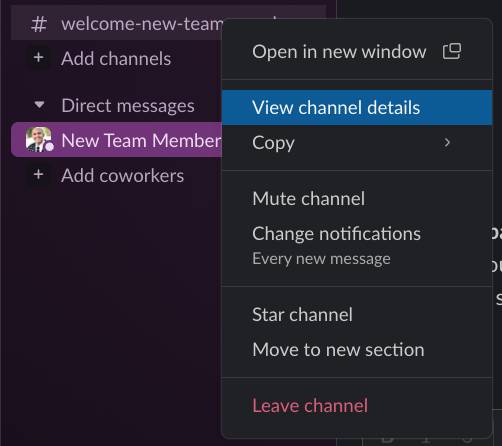
- In the left-hand channels navigation, right-click the #welcome-new-team-members channel.
- Click View channel details.
- Then, click the Integrations tab.
- Click Add an App.

- If you don’t see the Say Hello app right away, search for it using the search field. Then click Add next to your app.
You can confirm the app was added by heading back to the channel. You should see in the messages that Say Hello joined.

You’re now ready to host and develop your app!
Resources
- Slack: Create a Slack workspace
- Trailhead: API Basics
- Slack API: Using the Slack Web API
- Slack API: Events API
- Slack API: Web API methods
- Slack API: Retrieving messages