Build a Bolt App
Set Up Your Hosting Environment and Remix the App
To make development simple, this project uses Glitch, a tool that simplifies building and hosting apps. While a free Glitch account is great for development, your server won’t stay running while your app is idle. This means you need to keep Glitch open in your browser while you develop and test your app.
- If you don’t have a Glitch account, create an account for free. You can create an account using GitHub, Google, or an email account. Once you’ve created your account, you’re taken to your Glitch Dashboard.
- Keep Glitch open. Then, click this link to remix (or clone) the Bolt starter project.
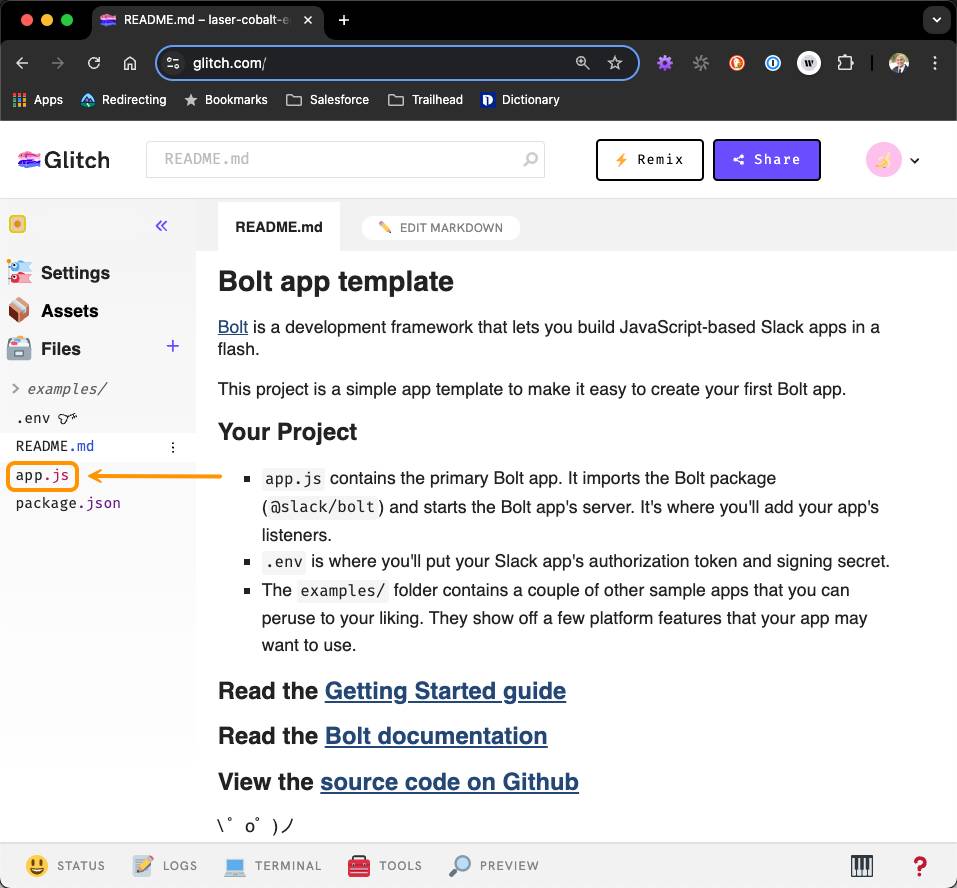
- Once the remix is complete, you’re taken directly to the project README.md file. You can read about the project files that are included with this templated app.
- When you’re ready, click app.js in the sidebar.
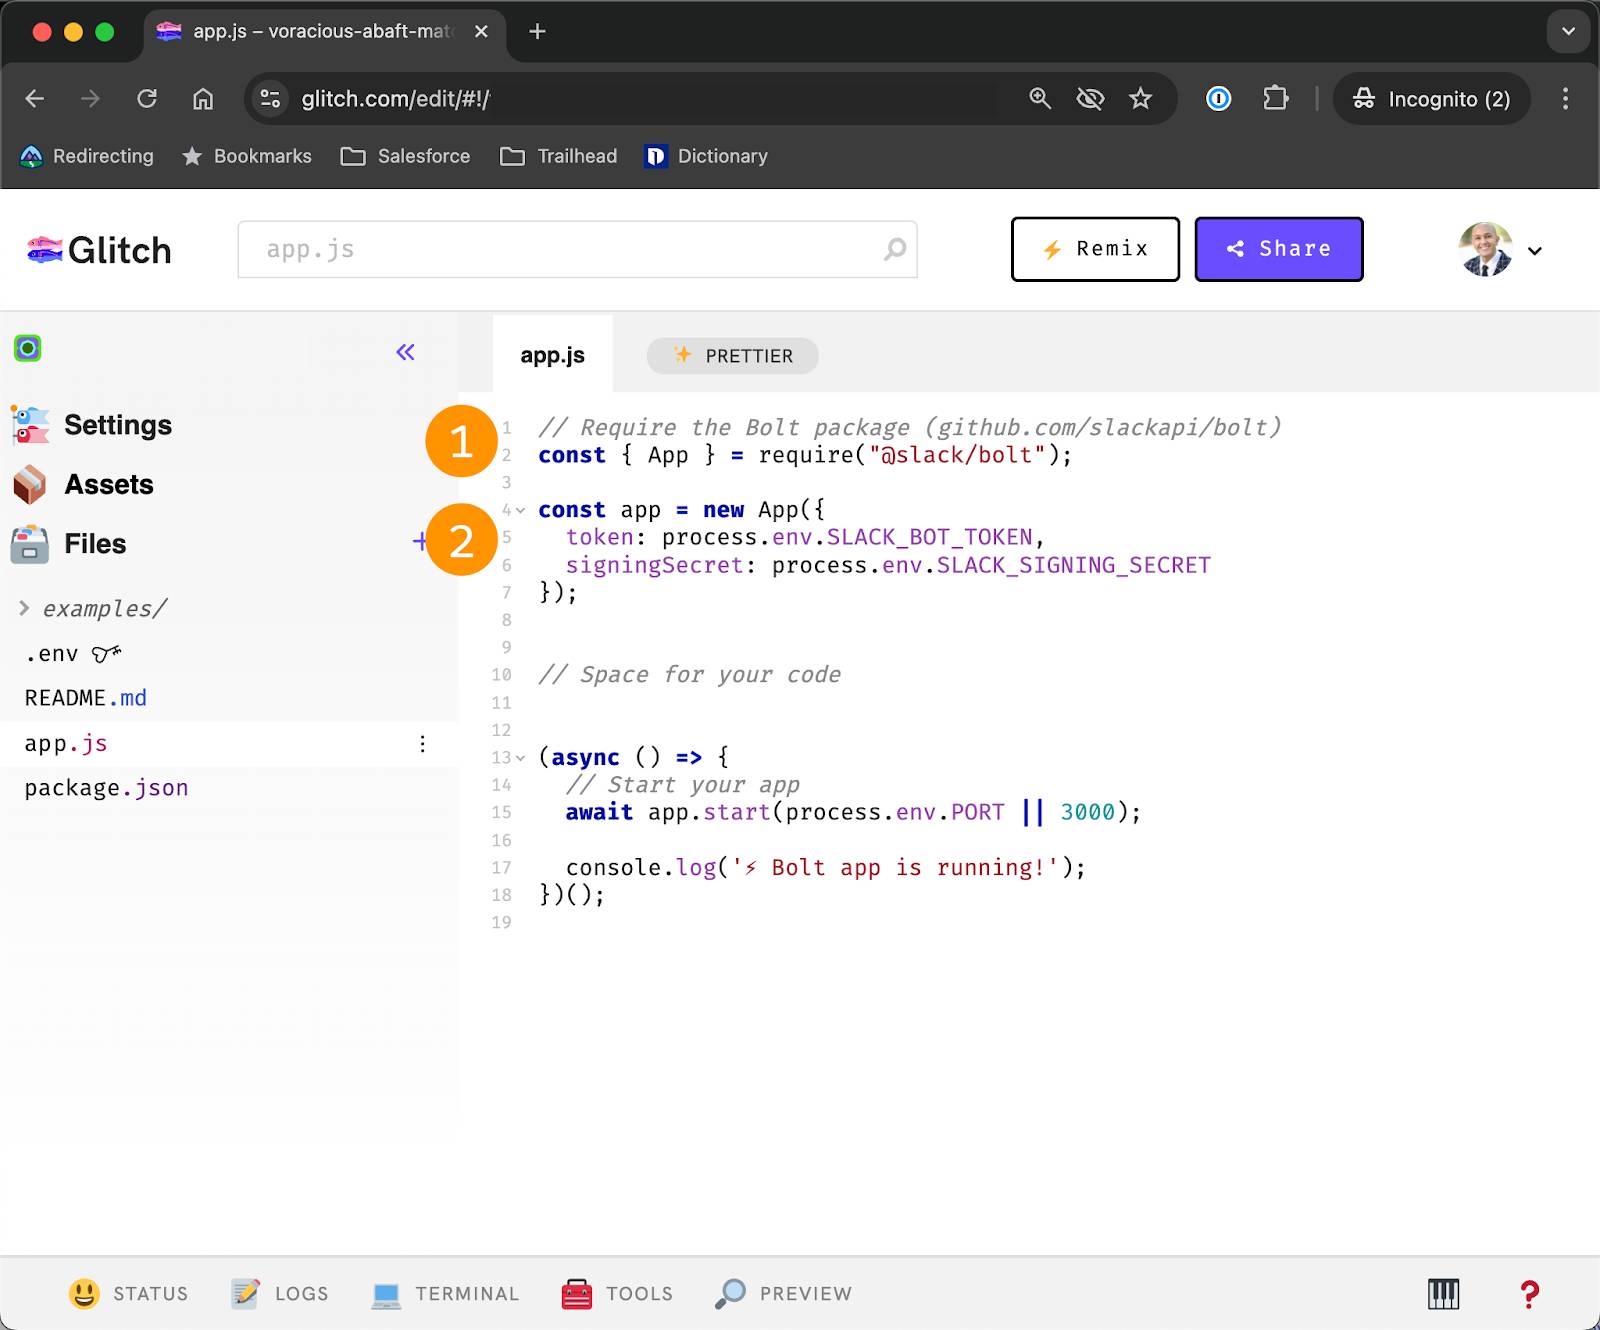
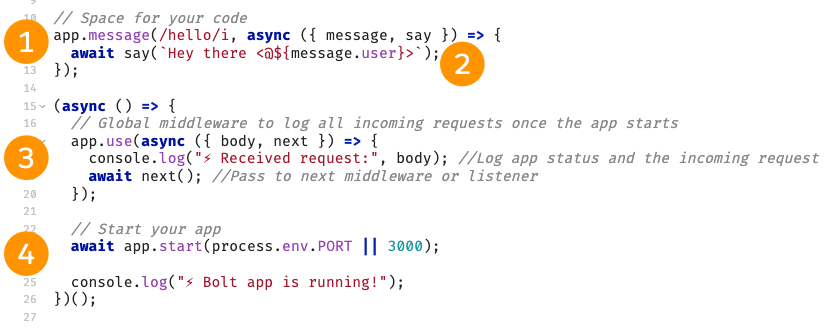
In the app.js file, you can see the @slack/bolt package imported and instantiated (1). Under that, the app’s server is set up and running so that it can receive incoming events from Slack (2).

Head back to your app page on the Slack API site.
Retrieve Your App Credentials
Retrieve your Signing Secret and Bot User OAuth Access Token. These are important. They enable your app to interact with your Slack workspace and are authorized with the scopes you set up. Make sure you have your favorite text editor handy so you can copy them.
- Head to your Slack app configuration page on the Slack API site.
- Click Basic Information from the sidebar. You should see the App Credentials section first thing.

- In the Signing Secret field, click Show.
- Copy your Signing Secret to your text editor so you can save it for later. You use it in the next section.
- Then, click OAuth & Permissions from the sidebar.
- Scroll to the OAuth Tokens section.
- Click Copy to copy your Bot User OAuth Access Token and save it for later. Similar to the Signing Secret, you need it in the next section.
Add App Credentials to Your Bolt App
With your secret and token saved, head back over to Glitch.
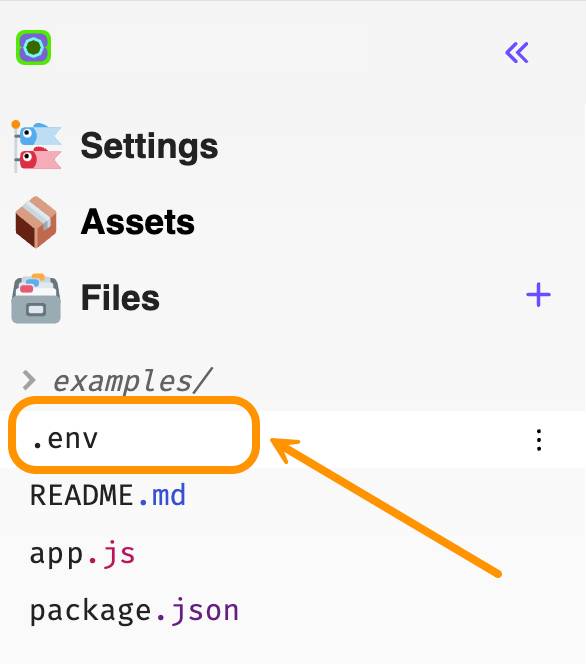
- In your Glitch project, navigate to the .env file located on the left sidebar.
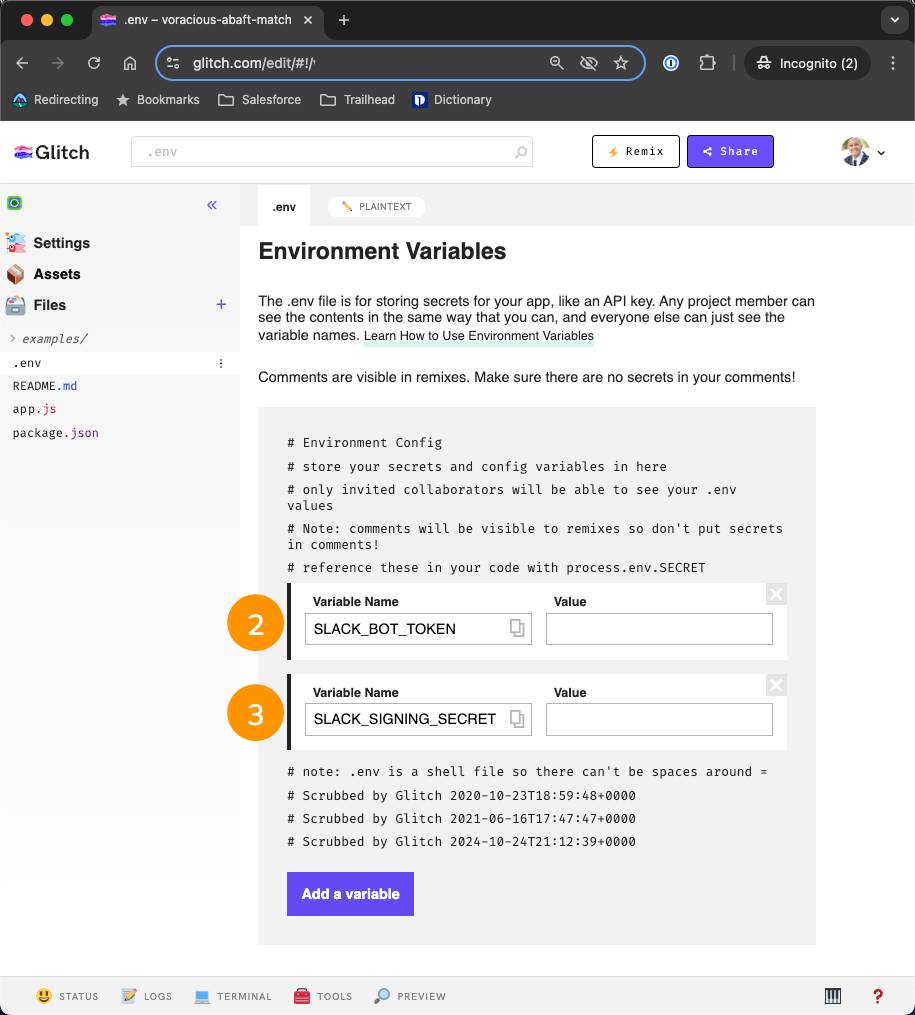
- Paste your Bot User OAuth Access Token in the Value field directly after SLACK_BOT_TOKEN.
- Paste your Signing Secret in the Value field directly after SLACK_SIGNING_SECRET. The app uses the signing secret to verify that incoming requests are coming from Slack. Bolt handles the verification automatically when the Signing Secret is passed into the App constructor.
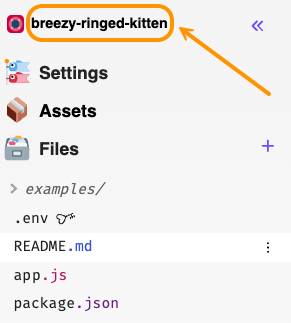
- While you're still in Glitch, go to the menu bar on the left hand side, copy your project name listed at the top, and save it to your text editor. You need it in the next step.
Get to Know Listener Functions
Slack apps typically receive and respond to 1:n (one to many) requests from Slack. For each type of incoming request from Slack, there is a corresponding listener function to handle and respond.
Here is a subset of the listeners Bolt apps can pass a function to.
Listener |
Description |
|---|---|
app.event(eventType, fn) |
Listens for Events API events. The eventType is a string used to identify the specific event. |
app.message([pattern ,], fn) |
Convenience listener to handle events of type message. The pattern can be any substring or RegExp expression. |
app.action(actionId, fn) |
Listens for interactive events from a Block element such as a user interaction with a button. The actionId identifier is a string that matches a block element’s action_id. |
app.shortcut(callbackId, fn) |
Listens for global and message shortcut invocations. The callbackId is a string or RegExp pattern that matches a shortcut’s callback_id, which is specified in the app configuration. |
The full list can be found in the Bolt reference documentation. It’s time to configure your app to listen and respond to events, interactions, and interactivities!
Subscribe to Events
You integrate your Bolt app with Slack in this section. While you do the work in the Slack API site, remember to keep Glitch open in a separate tab or window. To listen to Events API events, your app needs to enable event subscriptions.
- Head over to your Slack app page on the Slack API site if you’re not already there.
- Click Event Subscriptions in the sidebar.
- Event Subscriptions should activate automatically. You can also toggle it on if needed.
- You’re presented with an input box to enter a Request URL. A Request URL is where HTTP requests are sent for events to which your app is subscribed. If you created your app from the template, your request URL is currently https://project-name.glitch.me/slack/events.
- Event Subscriptions should activate automatically. You can also toggle it on if needed.
- Replace project-name with your Glitch project’s name. The Request URL will verify. It should look like this, https://breezy-ringed-kitten.glitch.me/slack/events, but instead of breezy-ringed-kitten, it’s your project’s name.
- Copy the entire Request URL to your text editor. You use it later. Bolt for JavaScript listens for all incoming requests at the
/slack/eventsroute by default, which is why it’s appended to the Request URL.
- Click Save Changes to save your work.
- Then, click Subscribe to bot events to open the section. Here you see message.channels under Event Name. This event listens for all messages posted to public channels your app is in. With the request URL enabled, your app should begin receiving these events.
- If you don’t see it included, make sure you do so by clicking Add Bot User Event and selecting it.
- If you don’t see it included, make sure you do so by clicking Add Bot User Event and selecting it.
Add an Events Listener
Event subscriptions use the event() listener, which you can find examples of in the Bolt documentation. For now, you use the message() listener to listen and respond to messages.
- Head over to your Glitch project.
- Go to app.js.
- Replace all the code under // Space for your code with the following. (To quickly copy the code to your clipboard, you can click Copy at the top right of the code block.)
Glitch auto saves your work. Let’s take a look at what you did.
You entered a message() listener that’s looking for the word Hello (1). This is formatted as /hello/i so the user can enter the word in various ways—“Hello”, “hello”, or even “HeLlO”—and the app will respond. The say() parameter exposes the event’s response URL (2) which, unlike calling chat.postMessage(), doesn’t require additional scopes to reply to message events.
You’ve also strengthened your logs with a middleware that lets you know a request was received (the listener heard Hello) (3). It then passes the message on to your final log letting you know that the app is functioning properly (4). This helps you monitor your app and troubleshoot any issues that may occur as you’re building and testing.
Test The Message
As long as Glitch is up and running in a separate tab, your app should automatically restart. You can now send a message that contains “hello” inside of the channel to which your app is added. The app should respond.
Go ahead and test it.
- Head to Slack.
- Go to the #welcome-new-team-members channel.
- Post
hello. The app responds.
This example gives you a place to start customizing your app based on your use case. Let’s try something a little more interactive by sending a button element rather than plain text.
Set Up Interactivity
To use features like buttons, select menus, date pickers, modals, and shortcuts, you need to enable interactivity. Similar to event subscriptions, you need to specify a request URL for Slack to send the action request (such as a user clicked your button).
- Back on your Slack app configuration page at https://api.slack.com/, click Interactivity & Shortcuts in the sidebar.
- Toggle Interactivity to On. You see that there’s another Request URL box.
- By default, Bolt is configured to use the same endpoint for interactive components that it uses for events, so enter the same request URL as above (for example, https://breezy-ringed-kitten.glitch.me/slack/events).
- Click Save Changes in the lower right-hand corner of the page, and that’s it! Your app is set up to handle interactivity.
Add an Action Listener to Respond to Message
When listening for interactivity, you use the action() listener. Before setting up the action() listener you modify the message() listener to send a button element.
- Head over to your Glitch project.
- In app.js, replace the listener with the following, more robust code which includes a button. Make sure you keep the log functions.
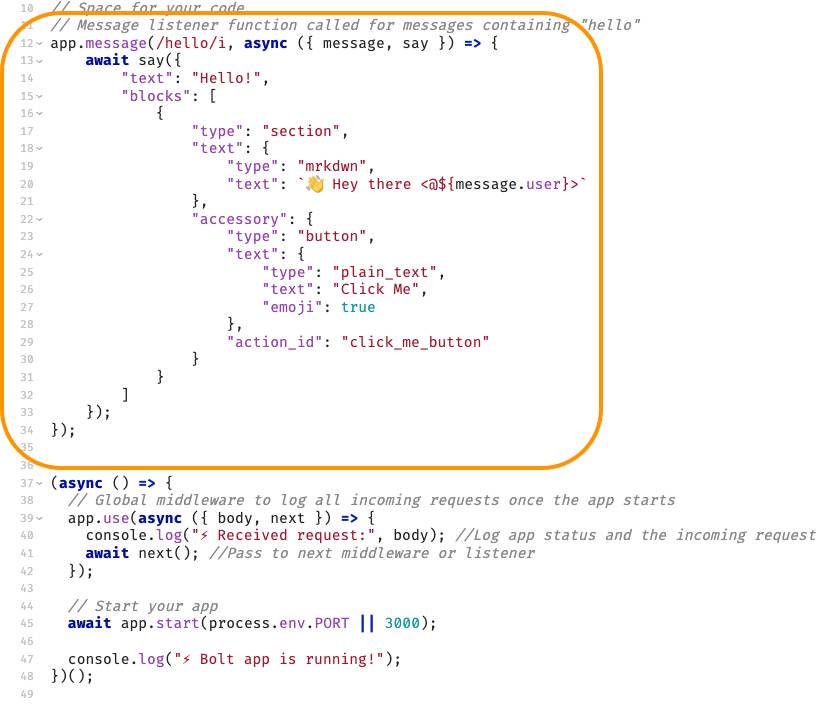
The value of say() is now an object containing an array of blocks. Blocks are components of a Slack message, and can range from text to images to date pickers. In this case, it contains a section block that includes a button as an accessory. More on blocks in Build Meaningful Interactions with Block Kit.
Block Kit can’t populate notifications or search by default, so the text field should be used to make your messages more accessible. To learn more about the text field there is information on the chat.postMessage reference page.
In the button accessory object, there is an action_id. This acts as a unique identifier that you can pass to your listener function to only listen to interactive events corresponding to that block element.
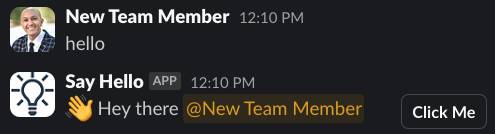
After Glitch autosaves your work, your app should have restarted, and you can send another message containing hello that your app will reply to with a message containing the button element. But if you click the button, nothing happens (yet!).
Add an Action Listener to Respond to a Button Interaction
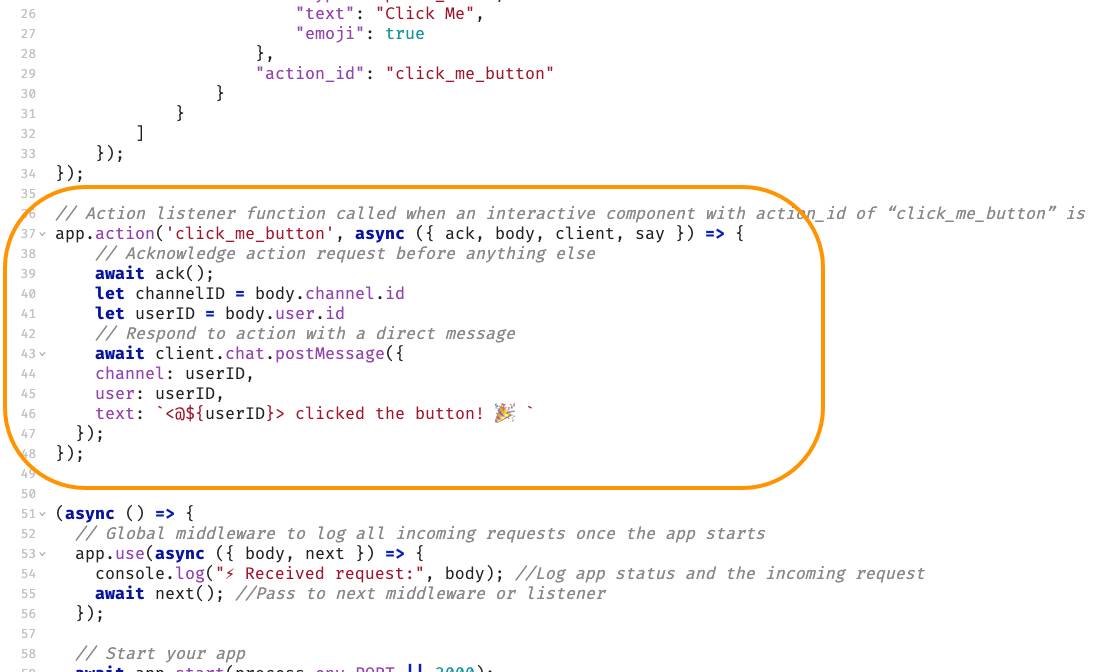
Let’s add an action() listener function to respond to the button click with a follow-up message.
- Head back to your Glitch project.
- Add the following action listener in app.js, under the code you just entered in the previous section.
Notice ack() being called inside of the listener function. ack() is used to acknowledge that your app received the event from Slack.
Test the Interaction
With your code hosted on Glitch, your app should be automatically refreshed with the new functionality you just added. Check it out.
- Head over to the #welcome-new-team-members channel.
- Enter
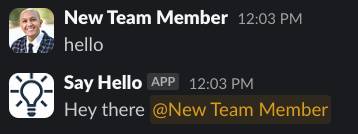
hello. You should see the app respond with 👋and a friendly, “Hey there”.
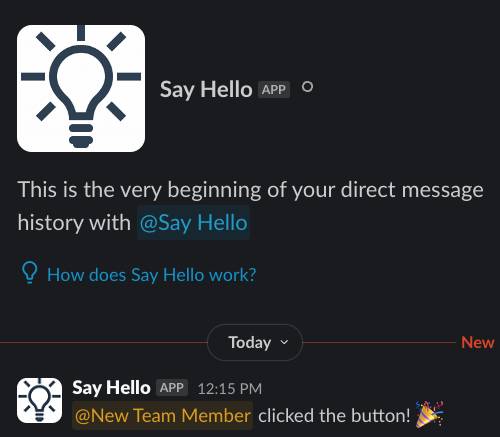
- Click Click Me, and the app sends you a direct message celebrating your click.
Refine Your App
You now have your first Bolt for JavaScript app that uses Bolt core concepts to listen and respond to different events coming from Slack! It’s a fun way for people to say hello and get a response. But there’s definitely more work to do to make it a welcoming message for new team members.
Check out Build Meaningful Interactions with Block Kit and see how you can build on the concepts and skills you’ve learned here.
Learn More About Bolt
With the basics, you can start exploring more Bolt and platform features. Here are a few paths you may consider exploring.
- Go through the examples folder within your Glitch project. There are a few files with different code samples you can copy and paste in your project.
- Read the Bolt for JavaScript documentation to learn about advanced functionality and find code snippets showcasing what’s possible.
- Level-up your app’s design using Block Kit Builder.
Explore other app surfaces, like the home tab and popup modals.
Sum It Up
In this project, you built a Slack app using Bolt for JavaScript. You ensured it listened to messages and responded with an interactive button. It’s a simple app to start with, but you can develop it more in Build Meaningful Interactions with Block Kit. In the meantime, go ahead and click Verify Step below to check your work.