Create and Customize a List View
Create List Views
A list view is a set of search conditions that displays records that match the search conditions. For example, a view of contacts that have "Birthdays This Month" would filter your list of contacts based on a search for birthdays falling on a day in the current month. By default, Salesforce includes a number of views for each screen Tab. You can switch between different list views by selecting the current list view and selecting another from the dropdown list.
- From the App Launcher, find and select the Travel App and select the Travel Approvals tab.
- Select record TA-00001 under All LIST VIEWS.
- Click the gear icon, then select Edit Object. This loads the object configuration page for the Travel Approval object.

- Click Search Layouts. Click the down arrow for the Default Layout and select Edit from the dropdown.
- Use the Add arrow to move these fields into the Selected Fields column, in order.
- Purpose of Trip
- Department
- Status
- Destination State
- Trip Start Date
- Trip End Date
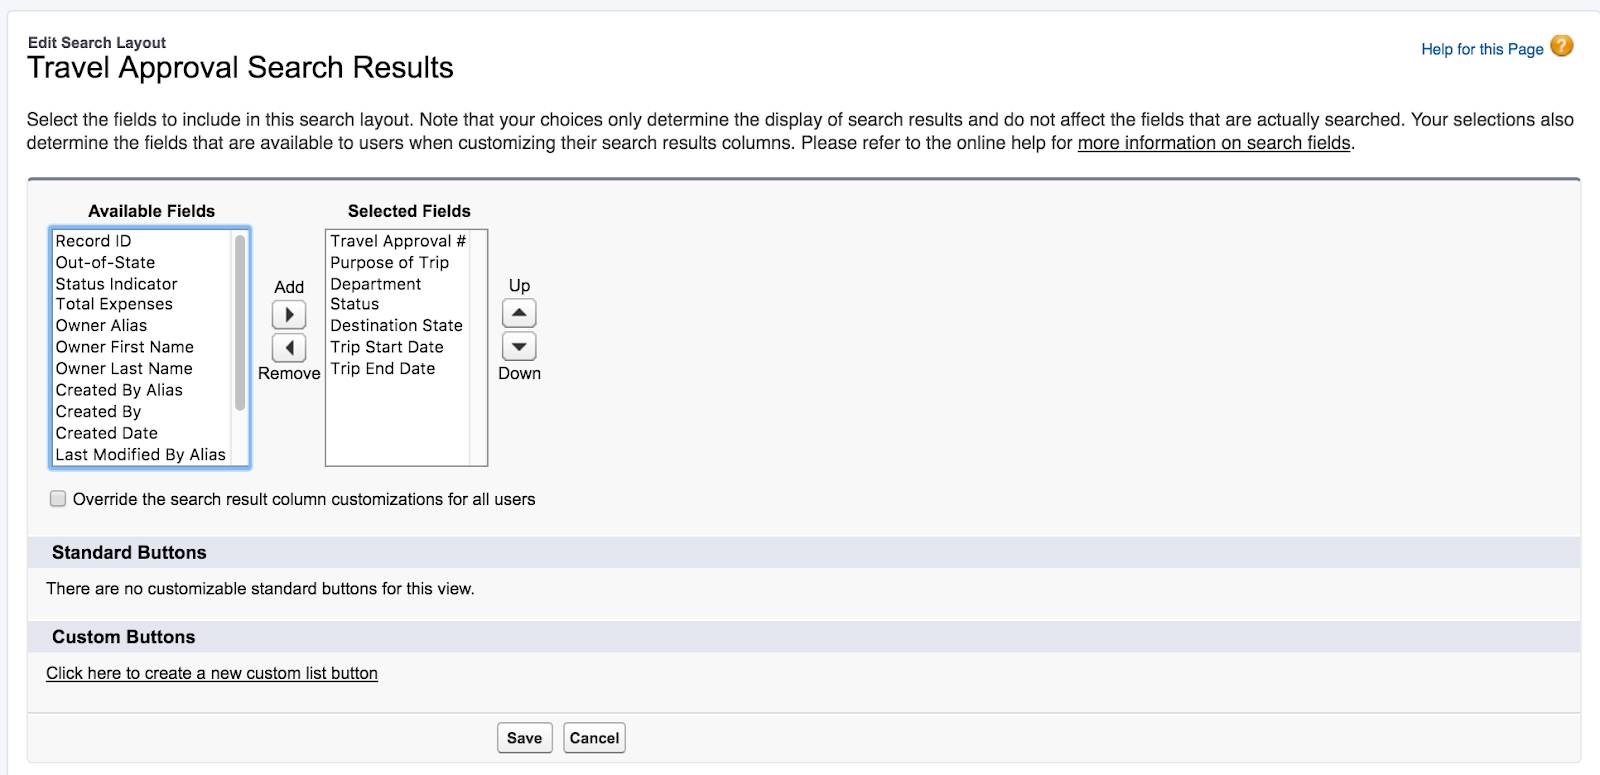
- Click Save.
- Using the App Launcher, navigate back to the Travel App and click the Travel Approvals tab.
- Click Recently Viewed and select the All list view.
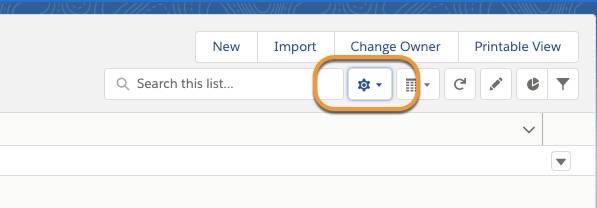
- Click the gear icon then select Select Fields to Display from the dropdown.
- Use the Add arrow to move these fields to the Selected Fields column, in order.
- Department
- Created By
- Status
- Trip Start Date
- Trip End Date
- Click Save.
You can also create a custom list view for your own use. Your custom list views can be private, or you can make them accessible to other users. In this scenario, you create a list view with a filter to show all out-of-state travel requests that have not been approved or rejected. This way you can see exactly what approvals are still outstanding.
- Click the List View gear icon and select New option.
- Name the new list view Open Out of State Travel Requests and select All users can see this list view.
- Click Save.
- Click Add Filter and select these details:
- Field: Out-of-State
- Operator: equals
- Value: True
- Click Save.
- Click Add Filter again and enter these details:
- Field: Status
- Operator: not equal to
- Value: Approved, Rejected
- Click Save.
- Click the gear icon and select Select Fields to Display.

- Use the Add arrow to move the following fields to the Visible Fields column, in order.
- Department
- Created By
- Status
- Destination State
- Trip Start Date
- Trip End Date
- Click Save.
Keep up the great work! Move on to the next unit and customize the page layout of the Travel Approval object.
Resources
- Salesforce Help: Create or Clone a List View in Lightning Experience
- Salesforce Help: Edit List View Filters in Lightning Experience
- Salesforce Help: Create a List View Chart in Lightning Experience
- Salesforce Help: Update Records Inline from a List View in Lightning Experience