Add a Custom Object to an App’s Recipe and Dataset
At Larry’s Laptop Emporium, you also created a custom object called Reseller Account Plan that is used to track the revenue target (quota) for a reseller for a given fiscal year on the Account page in Salesforce.
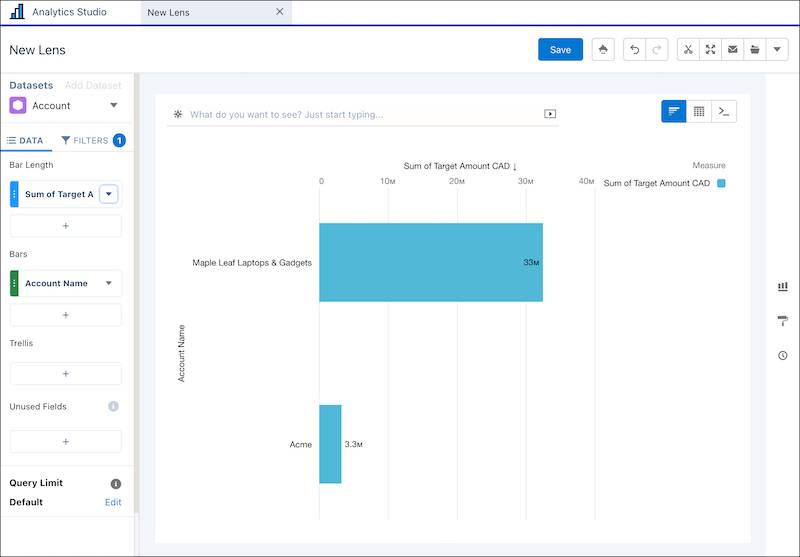
Maple Leaf Laptops & Gadgets is your biggest reseller and you plan to meet with them soon to discuss their resell strategy. Their agreed sales target and potential commission for the current year is on their reseller account plan.
Now you want to add data from the reseller account plan custom object to the Account page.
Add the Reseller Account Plan Custom Object to the Account Recipe
In order to add the Reseller Account Plan custom object to your Account dataset, start by setting up data sync for the custom object object.
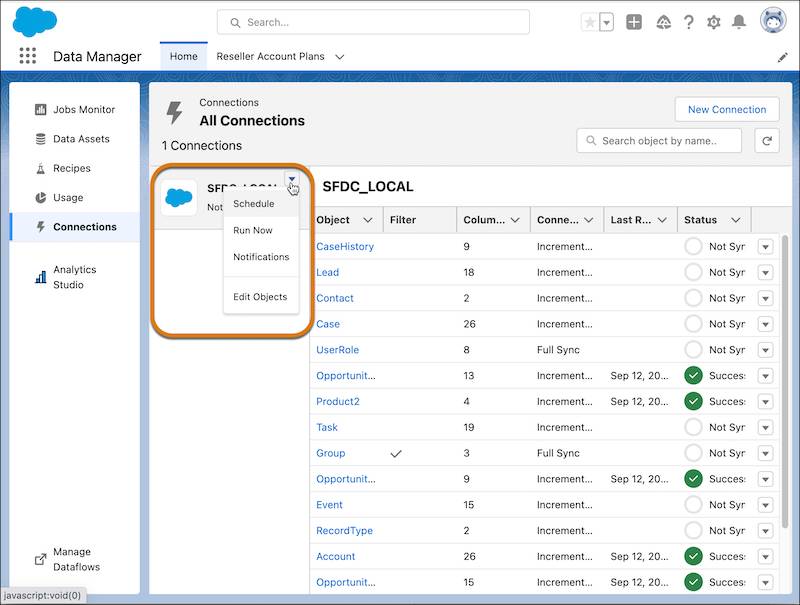
- From Analytics Studio, go to Data Manager | Connections.
- Select SFDC_Local and select Edit Objects from the dropdown menu.
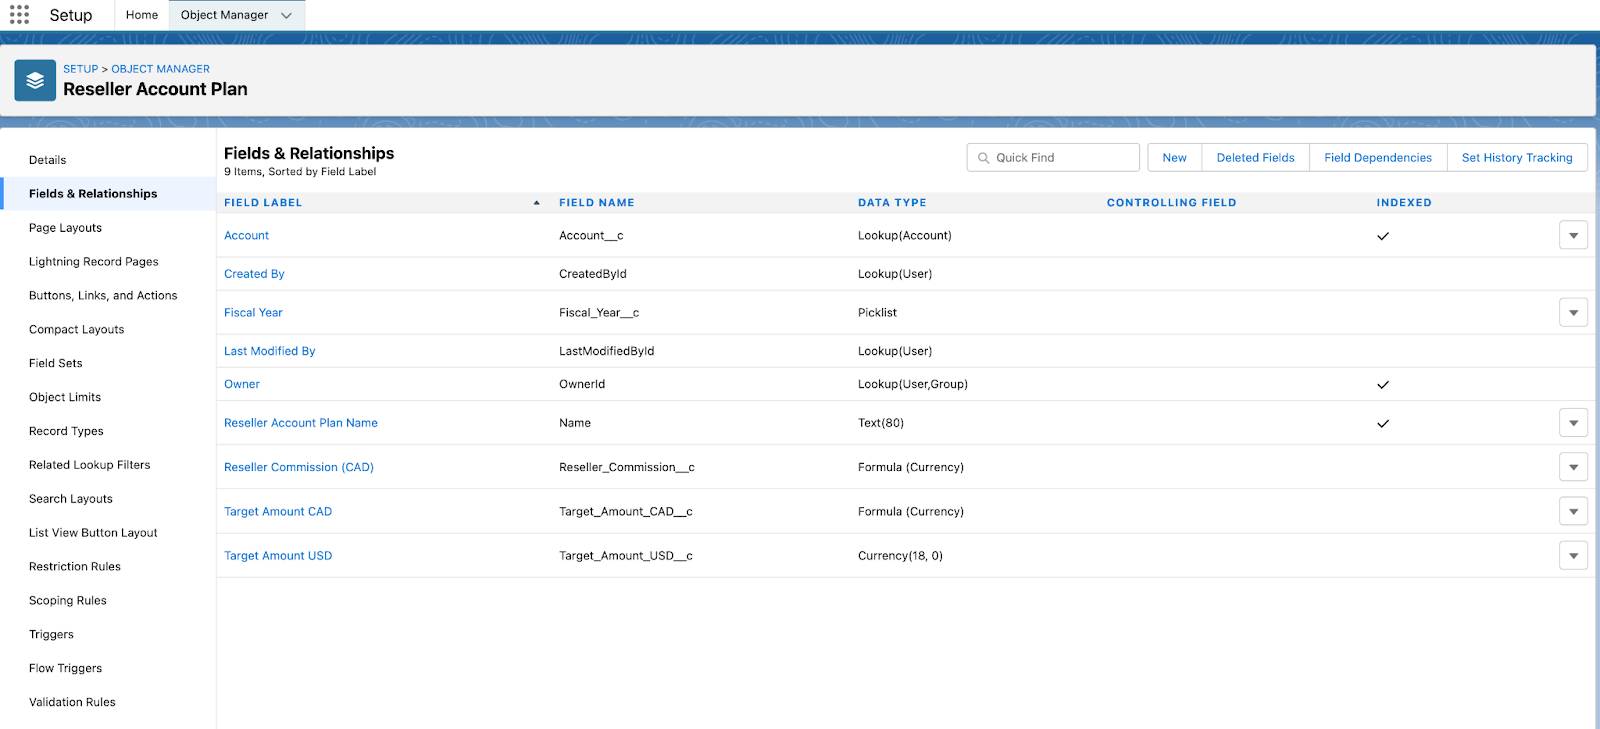
- Select the Reseller_Account_Plan__c object and select following fields:
- Account
- Fiscal Year
- Target Amount USD
- Target Amount CAD
- Click Save.
Run the Data Sync for the Custom Object
Next, run the initial Data Sync for the custom object.
- From the list of connection objects, find the Reseller_Account_Plan__c object.
- Click the dropdown icon on the Reseller_Account_Plan__c. You may need to scroll right to see the dropdown menu.
- From the drop-down list, select Run Data Sync | Run Full Sync.
- Go to Data Manager | Jobs Monitor to see the progress of the data sync running.
Add the Custom Object to a Recipe
Now let’s add the Reseller Account Plan fields to the Account dataset.
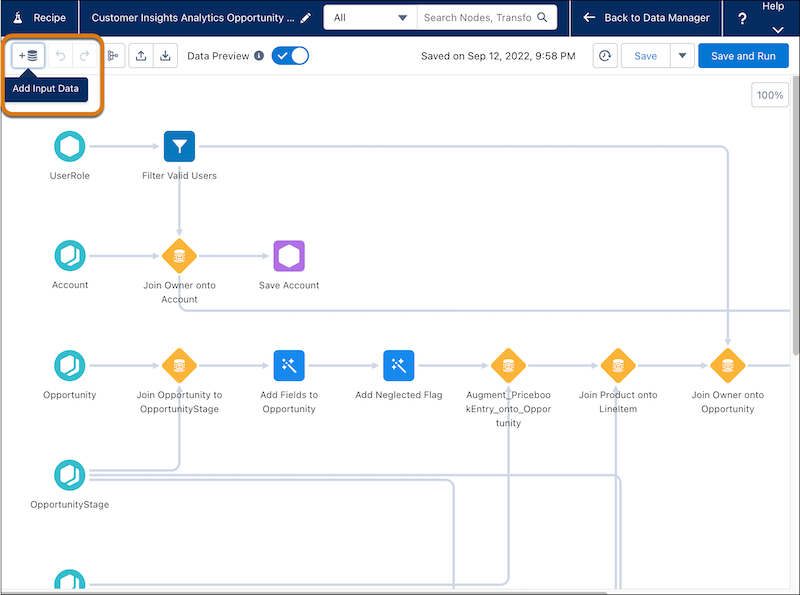
- From Analytics Studio, go to Data Manager | Recipes.
- Open the Customer Insights Analytics Opportunity Recipe and click Add Input Data.
- Search for then click the Reseller_Account_Plan__cobject, and then select the fields to include:
- Record ID
- Account
- Fiscal Year
- Target Amount USD
- Target Amount CAD
- Click Next.
- After the Reseller_Account_Plan__c object has been added to the recipe, click the + beside the Reseller_Account_Plan__c object and drag it on top of the existing Account node.
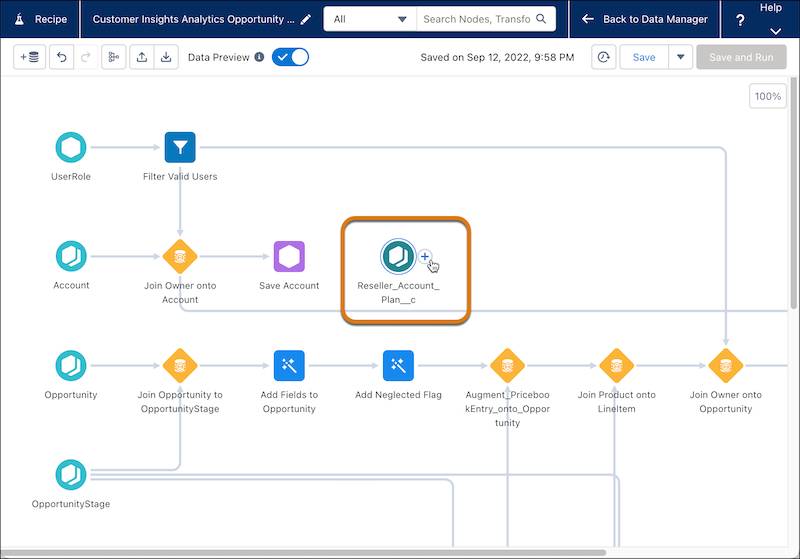
- Click Join | Look-up.
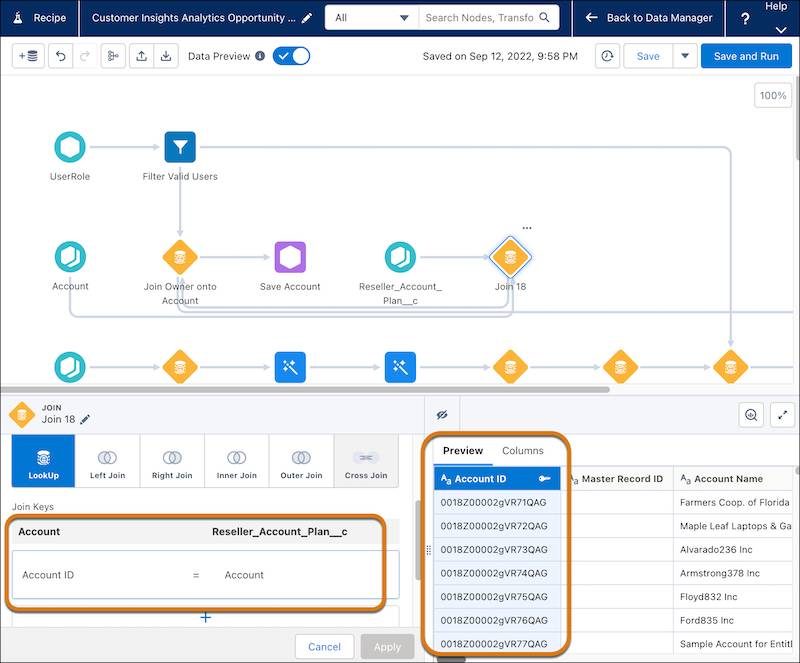
- Under Join keys, select Account as the join key for the Reseller Account Plan Object and Account ID as the join key for Account.
- Click the Preview tab to verify that the right IDs are joined and that the join type is correct.
- Click Apply on the left panel.
- Click Save and Run.
- Go to Data Manager | Jobs Monitor and verify that the recipe has run.
Explore the Data Added from the Custom Object in the Account Dataset
When the recipe has run, go to Analytics Studio to explore the new Reseller Account Plan data in the Account dataset.
- From Analytics Studio, click Browse | All Items | Datasets.
- Select Account.
- Click Explore.
- Click Filters and + to add a new filter.
- Add the filter: Account Type equals Channel Partner/Reseller.
- Click Apply.
- Click the Data tab to modify the bar account and length.
- In the Bar Length field select Sum | Target Amount (CAD) for Bar Length and Account Name for Bars.
- Sort Bar Length descending.
- Save the lens as
Yearly Target Amount CAD.
Now you have an overview of the targets that the resellers have committed to for the current fiscal year! Things are looking great and you are excited for your upcoming meeting.