Manage User Access
Learning Objectives
After completing this badge, you’ll be able to:
- Create new Salesforce users with the appropriate licenses, profiles, roles, and user details.
- Configure user locale settings, including language, time zone, and regional preferences, to support global teams.
- Assign user access based on business requirements by selecting appropriate roles and profiles.
Introduction
In this badge, you get hands-on practice setting up some of the basic but oh-so-useful functions a business needs when implementing Salesforce—from adding users to modifying your data model to fit your business needs and automating processes for max efficiency.
You find step-by-step instructions on how to get some important functions going for team members in your Customer Support department. By going through these exercises, you learn what's possible with the Salesforce platform and some of its specific applications. So let’s dive in.
Launch a New Trailhead Playground
Before you begin, we strongly recommend creating a new Trailhead Playground. To do this, scroll to the bottom of this page, click the three dots next to Launch, and select Create a Trailhead Playground. It typically takes 3–4 minutes for Salesforce to create your Trailhead Playground.
Note: Yes, we really mean a brand-new Trailhead playground! If you use an existing org or playground, you can run into problems completing this badge.
Create New Users
It just takes a few clicks, and you’re ready to enter a new user’s information into your Salesforce org. Some fields are mandatory (such as name and email), and others can be skipped if they’re not applicable to a particular user.

Kenya Collins, the manager over your Customer Support department, asked you to add her new team members to your org. Let’s start by creating a user record for Fumiko Suzuki, a member of the Customer Support team headquartered in Japan. Use these details:
- Click Setup
 and select Setup.
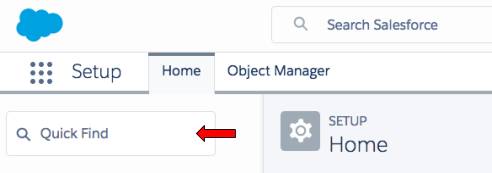
- In the Quick Find box, search for and select Users.
- Click New User. Complete the new user record with these details:
Field |
Value |
|---|---|
First Name |
Fumiko |
Last Name |
Suzuki |
Alias |
(auto-populates) |
(enter an email address) |
|
Username |
(auto-populates with your email address-replace using the formula in the yellow note box above) |
Nickname |
(auto-populates) |
Title |
Customer Support Rep |
Department |
Customer Support |
Role |
Customer Support, International |
User License |
Salesforce Platform |
Profile |
Standard Platform User |
- Next, fill in her Locale settings, including time zone and language.
- Time Zone = (GMT +09:00) Japan Standard Time (Asia/Tokyo)
- Locale = Japanese (Japan)
- Language = Japanese
- Click Save & New.
- Follow the same steps to add US-based customer support rep Aaron Hartzler, sticking with the default locale settings and using these details:
Field |
Value |
|---|---|
First Name |
Aaron |
Last Name |
Hartzler |
Alias |
(auto-populates) |
(fill in your own email address) |
|
Username |
(auto-populates with your email address-replace using the formula in the yellow note box above) |
Nickname |
(auto-populates) |
Title |
Customer Support Rep |
Department |
Customer Support |
Role |
Customer Support, North America |
User License |
Salesforce |
Profile |
Standard User |
- Click Save.
Verify Your Email Address
In a future step, you send a test email from within Salesforce. Salesforce requires that users have a verified email address to send emails through Salesforce, such as sends to contacts or leads. So while you are setting up users, it is a perfect time to verify your user email address is well... verified.
- From setup, click Users.
- Click on [your name] to open the Advanced User Details.
- Click [Verify] next to your email address. Note: If it already says [Verified] next your email address then you are good and do not need to do anything additional.
- Click OK in the pop-up window.
- Check your email and click the verification link.
Now that you set up a few users, move on to the next step in this badge and do some customizing.