Create a Custom Action to Display Bundles in One Click
Add Bundles Quickly
You might remember bundles from the Configurable Bundles in Salesforce CPQ badge. They’re premade sets of products that are sold together to simplify quoting with CPQ. AW Computing loves bundles—its sales reps sell a lot of them, so quick access is key. Wouldn’t it be great if reps could filter products to show only bundles? Even better, what if they could view bundles with a single click from the Quote Line Editor? Make it happen by creating a Custom Action!
Custom actions are part of the CPQ toolbox. They’re best known as the buttons you see in the Quote Line Editor.
In this step, you create a basic button to save sales reps several clicks when adding bundles to a quote. While eliminating a few clicks may not seem like a big deal, when you’re talking about high-speed sales, every click counts. Your sales reps will thank you for improving their user experience.
The button you create can be labeled anything, but we’ll call it Add Bundles. In order to show Add Bundles on a button in the user interface, it must first be included as a possible label. You do that by updating the Label field on the Custom Action object. Start by navigating to Setup.
- Click
 and click Setup. The Setup page opens in a new tab.
- Click Object Manager.
- Click Custom Action.
- Click Fields & Relationships.
- Click Label.
- In the Values list, click New.
- Enter
Add Bundles.
- Click Save.
Close the Setup tab to return to the Salesforce CPQ tab. You’re now ready to create a custom action record to make a button appear in the Quote Line Editor.
- In the navigation bar, click Custom Actions.
- Click New.
- For Name, enter
Add Bundles Prefilter.
This name is only seen by admins, so it can help to add more information.
- For Display Order, enter
10.
This determines where the button appears relative to other buttons. All of the out-of-the-box CPQ buttons are numbered in the 900s, so 10 will make your button appear farthest to the left.
- For Type, choose Button.
- Check Active.
- Check Brand Button.
This makes your button stand out by coloring it blue instead of white.
- For Location, choose Quote/Group.
If you use groups, this makes your button appear in every quote line group. Otherwise it appears in the quote header. Additionally, it’s the only choice that lets you make a button to bring users to the product selection page.
- For Action, choose Add Products.
As you might imagine, this tells CPQ to go to the product selection page.
- For Label, choose Add Bundles.
- Click Save.
Your Add Bundles button is almost finished. At this time, it will appear for users to click, but it will show the exact same products as the Add Product button.

The final step is to create a search filter that is associated with only this button. The set up is almost exactly like the others you created, but this time you start from the custom action record.
- While still on the Add Bundles Prefilter custom action record, click the Related tab.
- In Search Filters, click New.
- For Filter Name, enter
Bundles.
- For Target Object, choose Product.
- For Target Field, choose SBQQ__ConfigurationType__c.
Team Trailhead pre-added this value to save time. As you learn in Configurable Bundles in Salesforce CPQ, setting Configuration Type to Required, Allowed, or Disabled are all ways to tell CPQ that the product should be treated as a bundle.
- For Operator, choose ends with.
- For Filter Value, enter
ed.
Who’s Ed? It might seem odd, but really you’re just looking to see if the configuration type is set to Required, Allowed, or Disabled, all values that end in “ed.” Alternatively, you could set Operator to “not equals” and leave the Filter Value field blank. That would check if something was chosen for configuration type instead of being left empty.
- Check Hidden.
- For Display Order, enter
1.
Like your other hidden filters, the specific value isn’t important.
- Click Save.
Well done, your Add Bundles button is ready to test! Let’s give it a click and see what happens.
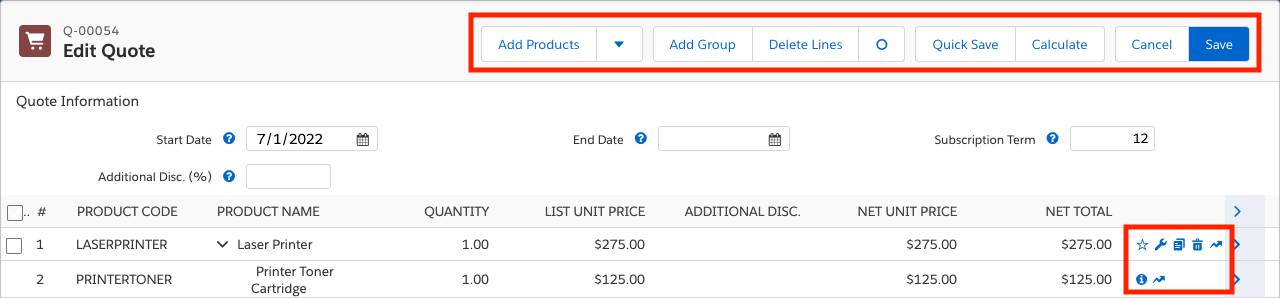
- In the navigation bar, click Quotes.
- Click Q-00054.
- Click Edit Lines.
- Click Add Bundles.
You should see the product selection page has about a dozen products, not the 150+ products you’d normally see. They’re all bundles thanks to the search filter attached to your custom action. Now prepare for all the adulation your sales reps heap upon you for making their lives so much better.
Note that if you delete the Add Bundles custom action, the Bundles search filter record will not be deleted! This means the Bundles search filter becomes generalized and will affect every other action that directs to the product selection page.
For example, if the Add Bundles custom action is deleted without first deleting the Bundles search filter record, when you click the Add Products button, it would also only show bundles. Since the filter is hidden, there’d be no way to show non-bundles. So if you ever delete a custom action, make sure to delete the related search filters first.
OK, now celebrate! Great job adding search filters to help the sales reps at AW Computing sell faster than ever before. With your amazing search filter skills, you’ve made a big product catalog easily manageable.
Resources