Create an External Client App
Create an SFDX Project
Now that your environment is set up, it’s time to create your external client app. To do that, you need an SFDX project.
- Create a folder called
ECA Metadataon your computer where you want to create the app.
- Open the folder in VS Code.
- Open the Terminal in VS Code at the folder you created.
- Run this command in the Terminal to create a Salesforce DX project called
ecaViaMetadatawith the standard template.
Authorize Your Dev Hub Org
Connect the SFDX project on your computer to the Trailhead Playground Dev Hub using the connected app. You’ll need your domain for this step. To find your domain in Setup, enter My Domain in the Quick Find box then click My Domain.
- Open the SFDX project ECA Metadata folder in VS Code.
- In the Terminal in VS Code, run this command after replacing <my domain> with your org’s domain.
- Log in with your Trailhead Playground credentials in the web page that opens.
- Allow access to the org.
Configure the SFDX Project for an External Client App
- Open the
sfdx-project.jsonfile in VS Code.
- Update the sfdcLoginUrl parameter to your domain.
To find your domain in Setup, enter My Domain in the Quick Find box then click My Domain.

- Expand the directory called config and open the scratch org definition file, which is called project-scratch-def.json. Add
ExternalClientAppsandExtlClntAppSecretExposeCtlto the features setting.

-
Create a package.xml manifest file in the project directory.
- Add this content to your package.xml file.
- In the force-app/main/default directory, create a folder called
externalClientApps.
- Add a file to the externalClientApps folder called
ecaViaMetadata.eca-meta.xml. This will be the header file for your external client app.

- Add this content to your header file.
At this point your external client app is technically complete. You could deploy this configuration, and it would show up in the External Client App Manager on your playground as a basic external client app. However, to make a useful app, you need a plugin. Let’s configure an OAuth plugin similar to the one we made in the first module. An OAuth plugin that is configured for the OAuth 2.0 Web Server flow requires a couple of edits and a couple new files.
Enable and Configure the OAuth Plugin
Unlike connected apps, which combine all configurations in a single file, external client apps include two settings files and a policies file. The Global OAuth Settings file includes those sensitive fields like OAuth consumer key and consumer secret that should be protected. The OAuth Settings file includes all of the less-sensitive configurations for an external client app. There is no need to create a policies file while configuring an external client app for the web server flow, because policies are configured based on the settings files. The OAuth Policies file is generated when you deploy the external client app.
Create a Global OAuth Settings File
- In the force-app/main/default directory, create a folder called
extlClntAppGlobalOauthSets.
- Add a file to the extlClntAppGlobalOauthSets folder called
ecaViaMetadataGlblOAuth.ecaGlblOauth-meta.xml.

- Open ecaViaMetadataGlblOAuth.ecaGlblOauth-meta.xml in VS Code and add this content to it.
- Save the Global OAuth Settings file.
Create an OAuth Settings File
- In the force-app/main/default directory, create a folder called
extlClntAppOauthSettings.
- Add a file to the extlClntAppOauthSettings folder called
ecaViaMetadataSettings.ecaOauth-meta.xml.

- Open ecaViaMetadataSettings.ecaOauth-meta.xml in VS Code and add this content to it.
- Save the OAuth Settings file.
Reference Settings Files in the Header File
Now that you have created the two settings files, you need to incorporate them into the external client app. The Header file is a list of all the files that make up the external client app.
- Open the package.xml manifest file.
- Add an entry for each of the three OAuth files.
- Save the package.xml manifest file.
Deploy Your External Client App
Now that your external client app is properly configured, deploy the app. The policies file is created on deployment, so after you deploy, retrieve the external client app to pull the generated file to your SFDX project.
- Run this command to deploy the external client app. Replace <username> with the username you used to log in when you authorized the Dev Hub.
- Retrieve the external client app from your Trailhead Playground. Replace <username> with the username you used to log in when you authorized the Dev Hub.
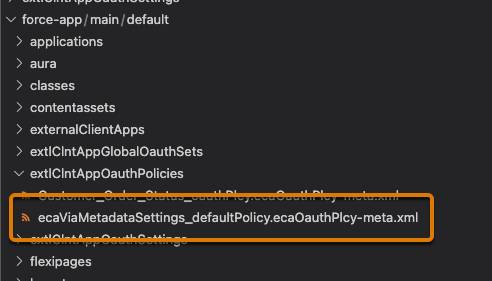
Verify Your App
After successfully deploying and retrieving the external client app, you should see a policies file in your SFDX project where there wasn’t one before.
Also, you can open the External Client App Manager and see a new external client app called ecaViaMetadata. If you’re feeling adventurous, you could collect your My Domain and the OAuth consumer key and secret, and plug it all into the OpenID Connect Playground to walk through the OAuth Web Server flow.