Customize Service Schedules and Attendance Tracking
Plan Ahead, Then Take Attendance
Some of your organization’s services may be scheduled in advance, with set rosters of clients or program participants. They may also repeat regularly.
In those cases, service schedules are the perfect tool to plan and create service deliveries.
Service schedules help you set up one-time or recurring service sessions, add your clients or program participants to the schedule, and take attendance after each session to create service delivery records.
In this unit, you configure service schedules and attendance tracking to make your users more effective.
Customize Service Schedule Information
To make your service schedules as helpful as possible, you can customize the information your users track on service schedule records and customize the data you show about session participants.
First, customize the Service Schedule object’s fields. The Information section on a service schedule, by default, includes fields to track the service, the service providers, participant capacity, and default service quality.
Imagine, though, that you need to track the location where a class will take place. Create that field, add it to the page, and include it on the New Service Schedule page.
Let’s start by creating the field.
- In Setup, click the Object Manager tab.
- Find and select Service Schedule from the list.
- Click Fields & Relationships.
- Click New.
- Select Picklist and click Next.
- Specify these details:
- Field Label:
Location - Values: Select Enter values, with each value separated by a new line then enter
Bullard HouseandWest Side House.
- Click Next.
- Click Next.
- Save your work.
Let’s make sure the field is in the correct area of the page layout.
- In the Service Schedule object in Object Manager, click Page Layouts.
- Click Service Schedule Layout.
- Enter
locationin the Quick Find box on the palette. If the Location field is currently on the page, you can click it in the palette to find it.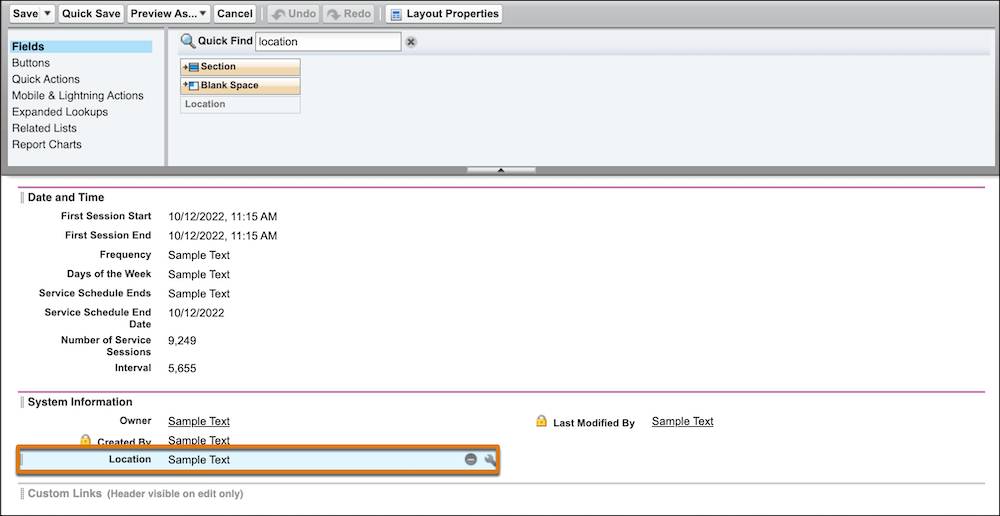
- Drag the Location field to the bottom of the Information section.
- Save your work.
Now add the field to the interface for creating a new service schedule.
- In the Service Schedule object in Setup, click Field Sets.
- Click Service Schedule Information.
- Drag Location from the palette to the bottom of the In the Field Set box.
- Save your work.
Try the new field set.
- From the App Launcher (
 ), find and select Program Management.
- Click Service Schedules in navigation. It may be listed under More.
- Click the Autumn Medical Careers Course from the list view to see the location field. You may need to select the All list view first.

- Click the Service Schedules Menu button (
 ) on the tab in navigation and select + New Service Schedule.
- The new Location field also appears in the Service Schedule Information area.
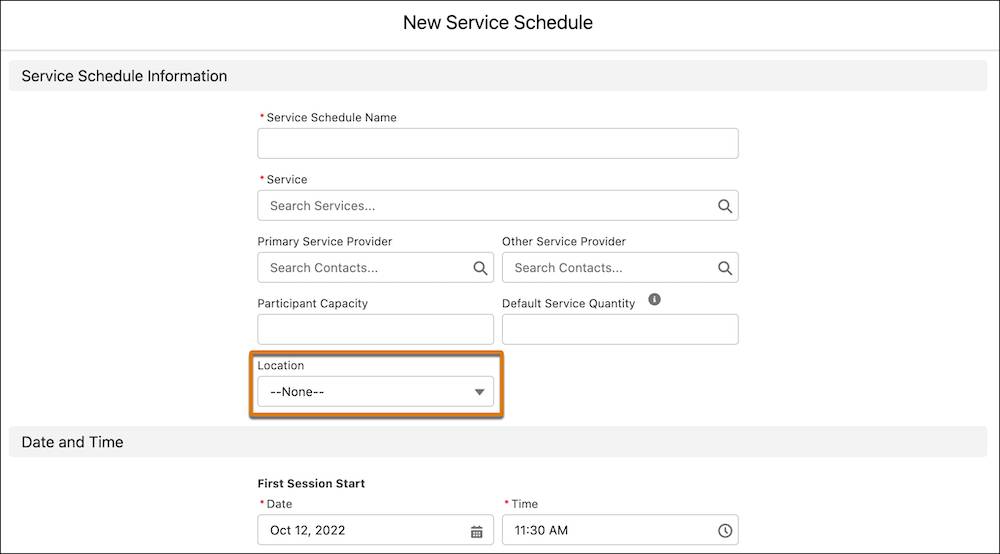
- Click
 to close the New Service Schedule screen.
Customize Add Service Participants Fields
When your users add participants to a service schedule, they can choose from a list that, by default, includes columns for participants’ names, emails, and program engagement stages. These columns can be customized to the information your users need most.
For example, add each participant’s program engagement start date to the list. You can do this using another field set.
- In Setup, click the Object Manager tab.
- Find and select Program Engagement from the list.
- Click Field Sets.
- Click SessionParticipantView. This is the field set that the service schedule wizard uses when you select participants.
- In the palette, click Program Engagement or an object under it in the list. Let’s click Program Engagement.
- Drag fields to and from the palette and In the Field Set. Drag Start Date to the In the Field Set box, under Client > Email.
- While you’re here, remove the Client > Email field. Hover over Client > Email in the In the Field Set box and click
 .
.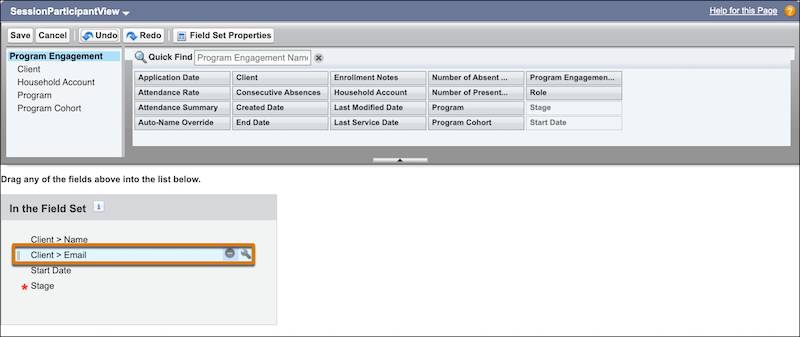
- Save your work.
Let’s check out this change in the context of creating a new service schedule.
- From the App Launcher (
 ), find and select Program Management.
- Click the Service Schedules tab. It may be under More.
- Click New.
- Enter a Service Schedule Name and select a Service. Any selection will be fine here. You aren’t going to create a new service schedule.
- Click Next.
- Click Next.
- Under Add Service Participants, check that you’re now displaying Full Name, Start Date, and Stage information for each possible participant.
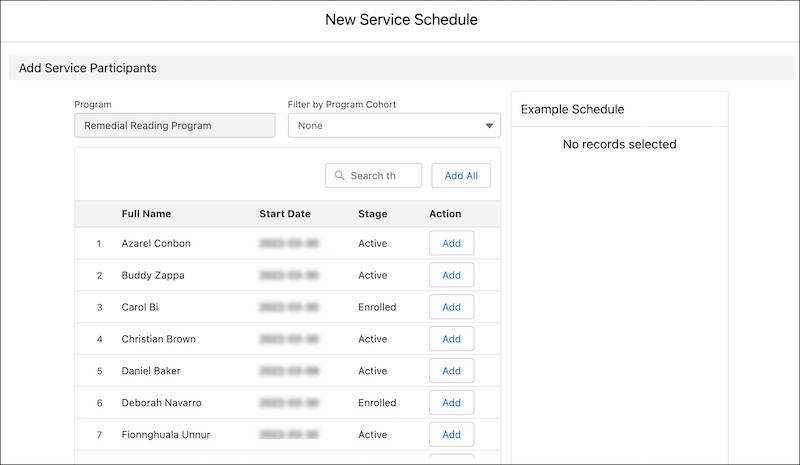
- Click
 to close the New Service Schedule screen.
Notice that we don’t have a lot of space on this list, so be selective about how much information is displayed to your users in this view.
Customize Service Schedule Attendance Tracking
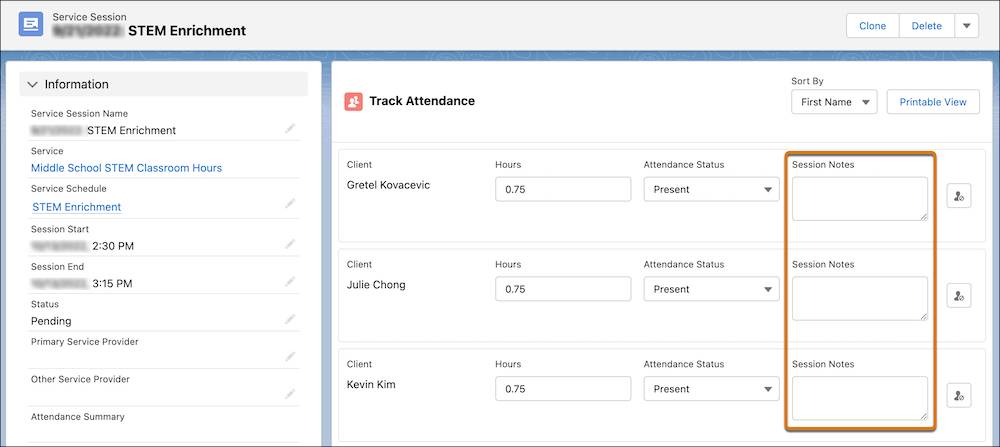
After a schedule is created, most of the work will happen in the Track Attendance component. Track Attendance helps users create service delivery records for all participants from a service session record.
By default, Track Attendance includes the Client, Quantity, and Attendance Status fields. The Client and Attendance Status fields can’t be removed. You can add other fields to the interface, however.
For example, add the Session Notes field you created earlier.
- In Setup, click the Object Manager tab.
- Find and select Service Delivery from the list.
- Click Field Sets.
- Click Attendance Service Deliveries.
- Drag fields to or from the palette and the In the Field Set box—but you can’t remove the Client or Attendance Status fields. Drag Session Notes from the palette to include it in the field set after Attendance Status.
- Save your work.

Now that you added the field, let’s see how it works.
- From the App Launcher (
 ), find and select Program Management.
- On the Program Management homepage, find the Recent Sessions component and click on a pending session. You may need to change the List View to All for the sessions to appear.
- Check out the Track Attendance component on the service session record. Your new field should be included. Try it out if you’d like.
After you collect all this attendance data, it’s helpful to see it in aggregate. How often is someone attending a program? Is attendance for a particular service doing well?
Click Verify to check your work here, then you dive into attendance summary data in the next step.
Resources