Target Audiences Based on the User Object
Follow Along with Trail Together
Want to follow along with an expert as you work through this step? Take a look at this video, part of the Trail Together series.
(This clip starts at the 15:59 minute mark, in case you want to rewind and watch the beginning of the step again.)
Marketing Locally
Like we mentioned, Ursa Major is quickly expanding outside its regional base. Now that it has customers around the country, Ursa Major is keen on targeting specific information to specific geographic areas. Specifically, it wants to show marketing assets that promote local sales on its portal’s homepage.
Creating Page Variations
The first step that Maria, the Ursa Major Salesforce administrator, has to take is to create two versions of the home page: one for customers who are based in Chicago, and another for all other customers. The Chicago affiliate is planning to handsomely reward current customers who refer their friends to Ursa Major. The marketing department hands over its assets and messaging to Maria, and she sets to work creating page variations for the home page.

- From Setup, enter
Digital Experiencesin the Quick Find box, then select All Sites.
- Click Builder next to the Ursa Major portal.
- Click the settings button next to Home.

- Click Page Variations (1) and
 (2).
(2).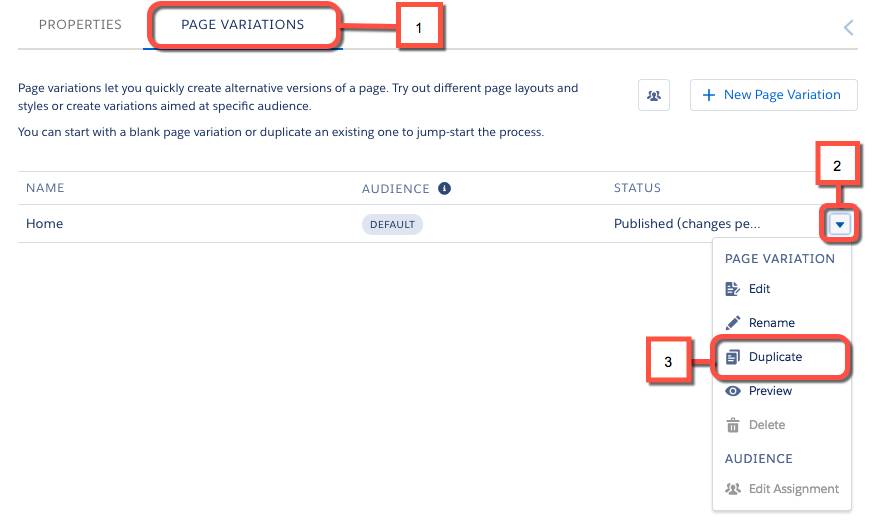
- Click Duplicate (3). The new page variation is called “Home (1)”.
- Click
 for Home (1) and click Rename.
- Rename to
Chicago Home Page.
Now that you have a specific page variation for Chicago, we can customize it.
- Click
 for the Chicago Home Page, and then click Edit.
- To access the components list, click
 .
.
- Drag a new Rich Content Editor component on the page.
- Click Edit Content and add the following text:
To all our Chicago customers: Tell your friends and family about our amazing products! When they buy, you'll get $500.Change the font size, type, and color to make it distinct. Here’s an example, but feel free to use your own fonts and colors.
Now you can customize the page variation for a non-Chicago audience.
- To switch to the Home page variation, open the Page Variations menu, and then select Home.

- Drag the Rich Content Editor component on the page, and then add the following text:
Thank you for trusting us with your solar power needs!It should look something like this.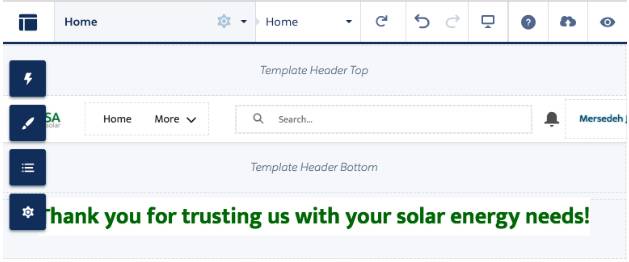
Maria has two distinct pages. Now all she needs are two audiences, one for each page variation.
Setting Up Audiences
Maria’s setting up two audiences so when a customer from Chicago looks at the Ursa Major portal, she sees messaging specific to Chicagoland. All other customers will see messaging that isn’t Chicago-specific. Let’s follow along with Maria.
- Click
 and then Page Variations.
- To create an audience, click
 and then New Audience. Enter the following information:
- Audience Name:
Chicago Customers - Audience Matches When: All Conditions Are Met
- Criteria Type: User > City
- Operator: equals
- Value: Chicago
- Audience Name:
- Click Save.
- Click Done. (You may have to scroll down to see the Done button.)

Fabulous! Now we’ve created an audience comprising folks living in Chicago.
You might have noticed we used the city field on the user object to target an audience based on their location. But you can target more specific audiences with many more fields, beyond the user object. How? Through field traversals. That means you can target a field by traversing from the one object to other associated objects. Let’s say you want to target a field on the account object. When you set up the audience criteria, you can traverse from user to contact to account, and target the field that way.
Now we have to assign this audience to the Chicago-specific home page we created, and test out the visibility.
- From the Page Variations tab, click
 for the Chicago Home Page variation.
- Click
 .
.
- Click Chicago Customers | Assign.
- Click Done. (You may have to scroll down to see the Done button.)
Easy peasy lemon squeezy, as some would say.
Audiences has other powerful tools in its arsenal, such as standard and custom permission criteria types, the ability to combine criteria into logic statements with ANDs and ORs, and formula fields. Learn more about audiences in Create an Audience for an Aura Site.
Now let’s go publish and activate our portal, and see what Ursa Major customers see.
- In Experience Builder, click Publish, and in the confirmation dialogue, click Publish again, and then Got It.
- Click
 , and then click Administration.
- Click Settings if you’re not already there by default.
- Click Activate, and then OK.
You’ll receive emails for each of the users you created with your own email address. Now let’s look at what our portal users, Edna Frank and Tim Barr, see when they log in to the portal.
- Go back to your Salesforce org (your Trailhead Playground). There should be a tab in your browser open to the org, but if not, click
 in Administration and click Salesforce Setup.
- Click
 and select Contacts.
- Click Edna Frank.
- Click
 and Log in to Experience as User.
You should see the generic Ursa Major messaging on the portal.
Now follow the exact same steps, but for Tim Barr. What do you notice? Yup, you're now seeing the Chicago-specific messaging for Tim. Remember how we changed his user detail page so it had Chicago as his hometown? Thanks to your settings, Salesforce used that bit of information to show Tim the information that he needed to see.
What do you see when you access the portal as the admin? Click  and then click the Ursa Major Portal tile. Unless you’ve changed the location in your user detail page to Chicago, you see the same default home page that Edna sees.
This brings up another important point: Everyone who has access to the portal sees the default homepage except Tim Barr. But let’s say you want to set up another audience and page variation for customers in Tucson. At that point, everyone would see the default homepage except for folks who have been assigned the Chicago and Tucson page variations.
Just think of the possibilities. You can personalize your portal based on a whole slew of criteria. Go on, have fun with it. Test it and try it out.
We won't check any of your setup. Click Verify Step to go to the next step in the project.