Compose Meaningful Messages
Make It More Than Just Hello
After reviewing how the app currently functions, you sit down with the onboarding team to discuss the user flow. This is the flow that came out of the meeting.
- The user heads to the welcome channel and posts, “onboard me”.
- The app sends onboarding instructions in a private message.
- The user then clicks a button to confirm that they’ve gone through the onboarding material.
- The app posts back into the welcome channel that they’ve been successfully onboarded.
It’s meaningful. It’s automated. And the team can track successful onboarding via the welcome channel. Let’s make it a reality.
Right now, you have the app listening for “hello” and responding with a simple block message. Let’s get to work on tailoring it for onboarding.
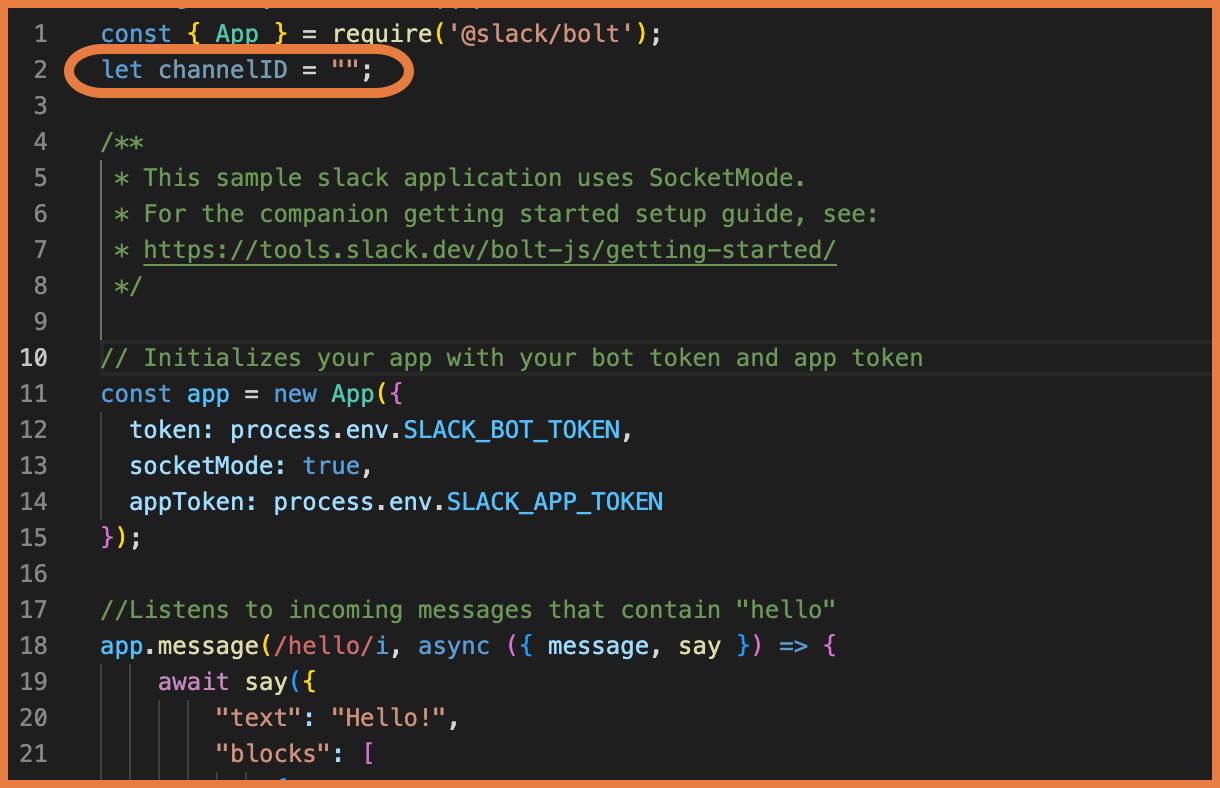
- If you don’t have it open, navigate to your project file, say-hello | app.js. At the end of the onboarding flow, your app needs to remember to post to the welcome channel. In order to do that, you need to make that channel a constant.
- At the top of your code, locate const { App } = require(“@slack/bolt”);. Add a return line under it.
- On the open line, enter,
let channelID = "";
This enables your app to remember the channel ID when it’s declared and reuse it for multiple listeners. Remember from building your app, listeners “listen” for messages or actions, like a button click, and then do what you coded them to do.
- Now, locate the comment for your first listener starting with the line //Listens to incoming messages that contain “hello”.
- Above it, add 3 to 4 lines to give you space for new code. You can preserve the Hello function for now and save it for reference if you need it.
- Then, above your hello listener, add a code comment for the new code you’ll be adding,
// Message listener function called for messages containing "onboard me"
This is good context to have, since you want the app to respond to team members with the declared intention for onboarding. And for anyone reviewing the app’s code, it’s a clear indication of this listener’s function.
- Under the code comment you just added, add the following code. To quickly copy the code to your clipboard, you can click Copy at the top right of the code block.
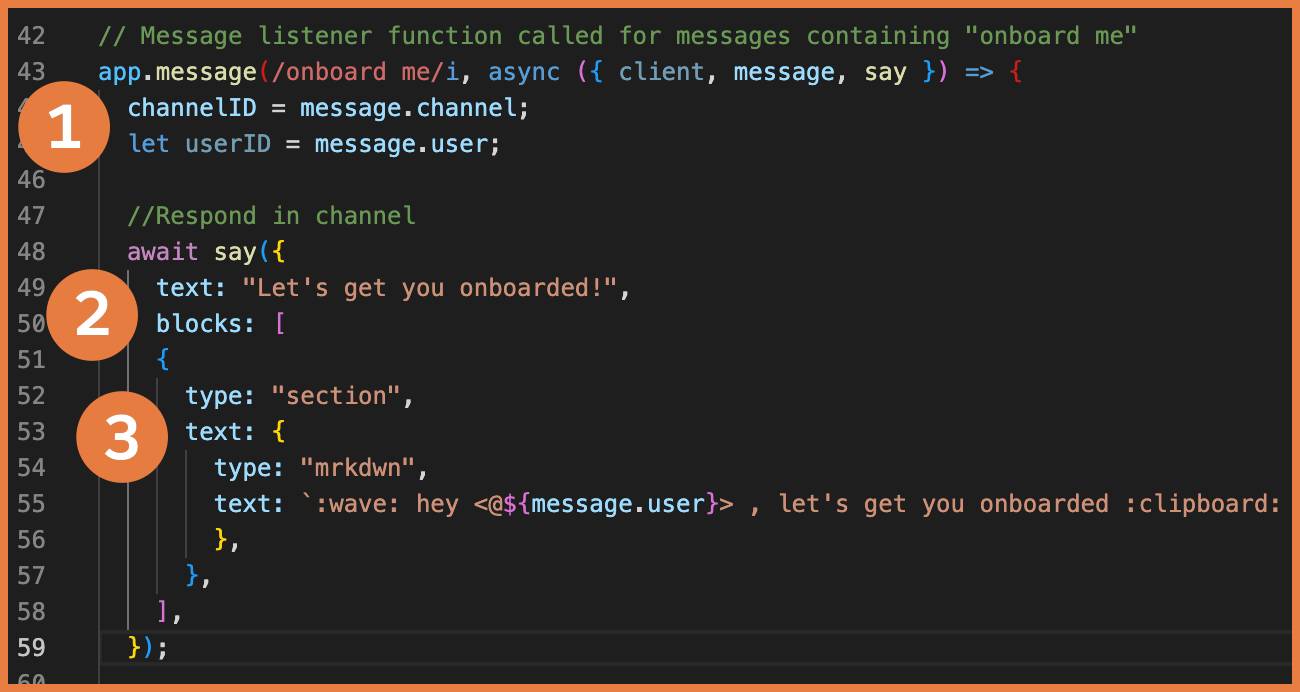
app.message(/onboard me/i, async ({ client, message, say }) => {
  channelID = message.channel;
  let userID = message.user;
  //Respond in channel
  await say({
    text: "Let's get you onboarded!",
    blocks: [
    {
      type: "section",
      text: {
        type: "mrkdwn",
        text: `:wave: hey <@${message.user}> , let's get you onboarded :clipboard: Check for a private message from me (hint: it's in the Apps section :wink:).`,
        },
      },
    ],
  });
Now you have the “onboard me” listener with a simple message block.
Notice a few things. The channel ID is set to channel where the “onboard me” message is posted (1), in this case #welcome-new-team-members. You’ve added accessibility text “Let’s get you onboarded!” for the Activity section of Slack (2). The new onboarding message is a section block, with markdown text telling the new team member where to find resources (3).
- Underneath the code you just added, add the following.
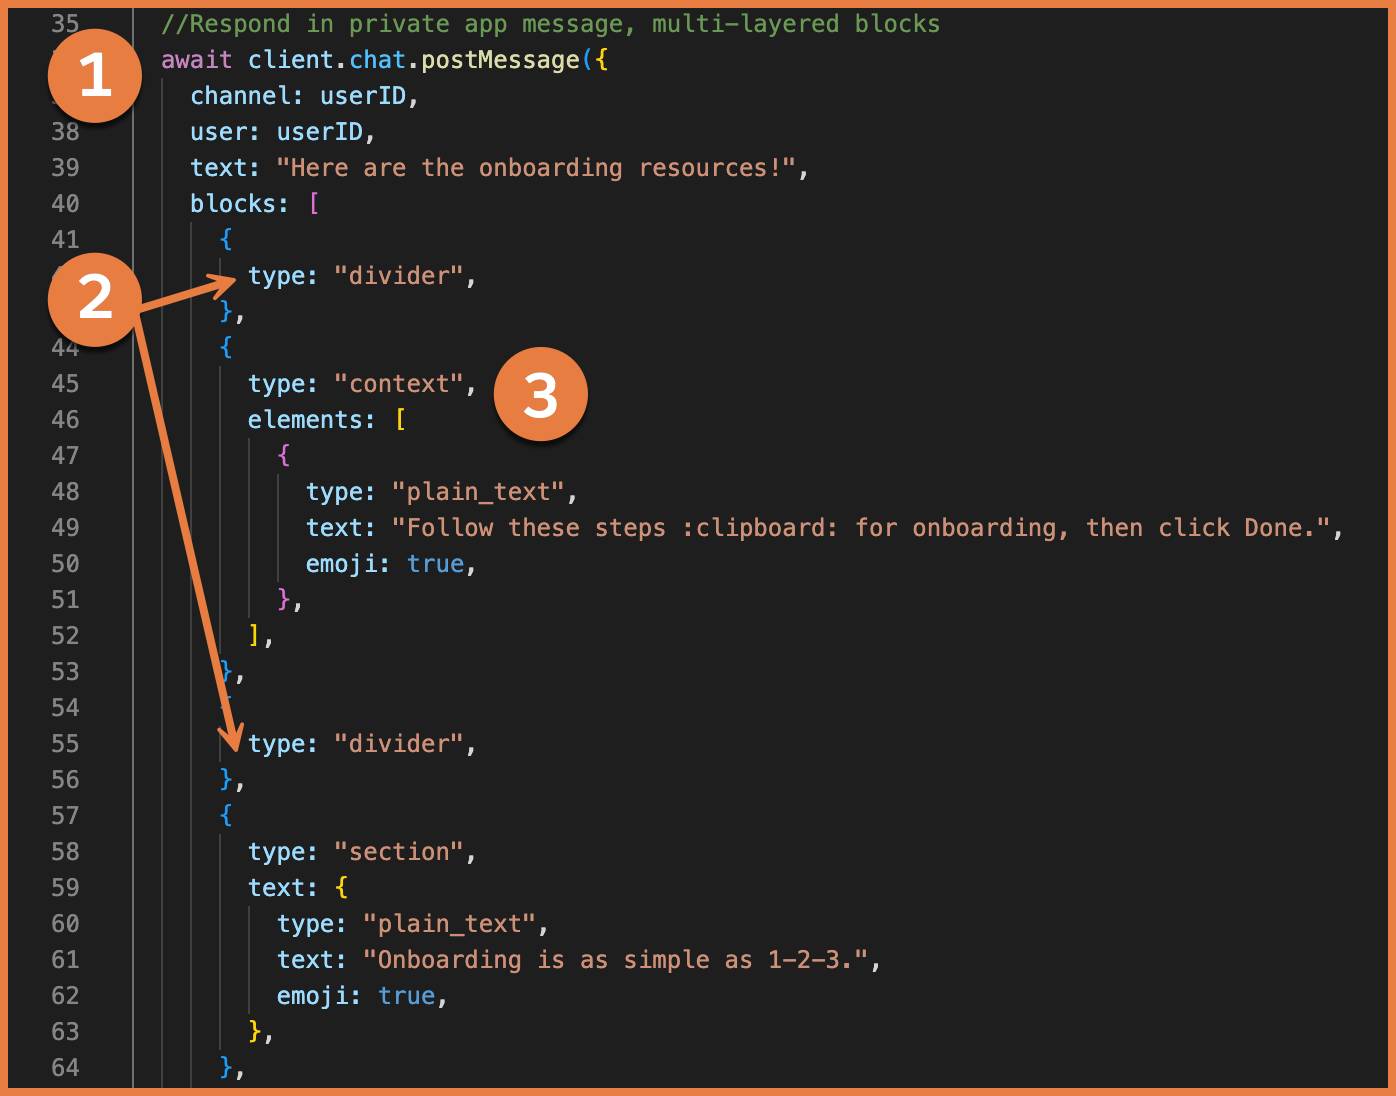
//Respond in private app message, multi-layered blocks
await client.chat.postMessage({
channel: userID,
user: userID,
text: "Here are the onboarding resources!",
blocks: [
{
type: "divider",
},
{
type: "context",
elements: [
{
type: "plain_text",
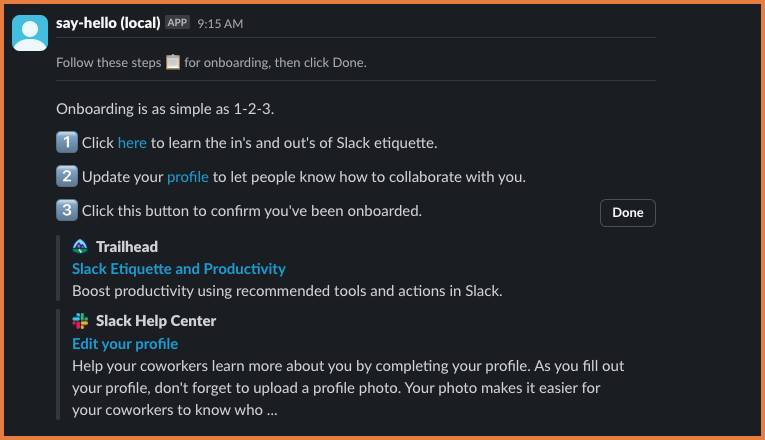
text: "Follow these steps :clipboard: for onboarding, then click Done.",
emoji: true,
},
],
},
{
type: "divider",
},
{
type: "section",
text: {
type: "plain_text",
text: "Onboarding is as simple as 1-2-3.",
emoji: true,
},
},
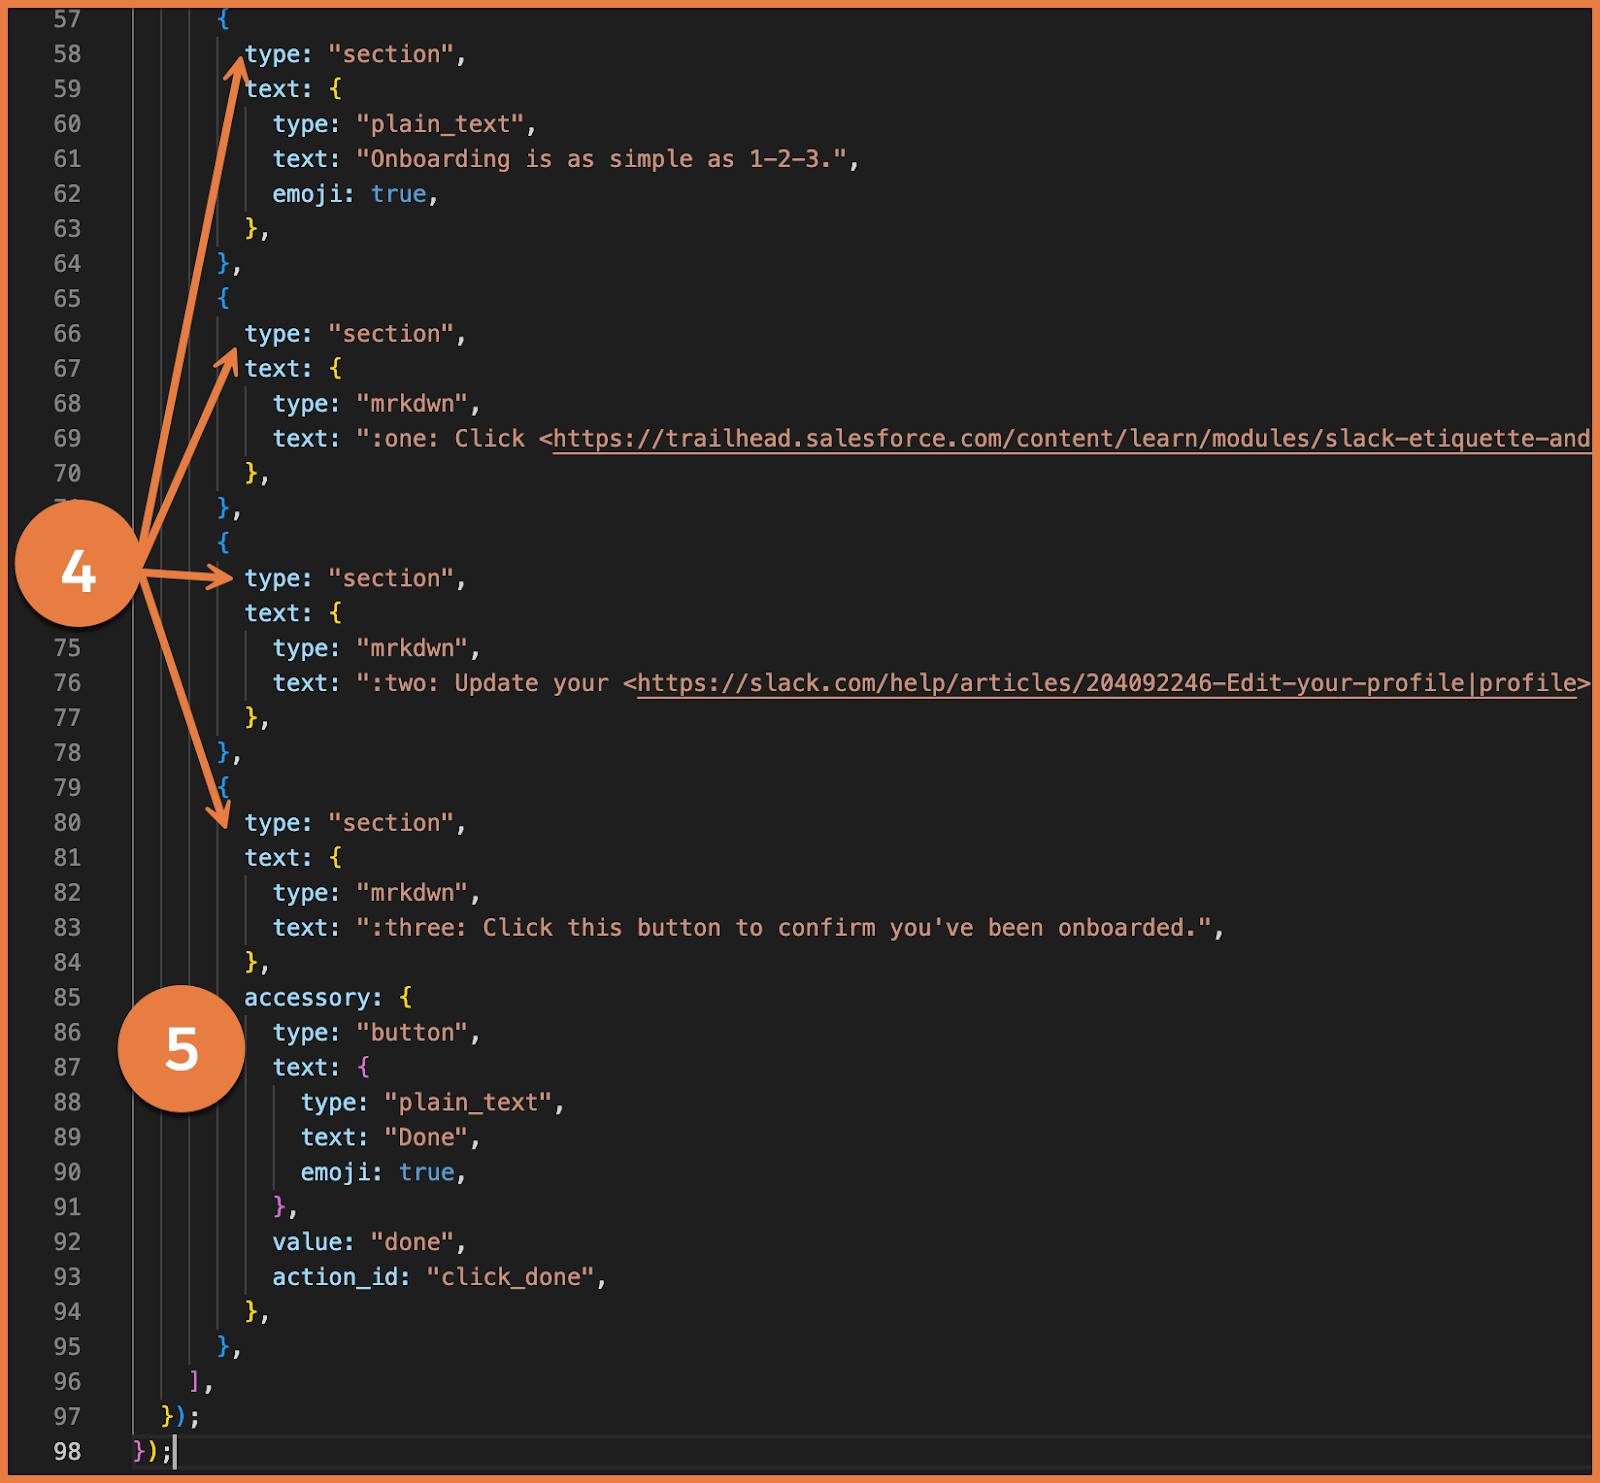
{
type: "section",
text: {
type: "mrkdwn",
text: ":one: Click <https://trailhead.salesforce.com/content/learn/modules/slack-etiquette-and-productivity|here> to learn the in's and out's of Slack etiquette.",
},
},
{
type: "section",
text: {
type: "mrkdwn",
text: ":two: Update your <https://slack.com/help/articles/204092246-Edit-your-profile|profile> to let people know how to collaborate with you.",
},
},
{
type: "section",
text: {
type: "mrkdwn",
text: ":three: Click this button to confirm you've been onboarded.",
},
accessory: {
type: "button",
text: {
type: "plain_text",
text: "Done",
emoji: true,
},
value: "done",
action_id: "click_done",
},
},
],
});
});OK. This code block is hefty. Let’s break it down a little bit. You have a second post, which is a private message to the new team member, as indicated by the channel and user userID (1). The block contains dividers (2) to highlight context (3). Then you have several sections that help the new team member follow the onboarding steps (4). You’ve included number emoji, instructions, and helpful links. You’ve also included the button accessory (5).
Your block messages are set and the app should run. But right now, the button you’ve included in the onboarding resource message is just a button. Let’s make it do something.
Make the Button Work
You have a meaningful onboarding process that’s simple and easy to follow. Now all that’s left to do is ensure new team members can close the process. The button needs to work!
- Under the new code you created, add the action listener.
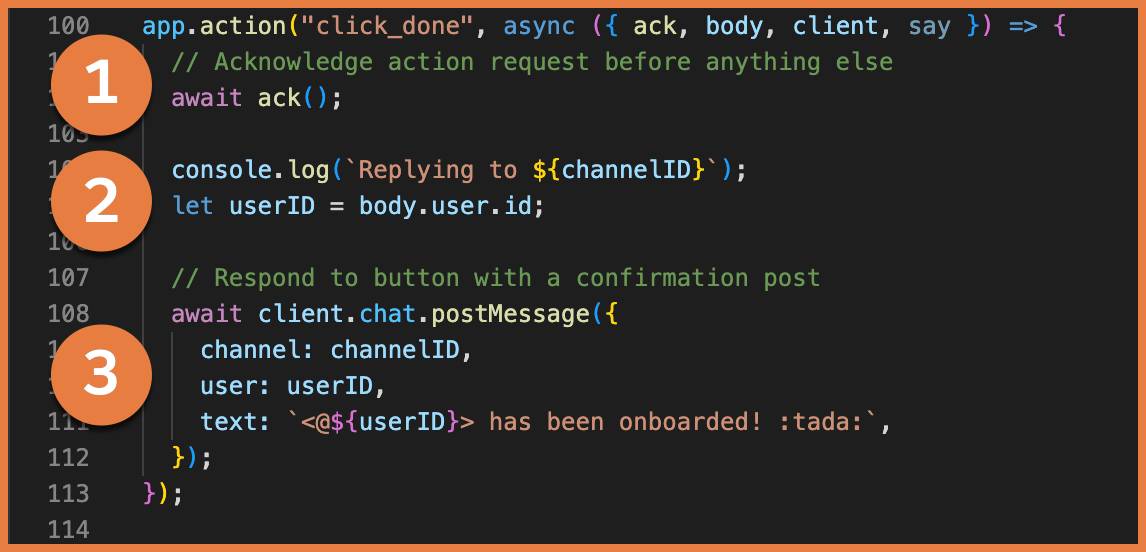
app.action("click_done", async ({ ack, body, client, say }) => {
  // Acknowledge action request before anything else
  await ack();


  console.log(`Replying to ${channelID}`);
  let userID = body.user.id;


  // Respond to button with a confirmation post
  await client.chat.postMessage({
    channel: channelID,
    user: userID,
    text: `<@${userID}> has been onboarded! :tada:`,
  });
});
This is a significantly smaller bit of code than what you added previously, but it’s doing a lot. It listens for the button action and acknowledges it (1). It ensures the app responds in channel instead of direct message (2). And it sends confirmation to the channel that the new team member has been onboarded (3).
- Save your work.
Now, you’re ready to test!
Test the Onboarding Process
Let’s see the app in action.
- Open Terminal.
- Enter
cd say-hello
- Then, enter
slack run
- Select your app and press return. The Slack CLI responds that your app is up and running.
- Keep Terminal open.
- Now, head to your Slack playground.
- Go to #welcome-new-team-members.
- Post
onboard me. The app should respond, guiding the new team member to a private message with details.

- Next, find the private message from the say-hello (local) app. Just as it mentioned, you find it in the Apps section.
- Click Done. A new message gets posted in #welcome-new-team-members.
- Head back to #welcome-new-team-members to find the onboarding completion message.

Clean Up Your App (Optional)
Now that your onboarding app is built, notice that it’s similar to the simple app you built in Develop a Slack App with Bolt. The user posts a message in channel, the app responds, the user interacts with a button, and then the app acknowledges and posts.
- Head back to your project file say-hello | app.js.
- Now that you’re done with the code that listens for “hello”, go ahead and remove it.
- Delete the listener for
/hello/iand its response.
- Delete the listener for the hello button click and its response.
- Delete the listener for
- Keep the log code that tells you that the app is running properly:
(async () => {
  // Global middleware to log all incoming requests once the app starts
  app.use(async ({ body, next }) => {
    console.log("⚡️ Received request:", body); //Log app status and the incoming request
    await next(); //Pass to next middleware or listener
  });


  // Start your app
  await app.start(process.env.PORT || 3000);


  console.log("⚡️ Bolt app is running!");
})();
Remember to save your work. This code is important to indicate that all is well with your app. If you want to make changes to your app, like adding different messages with Block Kit for instance, this critical bit of code will log that your app is still functional.
Go Further with Block Kit Builder
Now that you’re more familiar with Block Kit, the types of blocks, and block elements, go further with Block Kit Builder.
Block Kit Builder lets you choose from blocks in the left pane (1), then drag, drop, and rearrange them to design and preview Block Kit layouts in the center pane (2). Once you’ve built a Block Kit message to your liking, you can copy the JSON array needed for your Slack app (3), or send it directly to Slack with the click of a button (4).
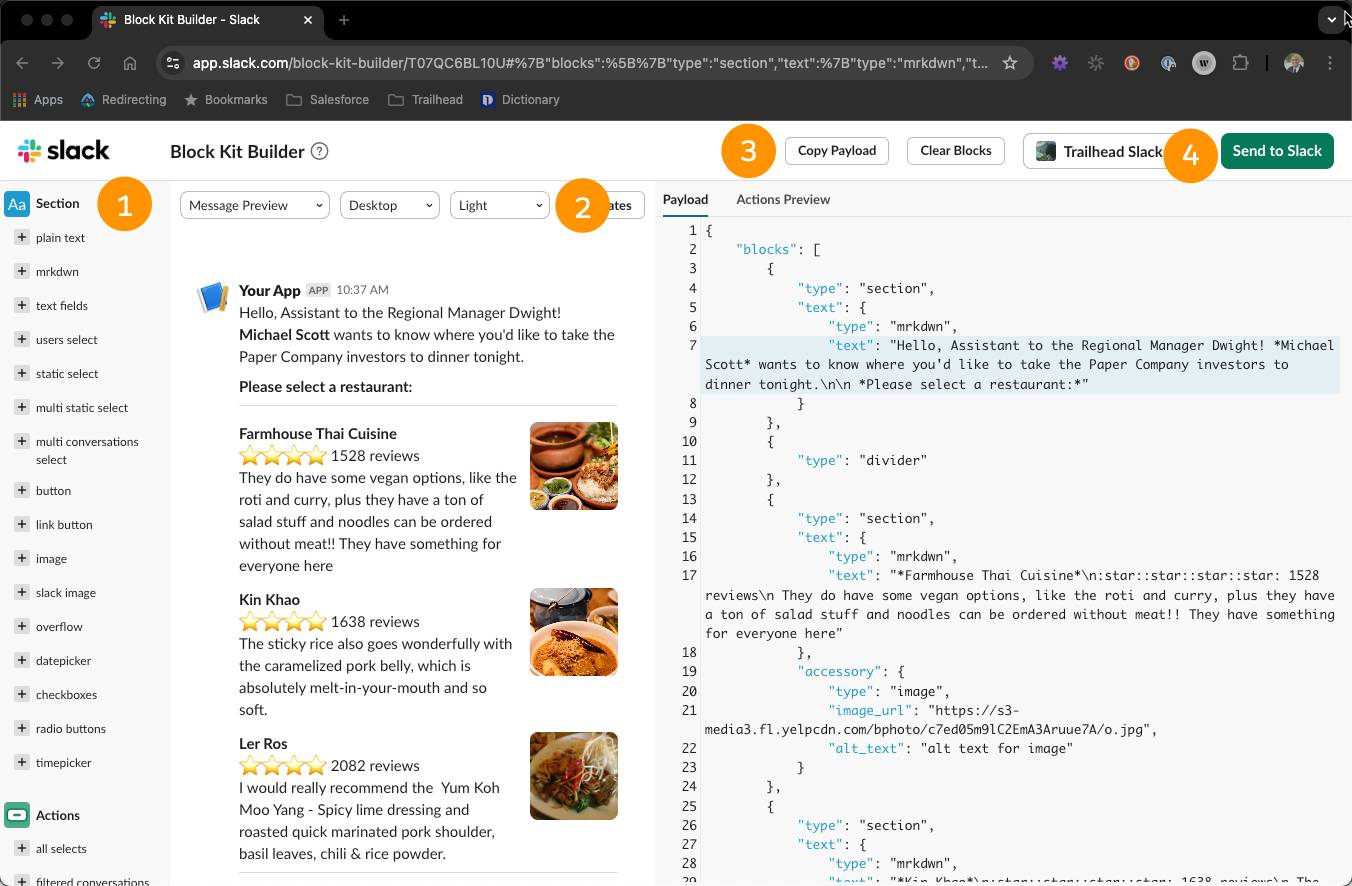

Block Kit Builder also has template messages that you can use as a starting point for such things as approvals, polls, onboarding, and newsletters.
Alternatively you can use the block reference guide to manually generate a complete block array.
What’s next? Try Block Kit builder out and see what you can come up with. After you check your work below, play around with modifications, or build an entirely new app to show off to your team.