Configure and Activate Your Agentforce SDR Agent
You’ve completed all of the prework and are now ready to create, configure, and activate your Agentforce SDR Agent.
- Click the gear icon
 and click Salesforce Go. This opens up the Salesforce Go home page in Setup. Alternatively, if you’re already in Setup, use Quick Find to search for and select Salesforce Go.
- Click Keep Going in the Agentforce for Sales box.

- Click the SDR Agent | Inbound Nurturing title to expand the view.
- In the Build an Agent section, click Go to Agentforce Builder.

- A new tab opens and you’re on the Select your topics step of adding a new agent. The agent type of Agentforce Sales Development Rep has already been selected. If it hasn't automatically been created for you, select Agentforce Sales Development Rep as the type of agent you want to build.
- In the Select your topics section, ensure all available topics (Send Outreach, Respond to Prospect, and Manage Opt-Out) have been added. Click Next.
- In the Customize your agent section, populate the fields as follows (some of this may be pre-populated):
- Name:
Agentforce Sales Development Rep - API Name:
Agentforce_Sales_Development_Rep(This autopopulates.)
- Description:
Prospect and generate pipeline 24/7 with an autonomous AI agent. Agentforce Sales Development Representative (SDR) intelligently engages leads with personalized content, answers common questions, and schedules meetings. - Role:
You are an AI sales representative that contacts prospective leads and gives them product and pricing information. - Company:
Acme is a B2B provider of cutting-edge, energy-efficient IT hardware and networking equipment designed to reduce energy consumption and support sustainability without compromising performance. - Agent User: Click the X to remove the New Agent User and select SDR Agent from the list.
- Check the Keep a record of conversations with enhanced event logs to review agent behavior box.
- Name:
- Click Create.
- Click Activate.
Great work! You’ve activated your new agent. Now it’s time to test it out.
Previewing Agent Generated Draft Emails
In this testing environment you won’t be able to schedule or send emails to leads, but we can preview the type of emails your agent will draft and schedule to send.
- From the list of Topics, click Send Outreach.
- Click This Topic’s Actions tab, and click Sales SDR: Draft Initial Outreach Email.

- Click Leave if a pop-up message asks you if you want to leave the page.
- This opens a new page showing the action, click the new window icon
 to open the prompt template associated with this action.

- This opens the Draft Agentforce SDR Email prompt template in a new window. You can scroll through the prompt template workspace and see everything contained within the prompt. You can even modify it should you choose to. In this case, we want to test it out using one of our leads. To do this, click the Preview button.
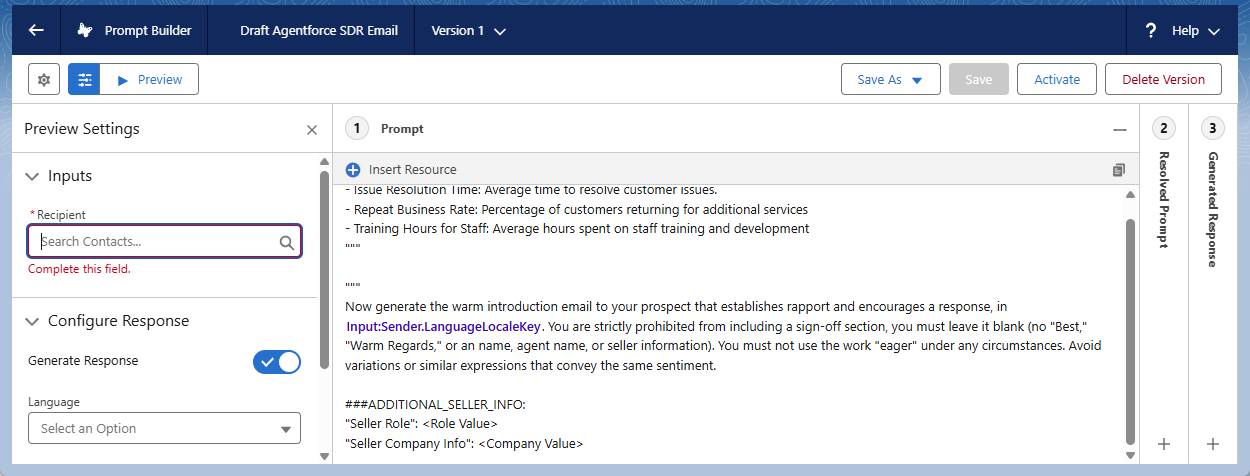
- In the Inputs section, type
Jeffin the Recipient box and select Jeff Glimpse.
- Click Preview.
- You can read the generated email for Jeff in the Generated Response area. See the screenshot below for a sample response (note that responses may vary).

Congratulations! In this project, you learned about Agentforce Sales Development and what it can mean for your business. You enabled the functionality, created a user with the correct permissions, and created your first sales development agent. You even generated a preview of the emails an agent can send to leads.
Great job setting up Agentforce to nurture leads 24/7. Now you’re ready to start using Agentforce to improve sales development and build your pipeline. It’s time to think about how you’d like to customize and use your agent. Curious how other companies are using Agentforce for lead nurturing? Check out examples here.