Collect Contact Info from Your User
Learning Objectives
In this project, you use Flow Builder to build a screen flow that:
- Captures information from a user.
- Queries your Salesforce org for a record that matches what the user entered.
- Asks the user whether to update the matching record or make no changes.
- Creates or updates a record.
- Provides a link to the updated or created record.
Introduction
Duplicate data is not just a pain to deal with, it’s a danger to your org’s integrity and its ability to support advanced technologies such as Data 360. Plus, it frustrates and confuses your users. So it can be very beneficial to add features that help prevent those duplicates.
In this badge, you create a screen flow that allows users to create new contacts, but also gives users the option of updating an existing contact if a contact with the same email address already exists.
Launch Your Trailhead Playground
You complete this hands-on project in your own personal Salesforce environment, called a Trailhead Playground. Get your Trailhead Playground now by first logging in to Trailhead, and then clicking Launch at the bottom of this page. Your playground opens in a new browser tab or window. Keep the playground window open while you work through this badge. After you complete the steps in your playground, come back to this window and click Verify step at the bottom of this page.
Create the Flow
- Click the App Launcher (
 ).
).
- In the Search apps and items box, enter
autoand then select Automation.
- In the Flows panel, click New.
- Under Frequently Used, select Screen Flow.
The Flow Builder canvas opens.
Create a Record Variable for the Contact
First, create a record variable to store contact data in the flow. This single variable stores all fields for one contact. Storing all of that data in one place makes it easier to use later.
- Click
 to view the Toolbox.
- In the Manager tab, click New Resource
- For Resource Type, select Variable.
- For API Name, enter
contact.
- For Data Type, select Record.
- For Object, enter Contact.
- Click Done.
In the toolbox, the Manager tab now contains a record variable named contact.
- Click Save, and enter these values.
- Flow Label:
New Contact - Flow API Name:
New_Contact
- Flow Label:
- Click Save.
You may see an error message saying the flow can’t run because nothing is connected to the Start element. Don’t worry about that error, because you’re just about to fix that.
Create a Screen Element
Next, create a screen element to collect the potential new contact’s data.
- On the flow canvas, on the path after the Start element, click
 .
.
- Select Screen.
The New Screen window opens.
- In the Screen Properties pane, for Label, enter
Contact Info.
The API Name is automatically set toContact_Info.
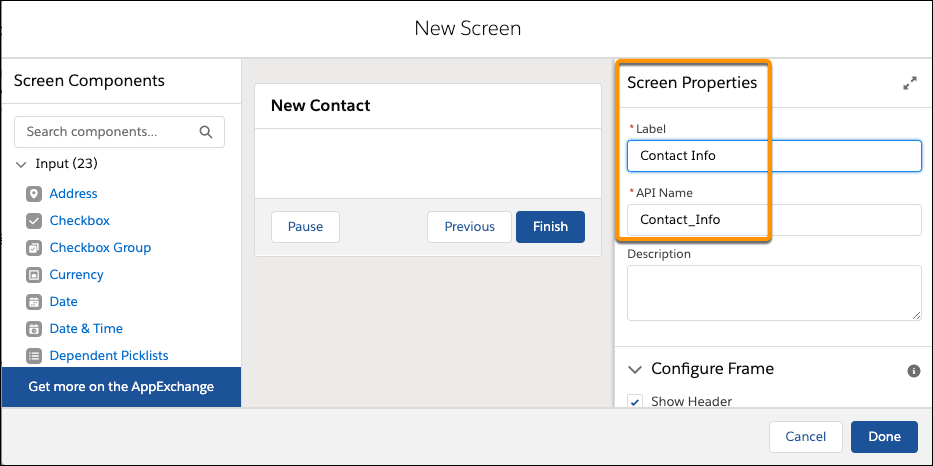
- Click Done.
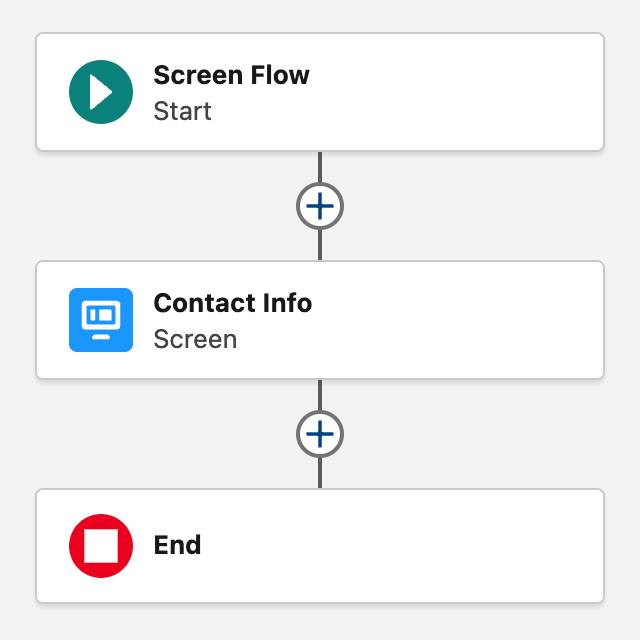
The canvas displays three elements: the Screen Flow Start element, the Contact Info screen, and the End element.
- Save the flow.
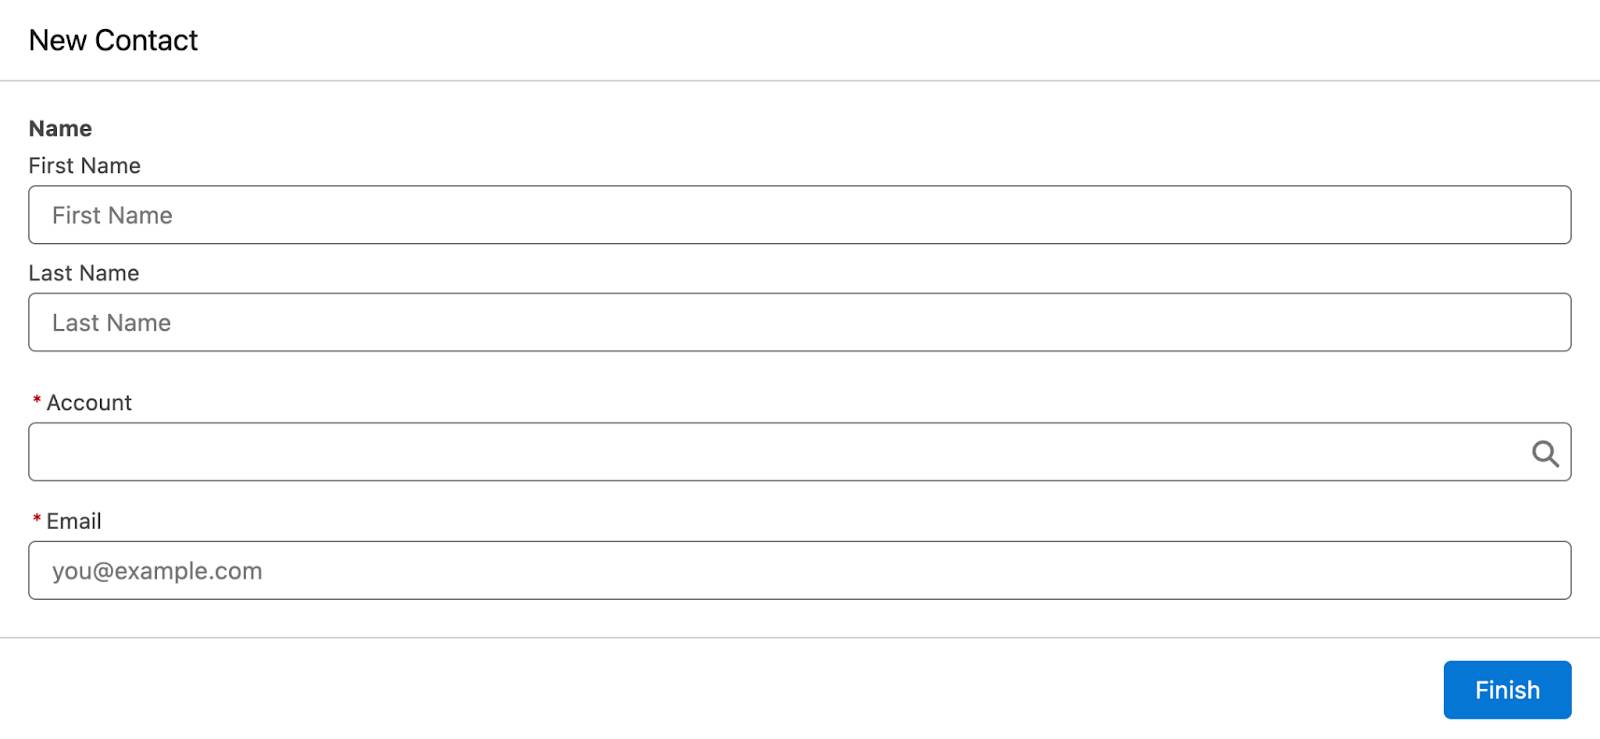
Add a Name Component to the Screen
A screen element needs screen components to request or display information for your users. In this case, the screen needs fields to enter the prospective contact’s information. Let’s start with a screen component that collects the contact’s name.
- On the canvas, click the Contact Info element.
The Edit Screen window opens. This window is also called the screen canvas.
- In the Components tab, enter
namein the Search components box.
- Click the Name component to add it to the screen canvas.
The properties pane now represents the Name component.
- In the Name component’s properties pane, for API Name, enter
contactName.
- Scroll down and click Advanced.
- Select Manually assign variables.
- In the Store Output Values to Select Variables section, enter values from the contact record variable.
- For First Name, select contact then select First Name.
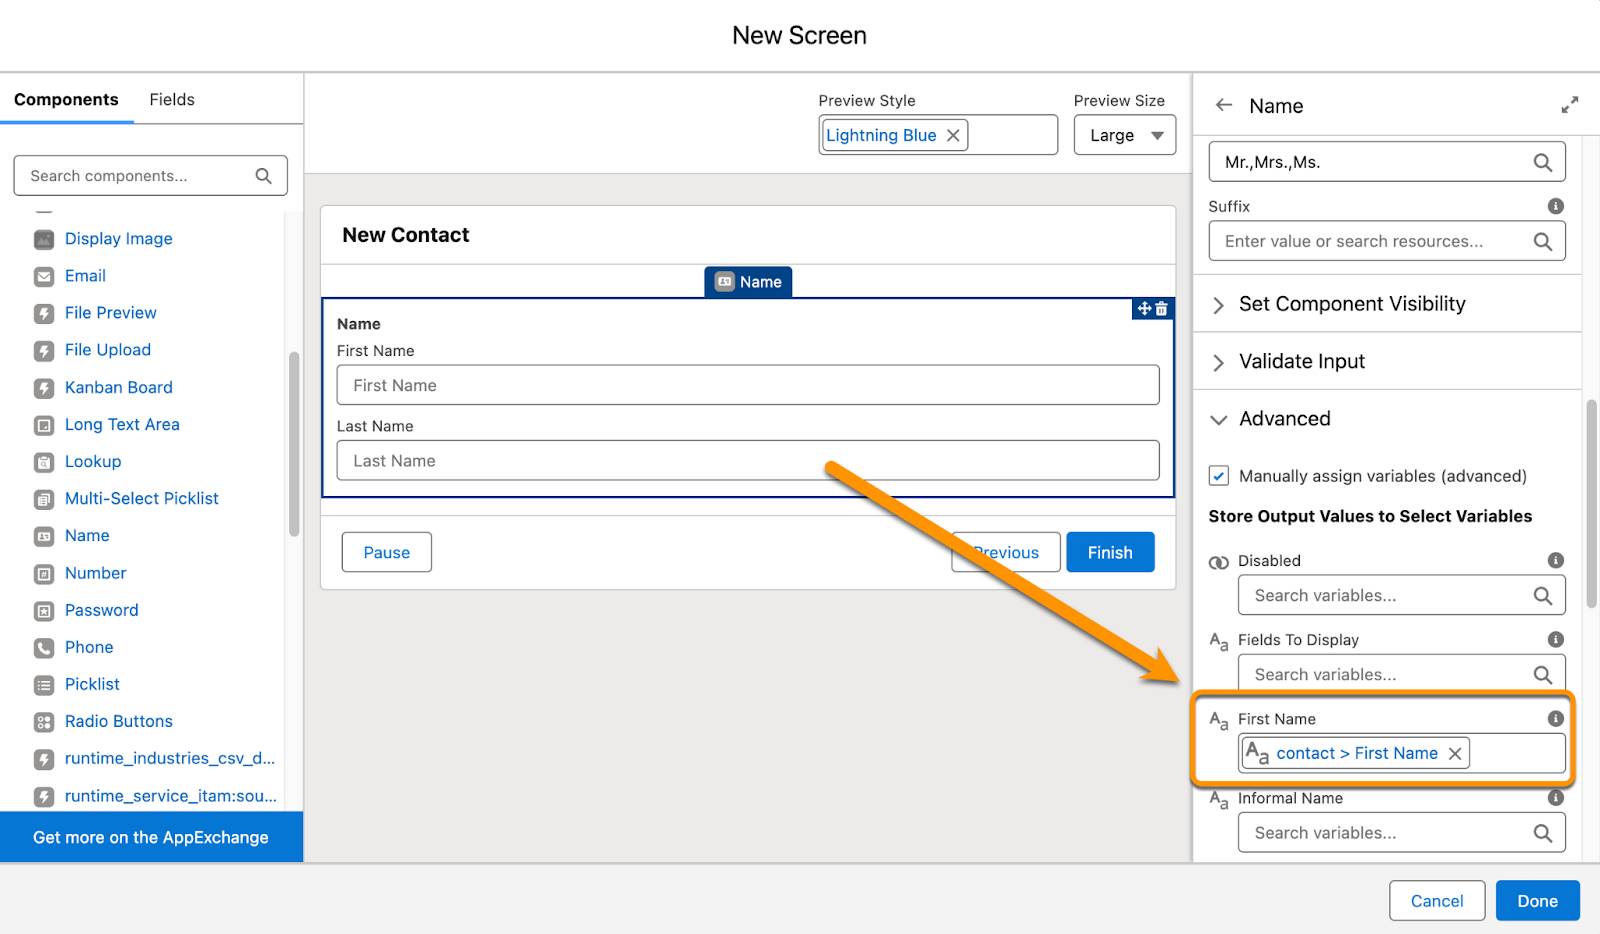
- For Last Name, select contact then select Last Name.
- Click Done.
- Save the flow.
Add a Choice Lookup Component to the Screen
Now let’s add a Choice Lookup component so the user can select the contact’s parent account.
- On the canvas, click the Contact Info element to open its screen canvas.
- In the Components tab, click Choice Lookup to add that component to the screen canvas just below the Name component.
The properties pane now represents the Choice Lookup component.
- In the Choice Lookup component’s properties pane, enter these values.
- For Label, enter
Account.The API Name is automatically set toAccount.
- Enable the Require checkbox.
- Make sure Let Users Select Multiple Options is set to No.
- For Label, enter
- In the Configure Choices section, for Choice, select New Choice Resource. Enter these values.
- For Resource Type, select Record Choice Set.
- For API Name, enter
AllAccounts.
- For Object, select Account.
- For Condition Requirements, select None—Get All Account Records.
- For Sort Order, select Ascending.
- For Sort By, select Name.
- For Choice Label, select Name.
- For Data Type, select Text.
- For Choice Value, select Id.
- In the Store More Account Field Values section, enter these values to store the ID of the user-selected account in the contact record variable.
- For Field, select Account ID.
- For Variable, select contact then select Account ID (the second one).
- For Field, select Account ID.
- For Resource Type, select Record Choice Set.
- Click Done to close the New Choice Resource window.
- Click Done to close the Edit Screen window.
- Save the flow.
Add an Email Component to the Screen
Finally, add an Email component for the user to enter the contact’s email address. Remember, the flow will use this value to find duplicate contacts, so the flow must require the field.
- On the canvas, click the Contact Info element to open its screen canvas.
- In the Components tab, click Email to add that component to the screen canvas.
- In the Email component’s properties pane, enter these values.
- For API Name, enter
contactEmail.
- For Label, enter
Email.
- For Required, select True.
- For API Name, enter
- Scroll down and click Advanced.
- Select Manually assign variables.
- In the Store Output Values to Select Variables section, for Value, select contact then select Email.
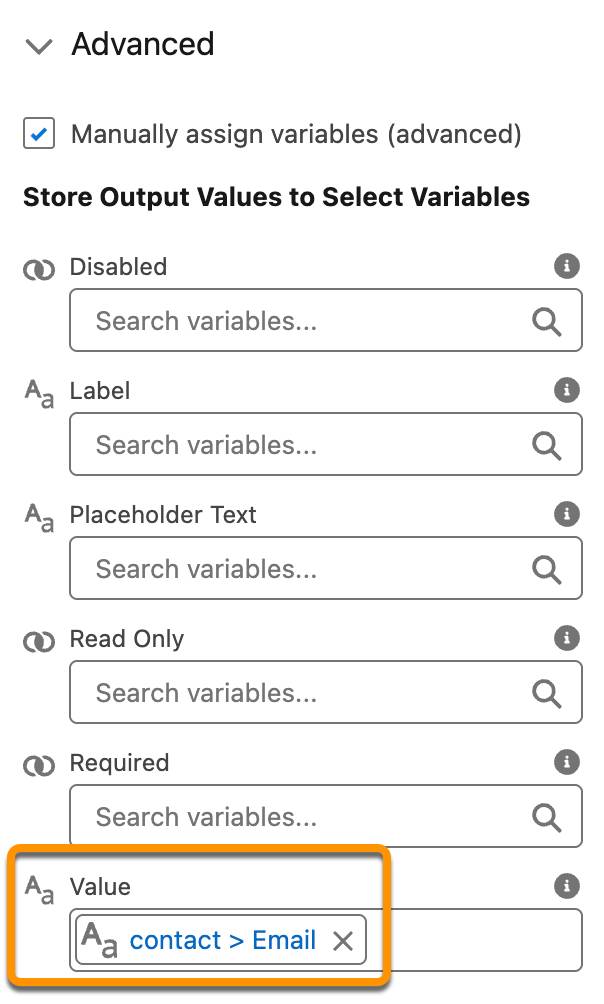
- Click Done.
- Save the flow.
Run the Flow to View the Screen
At this point, your flow can collect contact information from the user and store that information in flow variables. Let’s see what the screen looks like to users who run the flow.
- In the toolbar, click Run.
- Enter any values, select any account from the list, and click Finish.
Because the flow has no elements to execute after the screen, nothing happens when you click Finish. The flow simply runs again, which means that you see the screen again.
So far, the flow displays only a screen that accepts user input. Next, you configure the flow to compare some of that user input to data in your org.