Prepare Your Data
Learning Objectives
After completing this unit, you’ll be able to:
- Describe how you can use a recipe to prepare data for use.
- Prepare data using a recipe.
Prepare Data Overview
You’ve extracted all the data you need and you have two new datasets. The SIC Descriptions dataset contains data extracted from a CSV file. The Opportunities_with_Accounts_and_Users dataset has data extracted from objects in your Salesforce org. Your final task is to prepare this data and combine it into a dataset.
Prepare Data in a Recipe
We introduced recipes when we extracted Salesforce Object data, but it's in the data preparation stage where they really get cooking.
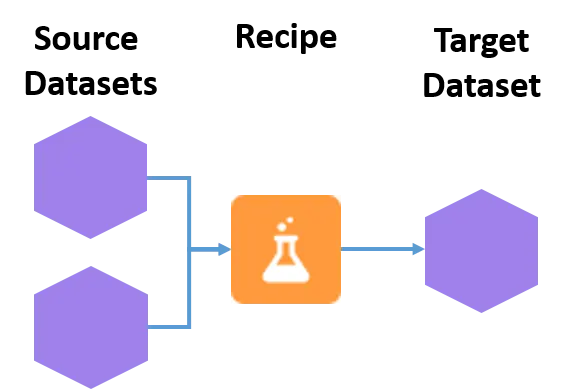
When you create a recipe, you specify the transformations, or steps, that you want to perform on a source. The source can be one or more datasets or connected objects. When you run the recipe, it applies these transformations and outputs the results to a new target dataset.
To keep your target dataset up to date, you can schedule a recipe to run on a recurring basis.
Create a Recipe
Similar to the steps you followed when extracting Salesforce objects, you can now create a dataset recipe with Opportunities_with_Accounts_and_Users and join it to SIC Descriptions. Here, Opportunities_with_Accounts_and_Users is what is known as a "base dataset." It's the dataset that contains the data to which we want to add fields and prepare.
- From Data Manager, in the left-hand pane, click Recipes.
- Click New Recipe.
- Click Add Input Data.
- Uncheck External Connected Objects and Salesforce Objects, so that only CRM Analytics datasets are visible. Click the dataset Opportunities_with_Accounts_and_Users.
- Click Next. The recipe opens in the recipe editor.
When you click the input node, you see the data Preview selected. By default, Preview displays up to 2000 rows of data.
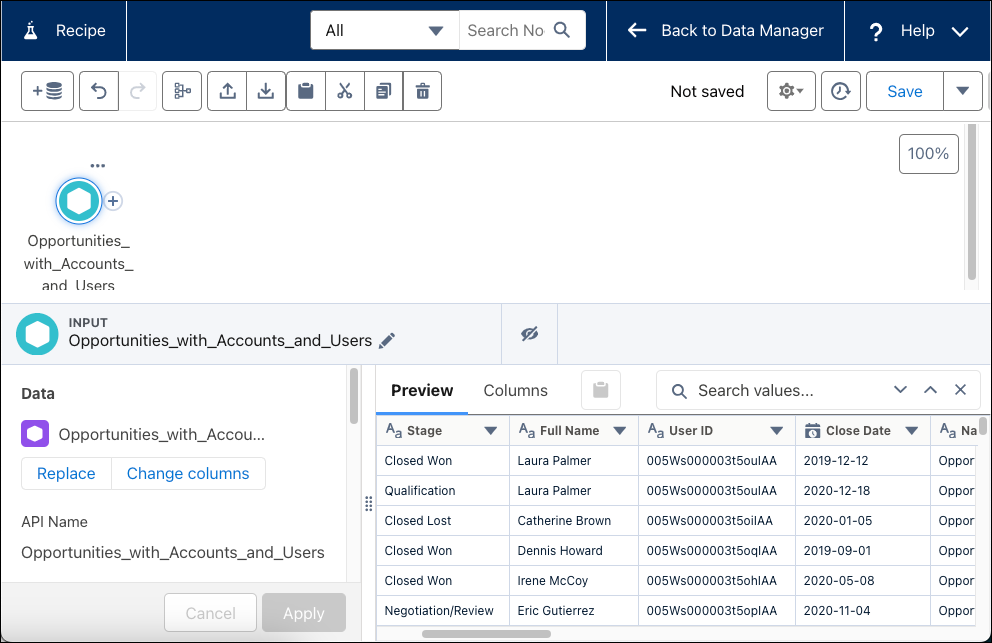
Hide Recipe Columns
If your dataset has many columns, you can switch to the Columns tab to search for columns or hide ones that you don’t need. To declutter the preview, let’s hide a few columns.
- Click the Columns tab. You see a list view of the columns in the recipe.
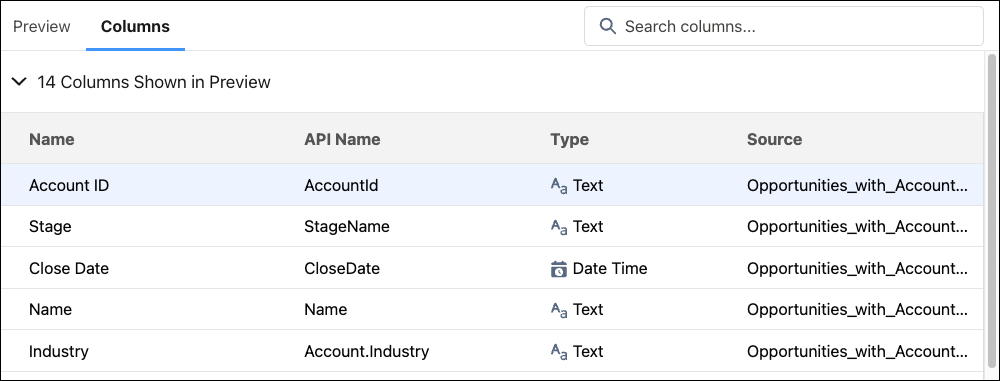
- To hide the Account ID column, select the column and click the Hide button (
 ) above the Preview and Column section. Hidden columns are listed below the displayed columns.
- Hide these columns, as you don’t need them now.
- Billing Country
- Billing City
- Owner ID (see under API name, Account.OwnerId)
- Created Date
- Opportunity ID
- Click the Preview tab. The preview no longer includes the columns that you hid.
OK, now that you’ve decluttered the recipe a bit, let’s get back to adding SIC Description data to your base opportunity dataset.
Join Datasets in a Recipe
As you saw when combining the Opportunity, Account, and User objects into a dataset, to bring data sources together, you must match fields between them. The join key here is the SIC Code, as the SIC Description's SIC Code and the account SIC Code fields match. Let's join them in the recipe.
- In Data Prep, click the plus button (+) next to the Opportunities_with_Accounts_and_Users input node.
- Select Join.
- Click the SIC Descriptions dataset. This dataset is the “lookup” dataset that has the columns that you want to add.
- Click Next. You see the Join window. You’re already familiar with this window from the previous lesson.
If CRM Analytics sees a possible match, it selects the join keys for you. If it can’t find a match, it selects the first fields from the recipe and the lookup dataset. You can keep this selection or choose different keys. You can use up to 5 key pairs.
Under the Columns tab you select the columns you want in the recipe after you add the data. Columns that you’ve hidden and columns from the lookup dataset aren’t selected. The Preview tab shows a preview of the data for the columns that you’ve included.
In this case, CRM Analytics hasn't selected the correct join keys.
- In the Join Keys section, click the preselected values and update them.
- Opportunities_with_Accounts_and_Users: SIC Code
- SIC Description: SIC Code
- Click Add.
- Click Apply. The Join node and SIC Descriptions input node are added to the recipe.
You can continue to add columns from other datasets in the same way.
Configure a Recipe's Output
Let's select the final fields to include then add an output node so you can run the recipe exactly as you want it.
- In the Columns tab, notice that all of the hidden columns are included in the recipe. Also, because they’re the lookup keys, the SIC Code appears twice as
Account.SicandSICDescrip.SIC_Code. You only need one of them, so hide the SIC Code at the bottom of the list.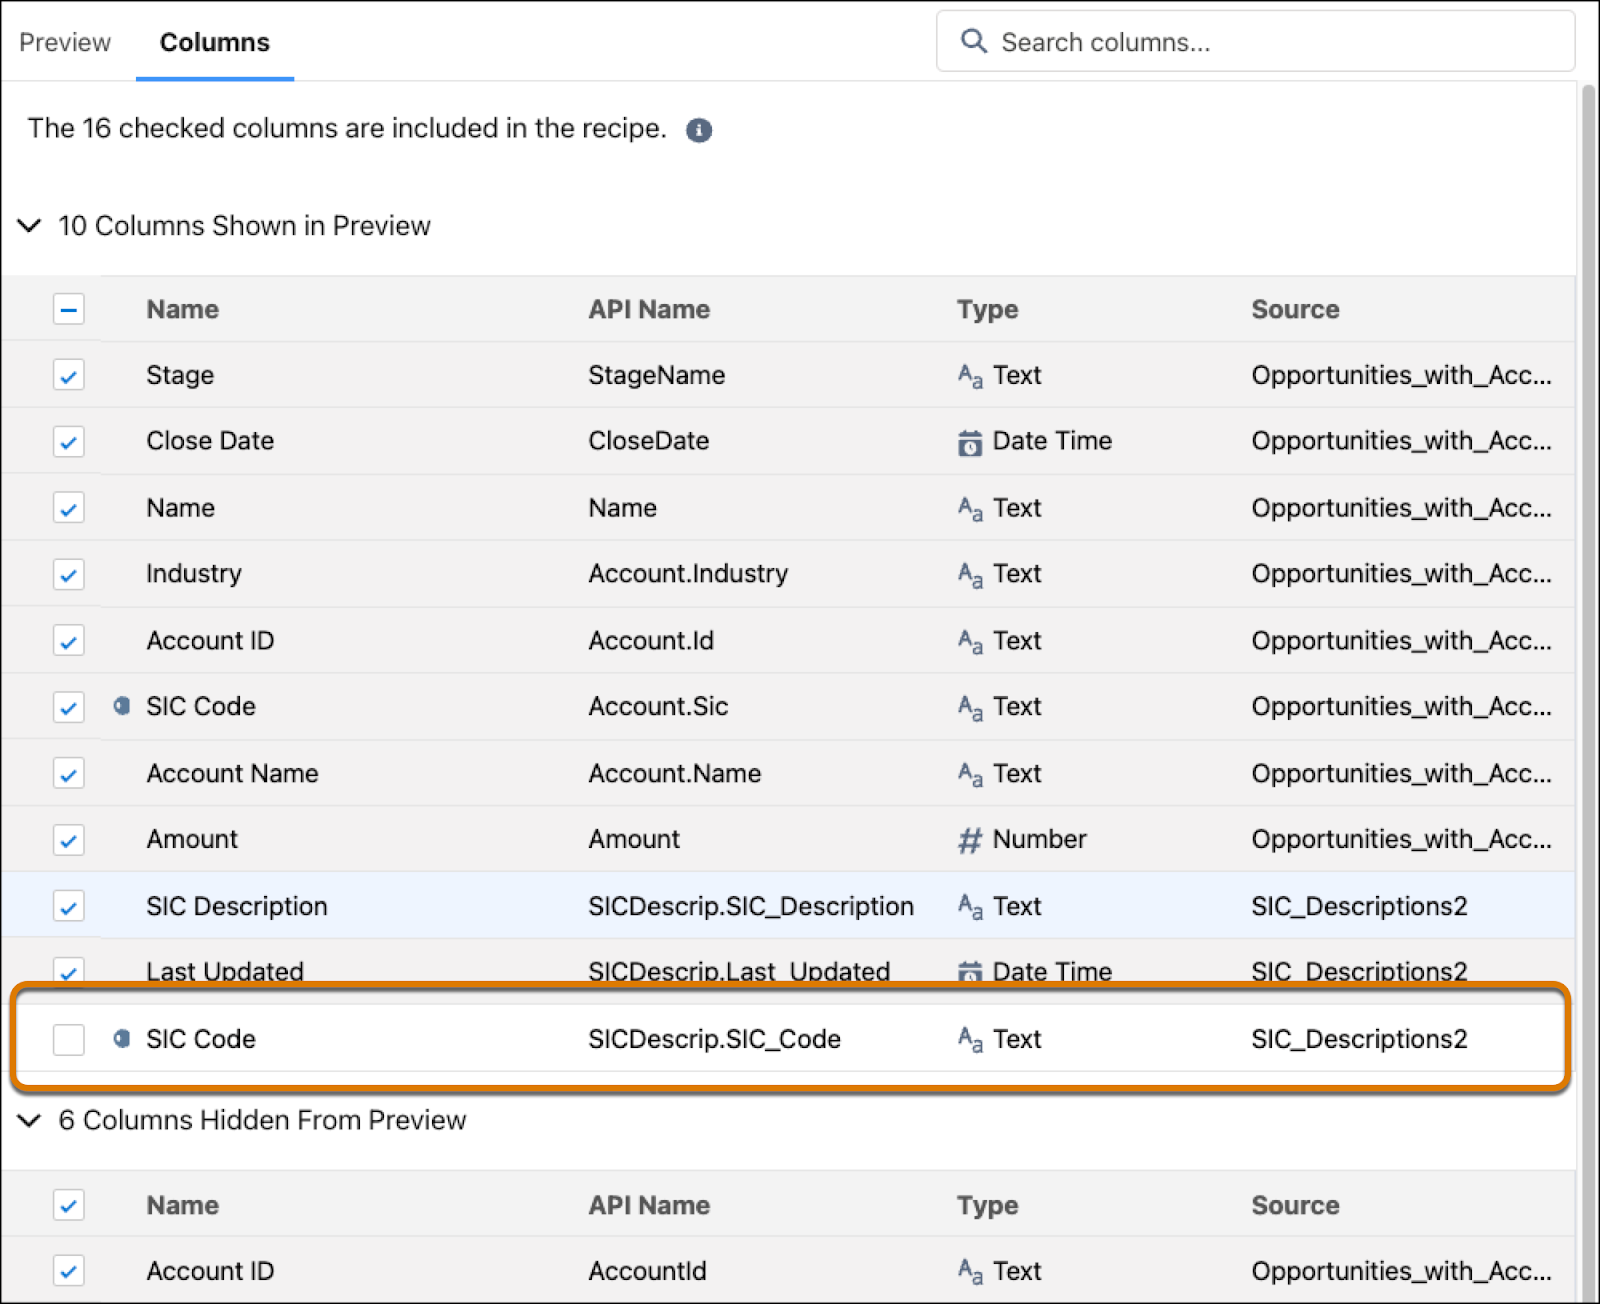
- Click Apply.
- Click the plus button (
 ) next to the Join node.
- Select Output.
- Set up the output node:
- Dataset Display Label: Opportunities with SIC Descriptions
- Dataset API Name: Opportunities_with_SIC_Descriptions
- App Location: Sales Performance Datasets
- In the Columns tab, notice that SIC Code appears only once.
- Click Apply.
- Click Save.
- Enter a recipe name. Call this recipe Opportunities with SIC Descriptions.
- Click Back to Data Manager.
Right now, you’ve done what you need to do in the recipe. But there’s a whole host of other data preparations you can do here. If you want to try some of them, look at the resources section for more details.
Run a Recipe
When you run a recipe, CRM Analytics performs the steps you added and creates the target dataset. You can also keep the target dataset fresh by scheduling the recipe to run regularly. Let’s create the dataset!
- In the data manager, click the Recipes option.
- To run the recipe, click
 to the right of Opportunities with SIC Descriptions recipe and select Run Now. You'll see a green banner at the top of the data manager that confirms the run.
- Click again
 and select Schedule.
- You want to schedule the recipe to run each weekday morning, after the dataflow runs. Schedule the dataflow to run every 24 hours at 2:00 AM each weekday by selecting these settings.
-
Schedule by: Hour
-
Start at: 2:00 am
-
Run every: 24 Hours
-
Select days: Mon, Tue, Wed, Thu, Fri
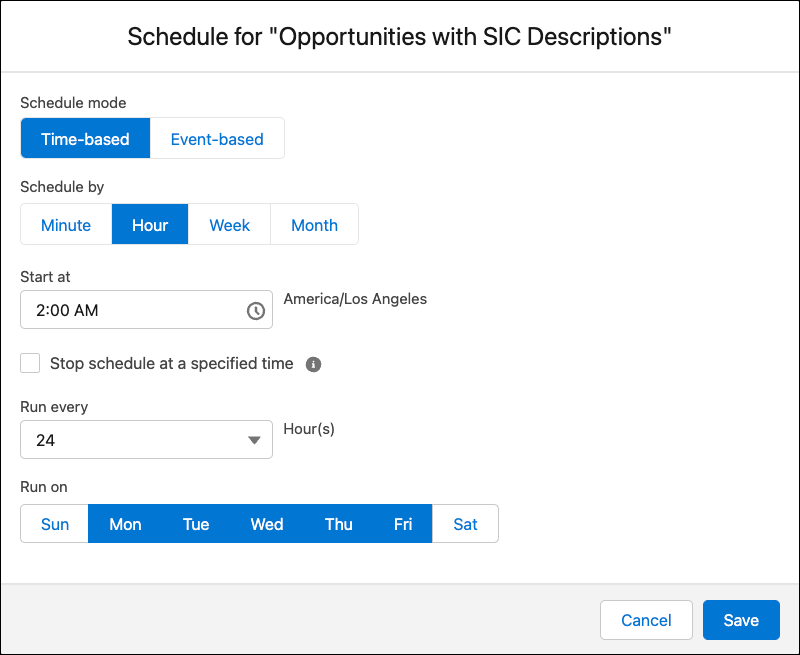
- Click Save. Your recipe is scheduled.
Monitor a Recipe Job and Verify the New Dataset
Behind the scenes, CRM Analytics creates a job for the recipe. To check on its progress, go to the Monitor tab of the data manager.
It’s also a good idea to open the new dataset to check that all the fields are there.
- In the data manager, click the Data Assets option.
- On the right of the Opportunities with SIC Descriptions dataset, click
 and select Explore. If you don’t see the dataset, try refreshing your browser.
- Under Bars, click the + button. You should see the SIC Description field in the list.
Congratulations!
You did it! You figured out the pieces of data, where they live, and got both external and Salesforce data into CRM Analytics. You then pulled them together, cleaned them up, and created a set of data with all the necessary fields, available instantly.
Resources